Asset Optimization - cdig/docs GitHub Wiki
NOTE (May 2022)
This guide is several years out of date. Please continue to follow it as best you can. This guide will be revised once we transition away from cd-module to the new translation-aware Lesson editor.
Official Standard: The minimum connection speed we support is 100Kb/s.
Rule of Thumb: The typical connection speed we can expect is roughly 500Kb/s.
Given the above, you can now look at any piece of media and determine, "How long might someone have to wait until this is loaded?"
| Size | Typical (500Kb/s) | Minimum (100Kb/s) |
|---|---|---|
| 100Kb | 0.2 Seconds | 1 Second |
| 1Mb | 2 Seconds | 10 Seconds |
| 5Mb | 10 Seconds | Almost 1 Minute |
Rule of Thumb: Full-width images and videos can generally be about 1600px wide.
If an image or video spans the entire width of a <cd-main>, you should make it about 1600px wide. If the image spans half the width, aim for 800px. Simple. At these sizes, the image resolution will be about 1.3x the size they appear in the browser (<cd-main> is roughly 1200px wide). The excess resolution gives images enough extra detail to look good on Retina/HiDPI devices, and it counteracts the blurring effects of JPG compression and the dithering effects of PNG8 compression.
Rule of Thumb: Aim for 250Kb/s data rate for medium/large videos, lower for smaller.
In addition to having the the correct resolution, videos need to have the correct data rate. You can tell the data rate by taking the file size of the video divided by the length of the video. It can be up to 500Kb per second, though please go lower whenever possible. 250Kb/s is probably the sweet spot.
Please consider the size-on-screen. If the video fills the screen, then it's okay to use up-to 500Kb/s. If the video is the size of a postage stamp, you should probably need no more than 50Kb/s per second.
| Duration | Full Width | Half Width | Tiny |
|---|---|---|---|
| 1 Second | 500Kb | 250Kb | 50Kb |
| 10 Seconds | 5Mb | 2.5Mb | 500Kb |
| 1 Minute | 30Mb | 15Mb | 3Mb |
First, optimize with the "delete" key. Ask yourself these questions:
- Is there another, similar piece of media elsewhere on the page that I can re-use?
- Can I recreate this image using pure HTML, CSS, and JS?
- Can I use CSS or JS to modify an existing piece of media to offer the same effect as this one?
No? This image is unique and special and totally worth it? Okay, then let's make it small enough to fit in a matchbox!
Download these two programs: ImageOptim and ImageAlpha. We'll use them to optimize JPGs and PNGs.
-
If the source of the image is a vector graphic, you should use an SVG. When using Illustrator, follow these drawing and export guidelines
Run it through ImageOptim in Lossy mode after exporting.
-
If your image is a scenic photograph, you should use JPG.
-
If your image is a flat graphic, 3D rendering, or requires transparency, you should use a PNG.
You probably never need to use a GIF. If you think you need a GIF, run it past Ivan. You are often better-off using a silent, looping, auto-playing video or a CSS animation that flips through a few well-optimized images.
- JPG: Resize in Photoshop, export at ~95% quality, then use ImageOptim.
- PNG: Resize in Photoshop, export, use ImageAlpha if it helps, then use ImageOptim.
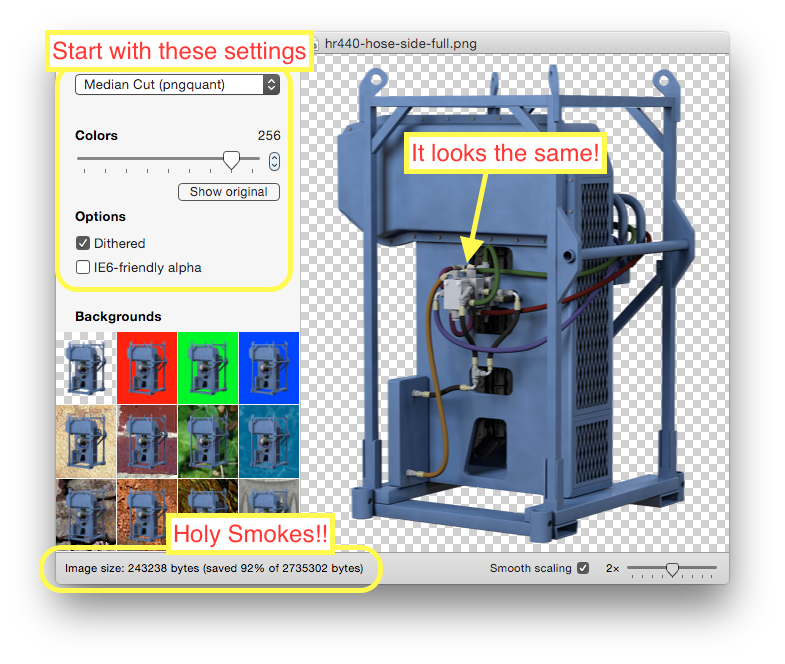
ImageAlpha is a lossy compression tool for PNGs. It'll shrink PNGs to a terrifyingly small file size, often with no visible difference. It works in part by reducing the number of colours in your image. If your image has a lot of different colours and ImageAlpha makes it look like crap, you might be better off using a JPG.
To start, drag your PNG (or JPG - it'll be converted) file into the ImageAlpha window. Set your settings like those shown:

Now, your results might not be as drastic as this example (90% savings are rare, 60% savings are very common). To work toward greater savings, reduce the number of colours. As you reduce the colours, you can tap the space bar to quickly toggle between the original and compressed version.

Too much! Too much!!
The strategy I tend to use is.. crank down the colours until you go one step too far and the difference is truly terrible, then go one step back up. For 3D renders, I find 32-128 to be good values. For 2D drawings, I can sometimes go as low as 8 colours without being able to see any difference. Antialiasing, gradients, shadows — these can be the trouble spots, so eye them carefully.
One other thing to watch out for — sometimes, reducing the colours below a certain point can actually increase the size of the resulting image. So always check the compression level in the bottom left corner — you want the highest compression % possible.
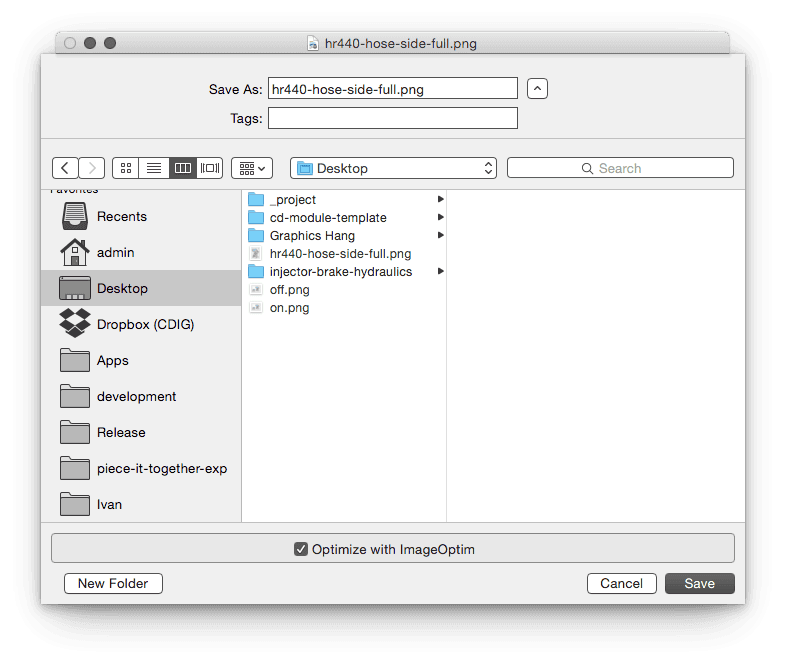
When you've got a good setting, hit Command-Shift-S, make sure the "Optimize with ImageOptim" box is checked, and save to the right spot (usually, replacing your source image).

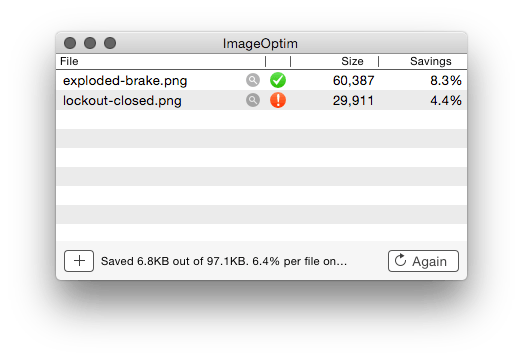
ImageOptim will open, and your new lossy-compressed PNG will appear in the list, for an additional round of lossless-compression.
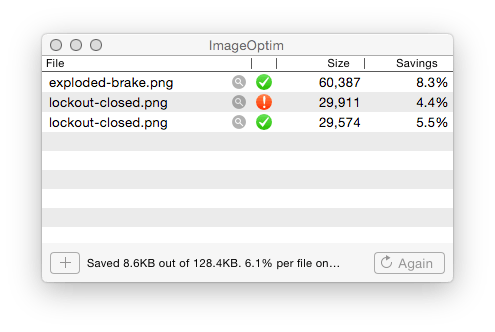
Sometimes, the handoff from ImageAlpha to ImageOptim can bug out (blame OS X), and you'll see a red X.

If that happens, just grab the file from the Finder, and drag it into ImageOptim manually.

All done!
Folks with the Adobe suite can use the Adobe Media Encoder. Folks without it can use HandBrake.
Container: MP4
Encoding: H.264
Profile: High
Level: 5.2
If you're using Adobe, you'll need these settings:
Bitrate Encoding: VB2 2-pass
Target Bitrate: 2 mbps
Max Bitrate: 5 mbps
Note if you're going to upload your video to Vimeo or YouTube, turn the Target up to 20 and Max up to 100 or so.
If you're using Handbrake, you'll need these settings:
Quality: CRF 22
Tune: Animation (assuming there's no live-action footage in your video)
Again, if uploading to YouTube or Vimeo, crank the quality up to CRF 18.
Same as with images, you'll want to look at how big the video appears in your content, and compare that to the size of source file. If the video is dramatically higher-resolution than the usage, open the original in Adobe Media Encoder and export it at a smaller size.