Adding Plugins - ccseer/Seer GitHub Wiki
From Seer-4.1.0, you can install plugins automatically.
- Go to
Settings > Plugins. - Click the
Availabletab. - Select a plugin from the plugin list then click
Installfrom the bottom right. - Seer will download and install the plugin for you automatically.
On first use, you will need to select a folder to store your plugins. If the installation fails due to file occupation (e.g., reinstalling after deletion), please restart Seer and try again.
-
To install a plugin, select it in the
Settingsand hit theDownloadbutton afterwards. This initiates the download of the plugin file in default system browser.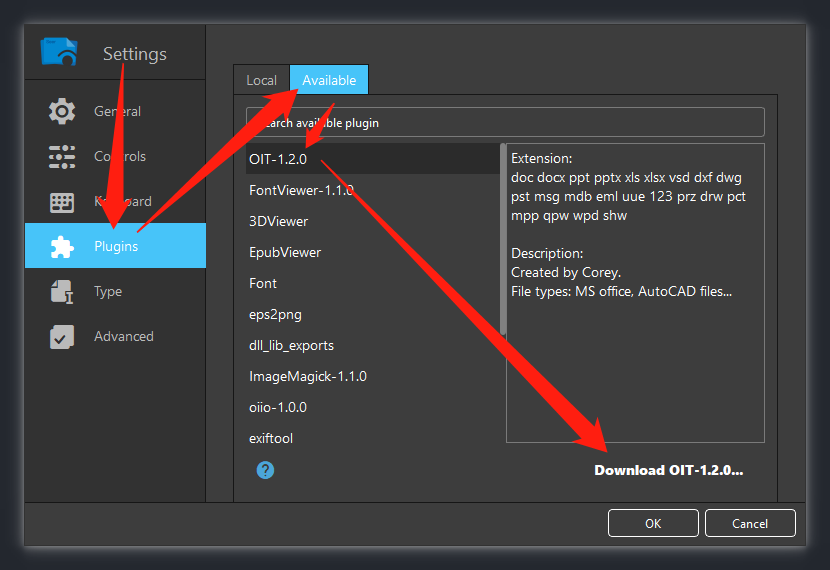
-
All plugins are provided as zip archives which you need to extract on the local system.
-
Afterwards, switch to the
Localtab underPluginsin Seer'sSettings, and click on+. This opens a file browser which you use to select thejsonfile in the folder you have extracted the archive to.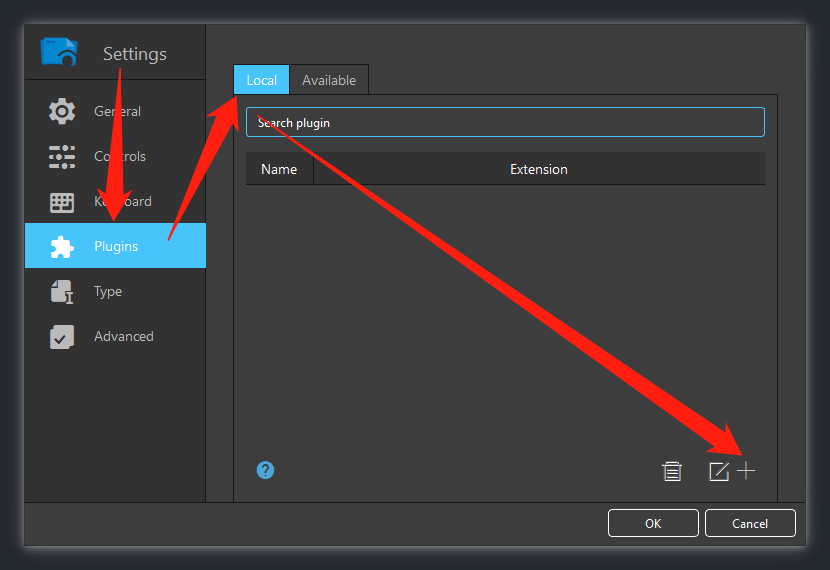
-
Once done, click
OKto save, then support for the new file types has been added to Seer.
- File extensions are not case-sensitive (e.g.
.JPGand.jpgare treated the same). -
Do not place plugins inside the Seer installation folder (including
Seer/plugins). - Most common file formats are already supported natively. There's no need to install every plugin. You won’t have every file format on your computer anyway, and installing too many plugins just wastes bandwidth and memory — which is a bad idea.
- After the steps are complete, moving or deleting files will cause the main program to fail to use the plugin successfully, and it needs to be added again.
- When multiple plugins support the same file format:
- The priority is:
.dllplugins > conversion-based plugins > viewer scripts. - For plugin conflicts, Seer will follow the order shown in the table.
- You can drag and reorder plugins to change their priority.
- The priority is: