Installing the ESP32 Arduino Core - cchamchi/ESP32 GitHub Wiki
아래 사이트를 참고하여 만들어 졌습니다.
https://learn.sparkfun.com/tutorials/esp32-thing-hookup-guide#installing-the-esp32-arduino-core
ESP32의 Tensilica코어 pair는 ARM또는 AVR이 아닌 Xtensal 기반의 코어입니다. 다행히도, 아직도 ESP32용으로 사용할 수 있는 GNU컴파일러가 있어 개발 환경이 대폭 개선될 수 있다! 본 자습서의 나머지 부분에서는 ESP32지원을 받는 아르 뒤노 IDE의 설정에 대해 설명하고, Wi-Fi가용 마이크로 컨트롤러를 처음 접하는데 필요한 간단한 예제 스케치를 설명합니다.
복잡한 오버 헤드를 추상화함에 있어, ESP32용 아두이노 IDE는 몇가지 기능에 액세스 할수가 없습니다. ESP32용 고급 툴체인을 직접 설치하고 싶다면 Espressif's esp-idf GitHub repository 를 추천합니다. IoT DevelopmentFramework의 줄임말인 esp-idf는 ESP32용 SDK(SoftwareDevelopmentKit)입니다.
Installing the ESP32 Core
Espressif’의 공식 ESP32 Arduino core는 여기에 host되고 있습니다. GitHub. 아직 Arduino board manager install 은 제공되지 않습니다. (it should be coming soon), 하지만 설치 방법을 설명하고 있습니다.simple set of installation directions
Windows
Clone or Download the Core
ESP32 board definitions을 인스톨 하기 위해서 esp32-arduino repository를 다운로드 하여 Arduino sketchbook directory에 “hardware/espressif/esp32”폴더를 만들고 복사하여야 합니다.esp32-arduino repository를 다운로드하는 방법은 git command line tool을 사용하거나 Github에서 직접 다운로드 하는 방법이 있습니다. 여기서는 접근하기 쉬운 후자로 설명하겠습니다.
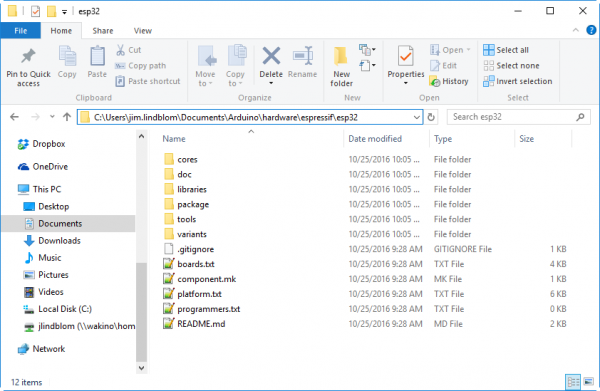
Github에서 직접 다운로드하기 위해 arduino-esp-master.zip를 클릭하세요.(or click “Download” > “Download ZIP” on the GitHub page), 그리고 unzip한후에 Arduino sketchbook directory에 있는 “hardware/espressif/esp32”에 복사 합니다.
<주의> arduino-esp-master 라는 폴더 밑에 있는 내용을 “hardware/espressif/esp32”에 복사합니다.
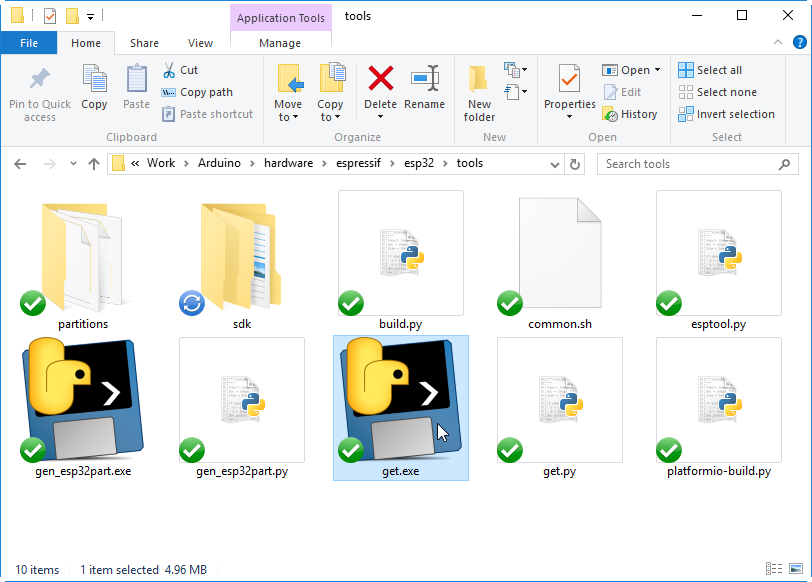
Install the Xtensa and ESP32 Tools
다음 단계는 Xtensa GNU compiler collection (GCC)을 인스톨합니다. Windows users can run get.exe, found in the “esp32/tools” 폴더에 있는 get.exe를 실행합니다.
Arduino Example: Blink
With the ESP32 Arduino core installed, you’re ready to begin programming. If you haven’t already, plug the ESP32 Thing into your computer using a micro-B USB cable.
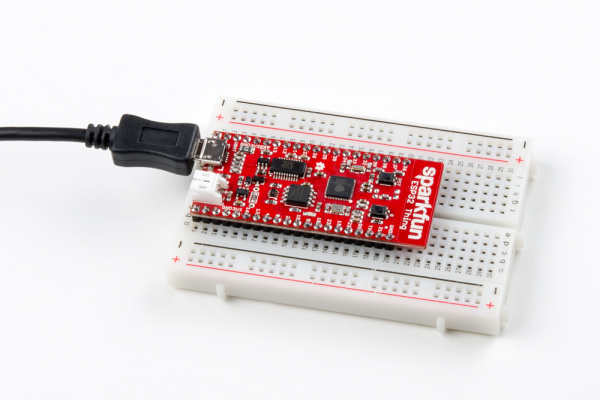
Once the board is plugged in (and drivers installed), it should be assigned a unique port identifier. On Windows machines, this will be something like “COM#”, and on Macs or Linux computers it will come in the form of “/dev/tty.usbserial-XXXXXX.”
Select the Board and Port
Once the ESP32 Arduino core is installed, you should see an “SparkFun ESP32 Thing” option under your “Tools” > “Board” menu. Select that.
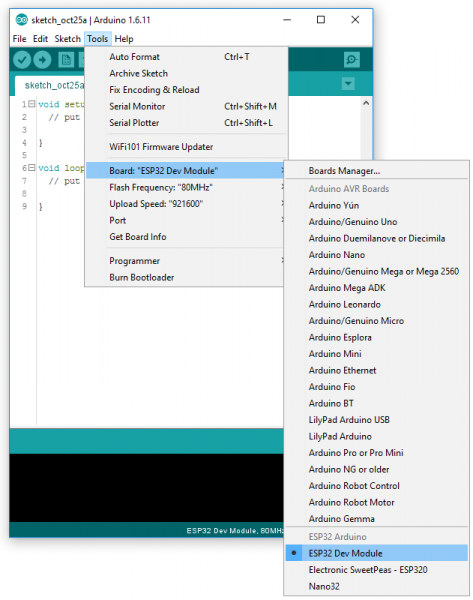
Then select your ESP32 Thing’s serial port under the “Tools” > “Port” menu.
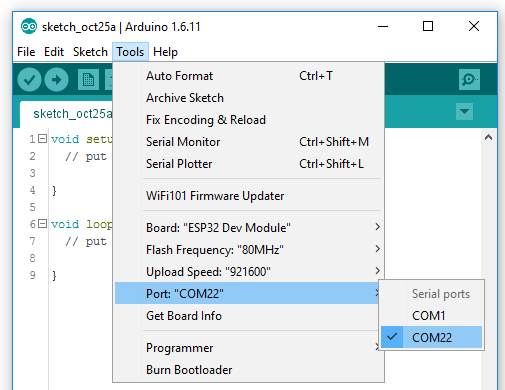
You can also select the “Upload Speed”. 921600 baud – the fastest selectable rate – will get the code loaded onto your ESP32 the fastest, but may fail to upload once-in-a-while. (It’s still way worth it for the speed increase!)
Loading Blink
To make sure your toolchain and board are properly set up, we’ll upload the simplest of sketches – Blink! The LED attached to GPIO 5 is perfect for this test. Plus, with the ESP32 attached to your computer, it’s a good time to test out serial. Copy and paste the example sketch below, into a fresh Arduino sketch:
int ledPin = 5;

void setup()
{
    pinMode(ledPin, OUTPUT);
    Serial.begin(115200);
}

void loop()
{
    Serial.println("Hello, world!");
    digitalWrite(ledPin, HIGH);
    delay(500);
    digitalWrite(ledPin, LOW);
    delay(500);
}