Translating Tests - campsych/concerto-platform GitHub Wiki
Translating a test is a process of creating a multiple variant of same test, that differs only in displayed text. Main goal when translating is to eliminate duplication and make maintaining your test much easier.
Concerto starter content comes with translationDictionary node which does just that. It lets you define dictionaries for each language.
We’re going to create a table that will be our dictionary. The most important column in this table is entryKey. It’s unique identifier that we will use in our test to reference dictionary entry. We’re going to use dictionary where each language has its own column for translation.
We will show how to use translation entries both at code level and directly in our template’s source.
For demo purposes we’ll define two languages for our test: English and Spanish. User will be able to select a language to use through URL parameter.
Lets start with creating a test. Initially it won’t be using translation dictionary. We’ll convert it later to use when done.
We want to create a linear test. We’ll mostly use default settings. We’ll only modify question of each item to add text to it. Then we’ll add a eval node that will create feedback text and last node on our flowchart will be showPage node that will show score and feedback text to user.
Start with adding linearTest node. Edit Items list.

Prepend each item question with What is:
Your item bank should look like this now.

Now, lets add eval node that will create feedback text. Right click your flowchart and select eval to add it. Use below for Code:
totalScore = scores$math
feedback = if(totalScore == 3) "great" else "not good enough"
Expose scores native return port on linearTest node and create scores dynamic input port on eval node. Connect them when done.

Add showPage node to flow. Set this for its HTML (in source mode):
<p>Your score is: {{totalScore}}</p>
<p><strong>{{feedback}}</strong></p>
Create totalScore and feedback both as dynamic return port of eval node and dynamic input port as showPage node and connect them.

All what is left now is to connect execution flow.

You can run your test to see if all is working fine.
We’re going to create a new table for our dictionary. We can do that by copying example translationDictionary table so we don’t have to start from scratch.
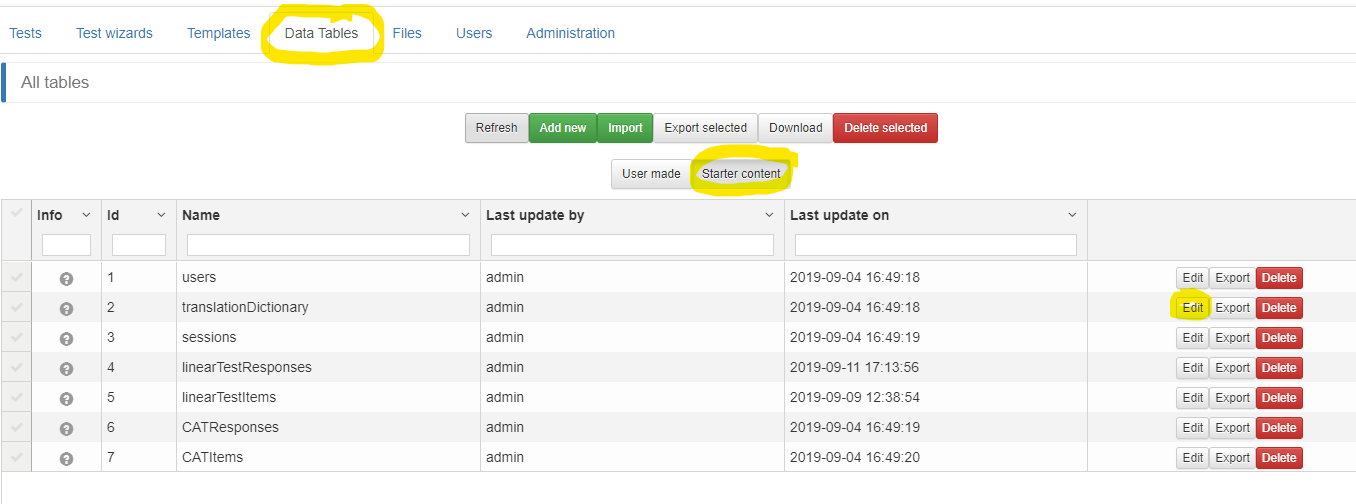
Go to Data Tables, select Starter content and click *Edit next to translationDictionary.
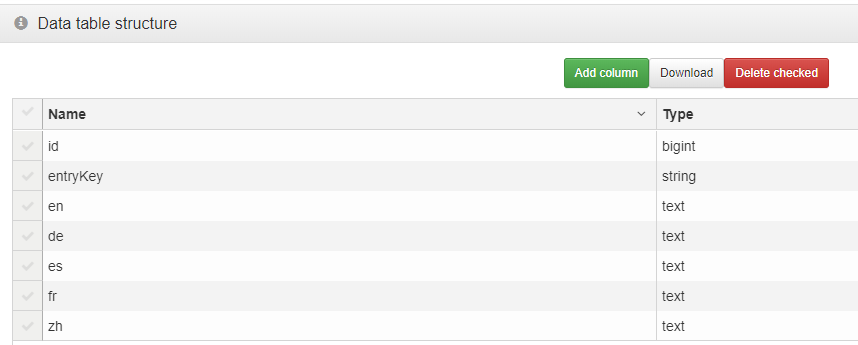
Check the table’s structure. As you see it comes with en, de, es, fr, zh columns already. These are language codes. Let’s remove de, fr and zh. For our demo, we only need en and es, which is English and Spanish.
Click Copy in bottom-right corner to copy default translation table. Enter demoTranslations for new table name when prompted.

Now we need to add dictionary entries. Add following entries.
| entryKey | en | es |
|---|---|---|
| whatIs | What is | Como es |
| yourScoreIs | Your score is | Tu puntaje es |
| great | great | genial |
| notGoodEnough | not good enough | no es suficiente |
Your data will look like this.

Add translationDictionary node right after test start. We’re going to use default settings for node, with one exception, we want to map to different dictionary table. Click Dictionary table edit icon.
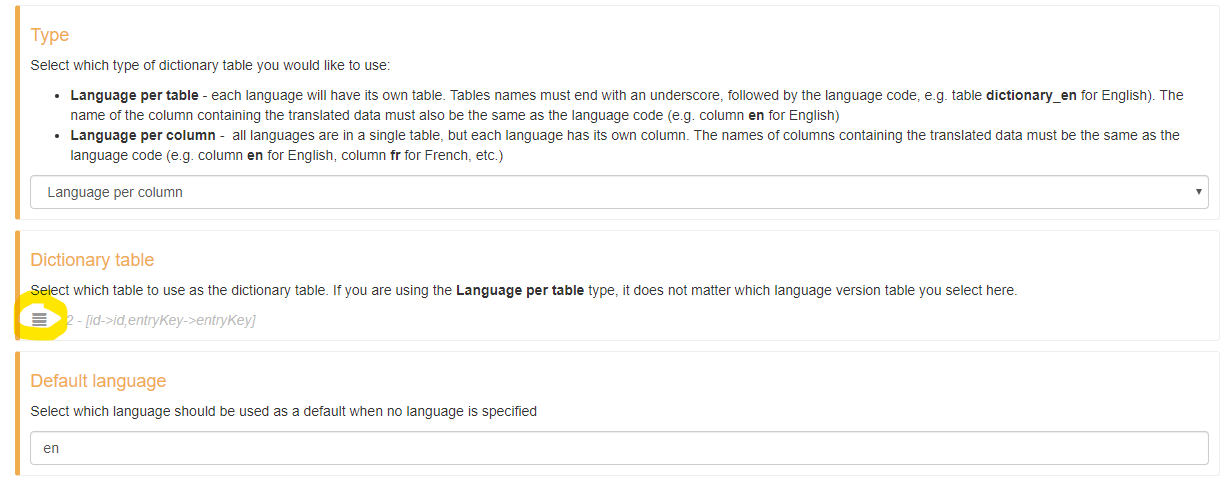
Now select our newly created demoTranslations table.

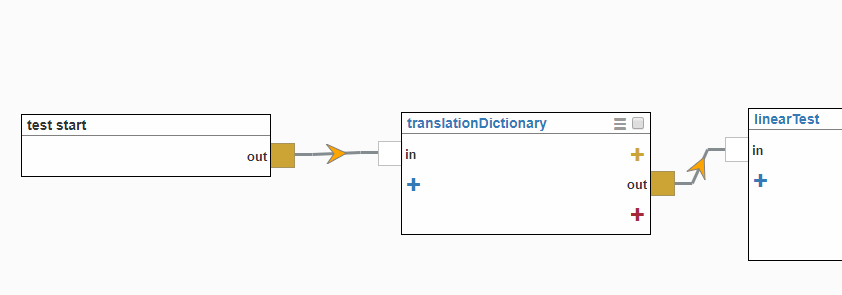
Connect our newly added node to our execution flow.
We’re going to add input parameter to our flow test. We’re going to accept values for it through URL.
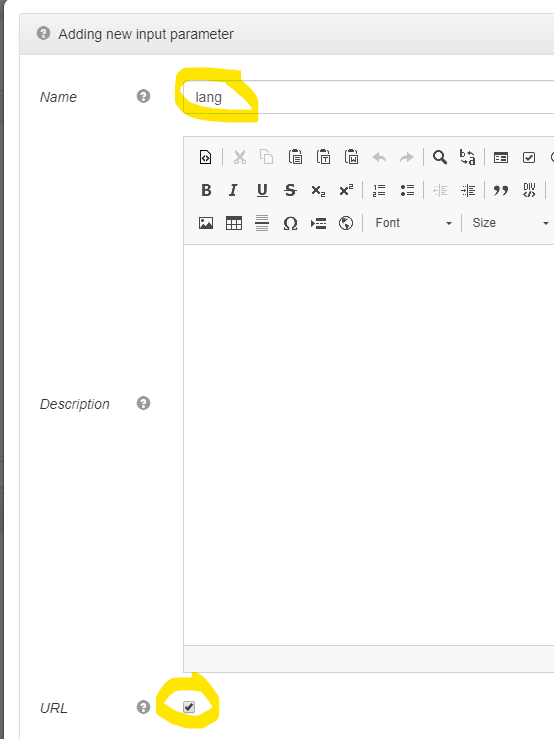
Go to Test input section and click Add input parameter

Type lang for name and make sure you checked URL option. Click Save when done.
Notice that new return port named lang just appeared on test start node.
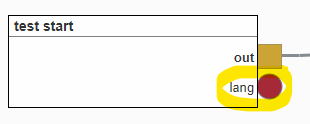
Expose language native input port of translationDictionary node and connect lang with language.

Now we are able to set the language we want to use from URL param when starting the test. We need to use language codes that will match the names of our language columns for values (en, es).
For all content that is going to be used on templates, we can use following directive to insert translation entry:
{{trans:entryKey}}
Replace entryKey above with actual entry key from your dictionary table.
Remember text we added to questions for each of our items? Lets replace the text with directive above. We want to use whatIs entry for this text. Our item bank should now look like this.

Lets go to our showPage node’s HTML. Let’s replace “Your score is” text with “{{trans:yourScoreIs}}”. Our whole HTML should now be:
<p>{{trans:yourScoreIs}}: {{totalScore}}</p>
<p><strong>{{feedback}}</strong></p>We also might need to get our translated text directly in R code. To get it we can use following function:
c.trans(entryKey)Lets go to our eval node and use this function there. Replace our hardcoded strings with translated text taken from our dictionary table. Update your code to.
totalScore = scores$math
feedback = if(totalScore == 3) c.trans("great") else c.trans("notGoodEnough")Run your test. When no ?lang= URL param is provided, English language will be used.
Now add ?lang=es to your URL. You’ll see that text entries are being translated to Spanish now.
You could go further from here and translate default linearTest template using same rules. You should be able to do it with ease now after what your just learned.