Linear Test - campsych/concerto-platform GitHub Wiki
To make tests in Concerto, typically we use the assessment node. This can be used for both linear tests and computer adaptive tests. For a linear test, the order of the test items will be predefined at node start rather than selected on-the-fly by computer-adaptive algorithms.
In this guide we’re going to:
- create an item bank that is split into different categories (traits) and that uses different item response types
- set scoring rules
- set a time limit for test execution
- create a data table in which to store responses to our items
- present a feedback page showing a score sum and feedback for each trait at the end of the test
Start by creating a flowchart-based test. Right click anywhere in the flowchart area and select assessment node to add it.
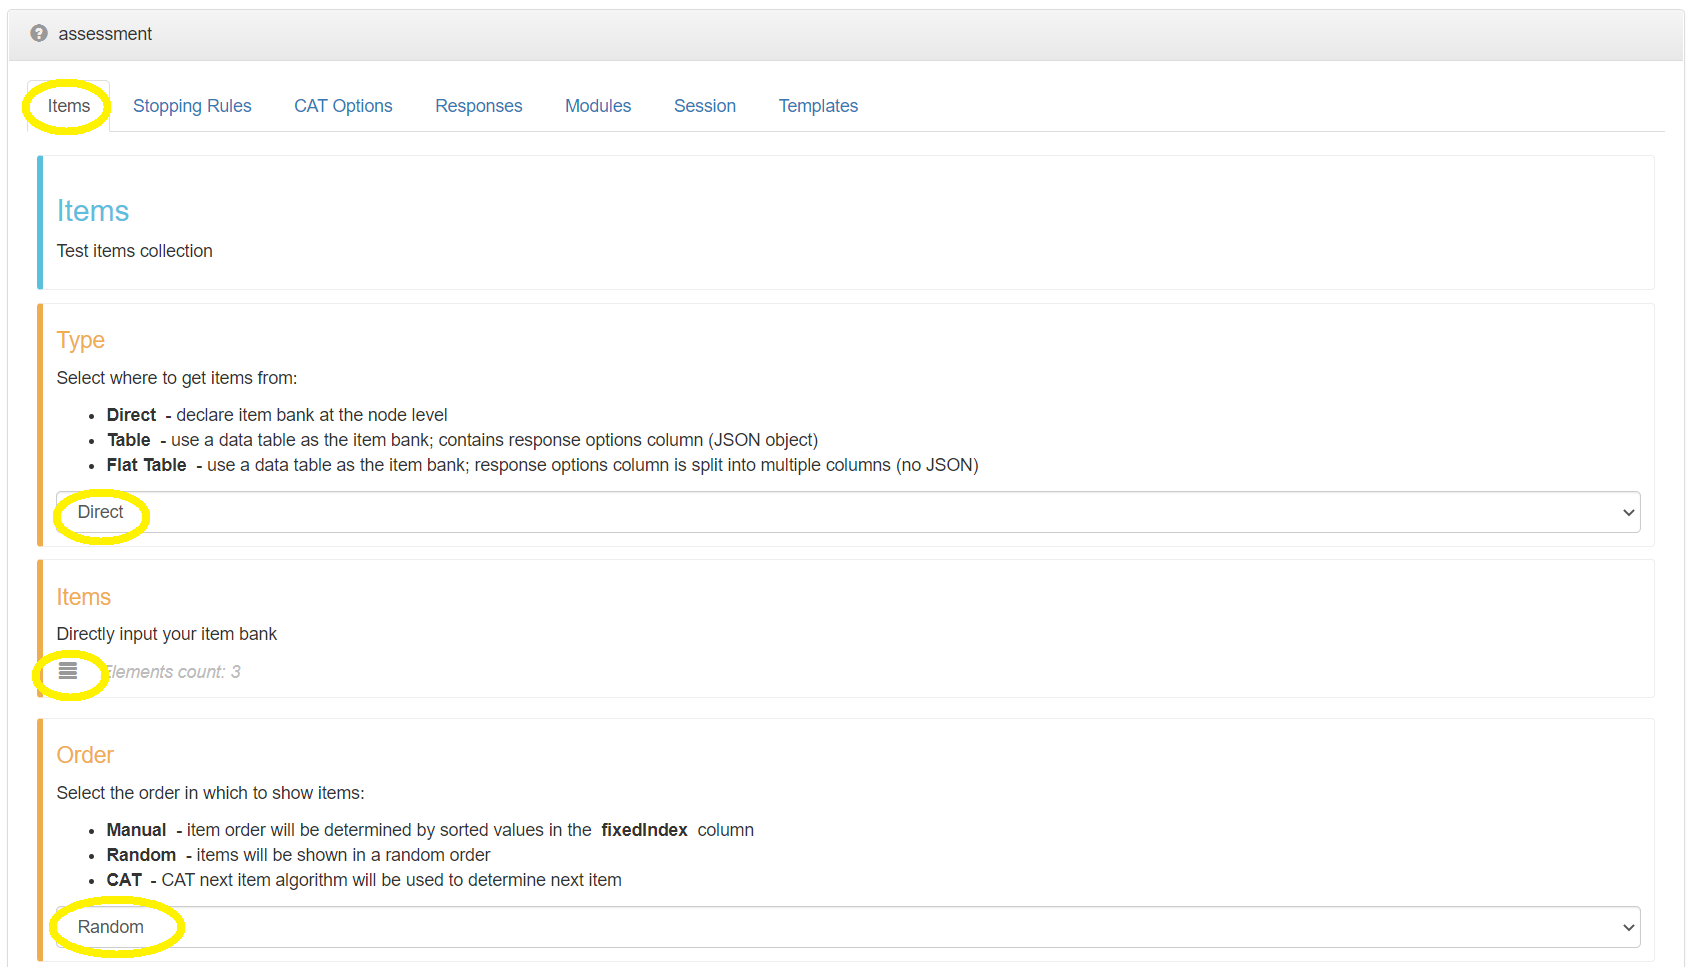
When an assessment node is added, a new window with node wizard should pop-up. The first step of the assessment wizard is to set the properties of test items.
We want to use Direct item bank type. This means that we will define our items directly in this node instance as opposed to having them declared in a separate data table. This will also let us use the wizard to set the properties of individual items. Make sure that Type parameter value is set to Direct. Set Order to Random to show items in a random order.
Now click the Items edit icon below to create your item bank.
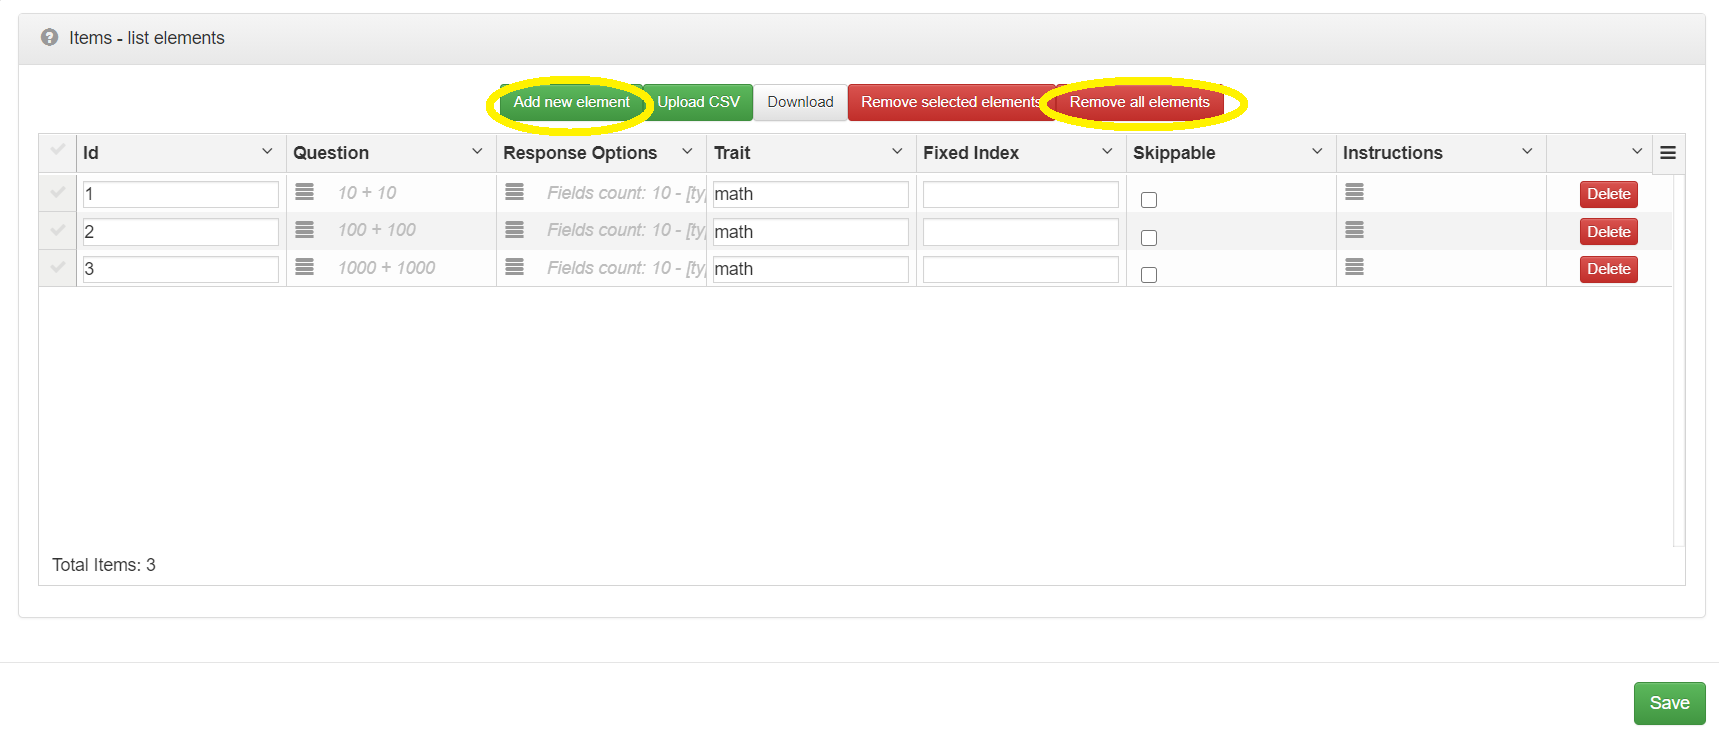
Newly added assessment nodes already contain three example items to make the node runnable out of the box.
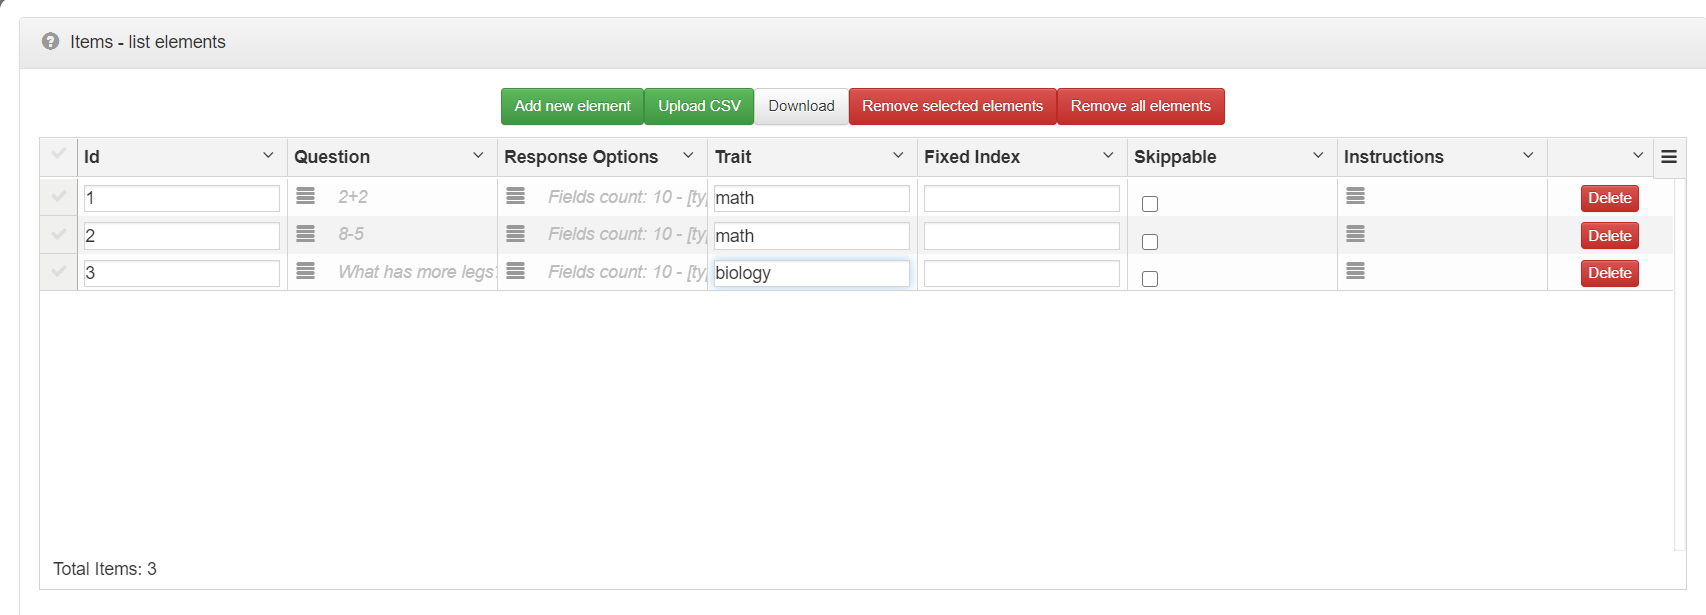
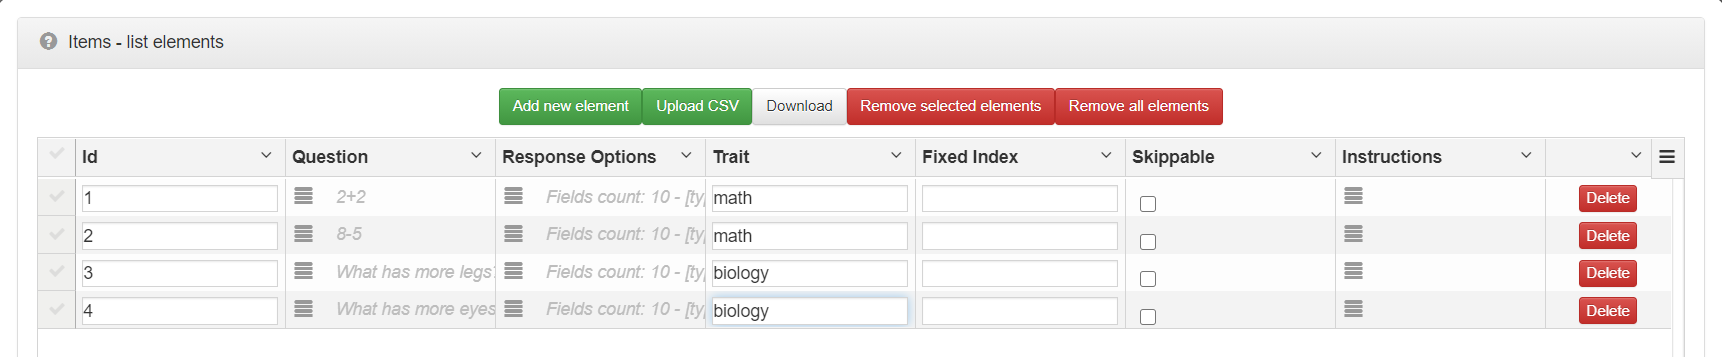
Each linear test item is described by the following properties:
- Id – Numeric identifier for your item. Needs to be unique.
- Question – Question presented to test taker.
- Response Options – Response properties. Defines response type and scoring.
- Fixed Index – Numerical value used for item’s order when your linear test’s Order property is set to Manual.
- Trait – Category this item belongs to. At the end of the test we’ll get separate score sums for each trait.
- Skippable – If selected this gives a separate option box that the participant may select if they wish to skip answering that item.
- Instructions – This allows you to add optional text before the question.
For this tutorial we will leave the Skippable and Instructions options blank. As the answer is not required (see Responses tab of the assessment node) a participant may skip the question anyway; the items are therefore skippable by default.
We want to set our own items, so let’s start by deleting the pre-loaded default items. To do that click “Remove all elements”.
Our plan will be to add four items. Two of them will belong to a trait called math and two of them to a trait called biology. Thanks to the trait category we’ll be able to get a sum of scores for each category separately when the test is finished.
To add a new item click “Add new element”.
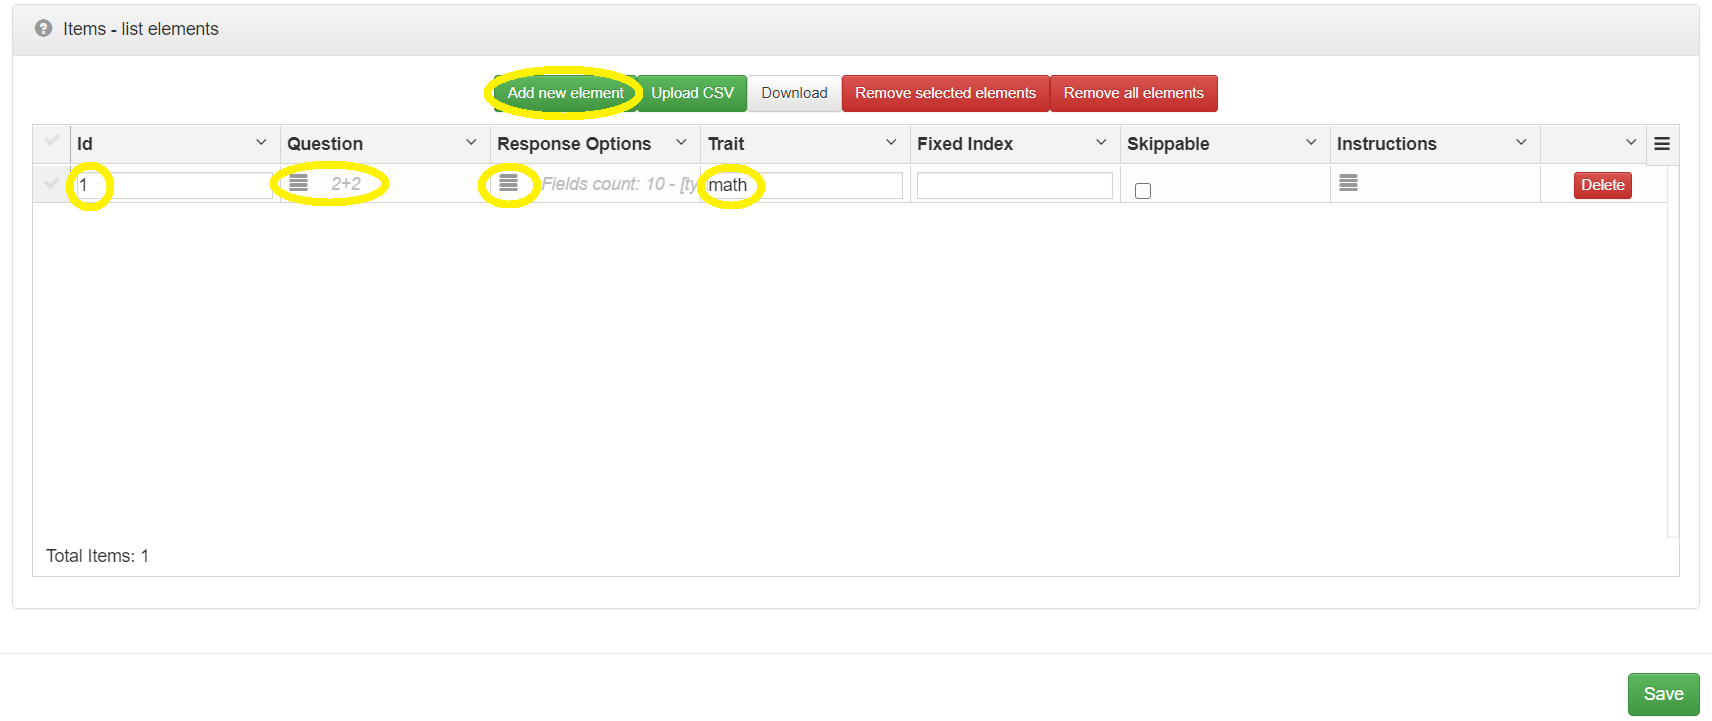
In the newly added row, set the following values:
- Id: 1
- Question: 2+2
- Trait: math
You can leave Fixed Index empty. We won’t be using it, since we use Random of the linear test’s Order property (selected at the beginning), which is to show the items in random order.
When set, click the first item’s Response Options edit icon.
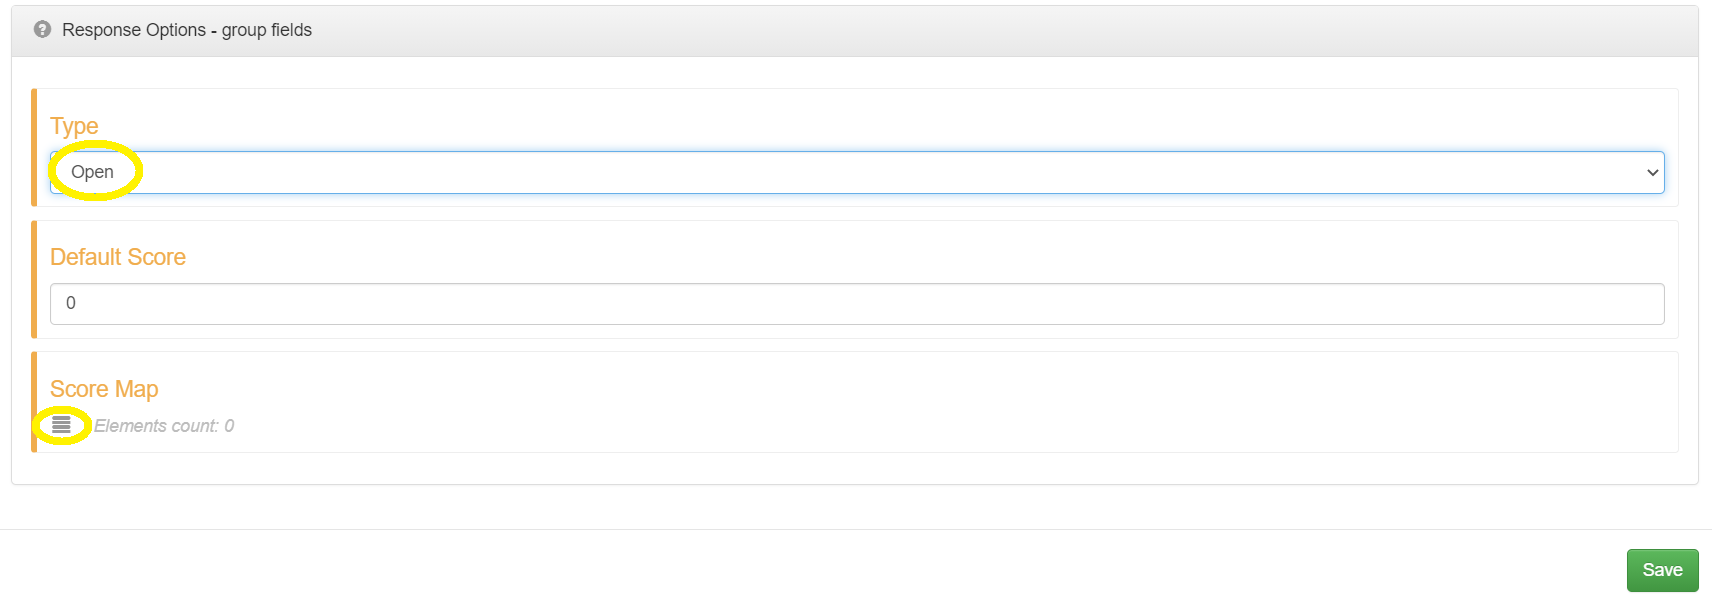
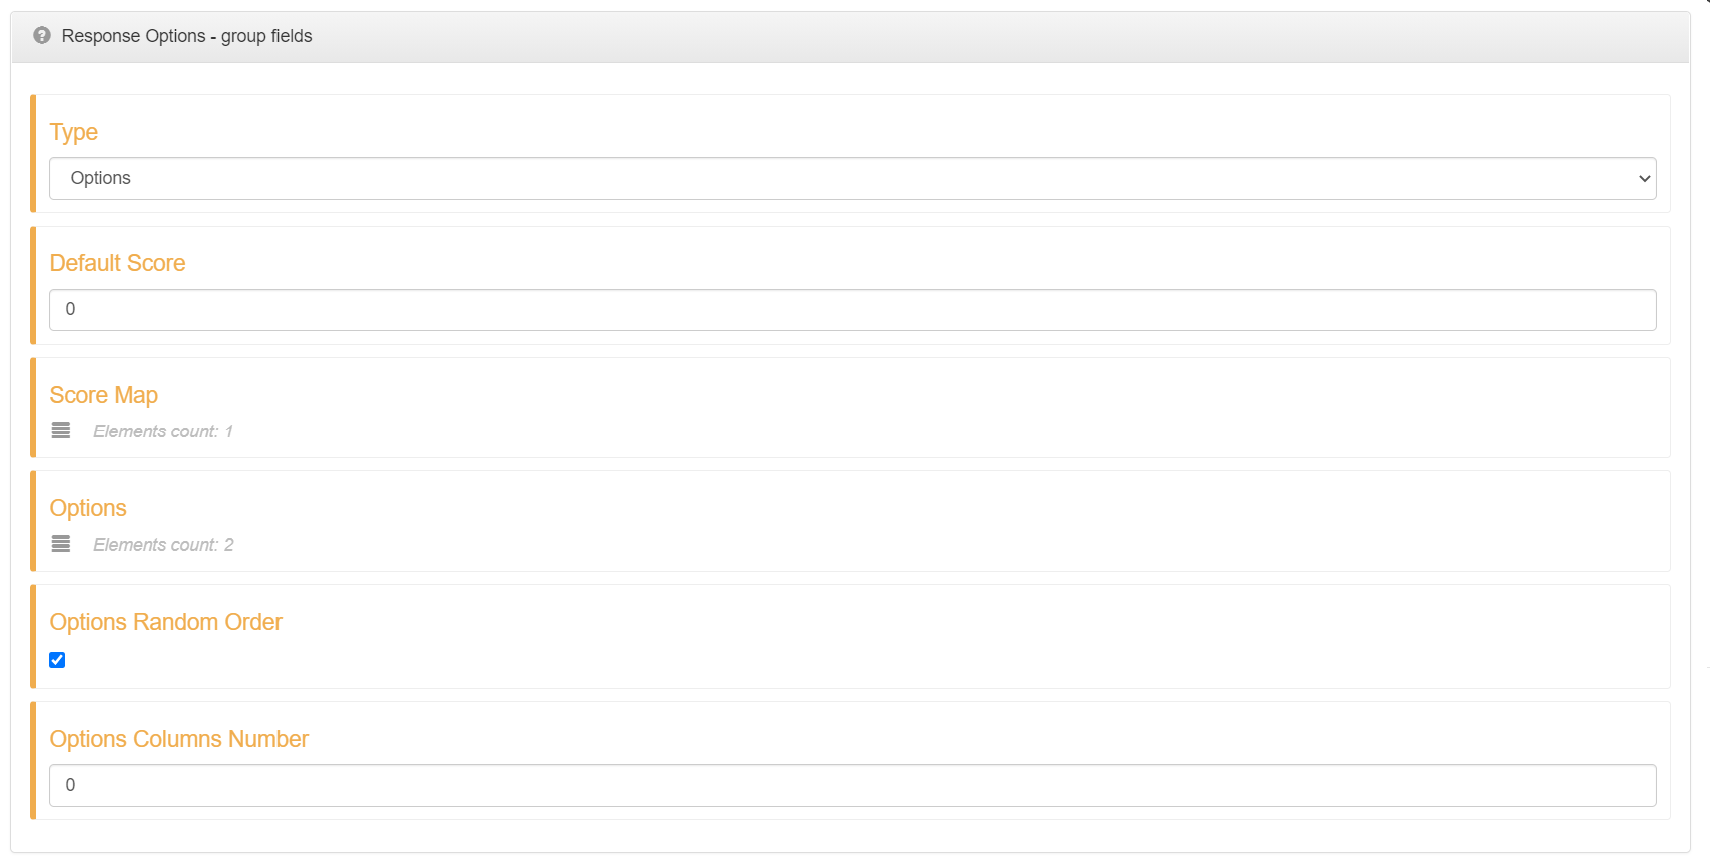
For item #1 we want to have Open response type. This means that the test participant will be able to type their answer into an open text input field. Select Open as response Type and click Score Map to set scoring rules.
Each response type will return a value to which we can map a specific score value. In the case of Open response’s type, the value will be the exact text as entered by the participant. Let’s add a new entry in our score map. We want to map Score 1 to Value 4, which means that whenever the user enters the value of 4 as a response, he’ll get a score of 1.
Our Score Map should look like this:

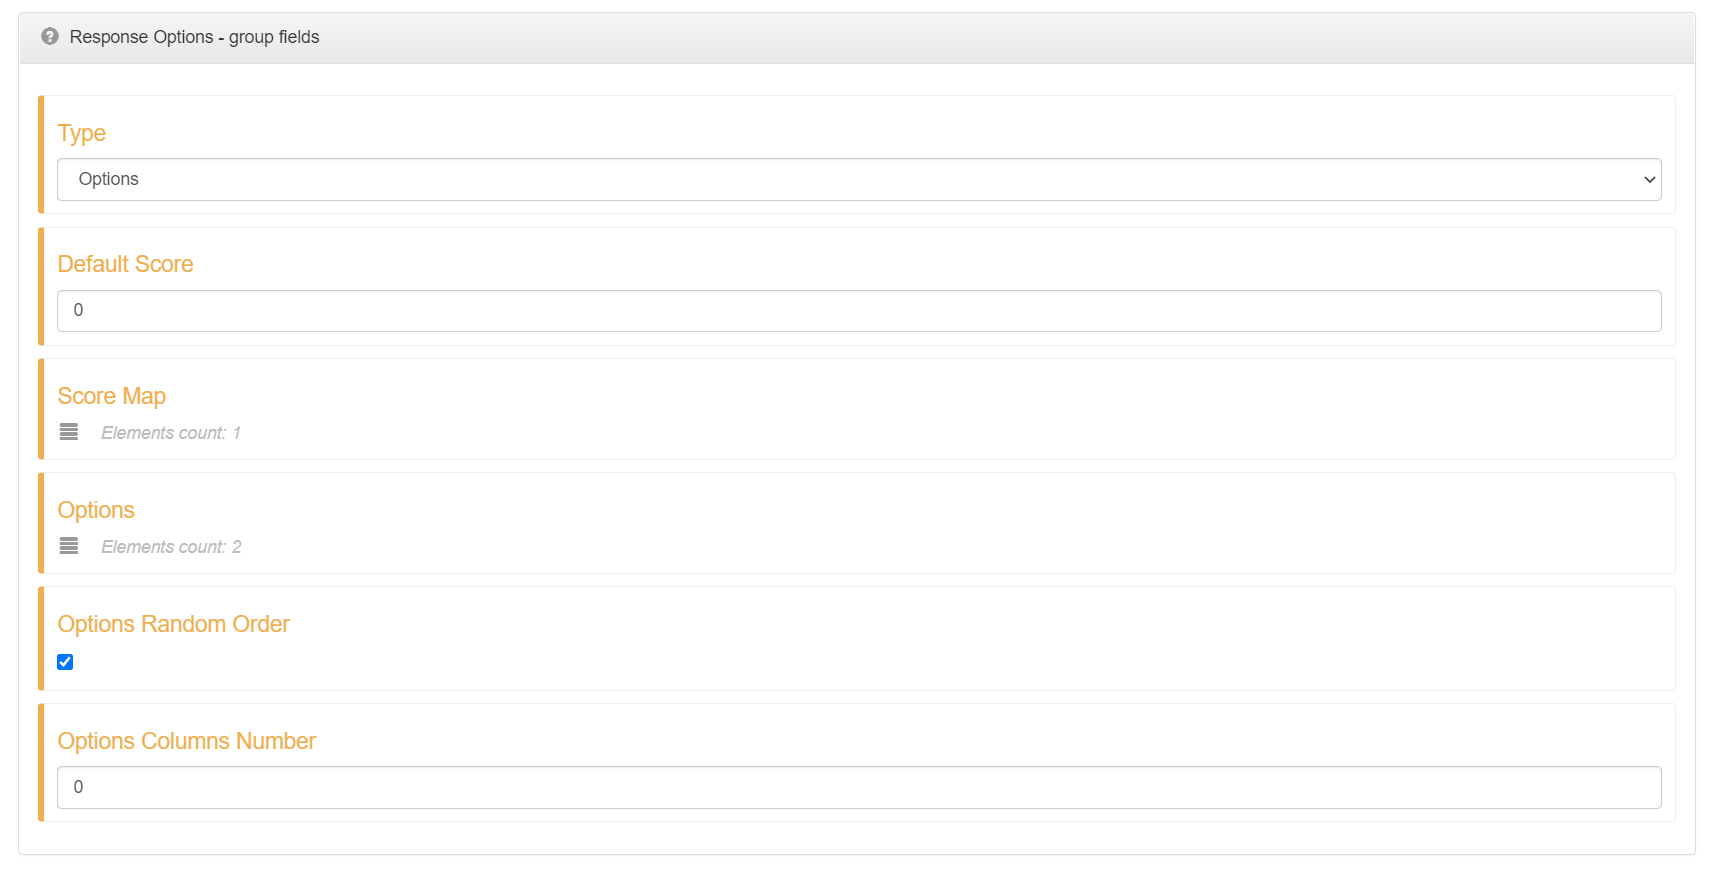
Our complete Response Options should look like this:
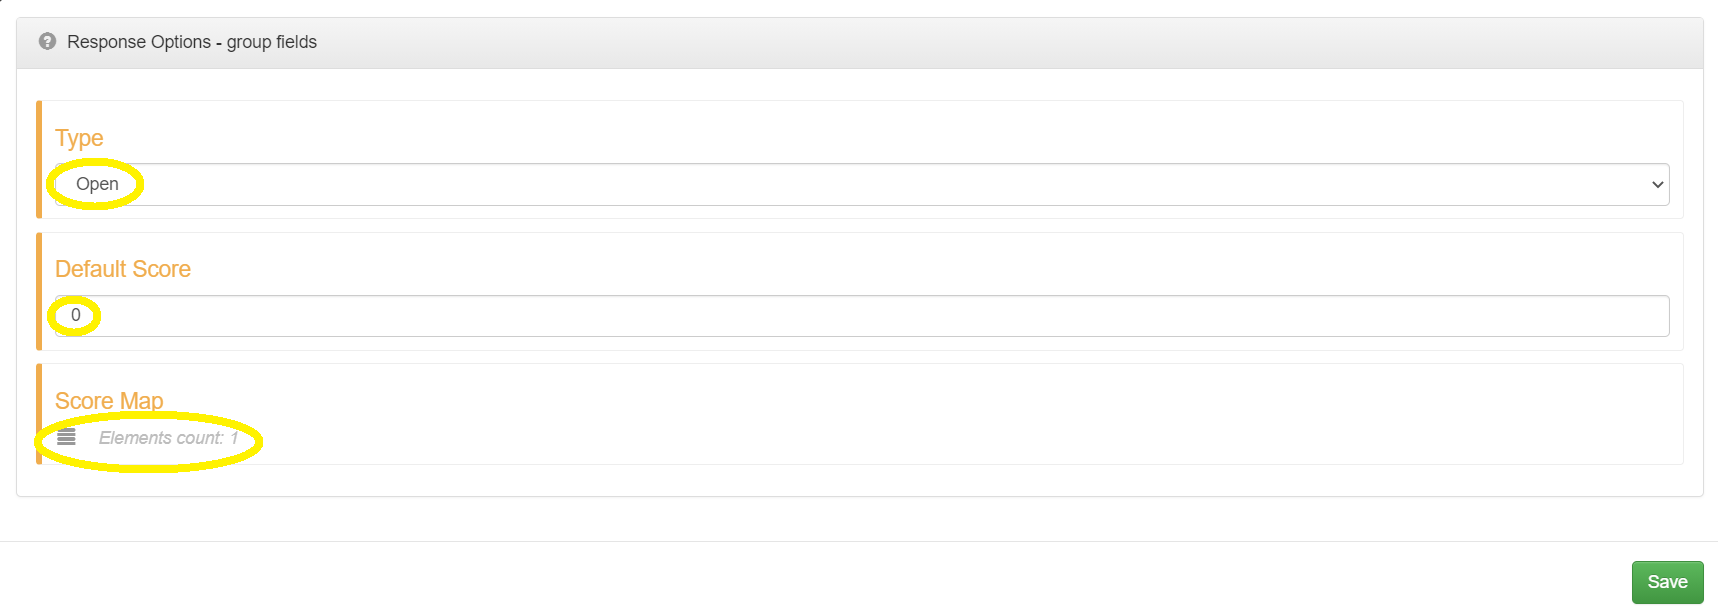
Notice the Default Score parameter. This means that whenever a participant enters a value that has not been specifically mapped to a score in our Score Map, then we should use the value set in Default Score as the score for that value. This parameter should be set to 0.
Lets add another item. Set its values to:
- Id: 2
- Question: 8-5
- Trait: math

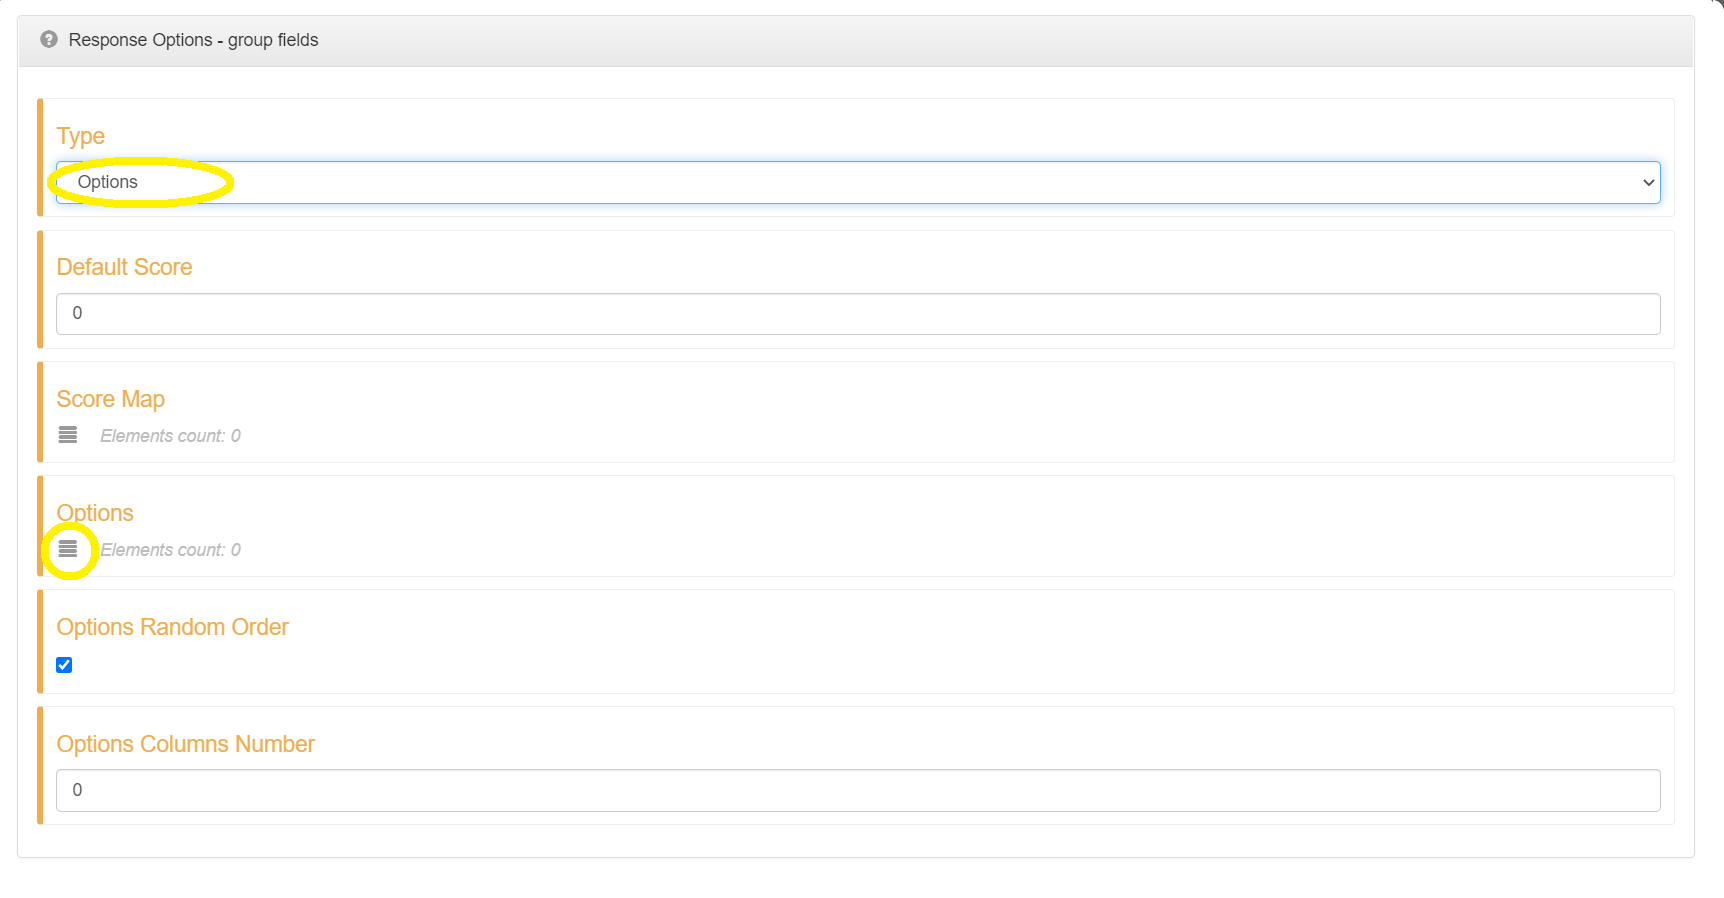
Now lets set its Response Options. This time set its Type to Options. This will present the user with a predefined set of response options from which he can choose one option. When set, click on the Options edit icon to set our options.
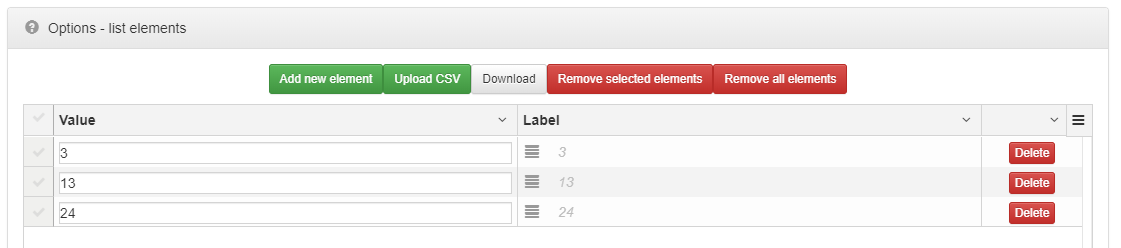
Lets set three possible options: 3, 13, 24. Each option consists of a Value and a Label.
Value is going to be used to refer to this option in our test logic and should be something simple (e.g. a numeric value). It needs to be unique for this specific list of options.
Label is what the user will see on screen. It can be any HTML.
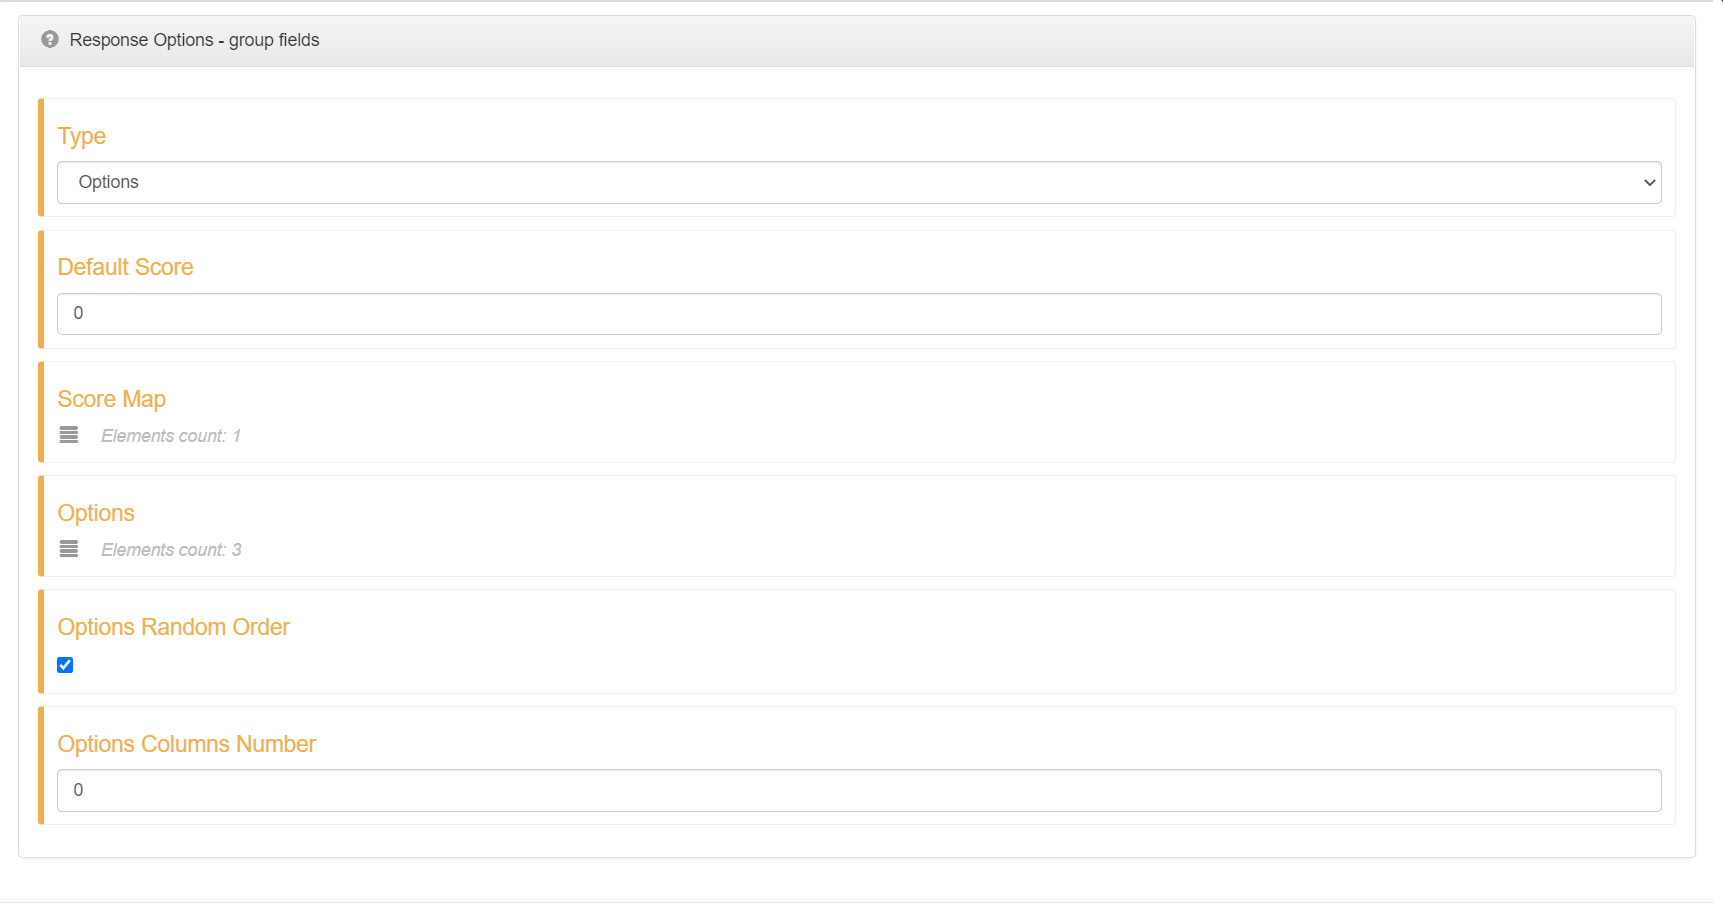
In our case we can use save values for both. Our options list should look like this.
Now lets set our Score Map. The correct response to this item is 3, so lets map it to score 1. 0 will be used as the score for all other options as this is the value of the Default Score parameter.

Response options for our second item should now look like this.
Add another item. Set its value to:
- Id: 3
- Question: What has more legs?
- Trait: biology
Now go to its Response Options. Set Type to Options and add the following response options.
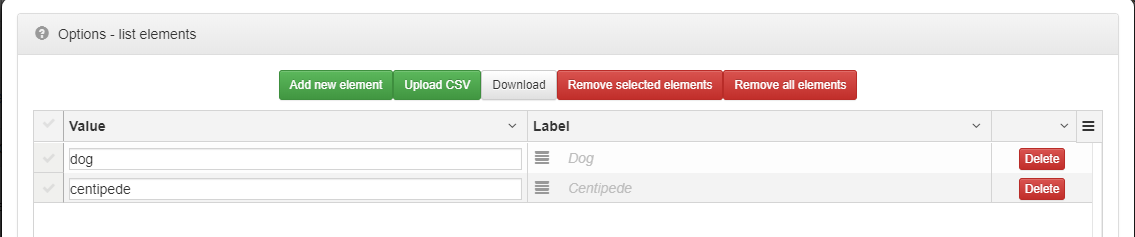
In Score Map set centipede as the correct value.
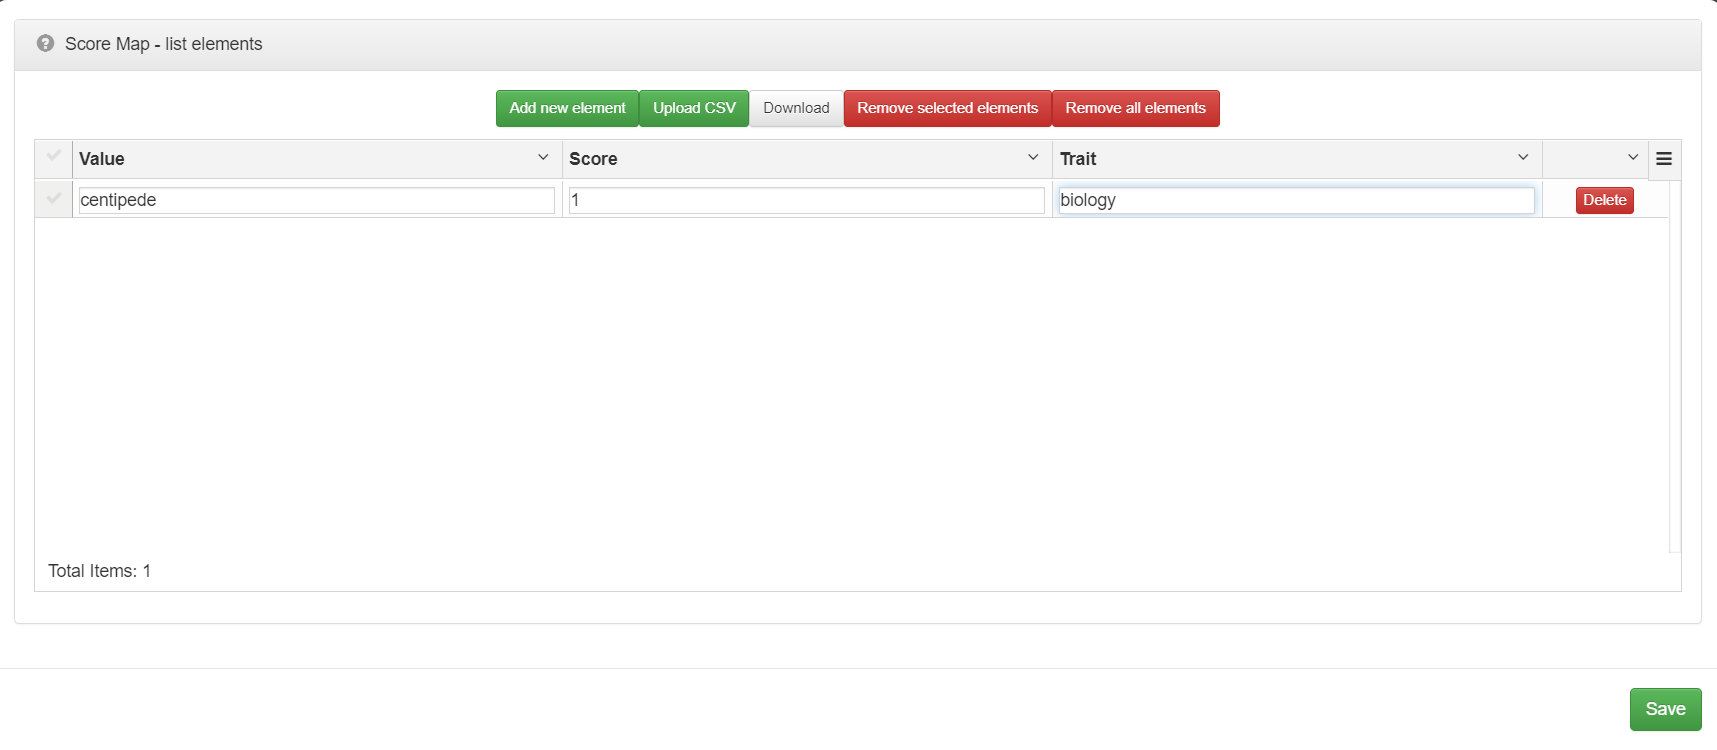
Your Response Options should look like this:
Add another item. Set its value to:
- Id: 4
- Question: What has more eyes?
- Trait: biology
Now go to its Response Options. Set Type to Options and add the following response options.

In Score Map set spider as the correct value.

Your Response Options should look like this:
We’ve now finished creating and scoring our item bank.
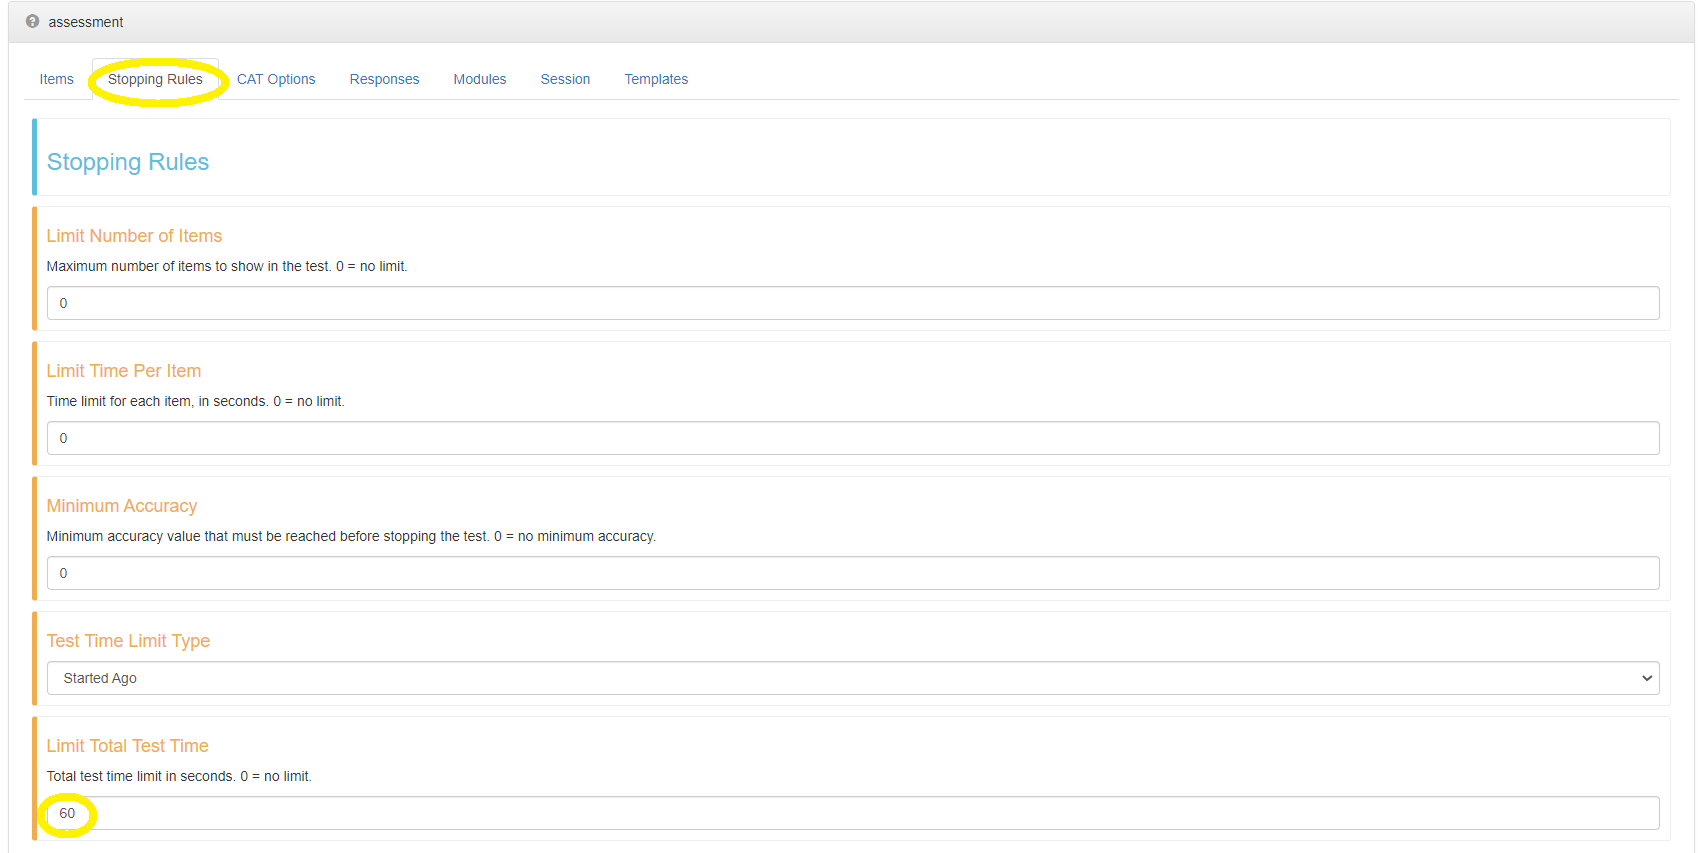
Go to the Stopping Rules step of the assessment wizard.
To set a time limit for the test, change the value of the Limit Total Test Time property from 0 (unlimited) to 60. This will set the total time limit to 60 seconds.
Although we could use the default response table to store the data from our assessment, which is the data table called assessmentResponses, as an exercise, we’ll create a new table which will be a copy of the default table.
Go to the Data Tables tab in Concerto administration panel and select Starter content tables.

Now click the Edit button next to the assessmentResponses table.

When in table detailed view, you should now be able to copy the table, by clicking Copy in the bottom right corner.

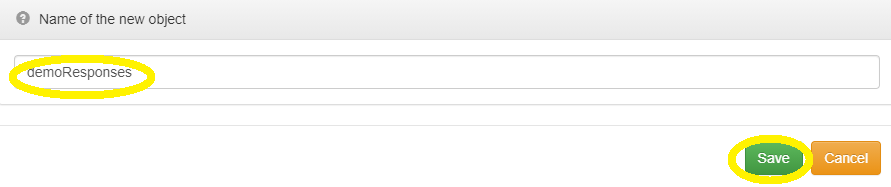
You’ll be prompted to enter a name for your new table. Enter: demoResponses as the name and click Save. Note that all new objects need to have a unique name.
By copying the table, you created a new table that will have the same structure as the source table. This will save us time in creating the structure from scratch. Now that we have it ready, let’s go back to our flowchart. Go back to the properties of our assessment node by clicking the node’s name.
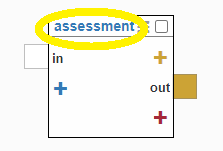
Go to the Responses step and click Response bank edit icon.

Change our response table from the default one to our newly created demoResponses table. When changed, all mappings should be set automatically, as long as the same column names are present in table.
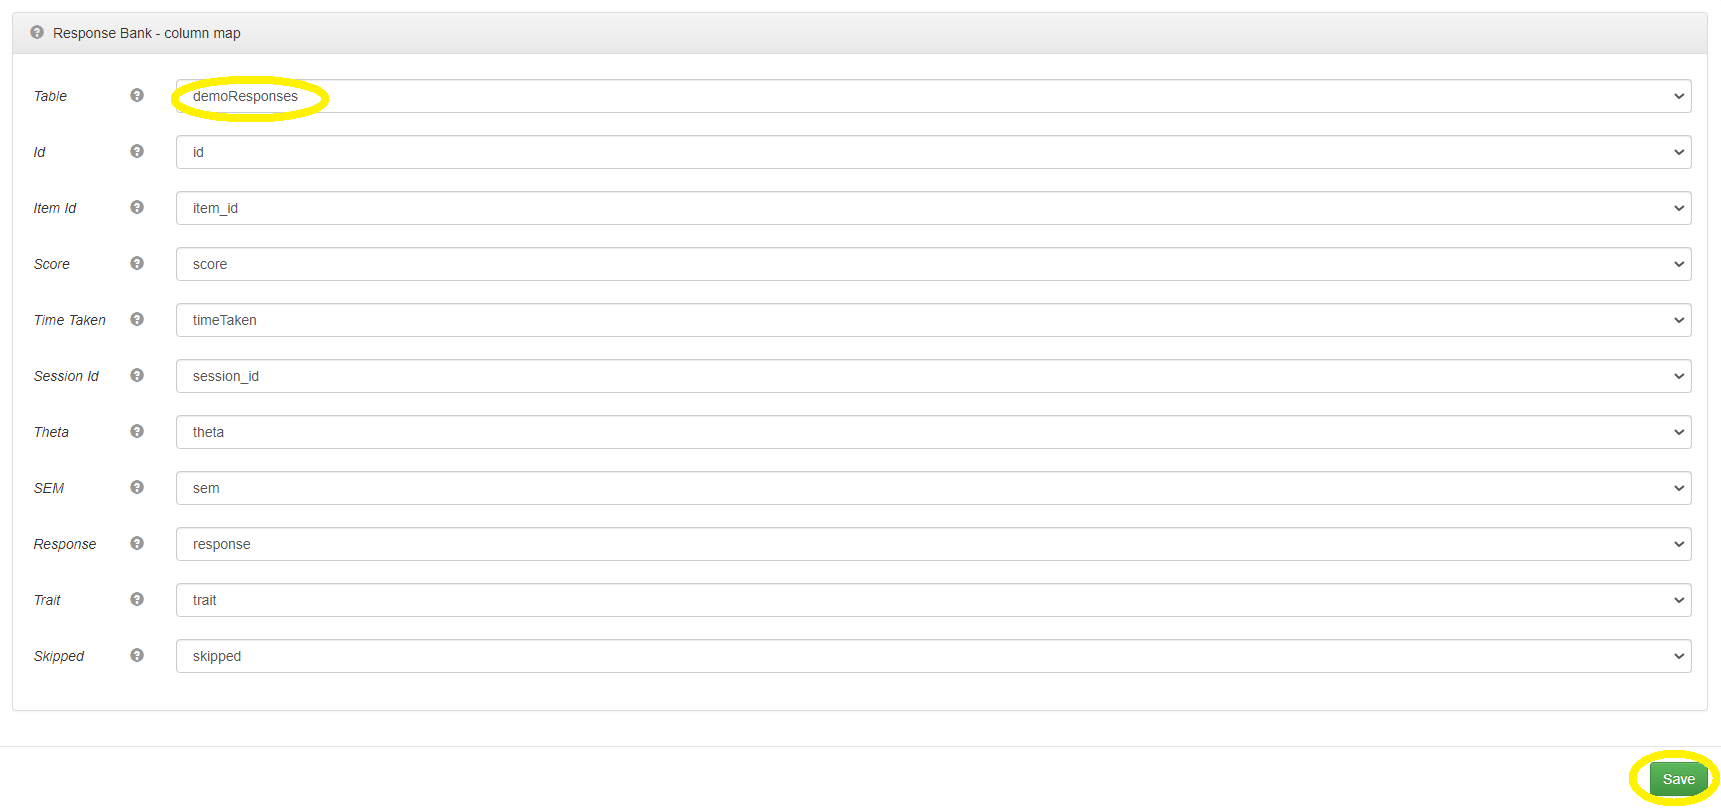
It’s also totally fine to set the response table to Not Selected for use cases where we don’t need to store individual responses and we are only interested in total scores, or where your test doesn’t need to collect any data at all.
We now have all the main settings for our test in place. Now what we want to do is to get each participant’s score when the assessment is finished, interpret this score and show our interpretation for user. We’ll interpret each trait (math, biology) separately.
We can accomplish this using two nodes. One will be an eval node that will get the scores from the assessment node and interpret them, and the other will be a showPage node, which will show our interpretation to the test participant.
Let’s start with the scores interpretation node. Right click on the flowchart and select eval to add it.
Set the below snippet as its code:
mathScore=scores$math biologyScore=scores$biologymathFeedback = if(mathScore == 2) "very good" else if(mathScore == 1) "acceptable" else "not good enough" biologyFeedback = if(biologyScore == 2) "very good" else if(biologyScore == 1) "acceptable" else "not good enough"
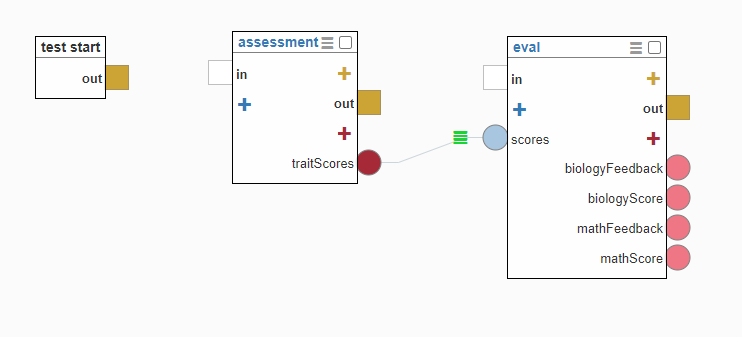
We need to pass scores argument to our eval node for it to be usable. Expose the native return port named traitScores on our assessment. It will contain a list type object with key value pairs elements. Each key in it will be named after our item’s traits and the values assigned will be equal to the total score for each trait.
Create a scores dynamic input parameter on our eval node, and connect both ports. Lets also expose the following variables through eval’s node dynamic return ports:
- mathScore
- biologyScore
- mathFeedback
- biologyFeedback
Now, lets add a showPage node that will show scores and feedback to user. Right click on the flowchart and select showPage to add it.
We’re going to enter the HTML we want to show directly on showPage instance. Paste this for HTML (in source mode):
<p>Your <strong>math</strong> score is: <strong>{{mathScore}}</strong>, which is {{mathFeedback}}.</p>
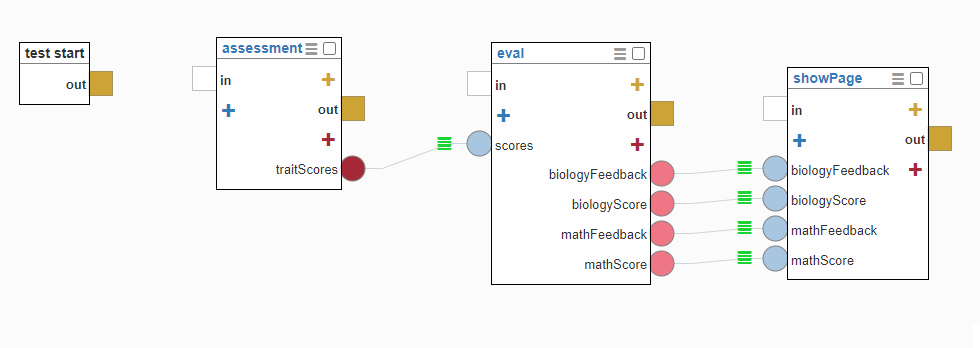
<p>Your <strong>biology</strong> score is: <strong>{{biologyScore}}</strong>, which is {{biologyFeedback}}.</p>Now let’s expose the same dynamic input ports on showPage node as their dynamic return ports counterparts from the eval node:
- mathScore
- biologyScore
- mathFeedback
- biologyFeedback
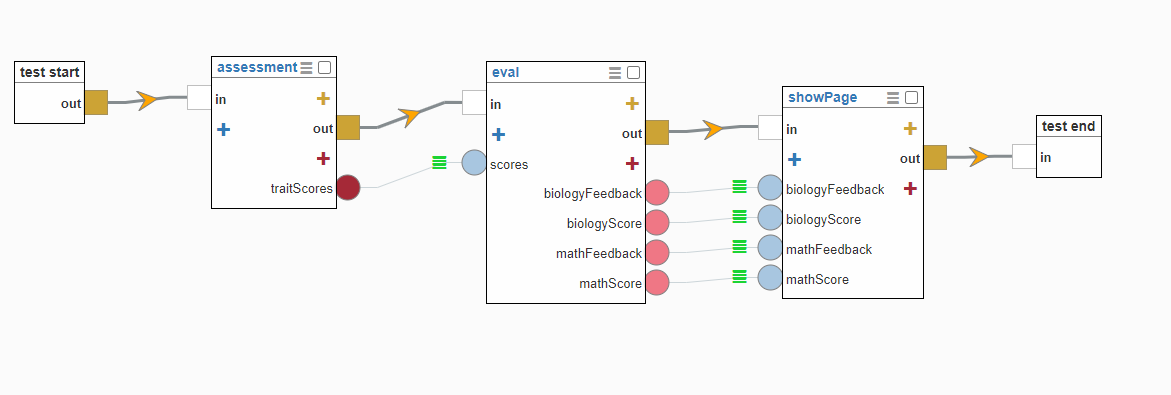
Connect them when done. This is how your flow should look now:
The last thing we need to do is to connect the execution flow:
Congratulations! You just created a full Concerto test. You can run it to see how it looks from the test participant perspective. When you run it a few times, you can also see how responses are being inserted into our demoResponses table.