[Deprecated] Train a Model: No Rows and Columns - byuawsfhtl/RLL_computer_vision GitHub Wiki
Train a Model: No Rows and Columns
When to train a model without rows and columns
If the records being segmented only need a specific field and the record only contains the information for one person, then there is a very good chance you will want to use this tutorial in order to train your model. Death Records or Birth Certificates are examples of records that will often use this tutorial.
If the records being segmented are in a grid format, such as census records, please refer to the other tutorial in order to train a model to segment those records.
Because a lot of the steps are similar or the same, there is a lot of crossover between the two tutorials
Using Detectron 2 via Jupyter Notebook and Google Colab
One of the benefits of using Jupyter Notebook and Google Colab is that it helps us visualize how our model is doing. You may want to make a copy of the following Jupyter Notebook and modify it for the project you are working on. Detectron2 Model Base Code https://colab.research.google.com/drive/1-p5UCcTr1Au4TrDiORM986PxGLMA6PrV?usp=sharing
(Click on the link and select "File", "Save a copy in Drive" at the top left corner)
Brazil Segmentation Code (A bit outdated, but helpful to look at if you are working with multiple classes) https://colab.research.google.com/drive/1wXYtnG9XDUkYlurG3Zv5KFM5Nn9tQ0fY?usp=sharing
Step 1: Load Labeled Images to Google Drive
You can either zip the folder containing the labeled images and then transfer them over to Google Drive, or you can transfer the uncompressed directory. You can do this by selecting "New", "Upload Folder" in the top left corner of your Google Drive.
Step 2: Open and Modify Code
Go to your Google Drive and select "Copy of Record_Linking_Lab_Detectron2_Tutorial.ipynb" (or whatever your script is named). Afterwards, select "Google Colaboratory" under "Connected apps". This should open up the script. (If you do not see "Google Colaboratory" under "Connected apps", try opening Google Colab by clicking one of the original models from the links above, and then trying again with your copy.)
Following this, you can modify the code. Examples will be given of areas where modifications should be made
Change the name of code
Click on title in the top left corner and type in the new name you would like.
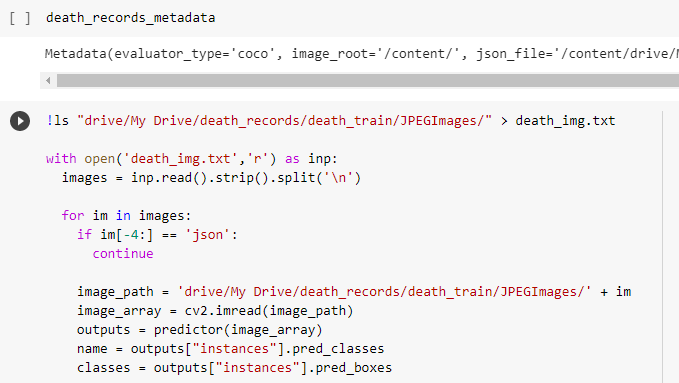
Enter the proper location on images and rename other variables
Before:
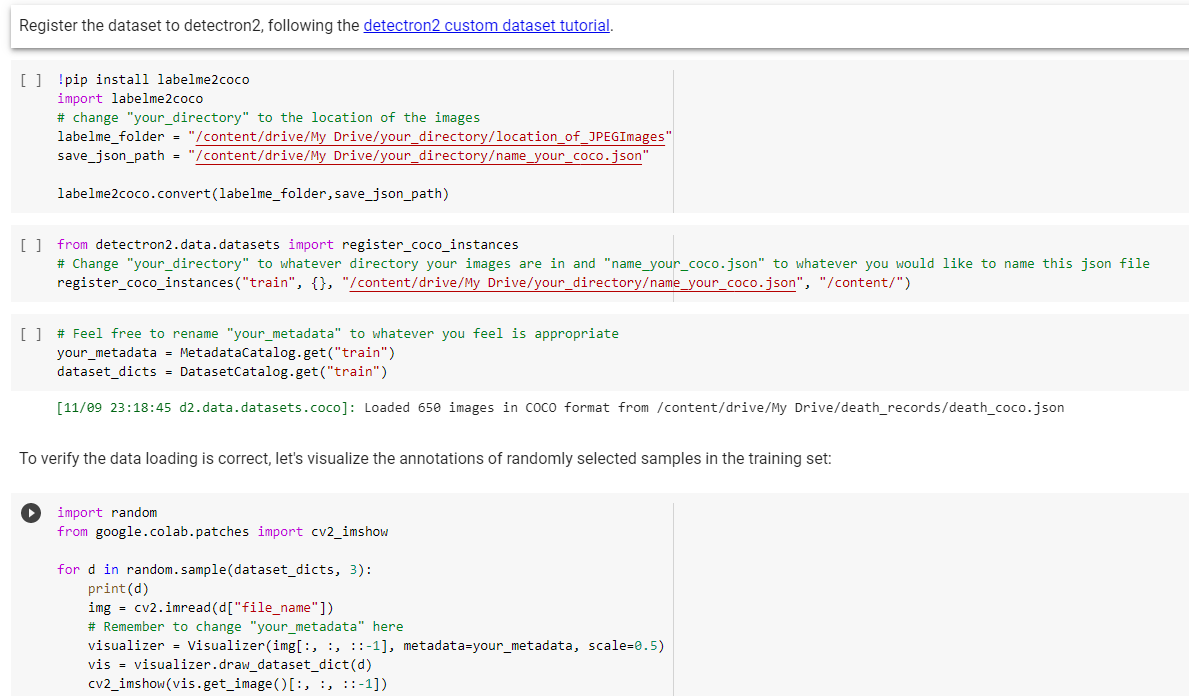
After:
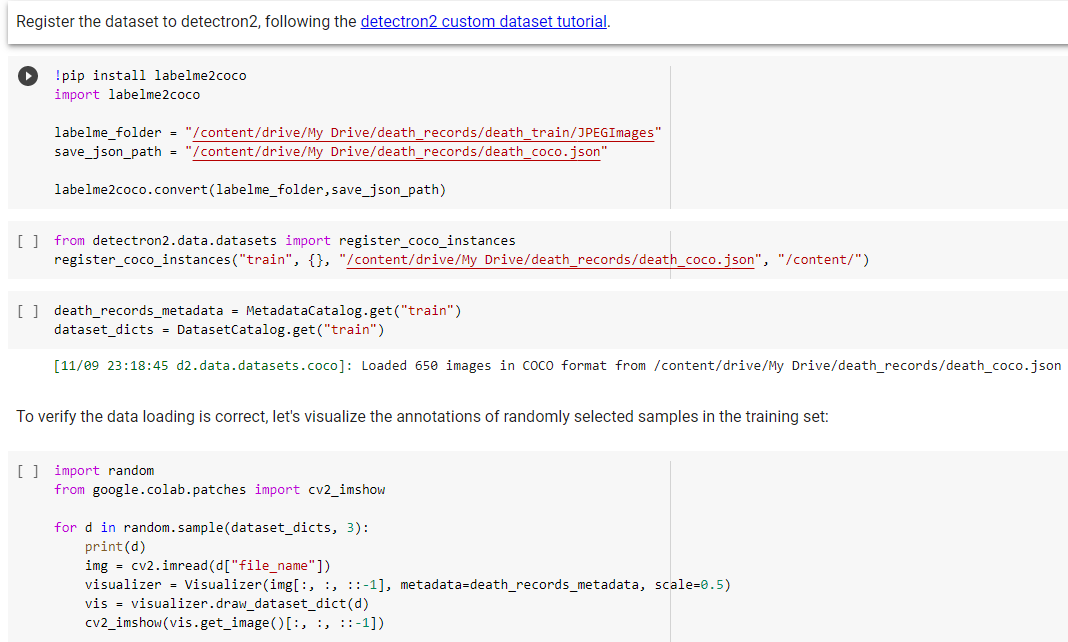
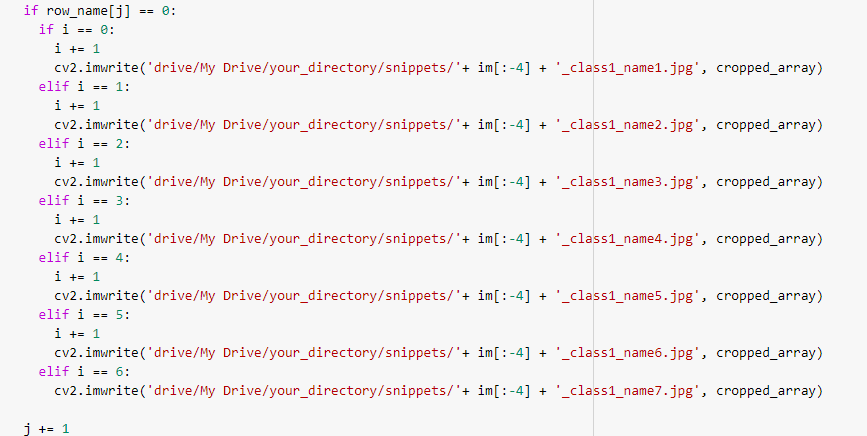
Before:

After:
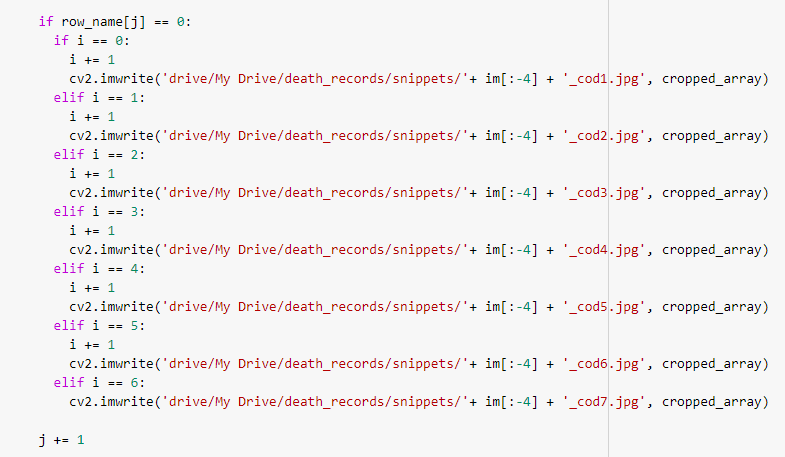
Before:
After:
Before:
After:
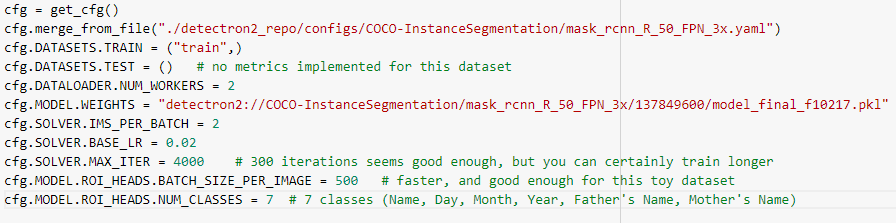
If your data set has multiple classes, you will need to make some additional changes
Before:
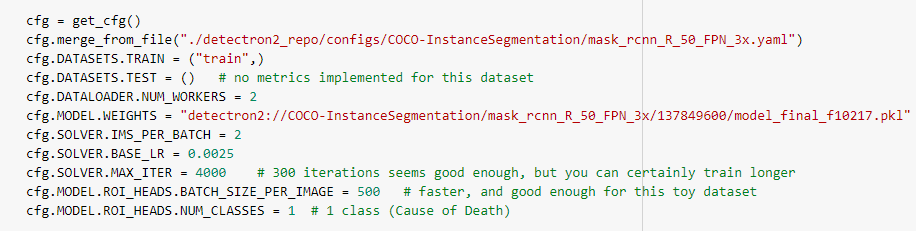
After:
(I personally would keep the BASE_LR the same as the original 0.0025 instead of 0.02)
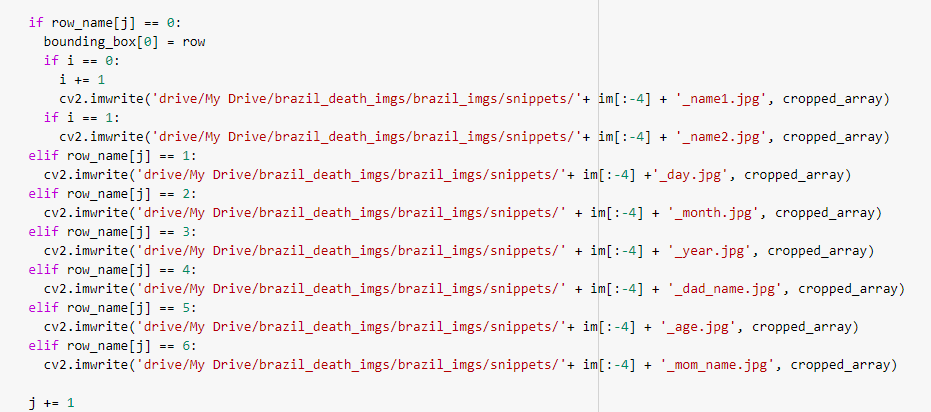
Before:
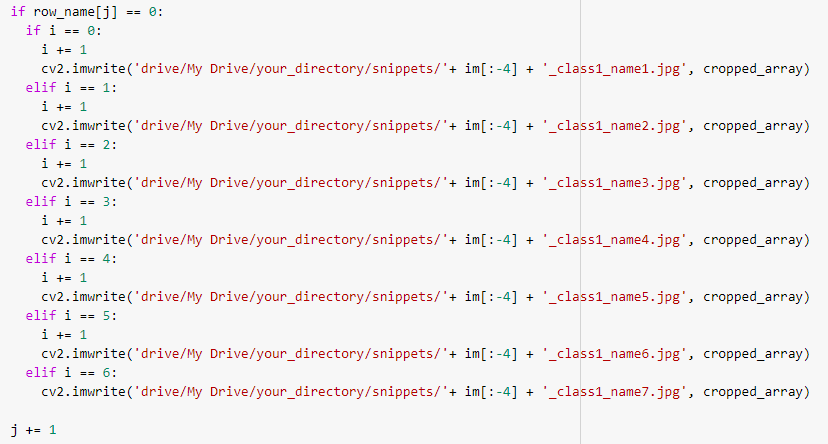
After:
Step 3: Run the code
Run each segment of code in order by clicking the run button at the top left of each chunk. Wait until the code finishes running before starting the next chunk.
13
After running the second chunk of code, you will probably need to restart your runtime. This can be done by clicking "RESTART RUNTIME" at the bottom of the second chunk of code.
14
When running the 4th chunk of code, it will look like this:
15
Follow the link and copy and paste the code you get at the end. This allows Google Colab to connect to the folders in your Google Drive. If you did it successfully it should look like this:
16
Continue to run the code. The fifth chunk of code sometimes takes a really long time to finish running for some reason. If it's been longer than 15 minutes and it still isn't complete, I will sometimes stop the code by clicking the run/stop icon in the top left corner, and then re-run that chunk of code. It usually will finish up after 10 minutes or less if you do that.
17
Some of the chunks of code will give you visual output. The first set of images shows the labels you made for a few random images. (This is to confirm that you properly labeled the images)
18
The chunk of code following the images is where we actually train the model. Depending on the size of your images and the number of images or classes, this chunk of code could take a few hours to finish. Do not let your computer fall asleep and maybe click around Google Colab a bit while this chunk of code is running. Otherwise, it might not finish executing.
19
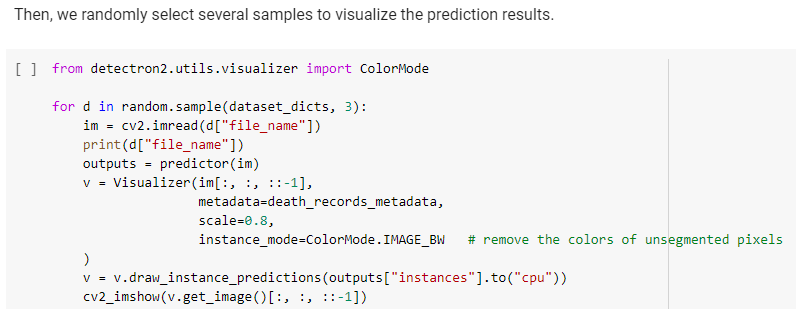
Once the code is done running, continue to run the code until you finish the next set of visual output code. This shows you how well the segmenting did on the images.
Step 4: Download the weights
Run the next two chunks of code to get some visualization on how the segmentation might look. (Keep in mind, this might be more accurate than what will be done on the supercomputer because you are running the model on your training dataset.) If you like how the model looks, you can download the weights for the model from the file section on the left side of Google Colab. Click the 3 dots to the left of "model_final.pth" and select download. This might take a while.
20
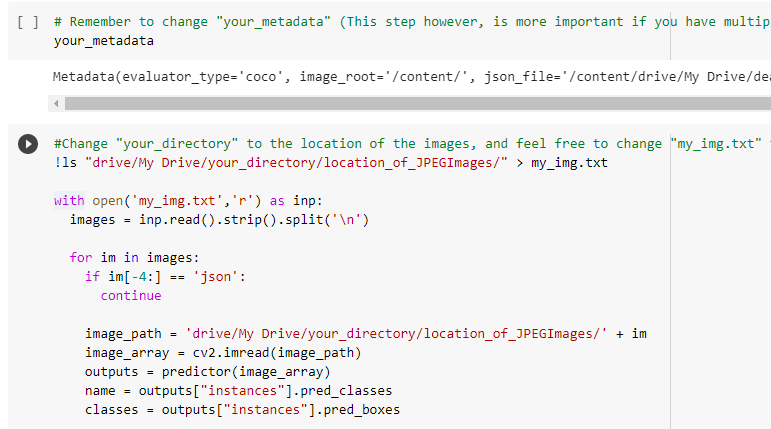
Step 5 (Optional): Create snippets on Google Colab
You can continue to run the remainder of the code if you would like to make snippets on Google Colab. This isn't necessary but is nice if you want a visual of what the supercomputer will do when it runs the segmentation. Make sure that you made a snippets directory in the proper location, otherwise the snippets will not save.
Step 6: Move weights to the supercomputer
You will need to use a secure copy from your command line in order to move the weights over to the supercomputer. In the command line, move to the location of your weights, (probably downloads). Then use scp to copy over the weights
It will look something like this: scp weights_name.pth [email protected]:/fslhome/username/fsl_groups/fslg_groupname/compute/desired_location/of_weights
Example:
21
You will need to enter your password and a duo authentification number every time you move something over to the supercomputer.
Congratulations! You have successfully trained a model
Troubleshooting
Problems loading Detectron2 onto GoogleColab
Unfortunately this is a repeated issue that pops up. There typically isn't a one size fits all method to solving this error, but there are a few methods to identify the problem faster.
- Google searches of Detectron2 and your specific error message
- Seeing if the official Detectron2 tutorial on GitHub has been updated recently
- Checking if there have been any changes made to base packages such as torchvision
- Checking if older versions of packages are incompatible with current Detectron2 Usually issues with loading detectron2 is a packages issue. These require minor changes to the code, but also mean that a new environment to run segmentation with that model will need to be created on the supercomputer
Labelme2coco Issues
Often times, you will run into problems when trying to run the labelme2coco chunk of code. A few reasons for this include:
- Having a json file but not the image connected to it (Solution: delete the json file, or find and upload the image)
- Having 2 jsons for the same image (Solution: delete the copy)
- A labelme2coco json file with the same name already exists (Solution: deleste the existing labelme2coco file and create a new one)
- Problems with polygon shapes that don't have 4 points (Solution: covered in the Making Training Data section of the pipeline)
Weird results with segmentation
If you are getting strange results, it is best to first look if there are inconsistencies with class names and polygon labels. The method to fix this issue is covered in the Making Training Data section of the pipeline. If class names are not the problem, you may want to look at the hyperparameters of detectron2. If NUM_WORKERS, IMS_PER_BATCH, BASE_LR, MAX_ITER, BATCH_SIZE_PER_IMG, or NUM_CLASSES look odd, you may need to change them to more standard numbers.
Model not segmenting accurately
If the model is more or less performing its function, but not as desired, there are a few tricks that can help improve performance. The best method is to increase the number of labeled images in the training set. More images results in longer training time, but more accurate performance. Another method is modifying the hyperparameters
- Raise the learning rate (BASE_LR): If you raise the learning rate too high, you may run into errors or cause the model to overfit images with some strange behavior, but if raised the right amount, performance can increase
- Raise the maximum number of iterations (MAX_ITER): The model might not be segmenting well enough because it needs more iterations to train the model. Raising the number of iterations increases the amount of time the model takes to train and often hits a point where an increase in iterations has little to no effect on model performance, so don't set too high
- Other hyperparameters such as NUM_WORKERS, IMS_PER_BATCH, and BATCH_SIZE_PER_IMAGE could probably be optimized for better model performance. MY current understanding of these parameters is not enough to make any proper suggestions, but these could be experimented with and explored