NugetPackages.md - brainchildservices/curriculum GitHub Wiki
When starting any .NET project, or whenever you identify a functional need for your app or service, you can save yourself lots of time and trouble by using existing NuGet packages that fulfill that need. These packages can come from the public collection on nuget.org, or a private source that's provided by your organization or another third party.
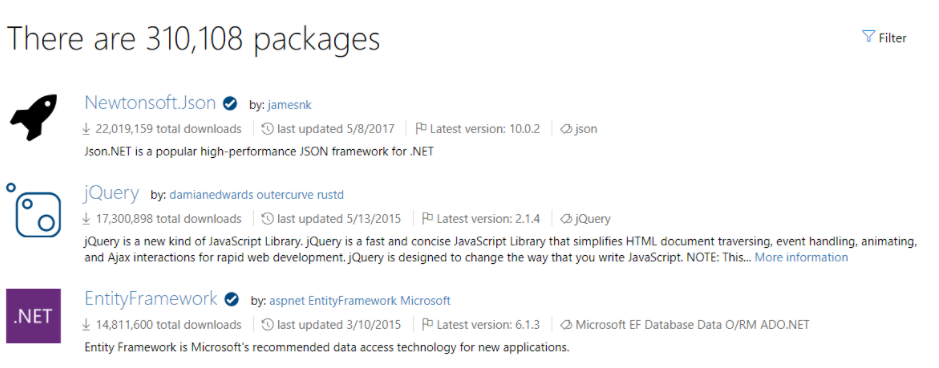
When you visit nuget.org or open the Package Manager UI in Visual Studio, you see a list of packages sorted by relevancy. This shows you the most widely used packages across all .NET projects. There's a good chance that some of these packages may be useful for your own projects!
On nuget.org, notice the Filter button on the upper right of the page. When clicked, the Advanced Search panel expands to present sorting and filtering options.
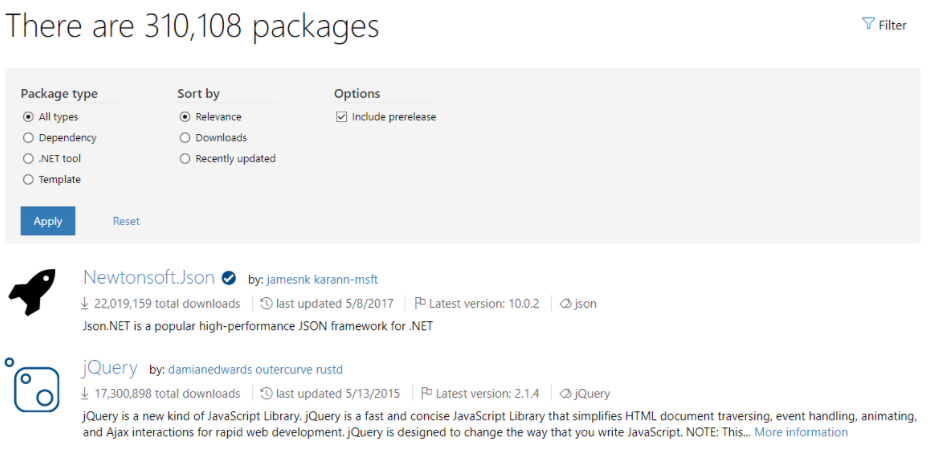
You can use the Package type filter to show packages of a specific type:
-
All types: This is the default behavior. It shows all packages regardless of their type. -
Dependency: Regular NuGet packages that can be installed into your project. -
.NET tool: This filters to .NET tools, a NuGet package that contains a console application. -
Template: This filters to .NET templates, which can be used to create new projects using the dotnet new command
You can use the Sort by option to sort the search results:
-
Relevance: This is the default behavior. It sorts results according to an internal scoring algorithm. -
Downloads: Sorts the search results by the total number of downloads, in descending order. -
Recently updated: Sorts the search results by their latest version's creation date, in descending chronological order.
In the Options section, we can find the Include prerelease checkbox. When checked, nuget.org shows all versions of packages including pre-releases. To show only stable versions, clear the option.
To apply the search filters, click on the Apply button. You can always get back to the default behavior by clicking on the Reset button.
You can also use the search syntax to filter on tags, owners, and package IDs.
NuGet installs a package into a project only if that package's supported frameworks include the project's target framework. If the package is not compatible, NuGet issues an error.
Some packages list their supported frameworks directly in the nuget.org gallery, but because such data is not required, many packages do not include that list. At present there is no means to search nuget.org for packages that support a specific target framework (the feature is under consideration)
Fortunately, you can determine supported frameworks through two other means:
- Attempt to install a package into a project using the Install-Package command in the NuGet Package Manager Console. If the package is incompatible, this command shows you the package's supported frameworks.
- Download the package from its page on nuget.org using the Manual download link under Info. Change the extension from .nupkg to .zip, and open the file to examine the content of its lib folder. There you see subfolders for each of the supported frameworks, where each subfolder is named with a target framework moniker (TFM; see Target Frameworks). If you see no subfolders under lib and only a single DLL, then you must attempt to install the package in your project to discover its compatibility.
NuGet packages contain reusable code that other developers make available to you for use in your projects. See What is NuGet? for background. Packages are installed into a .NET Core project using the dotnet add package command as described in this article for the popular Newtonsoft.Json package.
Once installed, refer to the package in code with using <namespace> where is specific to the package you're using. You can then use the package's API.
Start with nuget.org: Browsing nuget.org is how .NET developers typically find components they can reuse in their own applications. You can search nuget.org directly or find and install packages within Visual Studio as shown in this article.
The .NET Core SDK, which provides the dotnet command-line tool. Starting in Visual Studio 2017, the dotnet CLI is automatically installed with any .NET Core related workloads.
NuGet packages can be installed into a .NET project of some kind. For this walkthrough, create a simple .NET Core console project as follows:
-
Create a folder for the project.
-
Open a command prompt and switch to the new folder.
-
Create the project using the following command:
dotnet new console -
Use dotnet run to test that the app has been created properly.
-
Use the following command to install the
Newtonsoft.jsonpackage:dotnet add package Newtonsoft.Json -
After the command completes, open the
.csprojfile to see the added reference:<ItemGroup> <PackageReference Include="Newtonsoft.Json" Version="12.0.1" /> </ItemGroup>
-
Open the
Program.csfile and add the following line at the top of the file:using Newtonsoft.Json; -
Add the following code before the
class Programline:public class Account { public string Name { get; set; } public string Email { get; set; } public DateTime DOB { get; set; } } -
Replace the
Mainfunction with the following:static void Main(string[] args) { Account account = new Account { Name = "John Doe", Email = "[email protected]", DOB = new DateTime(1980, 2, 20, 0, 0, 0, DateTimeKind.Utc), }; string json = JsonConvert.SerializeObject(account, Formatting.Indented); Console.WriteLine(json); }
-
Build and run the app by using the
dotnet runcommand. The output should be the JSON representation of theAccountobject in the code:static void Main(string[] args) { Account account = new Account { Name = "John Doe", Email = "[email protected]", DOB = new DateTime(1980, 2, 20, 0, 0, 0, DateTimeKind.Utc), }; string json = JsonConvert.SerializeObject(account, Formatting.Indented); Console.WriteLine(json); }
- Try to Install NuGet Package for Microsoft.EntityFrameworkCore using manage NuGet packages.
- Try to Install NuGet Package for Microsoft.EntityFrameworkCore.SqlServer using
install-packageCommand.