Configuring Python API for Windows - benjamin-havens/AMT_SQUAD GitHub Wiki
https://www.microsoft.com/store/productId/9N6SVWS3RX71
https://pbpython.com/wsl-python.html
https://docs.microsoft.com/en-us/windows/wsl/tutorials/wsl-vscode
Run these in Ubuntu:
2.1
sudo apt-get install git cmake libboost-all-dev libusb-1.0-0-dev python3-docutils python3-mako python3-numpy python3-requests python3-ruamel.yaml python3-setuptools python3-matplotlib build-essential
cd ~
git clone https://github.com/EttusResearch/uhd.git
cd uhd/host
mkdir build
cd build
cmake -DENABLE_TESTS=OFF -DENABLE_C_API=OFF -DENABLE_MANUAL=OFF ..
make -j8
sudo make install
sudo ldconfig
It will take a long time.
In theory, the process should be done. You can test to see if it worked by running this in Ubuntu:
2.2
python3
usrp = uhd.usrp.MultiUSRP()
samples = usrp.recv_num_samps(10000, 100e6, 1e6, [0], 50)
print(samples[0:10])
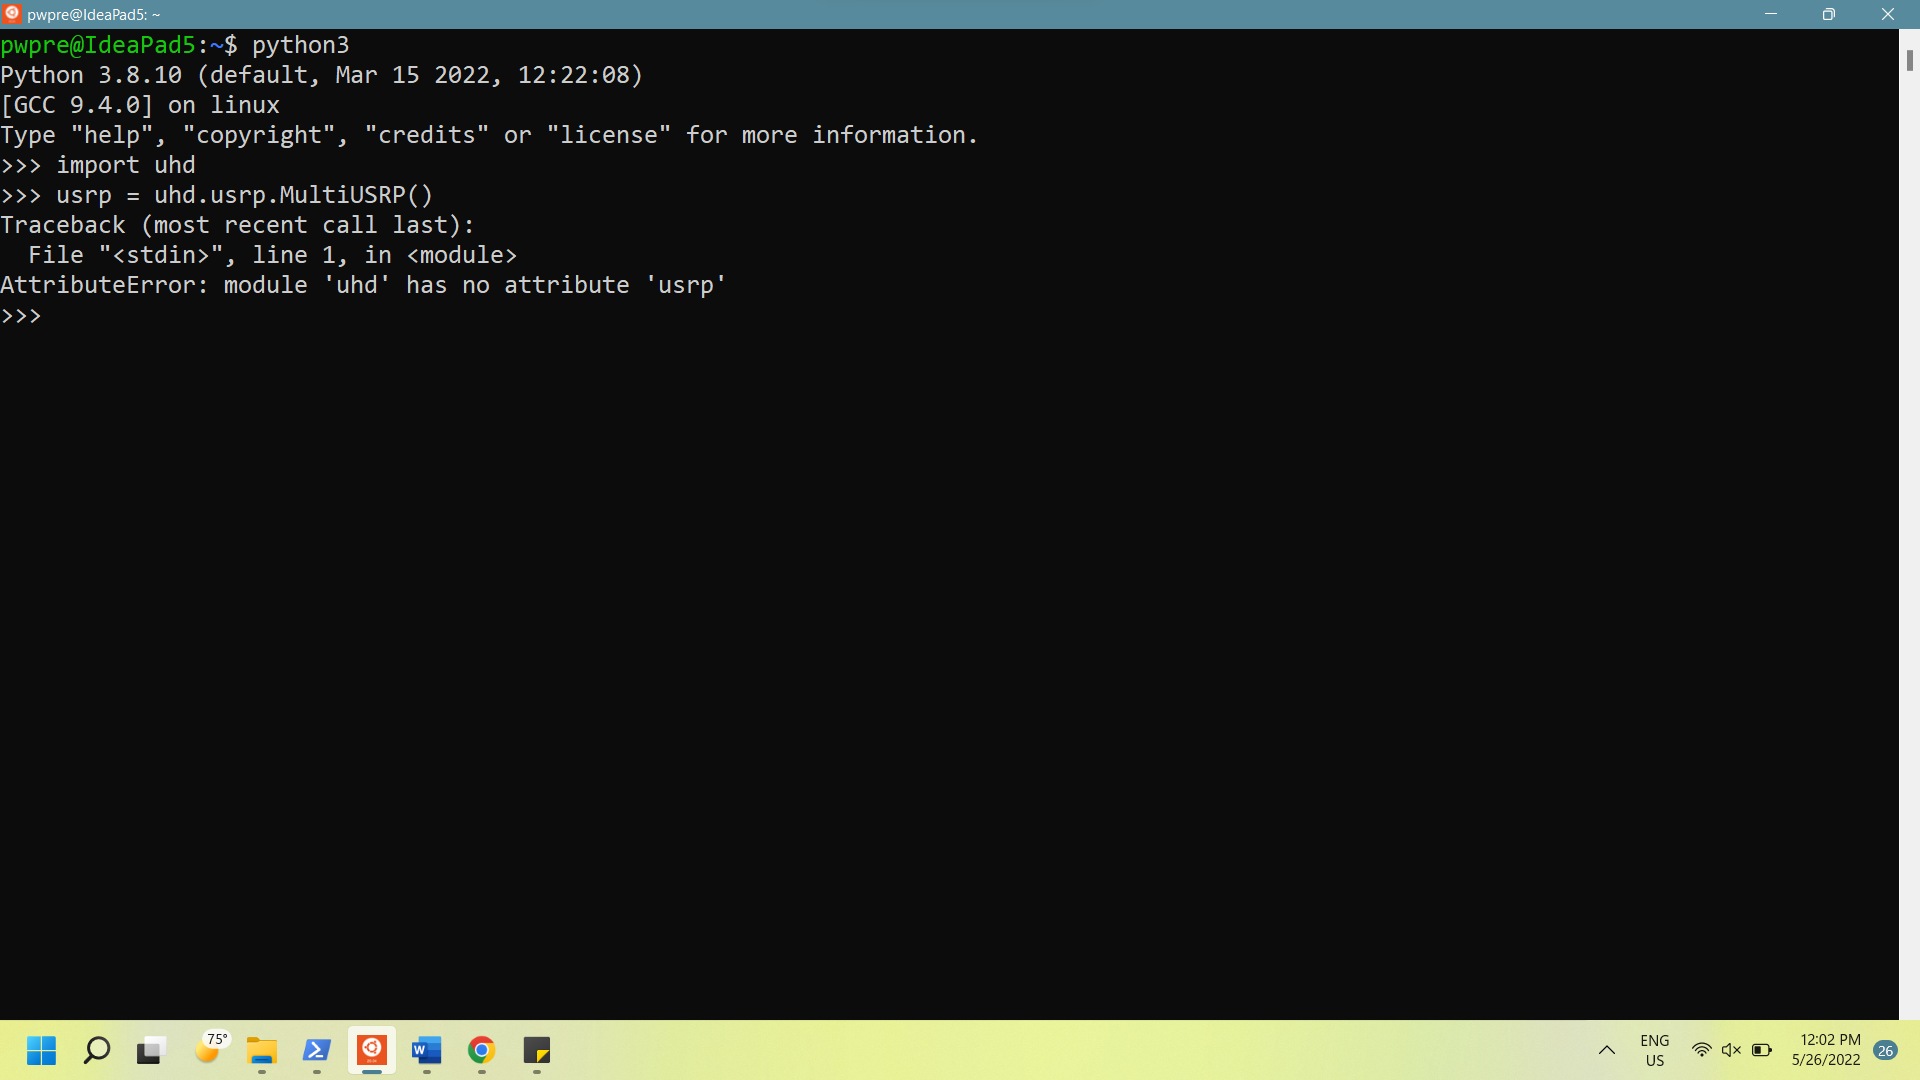
None of us found success at this point. When you run that, depending on what folder you are in, you will probably get one of two errors:
-
No module named 'uhd'
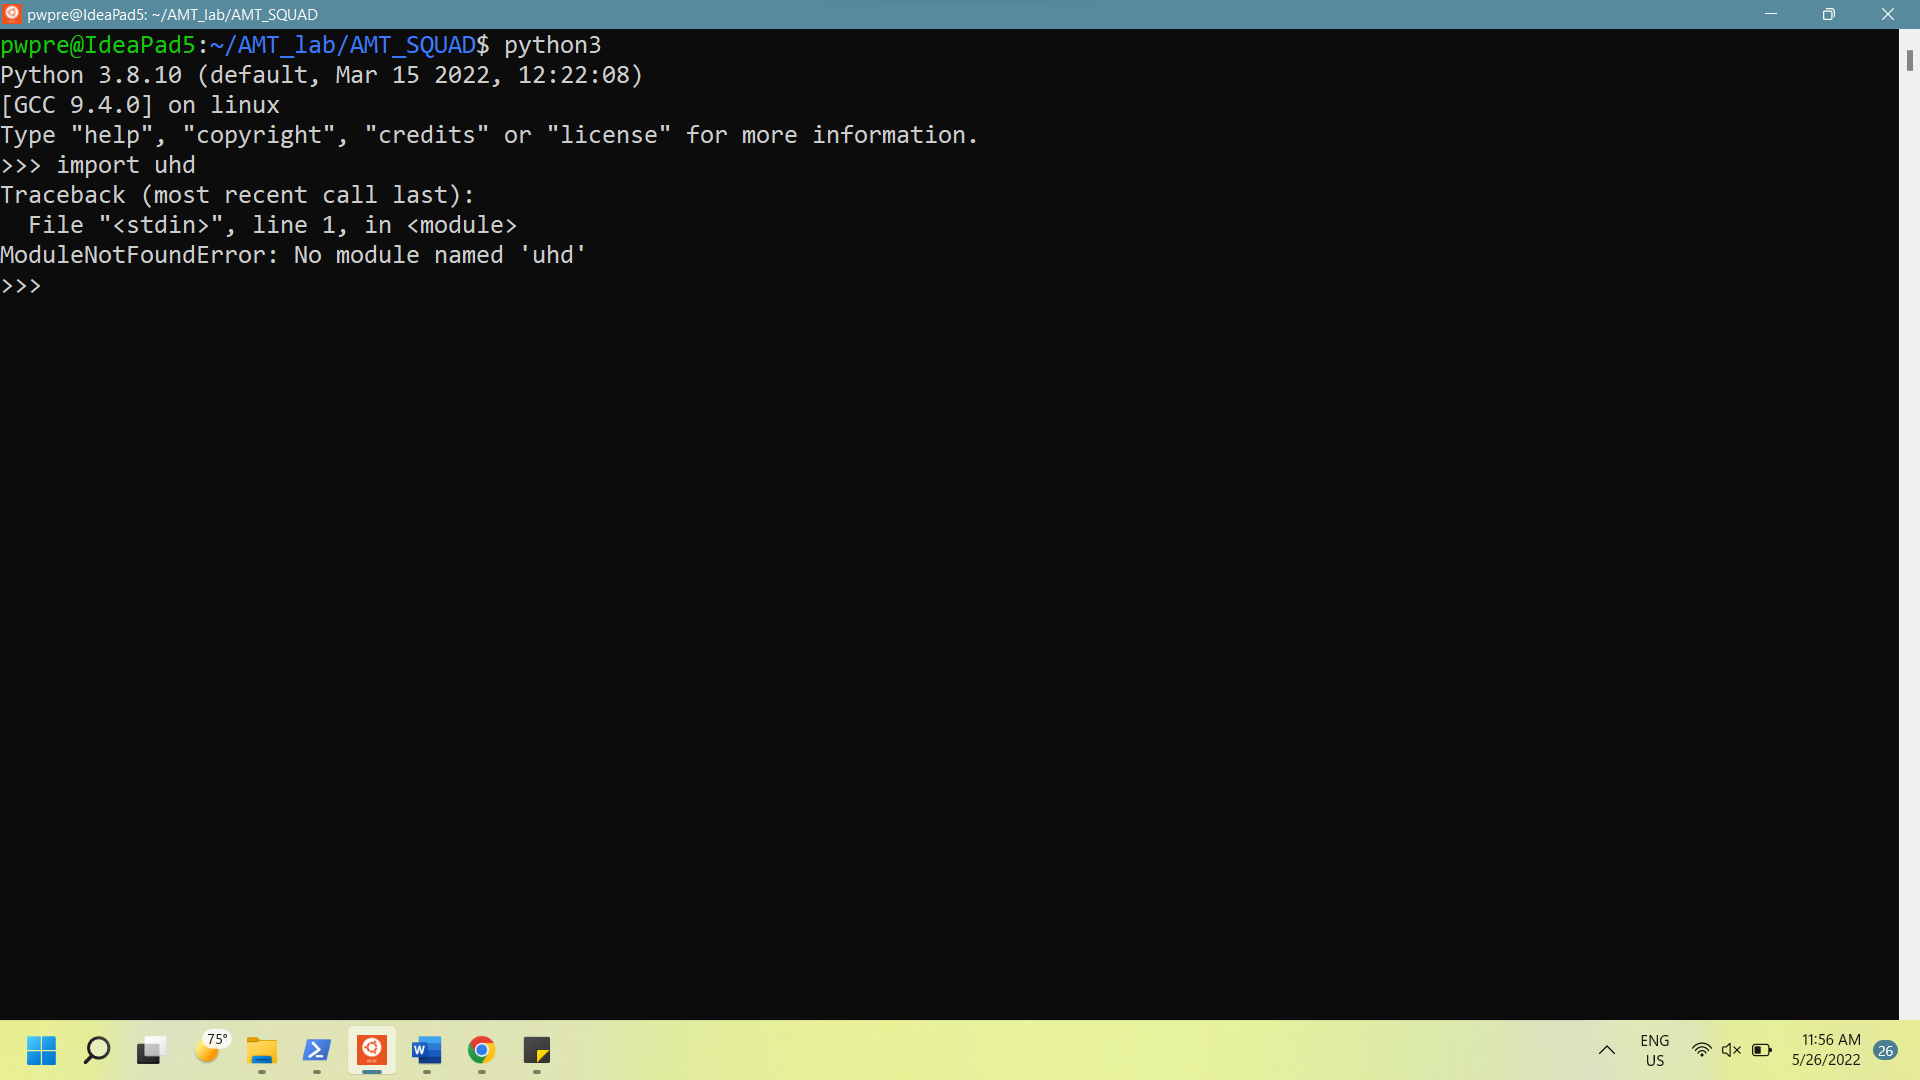
-
Module 'uhd' has no attribute 'usrp'
(If you didn't get either of the previous errors you may be able to skip this step)
What's going on is that the installation guide installs the module in a nonstandard location and python can't find the files. The installer also placed a 'uhd' folder in your home directory so if python is run while you are there, it will find the uhd folder, but not the files it expects to find inside of it.
To fix this, when you run the python API, you need to include a few lines of code that tell it where to find the module. Try running this code in Ubuntu:
3.1
python3
import sys
sys.path.insert(0, "/usr/local/lib/python3.8/site-packages")
import uhd
usrp = uhd.usrp.MultiUSRP()
This time an error should occur showing that the images for the fpga in the device have not been installed. The path to the images downloader python script should be given to you in the error message. The path should look something along the lines of this: /home/user.name/uhd/host/utils/uhd_images_downloader.py
You should then run this command in Ubuntu:
3.2
python3 /home/user.name/uhd/host/utils/uhd_images_downloader.py
Remember to replace the path with the one given in the error message. If this doesn't work, trying adding sudo before the command and running it again.
If you try running code block 3.1 again there will be another error, but this time it should say "No devices found".
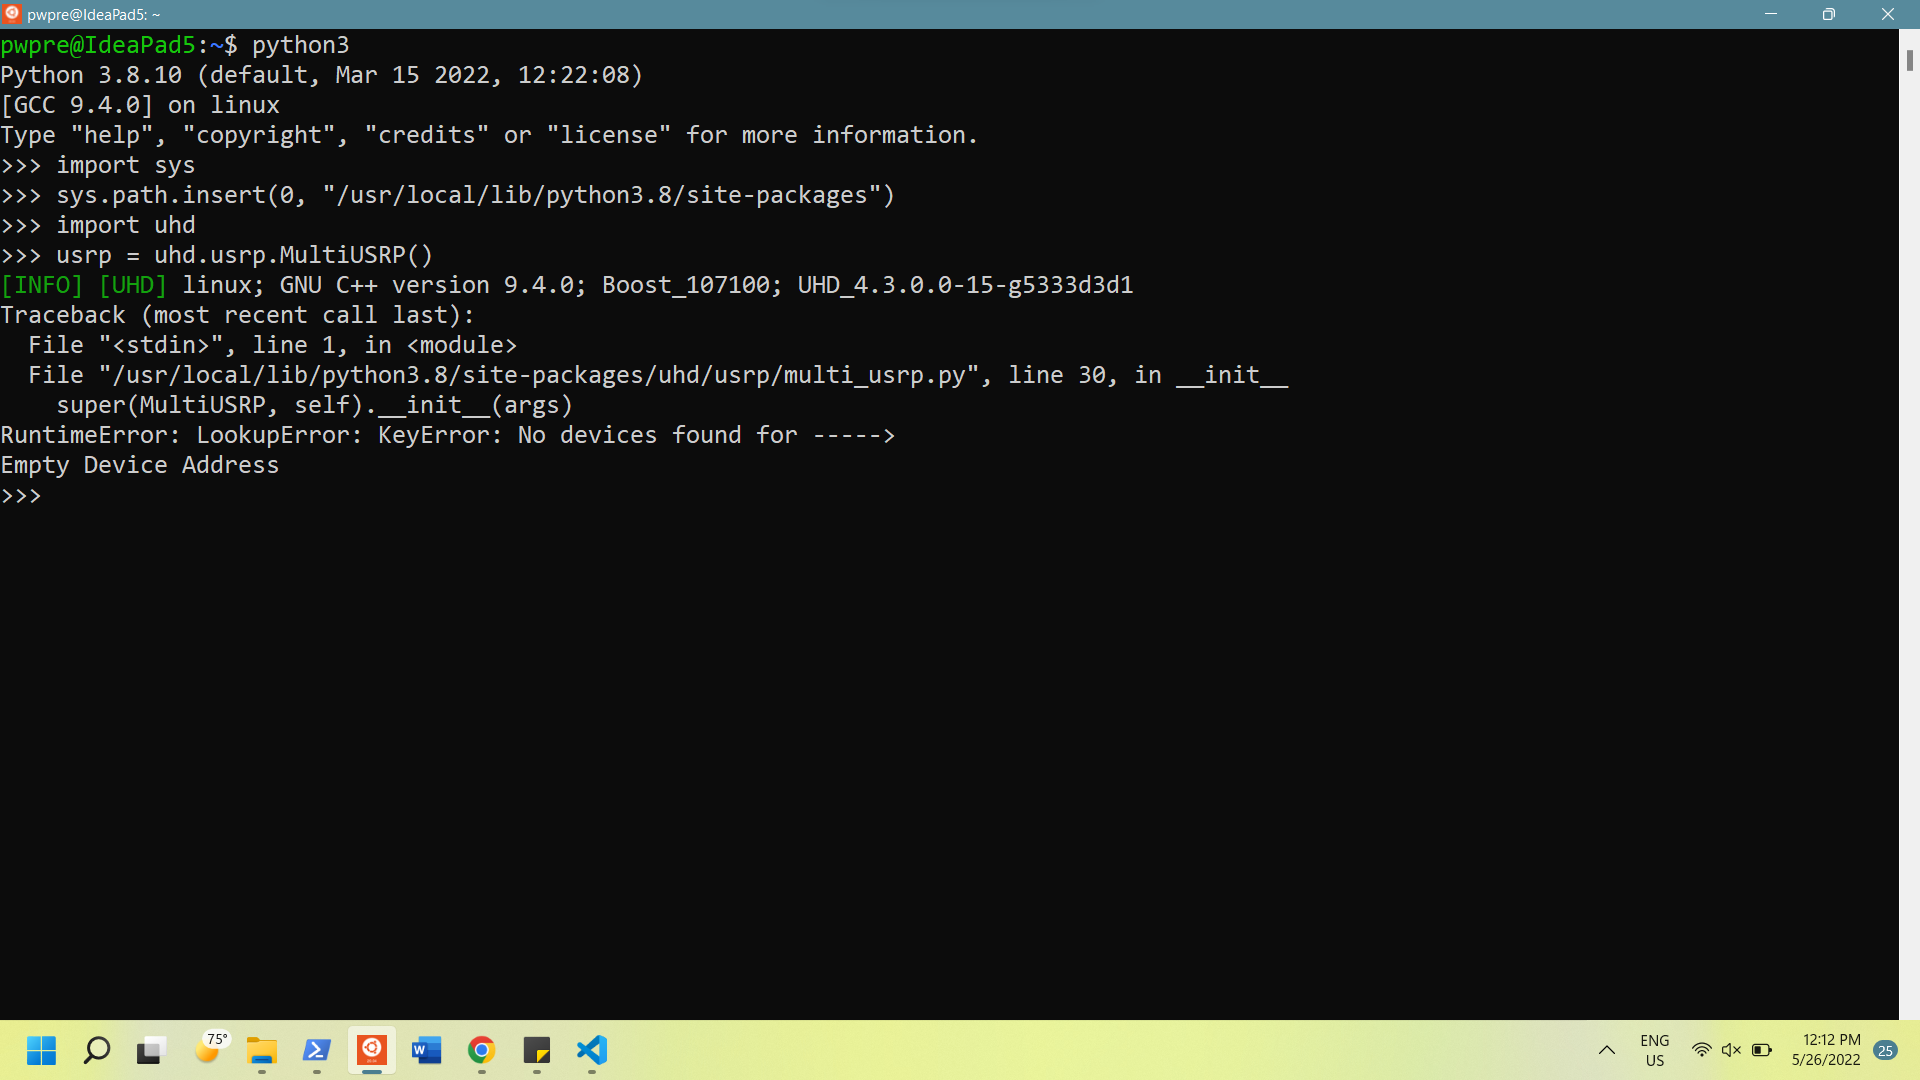
At this point, the path should be correct. The error comes because Ubuntu doesn't have access to the USB ports of our computer.
You will want to connect the radio to your computer if you haven't already.
Download and run the .msi file found at https://github.com/dorssel/usbipd-win/releases
Then, run these commands in Ubuntu:
4.1
sudo apt install linux-tools-virtual hwdata
sudo update-alternatives --install /usr/local/bin/usbip usbip /usr/lib/linux-tools/*/usbip 20
In some instances we got an error when running the second one.
Running this instead seemed to fix the problem
4.2
sudo update-alternatives --install "/usr/local/bin/usbip" "usbip" "/usr\lib\linux-tools\5.4.0-77-generic\usbipd" 20
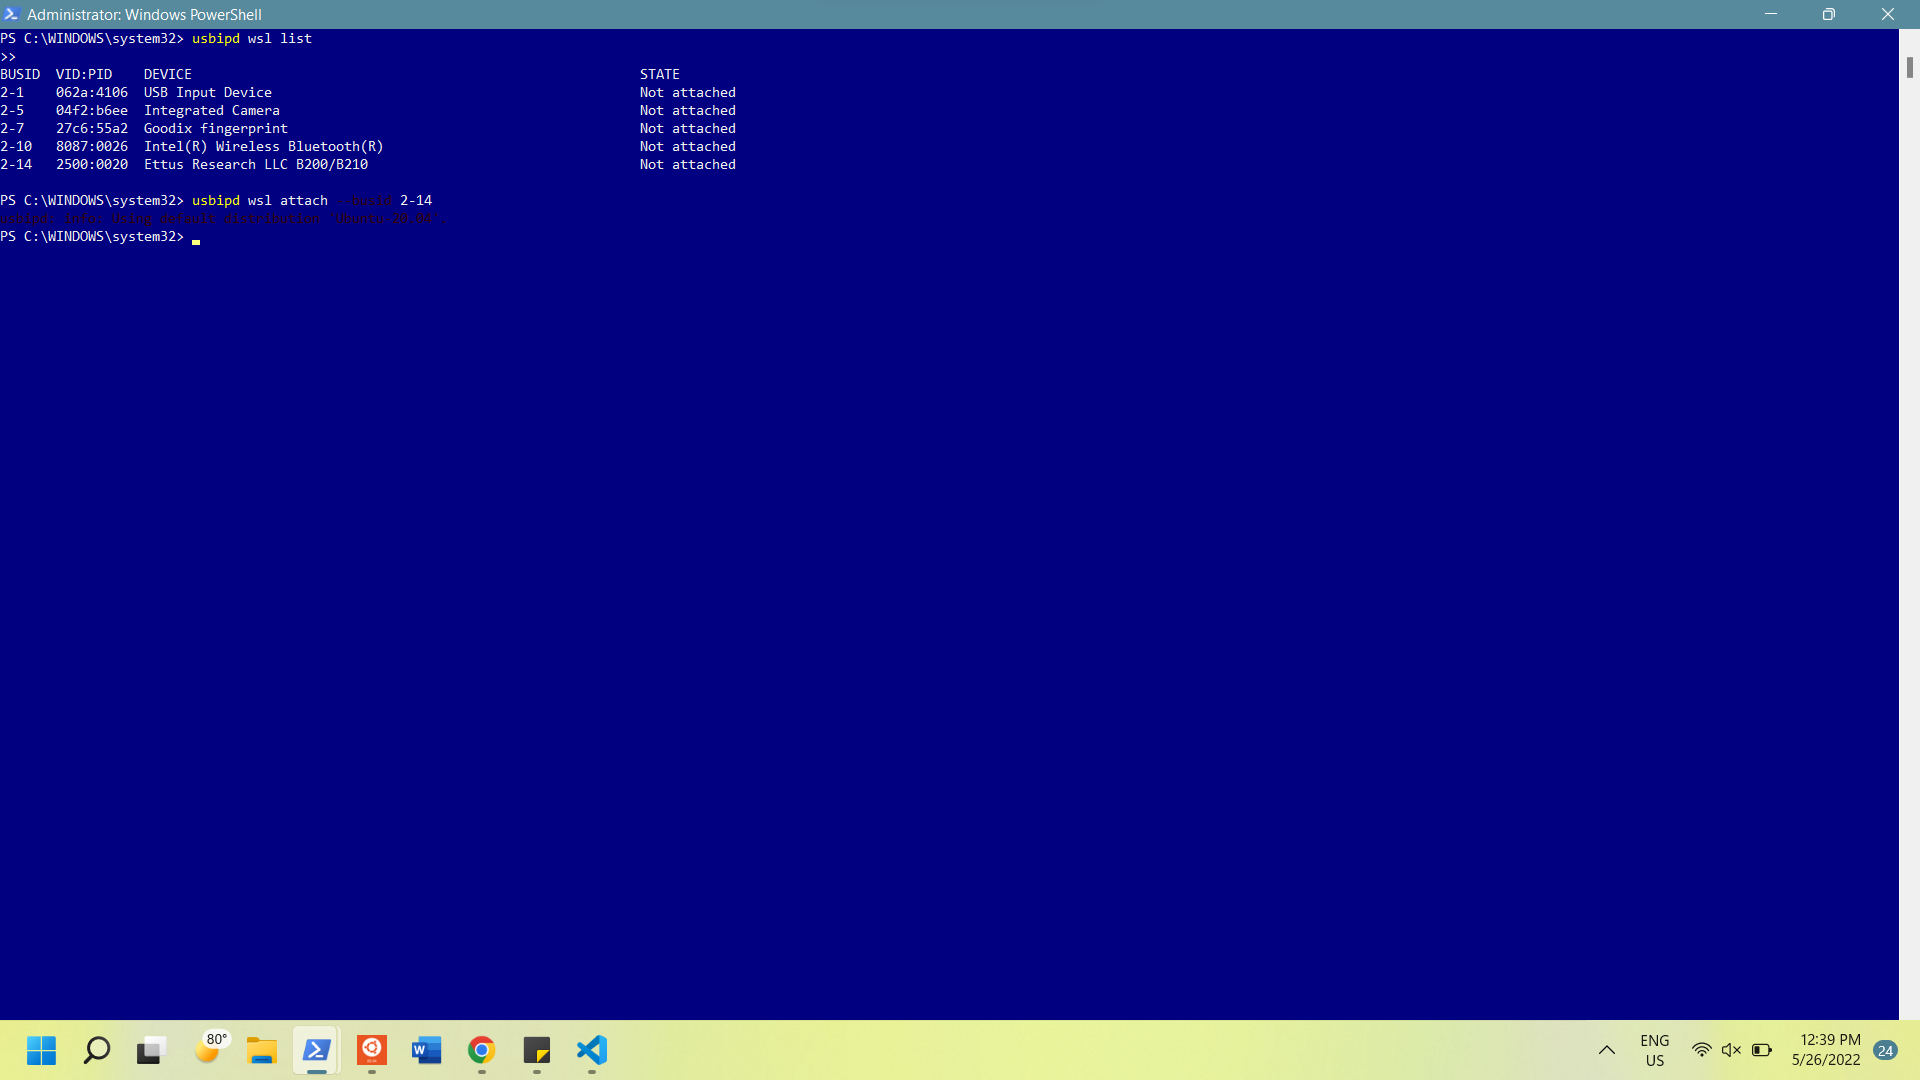
To attach the USB drive, open Windows Powershell as an administrator and run
4.3
usbipd wsl list
This should display a list of all devices connected to your computer with a BUSID for each device
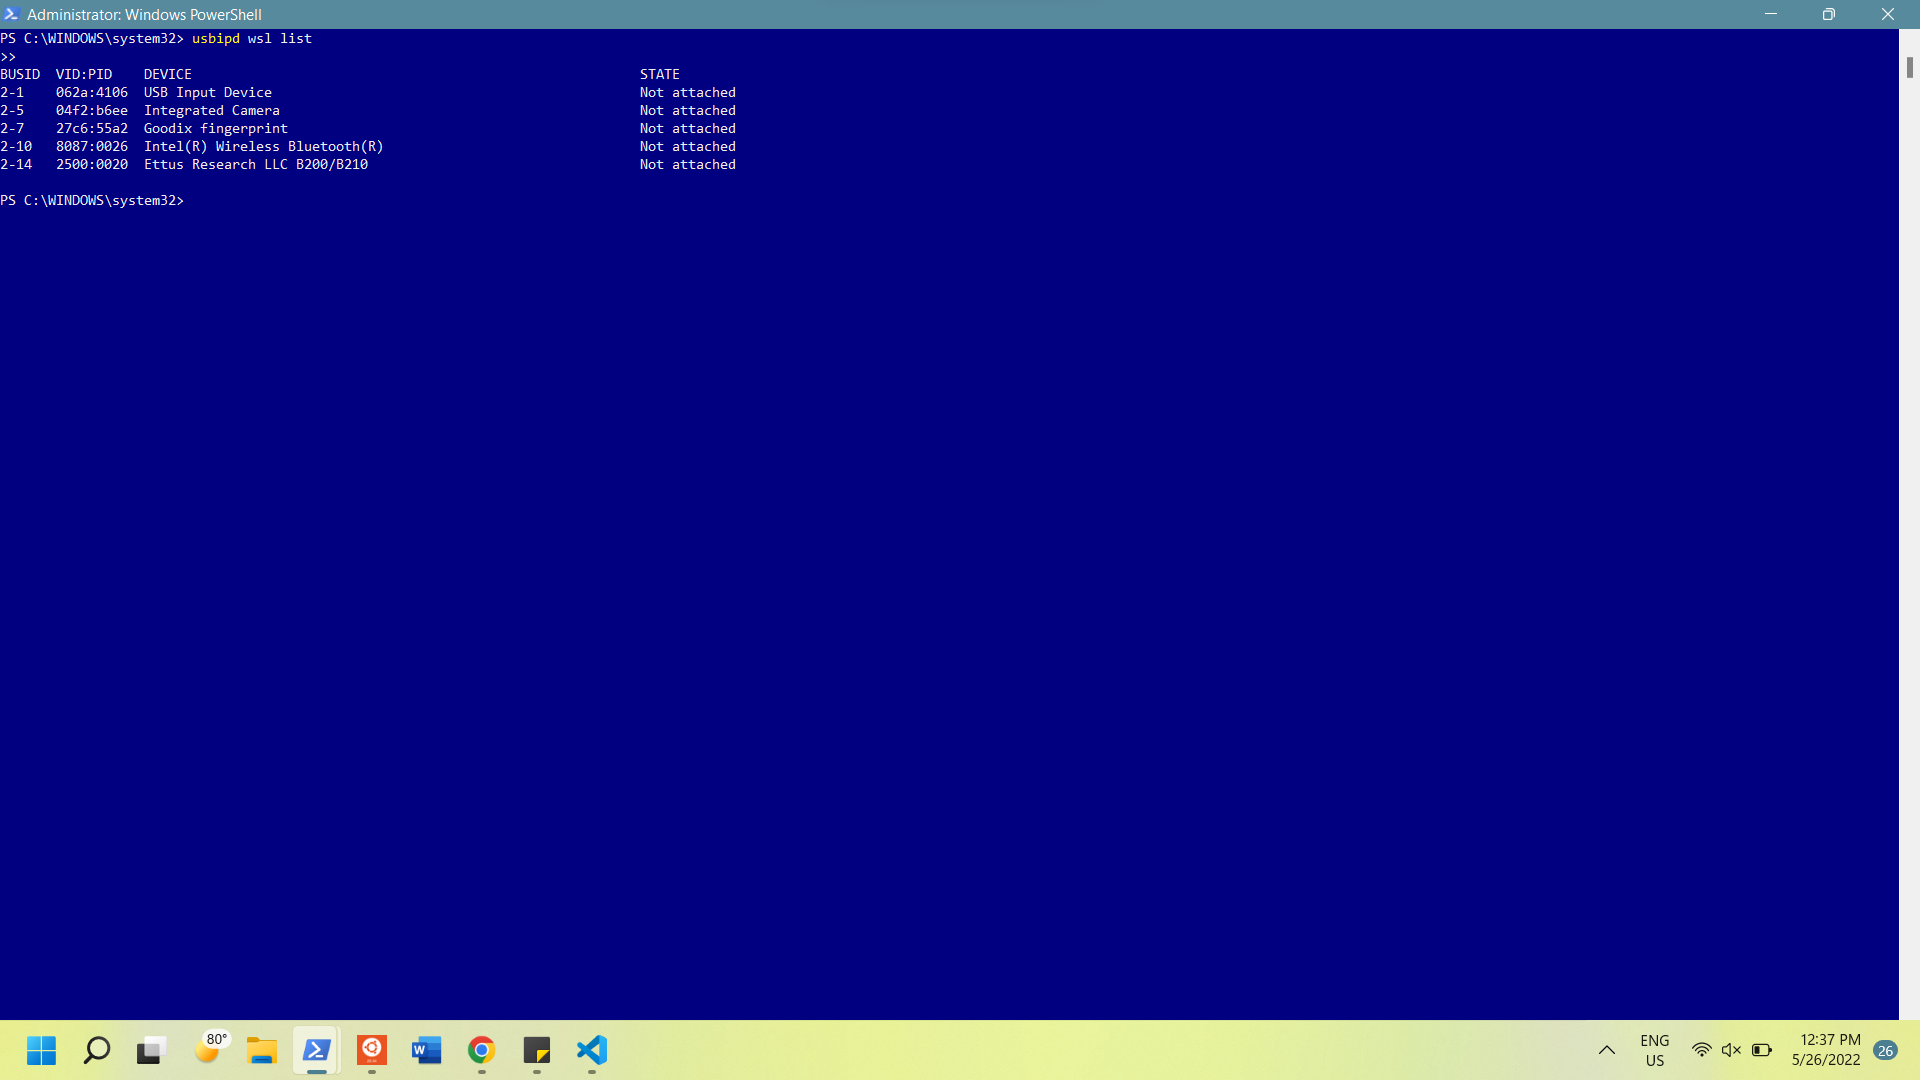
To attach the radio, find the "Ettus" device, note the busid, and run:
4.4
usbipd wsl attach --busid <busid>
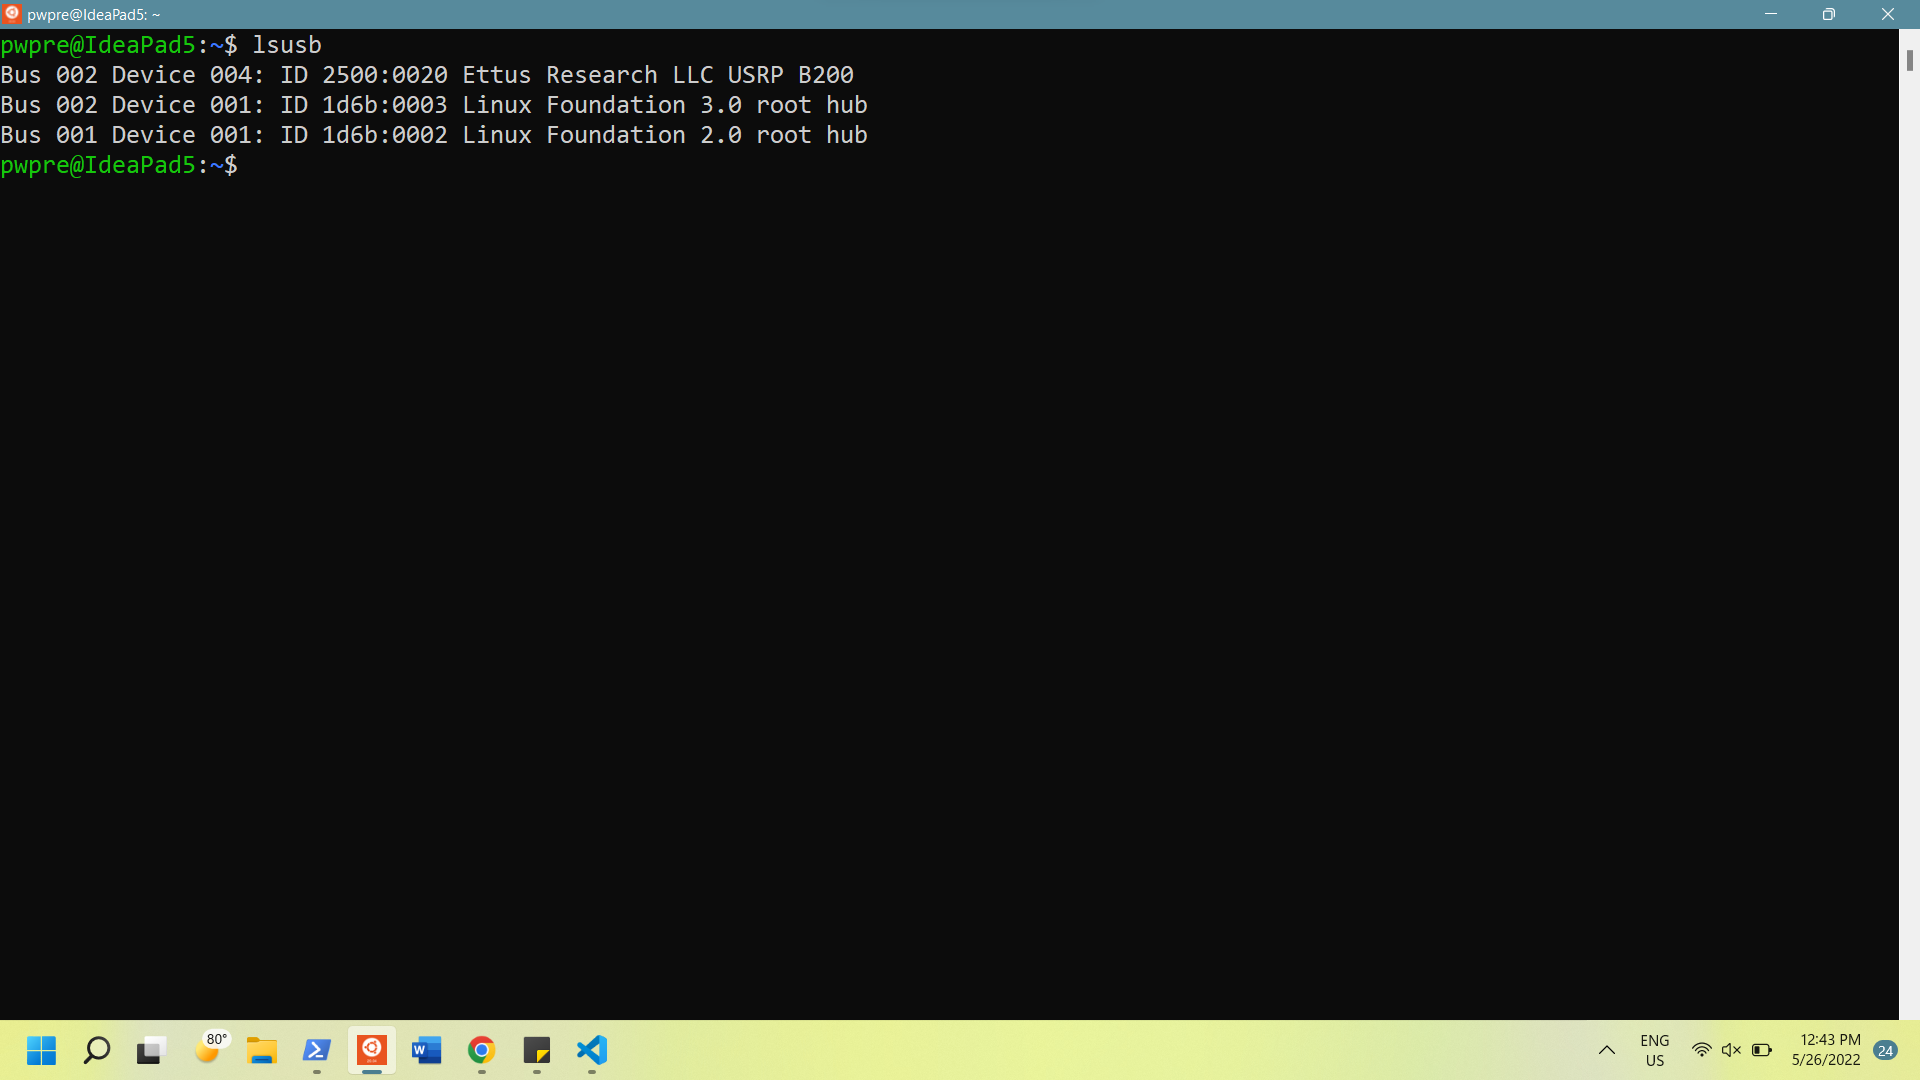
You can check to see if it worked by running lsusb in Ubuntu. If it worked, you should see an "Ettus" device listed.
To detach a drive, simply run usbipd wsl detach --busid <busid> in the administrator Powershell window
You will need to attach and detach your USB port every time you connect to the radio
When using the transmit and receive python scripts in this repository, you'll notice they begin by importing a path from uhd_params. Since this path is different for everyone, we have added this file to the .gitignore file. You will now have to create your own uhd_params.py file and create a variable named path_to_uhd_module with the value being the path you used for code block 3.1.
Running the transmit or receive python script now, you should receive an error saying that there are still no devices found. This is because Ubuntu needs to recognize you as root to access the ports even if they're attached. To fix this you run sudo !! to run the previous command as root.
Ubuntu seems to run a different python and sees packages differently; this is why you had run the sudo command before installing the python packages at the beginning. If your program doesn't recognize your installed packages (such as matplotlib and numpy), try running sudo pip3 install matplotlib numpy so that they are installed as root and accessed by your root python.
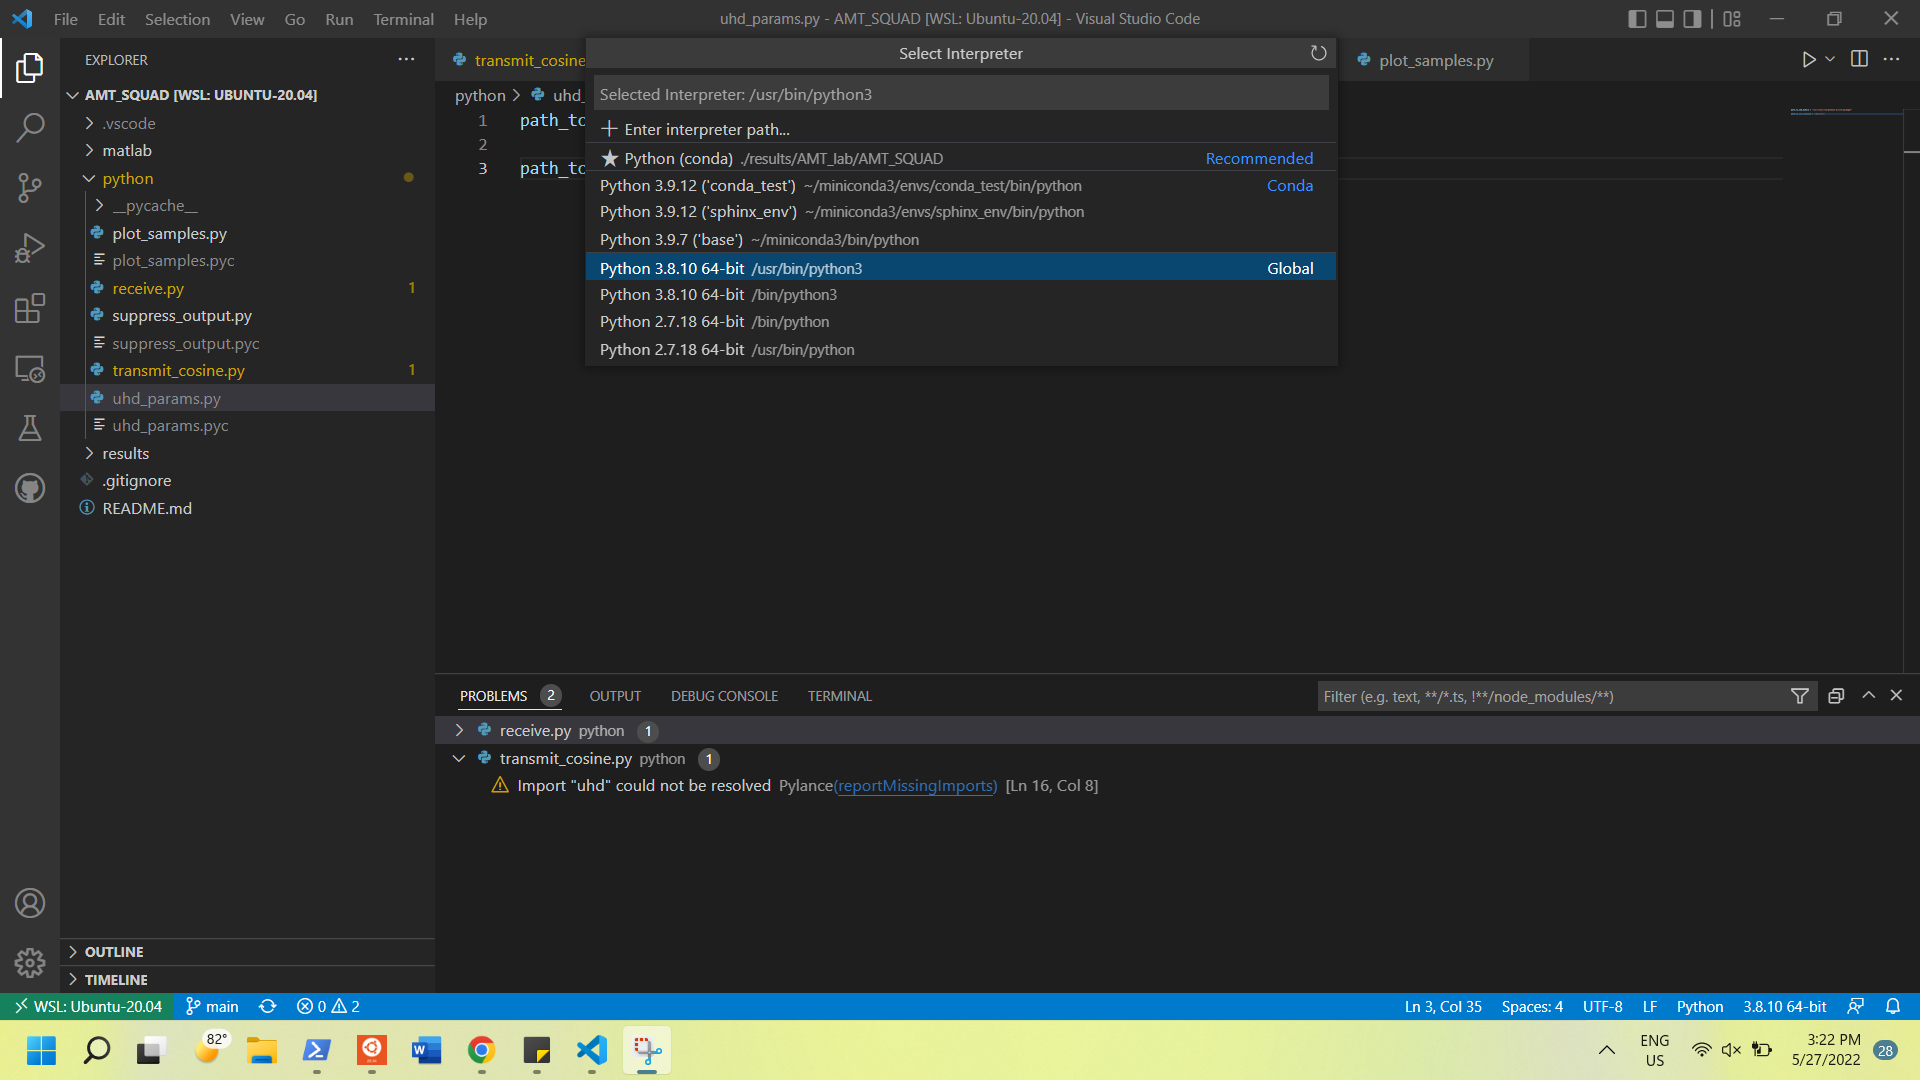
Another issue we ran into a few times was VS Code selecting the wrong python interpreter. This problem generally created an error stating that there is no module 'matplotlib'. To view/change the python interpreter VS Code is using:
-
press F1
-
type python select interpreter
-
Select the interpreter that matches the version of python you have been using
Using the gnu radio companion simplifies the process of transmitting signals and it wasn't particularly difficult to install.
To do so, run the following lines of code in Ubuntu:
6.1
sudo add-apt-repository ppa:gnuradio/gnuradio-releases-3.9
sudo apt-get update
sudo apt-get install gnuradio python3-packaging
We also had to run an image downloader, I'm not sure if these commands take care of that or not.
After doing so, you can launch the gui by running sudo gnuradio-companion