Setup MapMint - ayoubft/Journey-GSoC-21 GitHub Wiki
How I did it (setup MapMint) ?
Virtualization quick start See original
Downloads
-
Download Virtual Box for Windows and run the installer.
-
Download the OSGeoLive 13.0 Virtual disk file (vmdk) from live.osgeo.org.

Create a Virtual Machine
-
Start the VirtualBox application and click on the New button to create a new VM, and then Next.
-
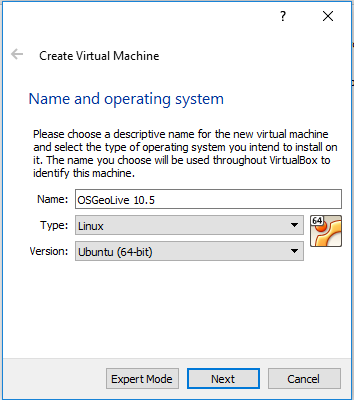
Enter a name such as OSGeoLive, and choose Linux as the “Operating system”, and Ubuntu as the “Version”.
-
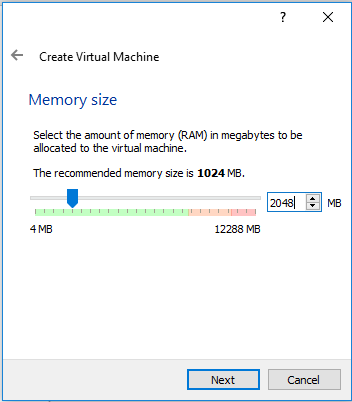
Set the memory.
-
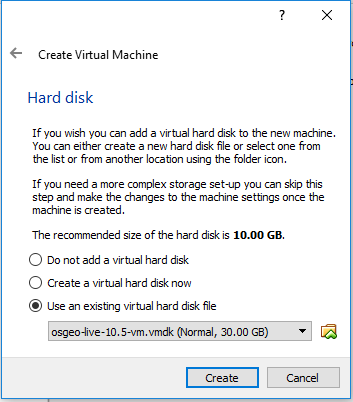
Continue to the next screen and choose “Use an existing virtual hard disk file”. Now click on the button (a folder icon) to browse to where you saved the OSGeoLive vmdk-file. Select this file, press Next and Create.
Config tips and tweaks (OPTIONAL!)
-
Once the VM is created, click on the Settings button. In the “General” section, go to the Advanced tab, and click to select “Show at top of screen” for the Mini toolbar.

-
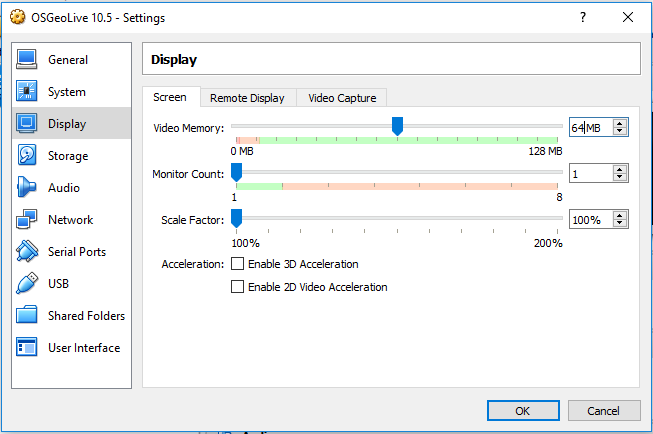
Go to the “Display” section and increase video memory to 32 or 64 MB. In some host operating systems, it may be required to “Enable 3D Acceleration” for display to work properly.
-
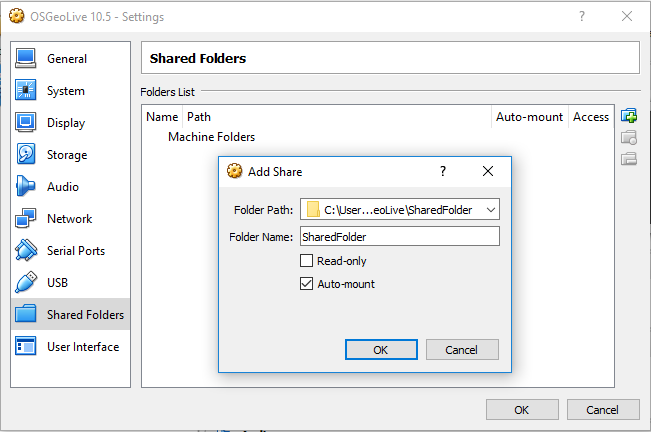
In addition, move to the “Shared Folders” section, and click the “Add folder” (green + icon on the right) to find a directory on your host computer that you wish to share inside the VM.
Installing MapMint on the OSGeoLive 12.0 VM See original
The MapMint application can be installed very simply using Ansible scripts. It is thus possible to deploy several instances of MapMint through the use of the ansible-playbook. In this section, you will learn how to setup only a single instance which is your local OSGeoLive 12.0 VM.
Before you can install MapMint using Ansible scripts, it is necessary to ensure the presence of some packages and specific Python modules.
sudo apt-get install ansible git python-setuptools openssh-server python-pip
It is necessary to download Ansible and specific MapMint installation scripts. To do this, use the following commands.
cd
mkdir mm-install
cd mm-install
git clone git://github.com/mapmint/ansible-roles mapmint-setup
cd mapmint-setup
git checkout gsoc
For making your user able connect to the server on which to install MapMint, you must create a key to enable an automatic authentication. To do this use the following commands.
mkdir ~/.ssh
ssh-keygen -t rsa
When you will be prompted, you are required to confirm every question by pressing “Enter”.
sudo mkdir /root/.ssh
sudo cp ~/.ssh/id_rsa.pub /root/.ssh/authorized_keys
Installing MapMint is fully automated via the previously downloaded Ansible scripts, so only remaining task is to launch it. Before that, it will be necessary to set Ansible and specific scripts installation for MapMint to define the name of the machine that will be used to access the instance.
echo "localhost" > ~/ansible_hosts
sed "s:myhost.net:localhost:g" -i \
   ~/mm-install/mapmint-setup/osgeolive/dependencies/vars/main.yml
export ANSIBLE_INVENTORY=~/ansible_hosts
Now use this commands to make sure you are using the correct LibreOffice and R-libraries:
cd ~/mm-install/mapmint-setup/osgeolive
pip3 install beautifulsoup4
python3 update_r-cran_version.py
python3 update_lo_version.py
To proceed with the installation, please use the following commands.
cd ~/mm-install/mapmint-setup/osgeolive
ansible-playbook -b server.yml -u root
Once the last command is finished, you are almost ready to start using your MapMint instance that you have just setup. Fist you should ensure that the settings defined in your main.cfg file is correct and correspond to your setup. To make sure that the main.cfg file is correct, please edit the file /ur/lib/cgi-bin/mm/main.cfg which contains the main settings for your MapMint instance. You will need to replace every occurence of myhost.net by localhost. The easiest way to achieve this is to use the following command:
sudo sed -i "s:myhost.net:localhost:g" /usr/lib/cgi-bin/mm/main.cfg
Before being able to access your MapMint instance, the last step is to edit the following files: /home/src/mapmint/public_map/assets/js/cfg.js and /home/src/mapmint/mapmint-ui/templates/preview/.htaccess to replace the following value: /~djay/progede2/public_map/ assets by this one: /pm/assets.
- Optional for testing
During this workshop, you will use two datastores already available on OSGeoLive 12.0, by the names: NC_Raster and NC_Shapes. To make them available through the Distiller, you have to create a symlink to these directories and allow the apache user to make any modification required to store files in these directories. To do this, use the following commands.
sudo ln -s /usr/local/share/data/north_carolina /var/data/ftp/
sudo chown -R www-data:www-data /var/data/ftp/*/
Now, you are ready to use your MapMint instance.
Welcome to MapMint!
