Basic Setup - aussig/BGS-Tally GitHub Wiki
Basic Setup
Step 1 - Open the EDMC Settings Screen (again)
Open the EDMC settings screen again:
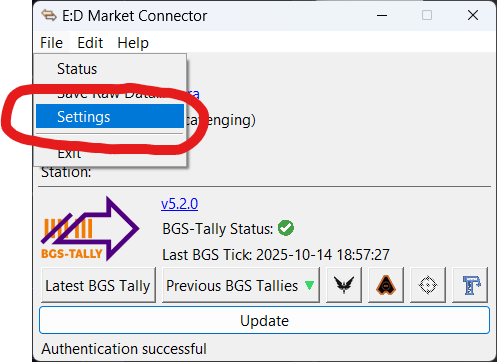
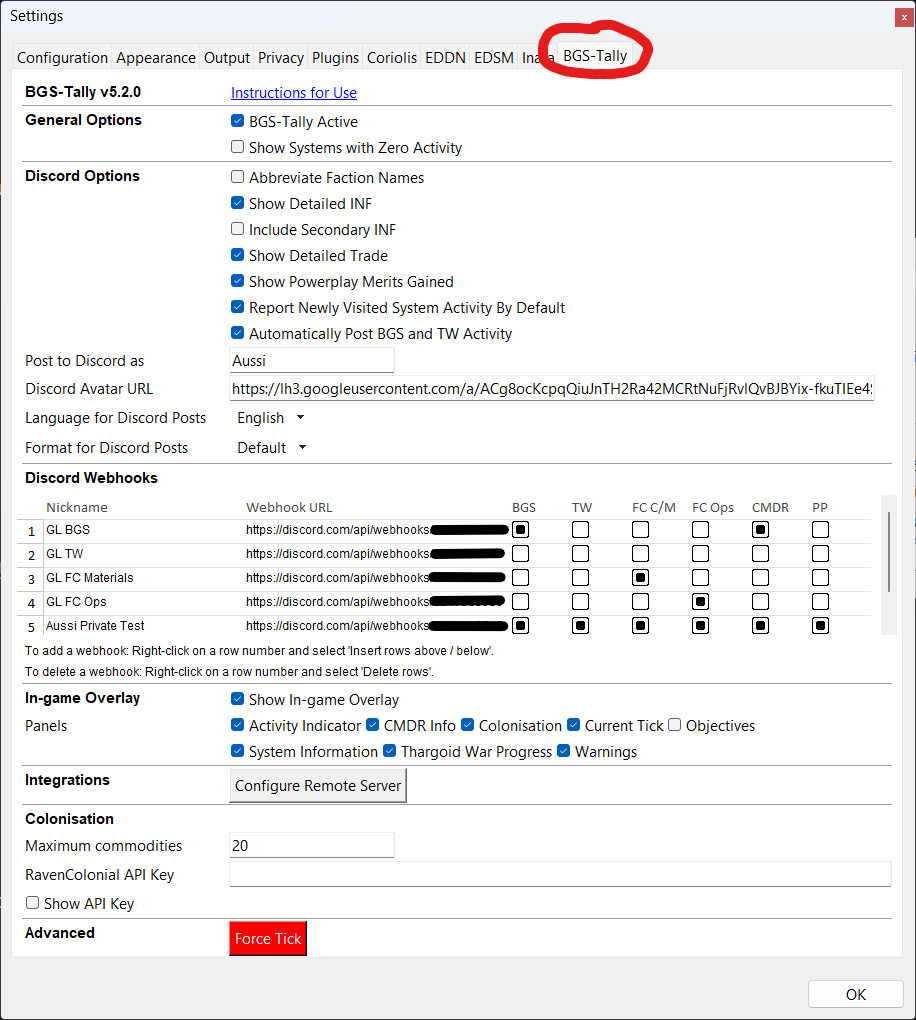
Step 2 - Open the BGS Tally Settings Panel
This time, open the BGS Tally settings tab:
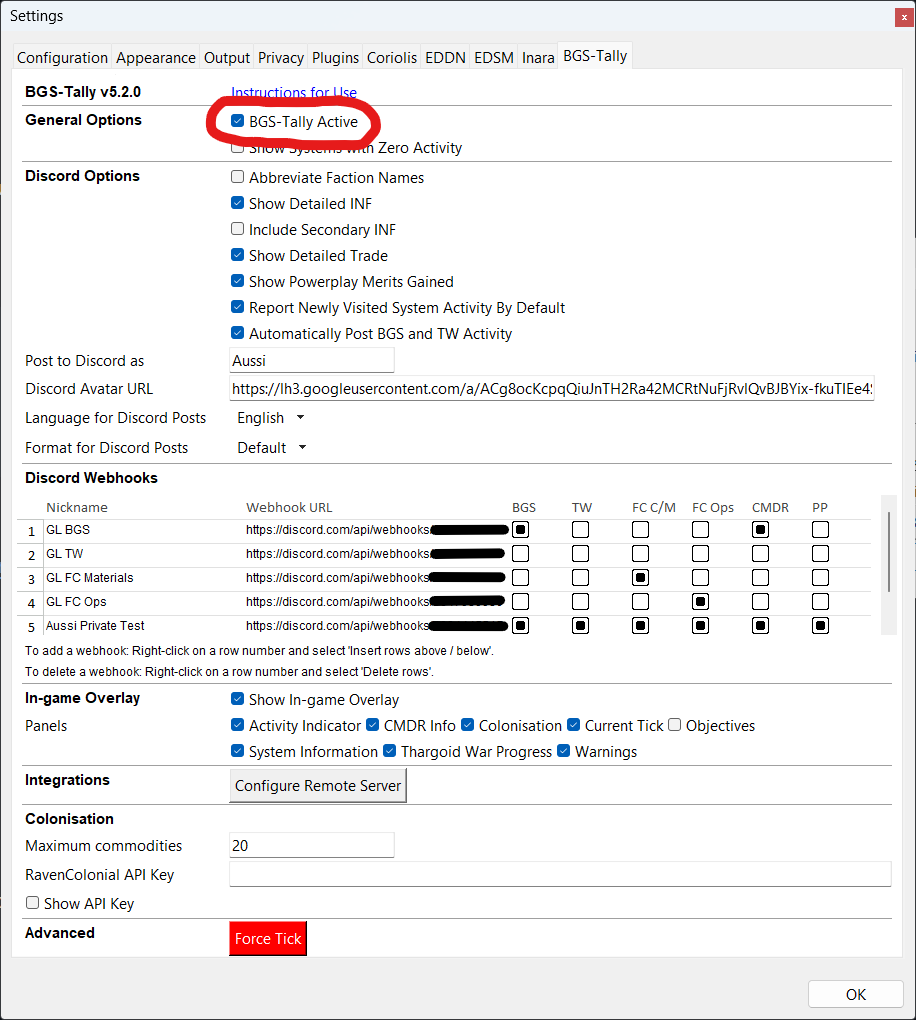
Step 3 - Switch the Plugin On
Ensure the BGS Tally Active checkbox is ticked:
Step 4 - OPTIONALLY Enable Discord Integration
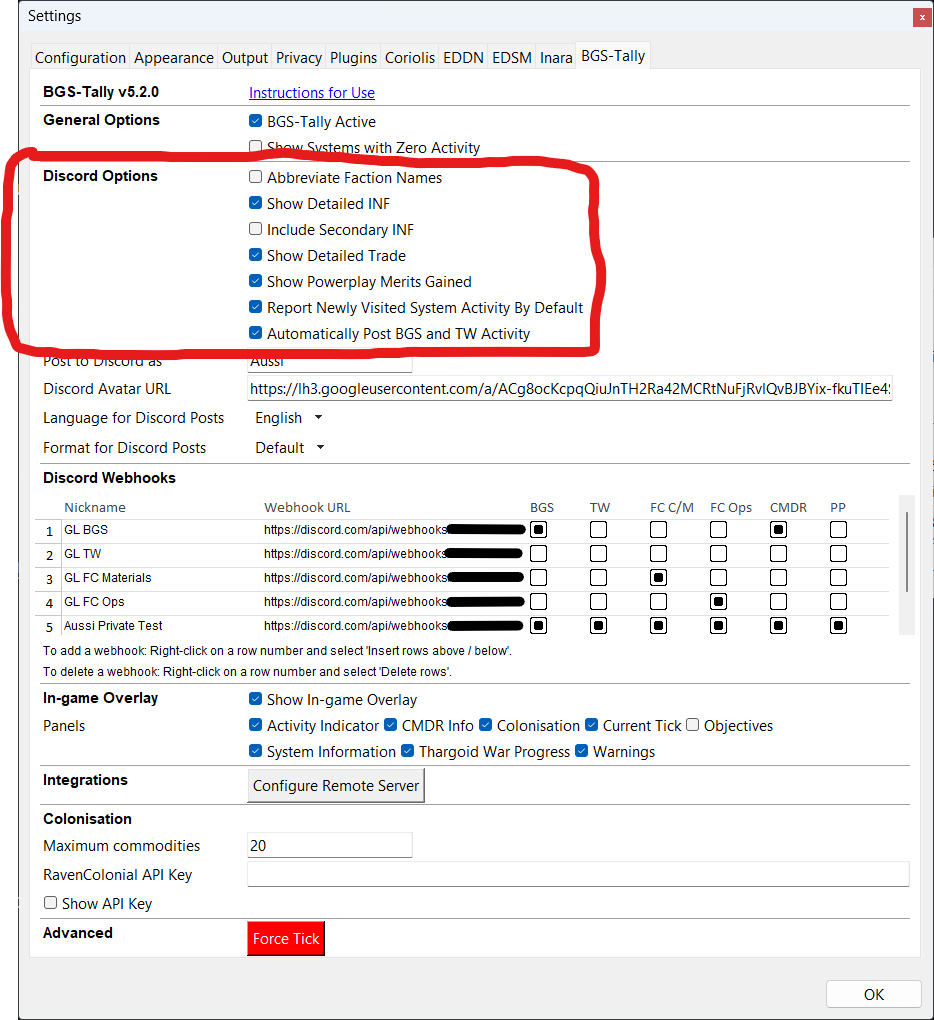
4.1 - Set Discord Options
The first 6 settings under Discord Options affect the content of your Discord posts. These are described in detail in the Usage ‐ BGS and TW Tracking section.
The 7th setting - Automatically Post BGS and TW Activity - when enabled will switch on fully automatic posting of your work to Discord. To avoid hitting rate limits, this is restricted to a maximum of one post every minute.
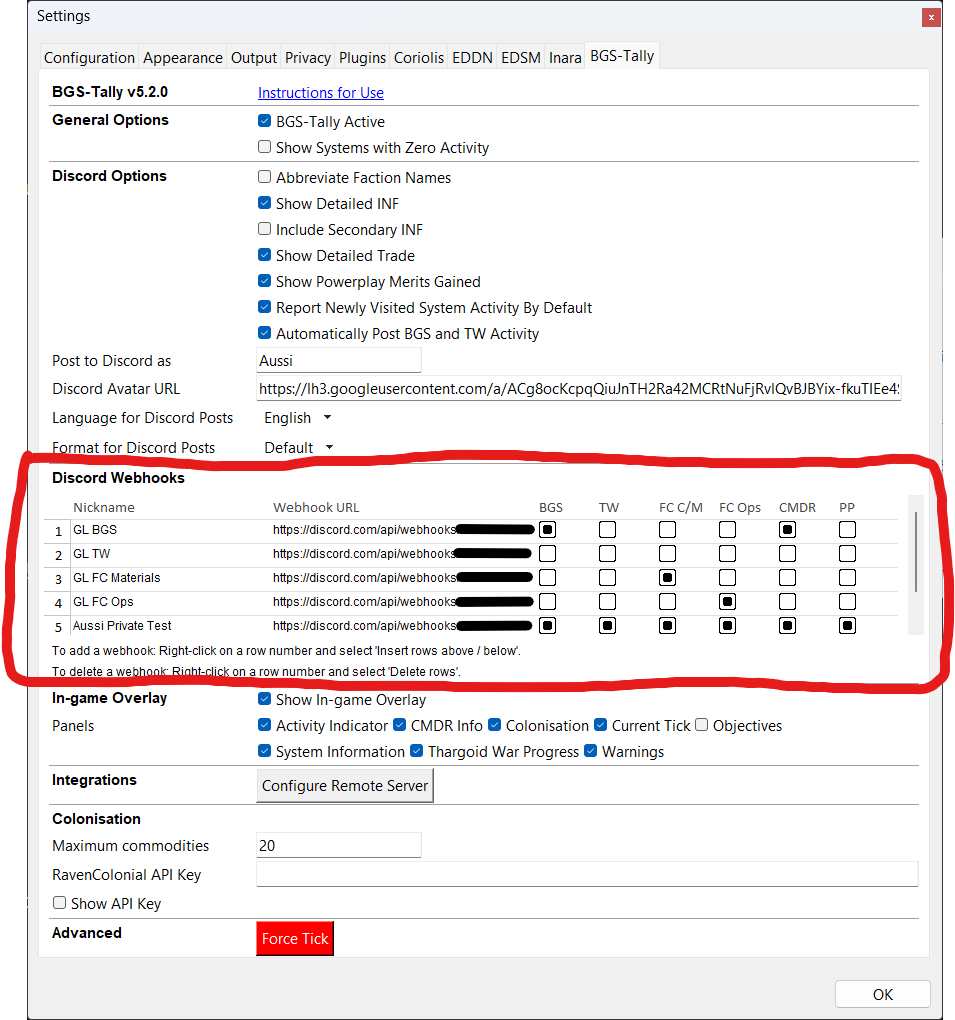
4.2 - Set up Discord Webhooks
If you want to be able to post to Discord either manually or automatically, you will also need to set up at least one Discord webhook - each webhook will post to a Discord server channel of your choice. To create a webhook, right-click in the Discord Webhooks section of the BGS-Tally settings panel, and choose Insert Row. You can then enter a Nickname for the webhook (for your own reference), enter the Webhook URL, and use the check boxes to set which information goes to which channels. The same information can go to multiple channels and you can set up as many webhooks as you like. The six types of information are:
BGS: BGS reportsTW: Thargoid War reportsFC C/M: Fleet carrier commodities and materials for purchase / saleFC Ops: Fleet carrier operations (jumps and cancelled jumps)CMDR: Information about commanders you have interacted withPP: Powerplay reports
You can get Discord Webhook URLs from your Discord server administrator.
If you manage your own Discord server, instructions for setting up the webhook within Discord are here.
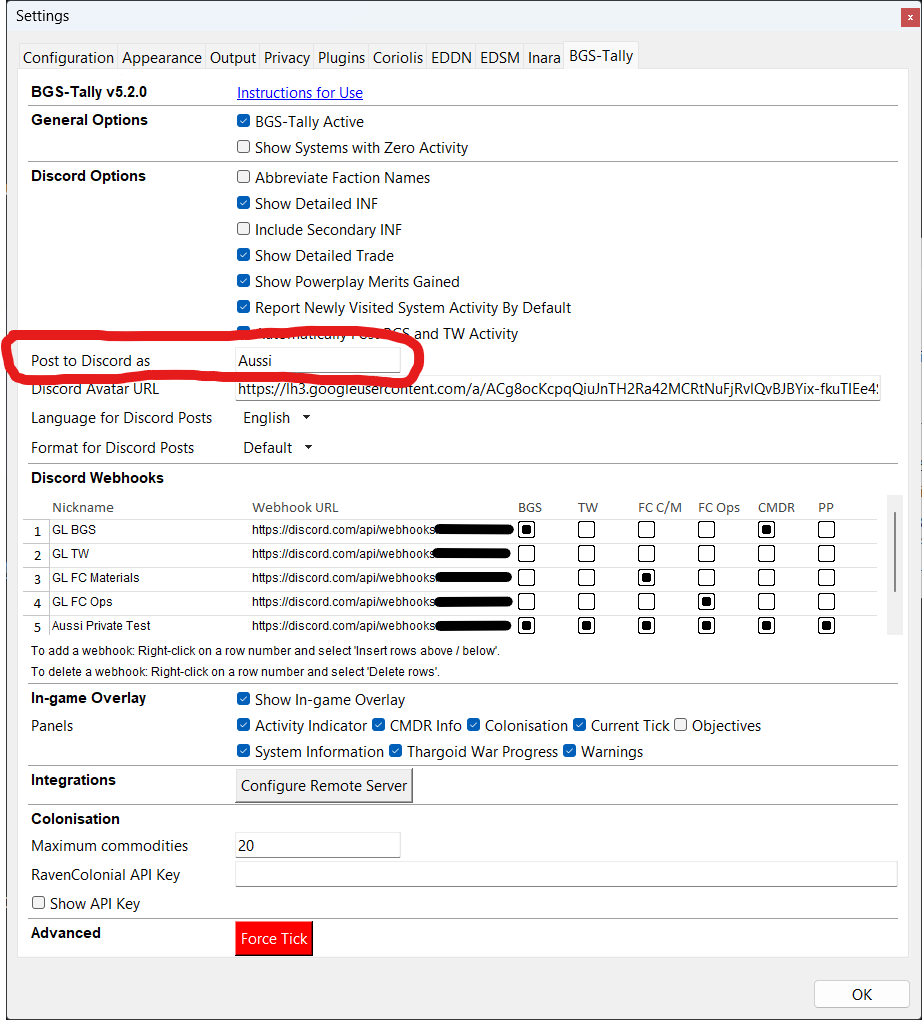
4.3 - Set Discord Username
If you have enabled posting to Discord, you must set your Discord username here so that the posts will be labelled with your username:
4.4 - OPTIONALLY Set Discord Avatar Image
If you have enabled posting to Discord, you can also set a Discord avatar image which will appear alongside your username. Just enter a URL to an image available on the web (a square 128px x 128px image is ideal).
![]()
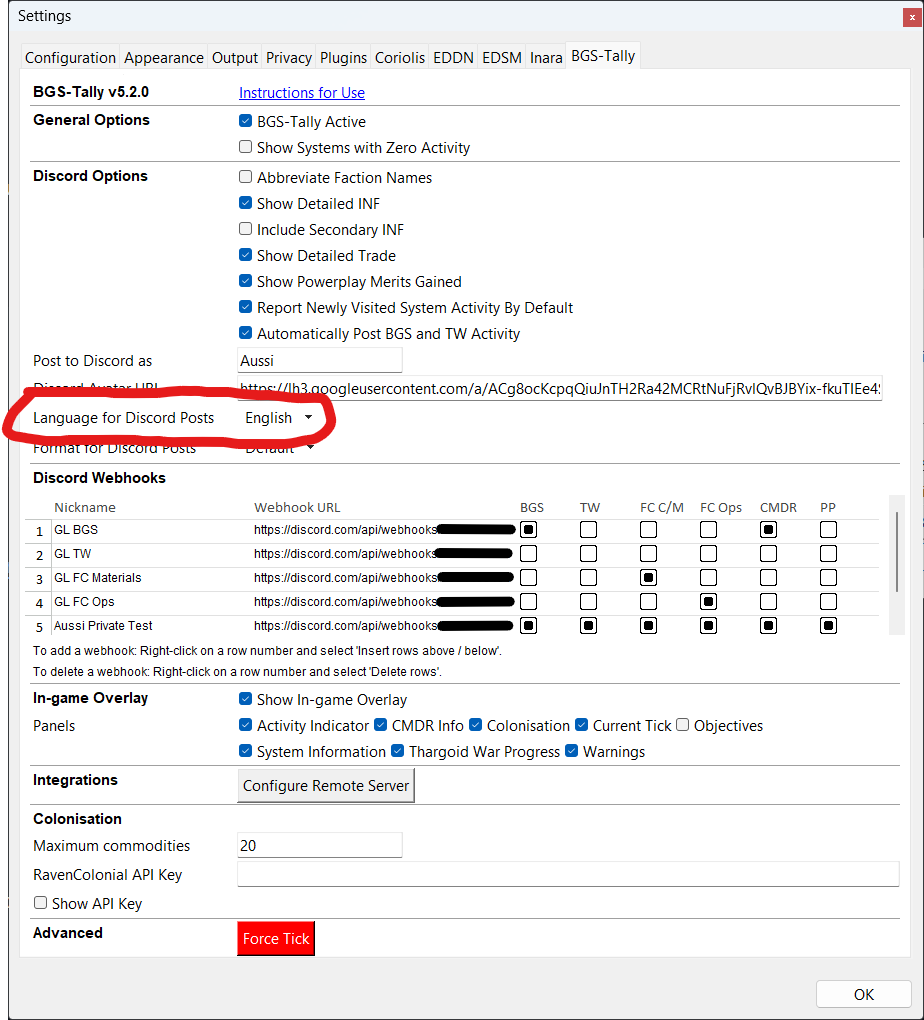
4.5 - Set Discord Language
If your Discord server has a different preferred language to the language you run EDMC and BGS-Tally in, you can override the language for Discord posts here:
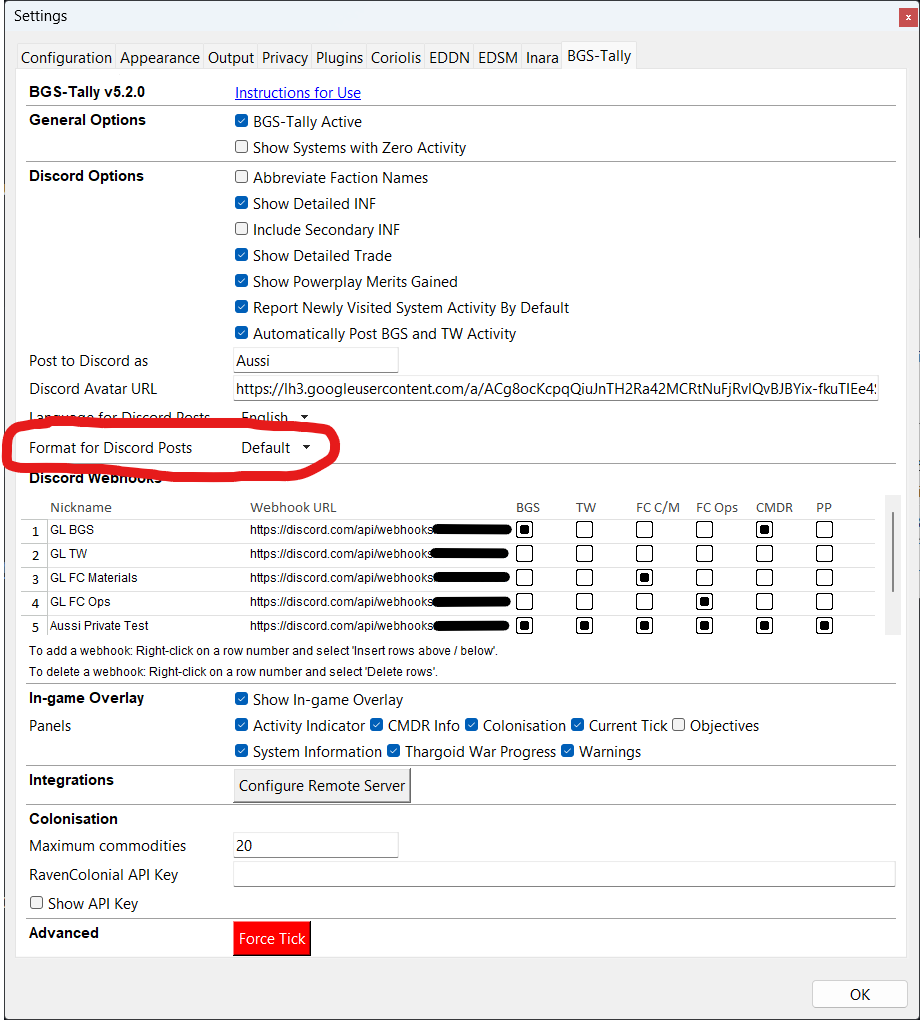
4.6 - Set Discord Post Format
There are currently two choices of formatting for your Discord posts - Default, which creates multi-panel Discord posts using Discord 'embeds', or a text only format. This is extensible, so more post formats may be developed in future.
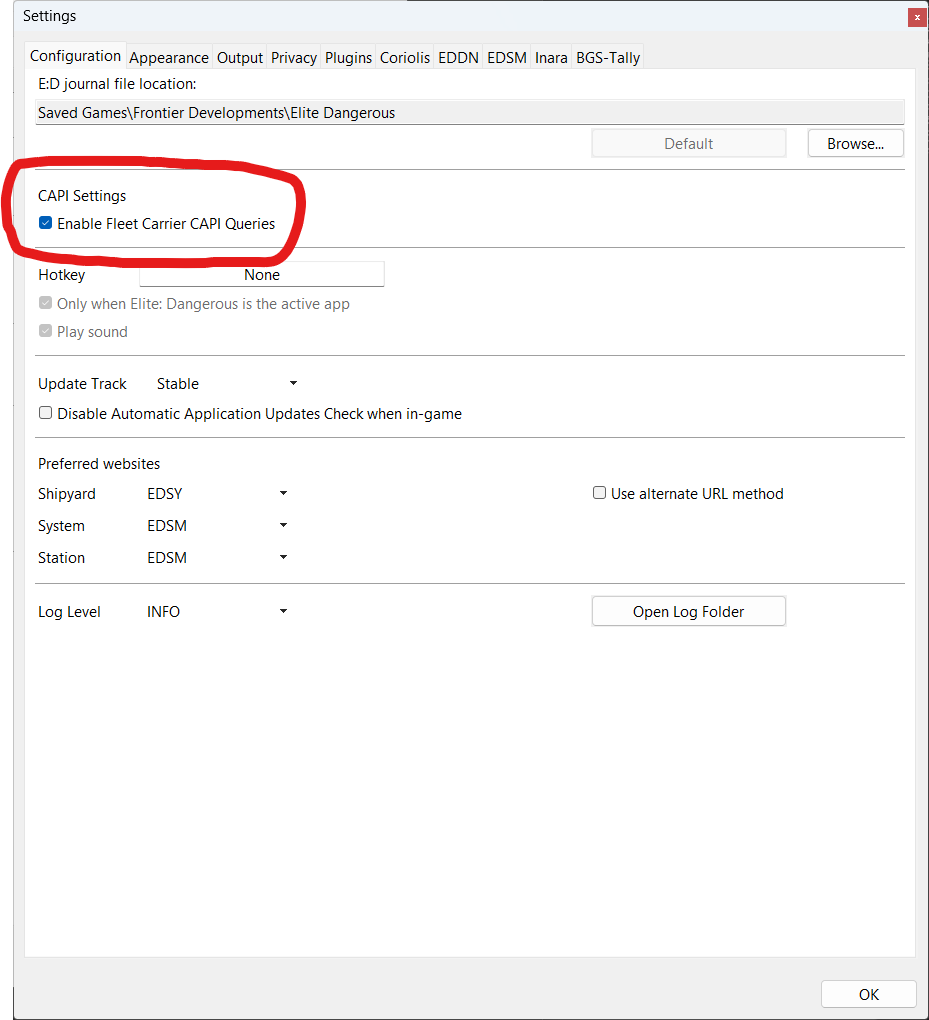
Step 5 - OPTIONALLY Enable Fleet Carrier Data
If you own a fleet carrier and would like to be able to post your commodity buy and sell orders and bartender materials buy and sell orders, or post accurate information about your carrier jumps, you will need to enable an EDMC setting. In the 'Configuration' tab of the EDMC Settings panel, ensure 'Enable Fleetcarrier CAPI Queries' is ticked. You will also need to ensure EDMC is authenticated with your Frontier account (it automatically asks this when you launch it, if you haven't previously authenticated).
Step 6 - Close the Settings
Close the settings panel by clicking OK. The plugin is now all set up and ready to go.