220623 Build Pipelines in GitLab and Deploy to AWS - arashafazeli/bb-readme-tutorials GitHub Wiki
2022-06-23
Intro
This readme is divided into two parts. The first part is about continuous integration (CI) in Gitlab. The second is about continuous deployment (CD) in AWS S3. The pipeline executes both CI and CD and is created in Gitlab Web Ide. GIT is not used in this lab. AWS S3 stands for Simple Storage Service. It is possible to host a webservice in S3.
This is a write-up from Youtube tutorial https://www.youtube.com/watch?v=PGyhBwLyK2U
Requirements
- Validated GitLab account
- AWS Free tier account
Preparations
GitLab:
- Clone website repository https://gitlab.com/kjebo/labb.git
- Create a new blank project in GitLab
- In the Profile Account in the top right corner. Select preferences, click "Render whitespace characters in the Web IDE"
- It is not possible to commit changes directly to the main branch. To protect main, only merge requests are allowed.
- In the new project Click Settings, Repository, expand Protected branches. In Allowed to push menu Select "no one"
- Click General, expand Merge requests.
- Merge method: Fast-forward merge
- Squash commits when merging: Encourage
- Merge checks: Pipelines must succeed
The YML file
About Job artifacts and variables in yml
- Create new .gitlab-ci.yml file and copy the YML-code.
stages:
    - build
    - test

variables:
    FILE_NAME: hello.txt

build job:
    image: alpine
    stage: build
    script:
        - mkdir build
        - echo "Hello World" >> build/$FILE_NAME

    artifacts:
        paths:
            - build

test job:
    image: alpine
    stage: test
    script:
        - grep "Hello" build/$FILE_NAME
- Comment out "artifacts" in the build job.
- Merge the job. The pipeline will start automatically.
- The test job will fail. Remove then the hashtags and commit the changes.
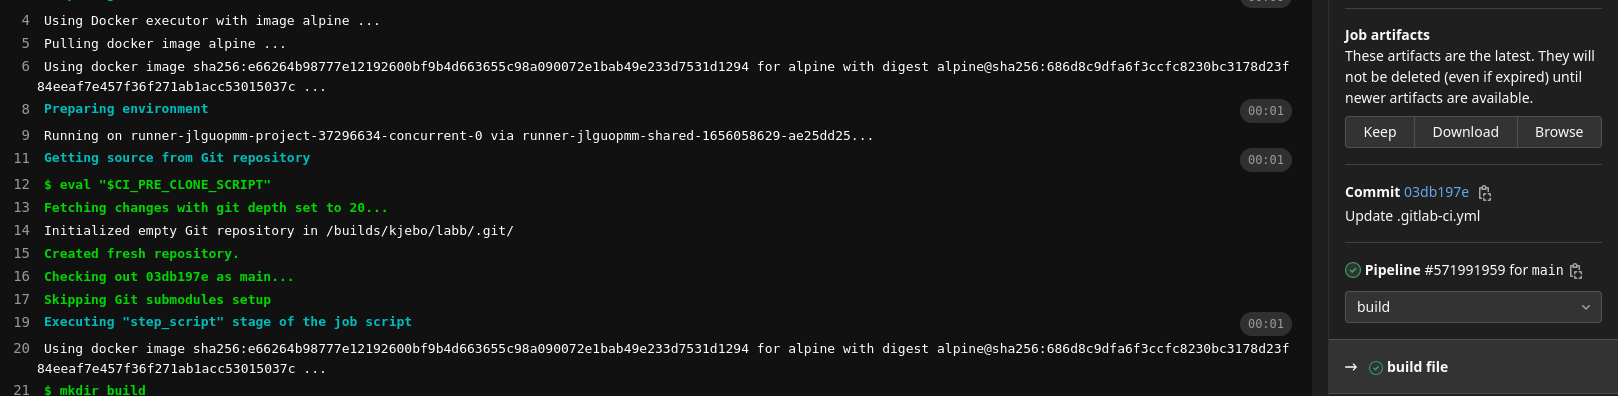
- Click browse in the Job artifacts menu on the right hand side to se the output. You can access it from the job log for the build stage
Global variables can be defined and used as above. To access a the output from a specific stage, use job artifacts.
Continuous Integration in GitLab
- Create new .gitlab-ci.yml file and copy the YML-code.
- To create a Node.js website, node docker image is used.
- The pipelines runs automatically after changes in any file.
- If the pipeline breaks the merge request to main branch will not be executed.
- The website is built and tested by the pipeline, inside the docker container.
stages:
    - build
    - test

build website:
    image: node:16-alpine
    stage: build
    script:
        - yarn install
        - yarn lint
        - yarn test
        - yarn build
    artifacts:
        paths:
            - build

test website:
    image: node:16-alpine
    stage: test
    script:
        - yarn global add serve
        - apk add curl
        - serve -s build &
        - sleep 10
        - curl http://localhost:3000 | grep "React App"
Continuous Deployment to AWS S3
Setting in AWS
- Create two buckets with same settings but with different names. One for staging and one for production.
- In the search box on the AWS console. Search on s3
-
Click Create bucket.
-
Enter Bucket name (must be unique) and AWS Region.
-
Click Create bucket at the bottom . Click properties for both buckets and edit Static website hosting.
- Enable
- Host static website
- Index document : index.html
- Error document : index.html
- Save changes
-
Click permissions
- Edit block public access. Uncheck block public access.
- Add bucket policy. Copy the code.
- Change "Resource" to your Bucket Name
-
{
    "Version": "2012-10-17",
    "Statement": [
        {
            "Sid": "PublicRead",
            "Effect": "Allow",
            "Principal": "*",
            "Action": "s3:GetObject",
            "Resource": "arn:aws:s3:::<BUCKET NAME>/*"
        }
    ]
}
- Copy the buckets URL
Search on IAM
- Add user: gitlab. Select AccessKey: Programmic access
- Next
- Add existing policies: AmazonS3FullAccess , AdministratorAccess-AWSElasticBeanstalk
- Copy Access key ID and Secret access key to clipboard
Settings in Gitlab
-
Click settings, repository, expand Deploy tokens. Create new token
- Name: AWS
- Username: AWS
- Scope read_repository, read_registry
-
Click Deployments, Environments. Add two new environments: staging and production.
- production: Value is the URL to AWS staging bucket.
- staging: Value is the URL to AWS production bucket.
-
Click settings, CI/CD, expand Variables, add new variable. Create:
- AWS_S3_BUCKET (Select Environment scope: staging) Value is the name on staging bucket.
- AWS_S3_BUCKET (Select Environment scope: production) Value is the name on production bucket.
- AWS_ACCESS_KEY_ID Access key ID from AWS IAM
- AWS_DEFAULT_REGION Bucket AWS Region
- AWS_SECRET_ACCESS_KEY Secret access key from AWS IAM (check "masked variable" flag)
- GITLAB_DEPLOY_TOKEN
-
Uncheck protect variable (It is only used in protected branches)
-
Create new .gitlab-ci.yml file and copy the YML-code.
 stages:
    - build
    - test
    - deploy staging
    - deploy production

variables:
    APP_VERSION: $CI_PIPELINE_IID

build website:
    image: node:16-alpine
    stage: build
    script:
        - yarn install
        - yarn lint
        - yarn test
        - yarn build
        - echo $APP_VERSION > build/version.html
    artifacts:
        paths:
            - build

test website:
    image: node:16-alpine
    stage: test
    script:
        - yarn global add serve
        - apk add curl
        - serve -s build &
        - sleep 10
        - curl http://localhost:3000 | grep "React App"

.deploy:
    image:
        name: amazon/aws-cli:2.4.11
        entrypoint: [""]
    rules:
        - if: $CI_COMMIT_REF_NAME == $CI_DEFAULT_BRANCH
    script:
        - aws --version
        - aws s3 sync build s3://$AWS_S3_BUCKET --delete
        - curl $CI_ENVIRONMENT_URL | grep "React App"
        - curl $CI_ENVIRONMENT_URL/version.html | grep $APP_VERSION

deploy to staging:
    stage: deploy staging
    environment: staging
    extends: .deploy

deploy to production:
    stage: deploy production
    environment: production
    extends: .deploy
- Staging and production are two different buckets (in S3) and environments (in GitLab). If pipeline breaks in job "deploy to staging" the job "deploy to production" will not be executed.
- Environment controls which website to update
- $APP_VERSION is a variable that is set in job "build website" and double-checked in both "deploy to staging" and "deploy to production".