Start Ant Media Server on Azure
Attention: We have migrated our documentation to our new platform, Ant Media Resources. Please follow this link for the latest and up-to-date documentation.
This guide describes how to install and set up Ant Media Server on a Microsoft Azure Marketplace Ubuntu 16.04 virtual machine instance. This tutorial assumes that you have an Azure account or a trial account.
- Firstly, click Create a resource in Azure Dashboard.

- After clicking on Create a resource, you will see the new Marketplace page. Please write “Ant Media Server” to the search side.

- Choose one of Ant Media Server Community Edition or Enterprise Edition.

Community Edition and Enterprise Edition comparison chart is here.

In Subscription, Azure default payment method is Pay-As-You-Go. More details for see this link.
In Resource group, specify the resource group. To select an existing resource group, click Use existing, and then click the arrow in the list box to reveal existing resource groups. To create a new resource group, click Create new, and then type a name for it in the list box. For details, see Manage resource groups.
In Virtual machine name, enter a name for your virtual machine. (“name must be 1-64 characters long and it cannot contain non-ASCII and special characters.”)
In Region, select the region where the virtual machine instance will be located. It’s best to select a location that has the lowest latency to a camera or encoder that’s delivering a live stream to Ant Media Server.
In Image, will see your selected image.
In VM disk type, choose a disk type. Azure solid-state disks (SSD) are backed by solid-state drives and offer consistent, low latency performance. They provide the best balance between price and performance and are ideal for I/O-intensive applications and production workloads.
In User name, type the name of the account that you’ll use to administer the virtual machine (you can’t use root for the user name). Then under Authentication type, click SSH public key and copy and paste an OpenSSH public key that will be used to authenticate the account user name.
Note: You can generate an OpenSSH public key with tools like ssh-keygen on Linux and OS X or PuTTYgen on Windows. For details, see Create and use an SSH public-private key pair for Linux VMs in Azure.

In OS disk type, Effective at input speeds I/O. Premium SSD disks offer high-performance, low-latency disk support for I/O-intensive applications and production workloads.
Standard SSD Disks are a cost-effective storage option optimized for workloads that need consistent performance at lower IOPS levels.
Use Standard HDD disks for Dev/Test scenarios and less critical workloads at lowest cost.
We recommend Premium SSD for high I/O.

In Virtual Network, currently selected subscription and location are listed. If you choose to create a new virtual network, it will be created in the same subscription, location, and resource group as the storage account. Virtual networks in a different subscription, and/or paired failover location, may be specified after storage account creation.
In Subnet, listed in default value of your Virtual Network.
In Public IP, communicate with Virtual Machine from outside the Virtual Network.
In Configure network security group, the most important configuration is here. Here are the TCP and UDP port, inbound and outbound permissions are configured. If you change port settings in Ant Media Server, you need to change “Configure network security group”. Ant Media Server default port values listed below.
The following ports to the Inbound list in Ant Media Server:
TCP:1935 (RTMP)
TCP:5080 (HTTP)
TCP:5443 (HTTPS)
TCP:5554 (RTSP)
UDP:5000-65000 (WebRTC and RTSP)
TCP:5000-65000 (WebRTC and RTSP)
Important Note: You need to open TCP port range(TCP:5000-65000) for the internal network. It should not be open to public.


Here is Extensions and Cloud-Init options.
Extension means using in server applications like Acronis Backup.
Ant Media Server image doesn’t support cloud-init.

Tags are name/value pairs that enable you to categorize resources and view consolidated billing by applying the same tag to multiple resources and resource groups.

Here you will see the settings you have made in other sections. Checking all the settings you can create the virtual machine.
After creating the instance, wait for installation and reach management console from the URL: http://<Server_IP_Address>:5080.
While setting up a scaling Azure Ant Media Solution, SSL needs to be set up for Azure Application Gateway, which acts as a load balancer.
SSL is required for enabling mic and camera in browsers. Otherwise, WebRTC will not work. In this post, you will learn how to enable SSL for Azure Application Gateway. Application Gateway is used for load balancing in a clustering Azure solution. Please have a look at this document for enabling SSL for standalone servers.
We are going to use Let’s Encrypt for enabling SSL. Let’s Encrypt is a FREE, automated and open Certificate Authority brought to you by the non-profit Internet Security Research Group (ISRG) and supported by big corps such as Google, Facebook, Microsoft, and many others, to have a more secure and privacy-respecting Web.
Create Certificate
- Open a terminal.
- Install certbot
sudo apt-get install certbot
- Executed the following command by writing your email address and your domain
sudo certbot certonly --email your_email_address -d your_domain --agree-tos --manual
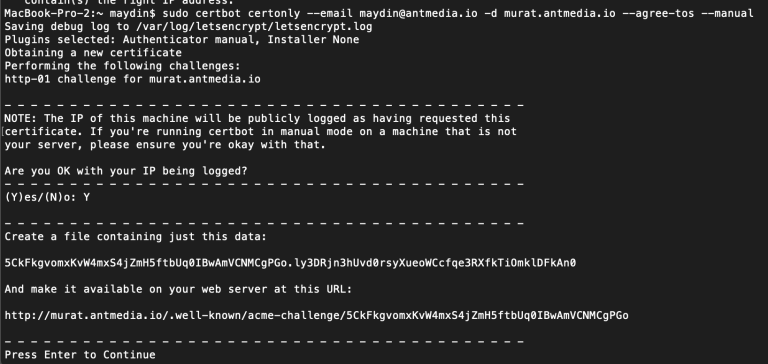
- Follow the instructions and press Enter to continue.
- After successful operation, terminal output should something like below
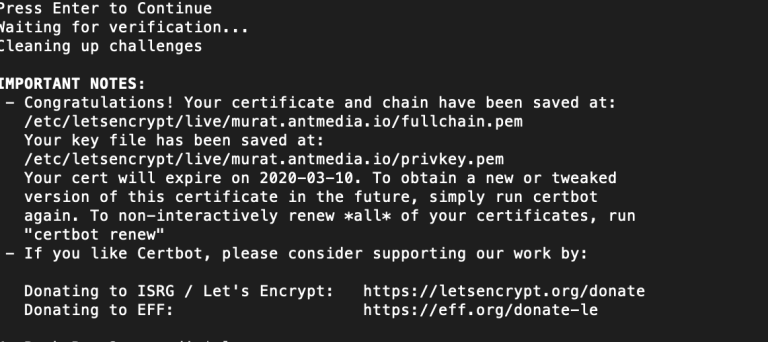
Create PFX for Azure Application Gateway
We need a PFX file for Azure Application Gateway and we can create it using OpenSSL by using
the files(cert.pem, chain.pem, fullchain.pem, privkey.pem) which are created under /etc/letsencrypt/live/{Your_Domain} in previous step.
- Run the below command to have PFX file
sudo openssl pkcs12 -inkey ./privkey.pem -in ./cert.pem -export -out murat.antmedia.io.pfx
Now you have the PFX file.
Create Azure Application Gateway with Certificate for Scaling Azure Ant Media Solution
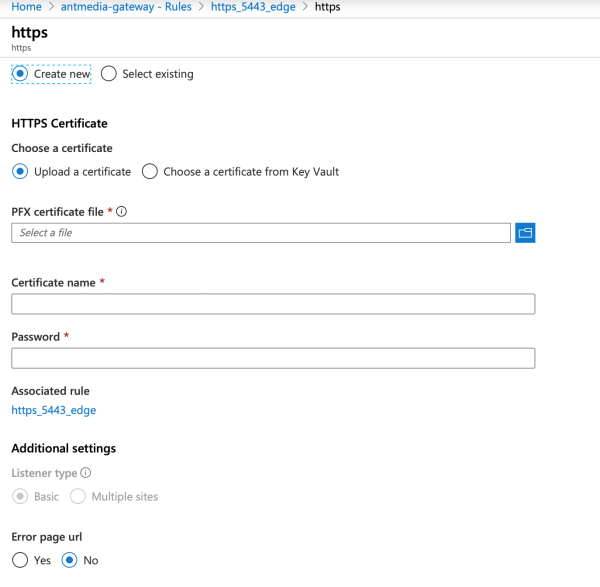
When creating the Azure Application Gateway, we will provide this certificate.
- Upload certificate while creating rule (https_5443_edge) rule and provide a name and password for the certificate.
- While creating the listener for the https_443_origin rule, use the certificate which is previously uploaded.
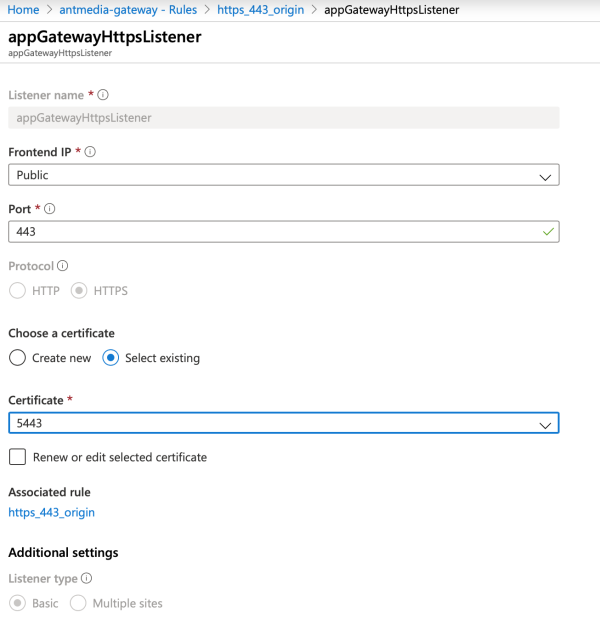
After that, you can open your Ant Media Server instance with https://your_domain URL. For the full guide that describes setting up a clustering solution in Azure, please have a look at this post.
References:
https://docs.microsoft.com/en-us/azure/application-gateway/end-to-end-ssl-portal