6. Solar Board - alanbjohnston/CubeSatSim GitHub Wiki
If the images on this page fail to load, you can download a PDF of the page here.
6. Solar Board
These steps are to build the CubeSatSim Solar PCB:

Here is the Solar PCB v2.1:
Here is the schematic:
Note that these instructions show the v2.0 board, but it is identical to the v2.1 board except for extra JST connectors for solar panels.
You will need these tools:
- Safety glasses (to protect eyes while soldering or trimming leads)
- Soldering iron and solder (I use lead-free solder, but leaded solder is easier to work with)
- Needle nose pliers (to bend leads and hold parts)
- Side cutters (to trim leads)
- glue, such as super glue gel to attach the JST connectors to the PCB
Other tools that are helpful:
- Blue mounting putty(to hold components in place while soldering)
Checklist
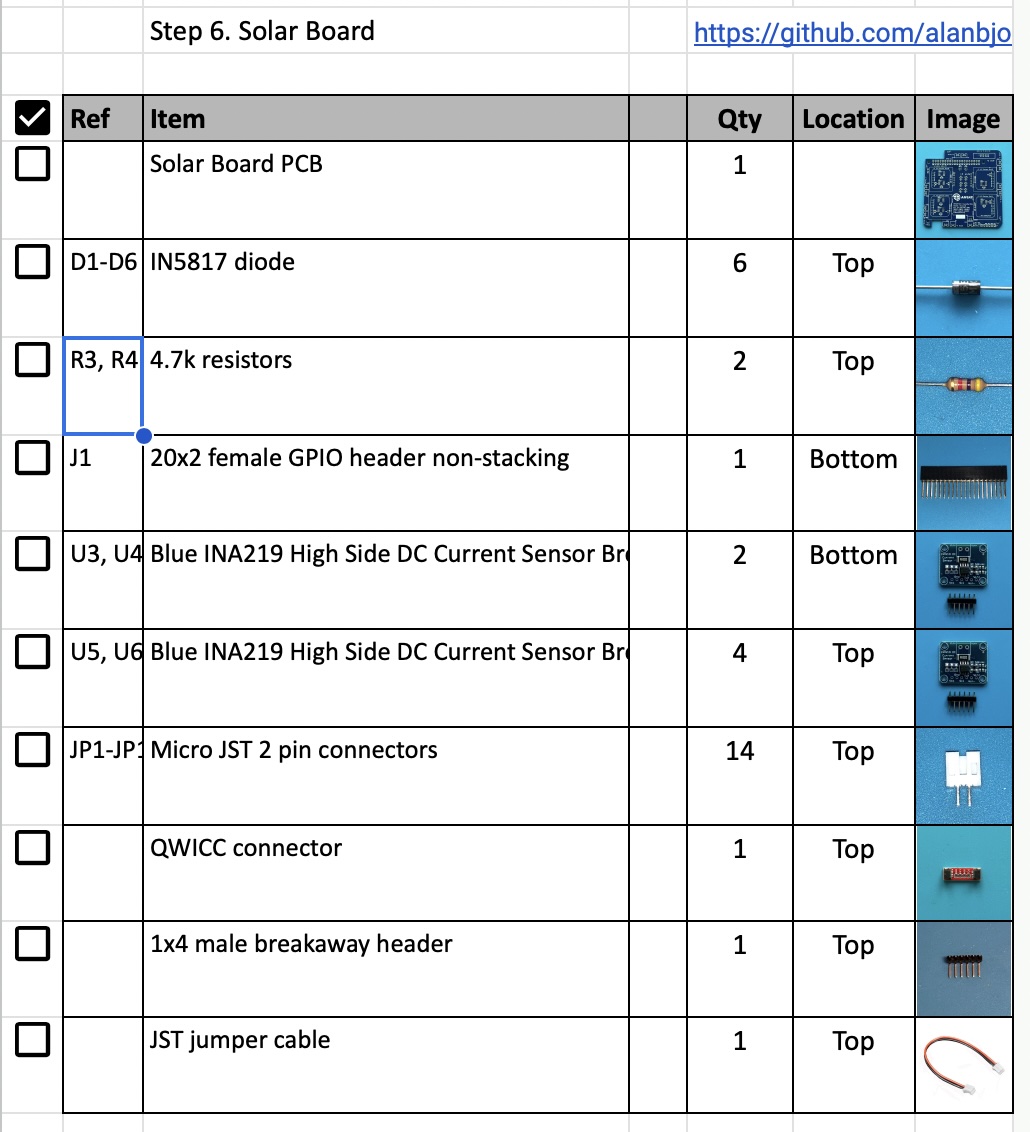
The BOM has a sheet "By Steps" which lists the parts needed for each step in order. https://CubeSatSim.org/bom If you have a Google account, you can make a copy of this spreadsheet ("File" then "Make a Copy") and check off each part as you install it.
For example, here is the checklist for this step:
Video
Here is a video of this step.
Steps
Start with the blank PCB, shown here top on left with AMSAT logo, bottom on the left:

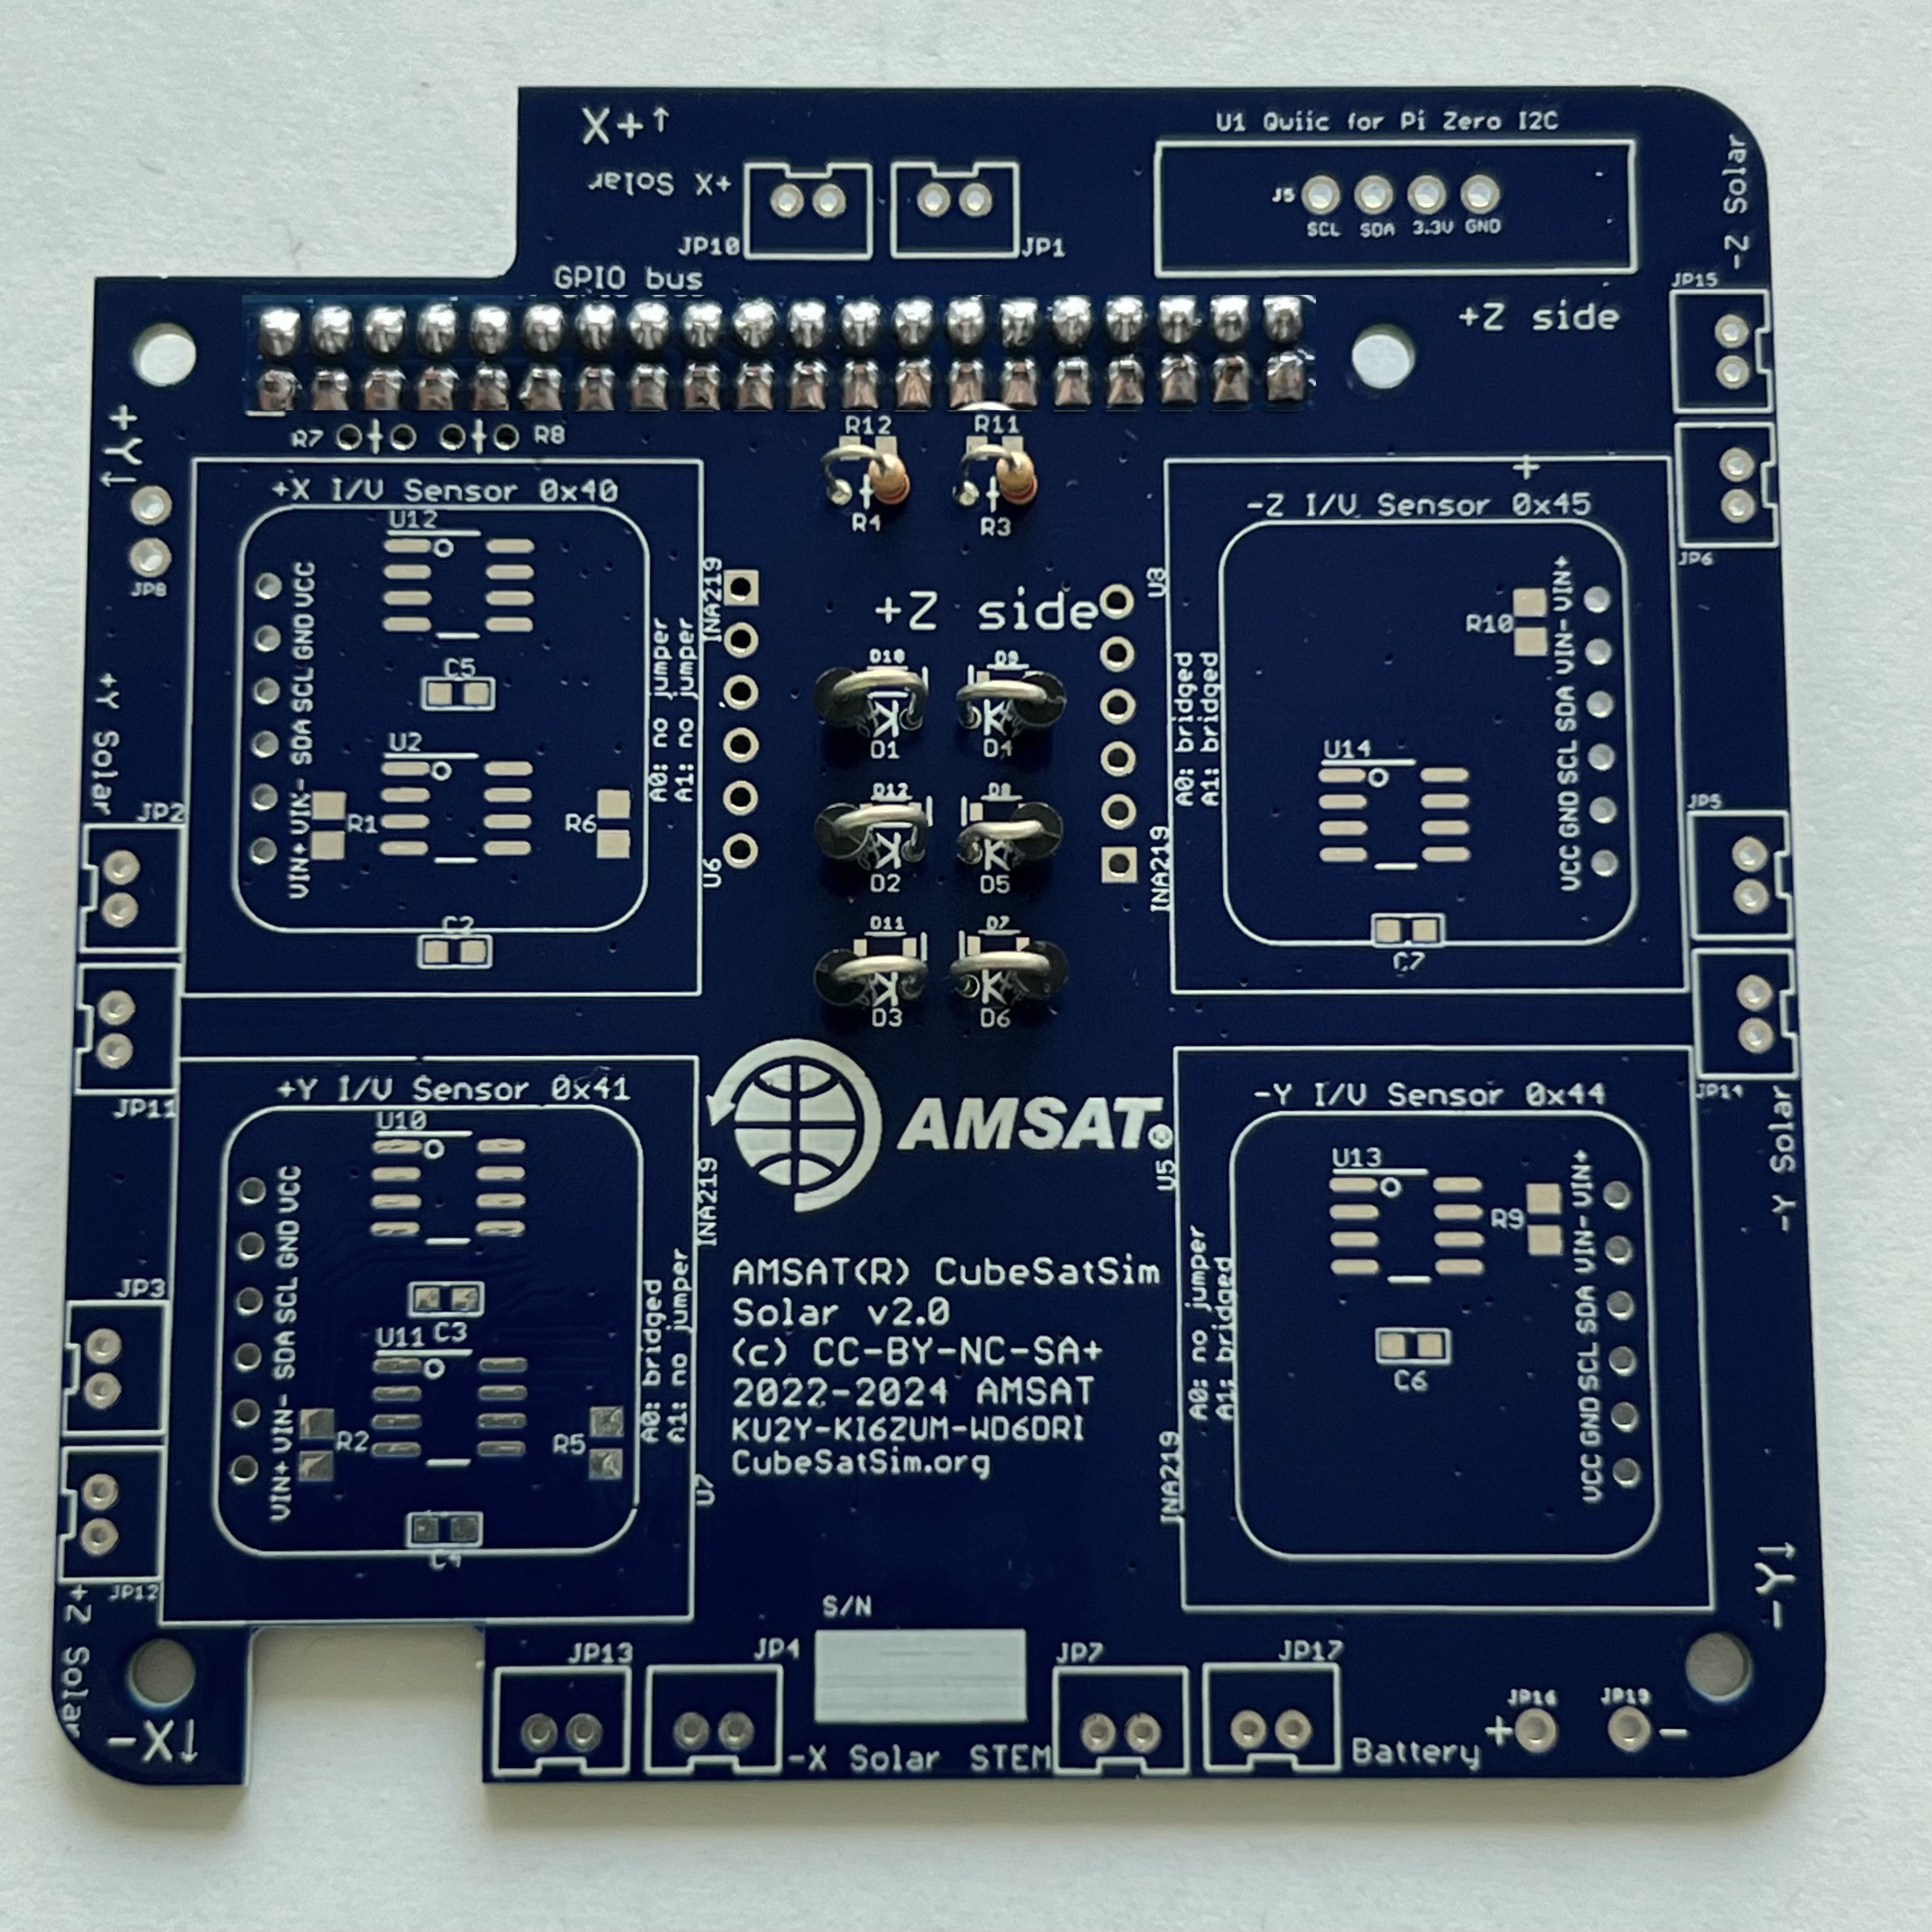
The 1N5817 diodes D1 - D6 and 4.7k Ohm resistors R3 and R4 are installed vertically:

First insert the 4.7k Ohm resistors R3 and R4 (color bands yellow blue red):

Bend the leads on the bottom of the PCB so they are held in place:

Solder one pin on each resistor then check the top of the PCB that the resistors are straight and inserted all the way:

Then solder the other pin, the trim the leads:


Here's how the board looks:

Next, solder the six diodes. The polarity of this diode is marked by a white band, which is on the left side in this photo, which matches the schematic symbol on the PCB for D4, D5, and D6:

Here is the polarity of the diodes:

They are installed on the PCB top then soldered on the PCB bottom. Solder one lead on each diode then flip the board over and double check polarity, insertion, and straightness before flipping board back over and soldering the other lead:

Trim the leads after soldering:

On the bottom, install the 2x20 GPIO female header J1.
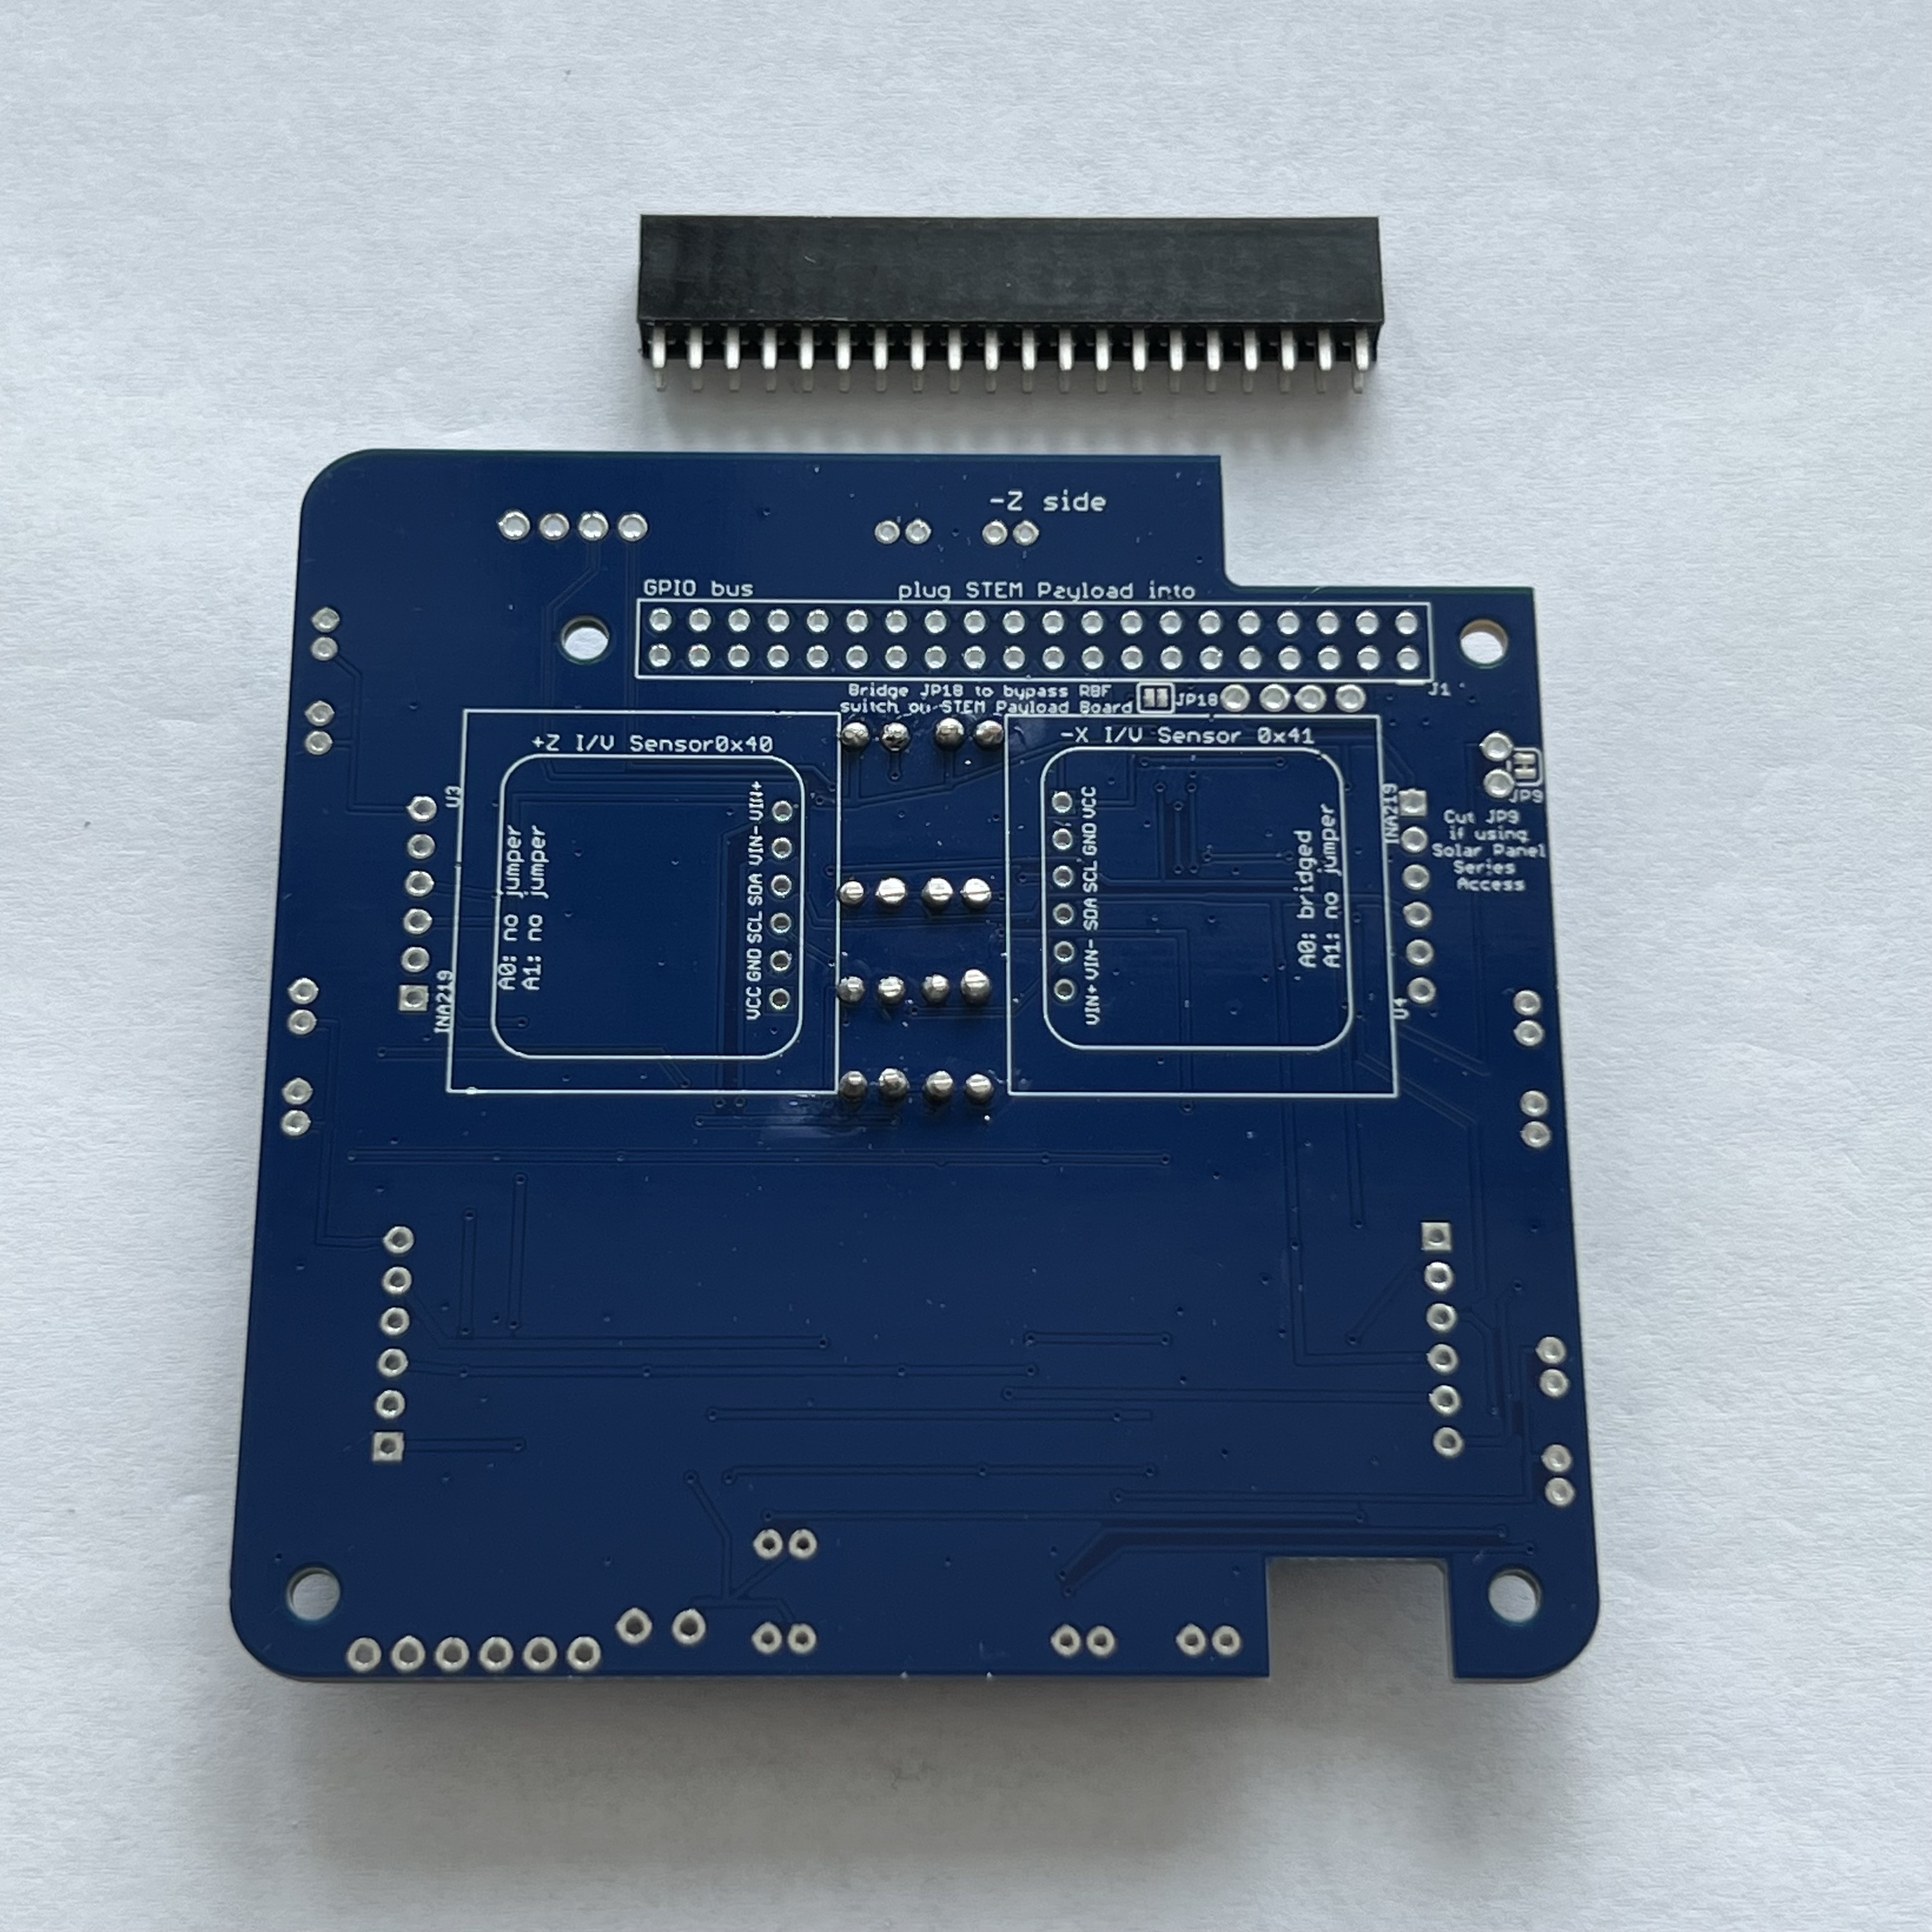
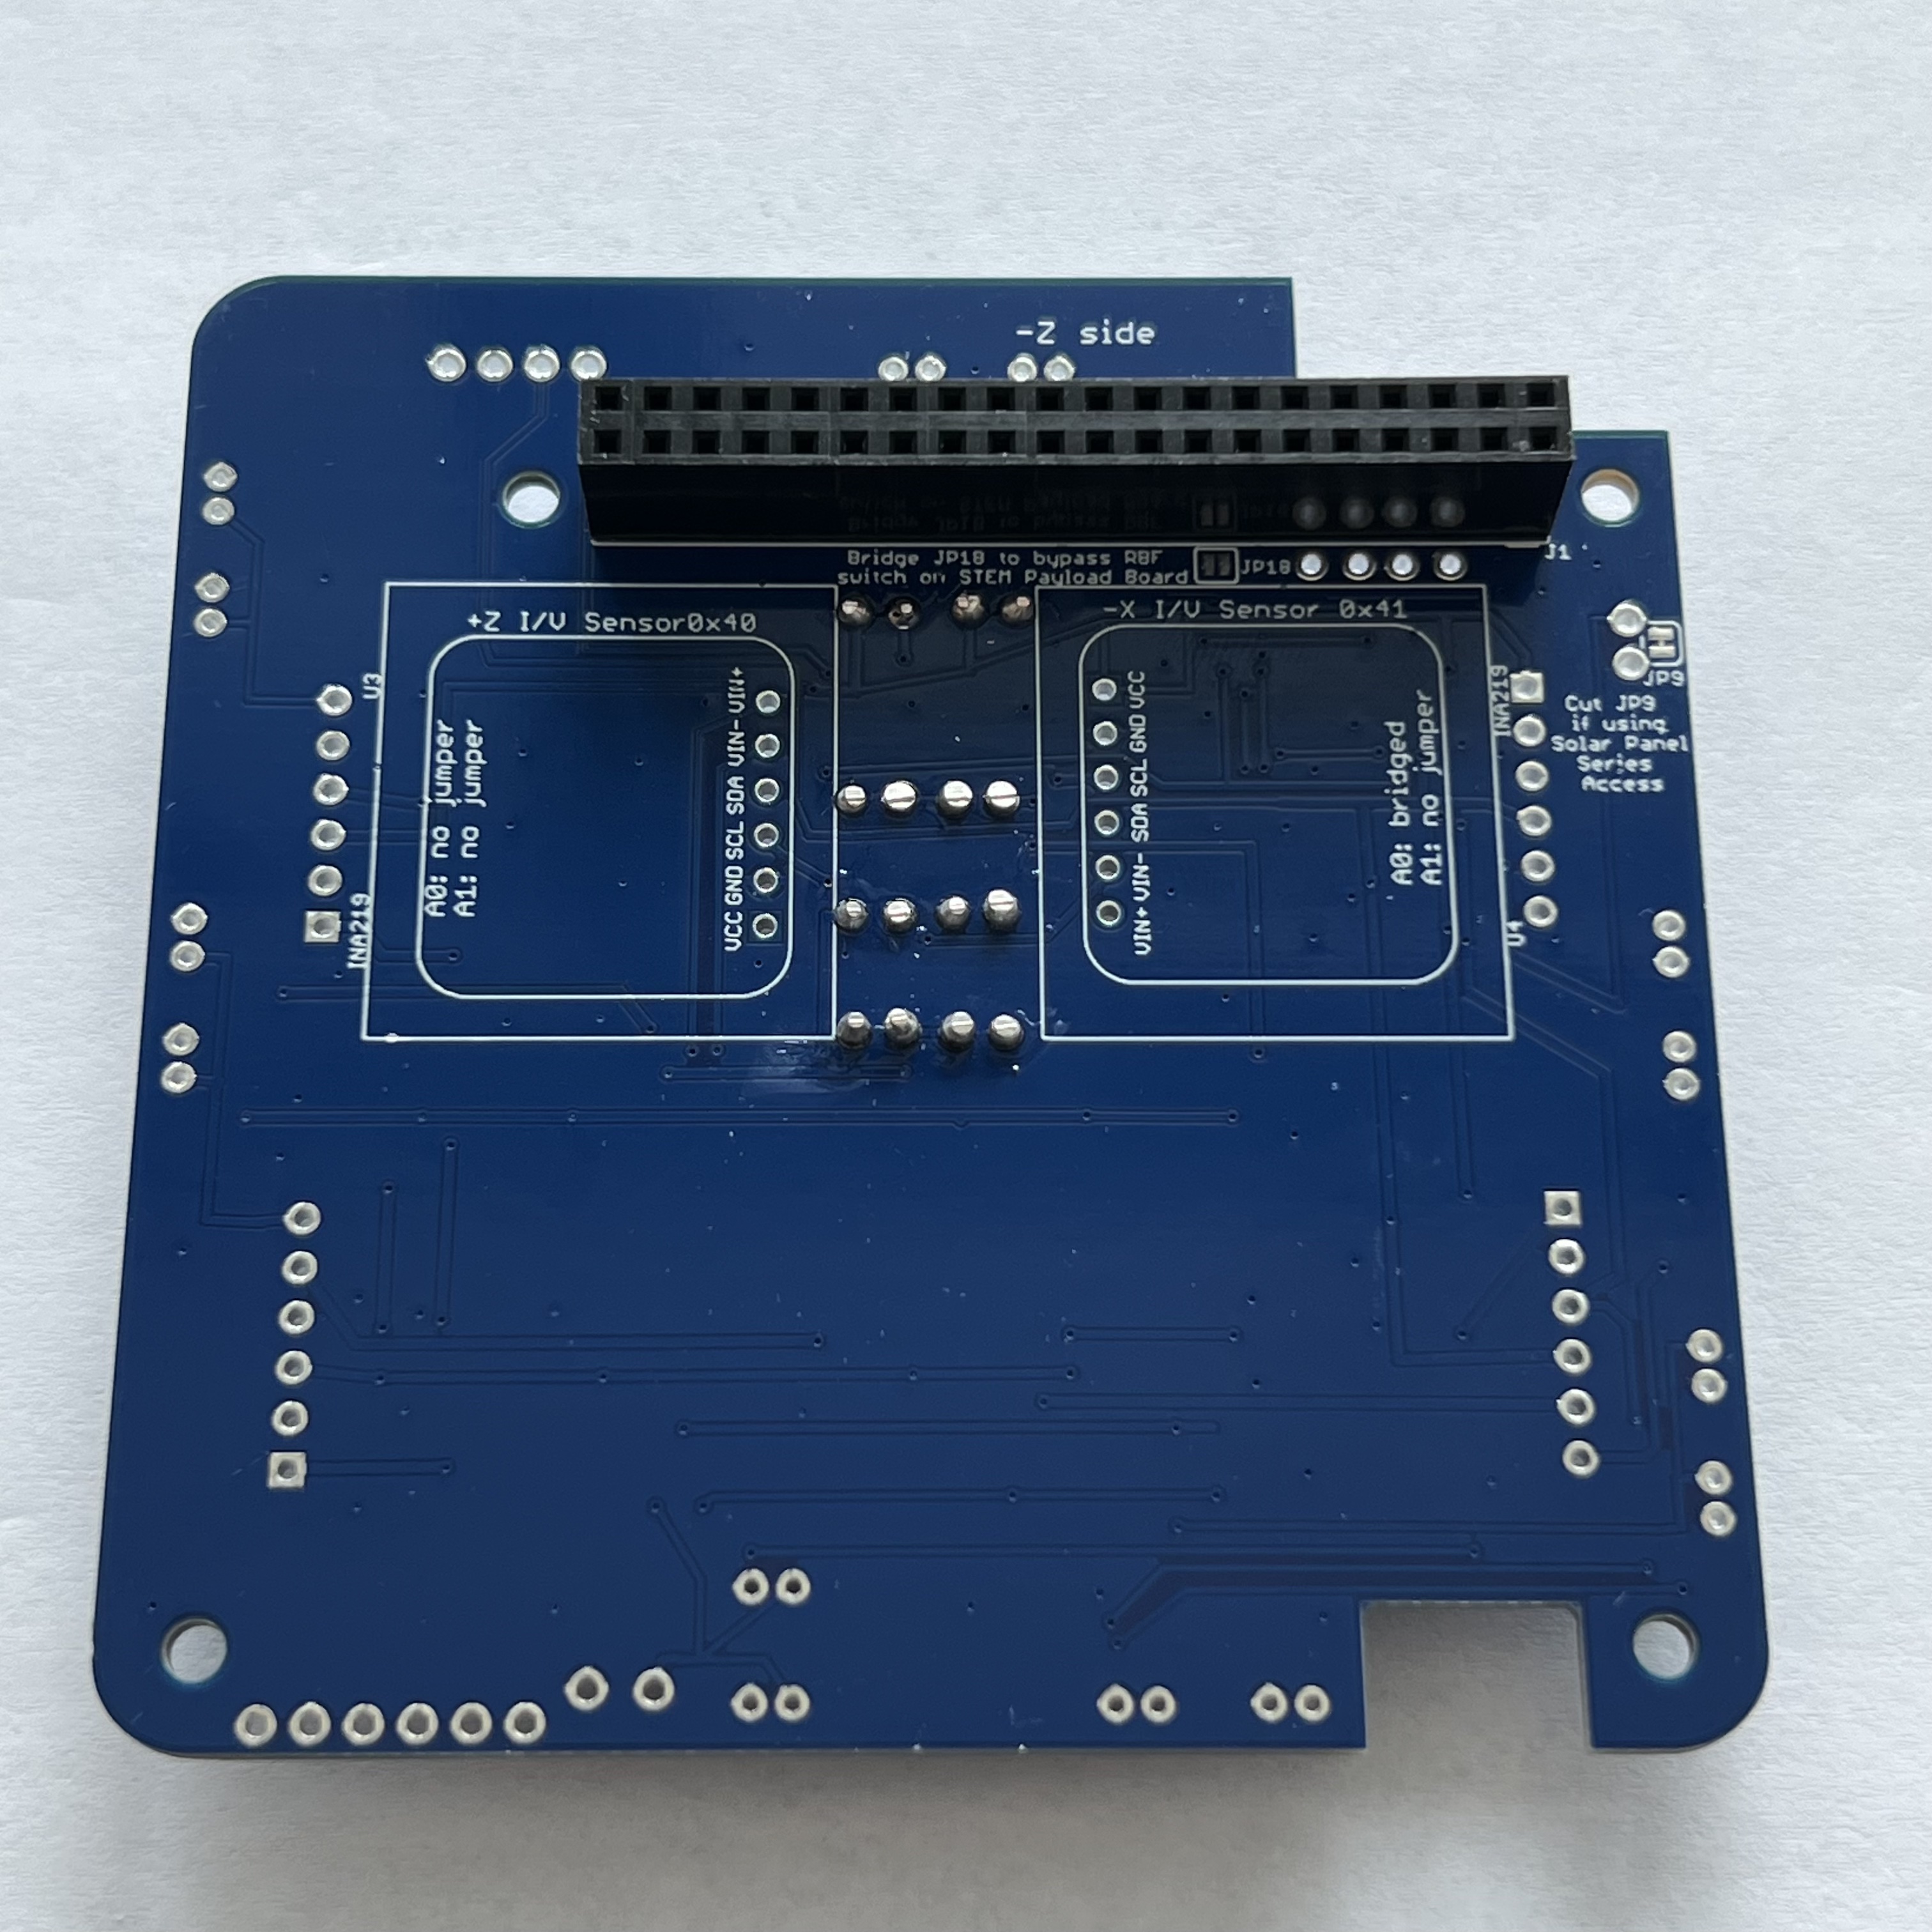
First solder only one pin on each side. Verify it is fully inserted and straight before proceeding to solder the other pins:

Also on the bottom, install two INA219 boards CJMCU-219 U3 and U4 and their 1x6 male pin headers:

Insert the pin headers, long pins down and hold in place with blue putty while you solder them on the other side:

Solder one pin on each header, then check to make sure they are fully inserted and straight:


Solder the remaining pins:

Then, on the bottom, install the INA219 boards and hold in place and level with blue putty:

Solder one pin on each then check for straightness:

Solder the remaining pins:

One jumper needs to be soldered on right INA219 (marked here in red):
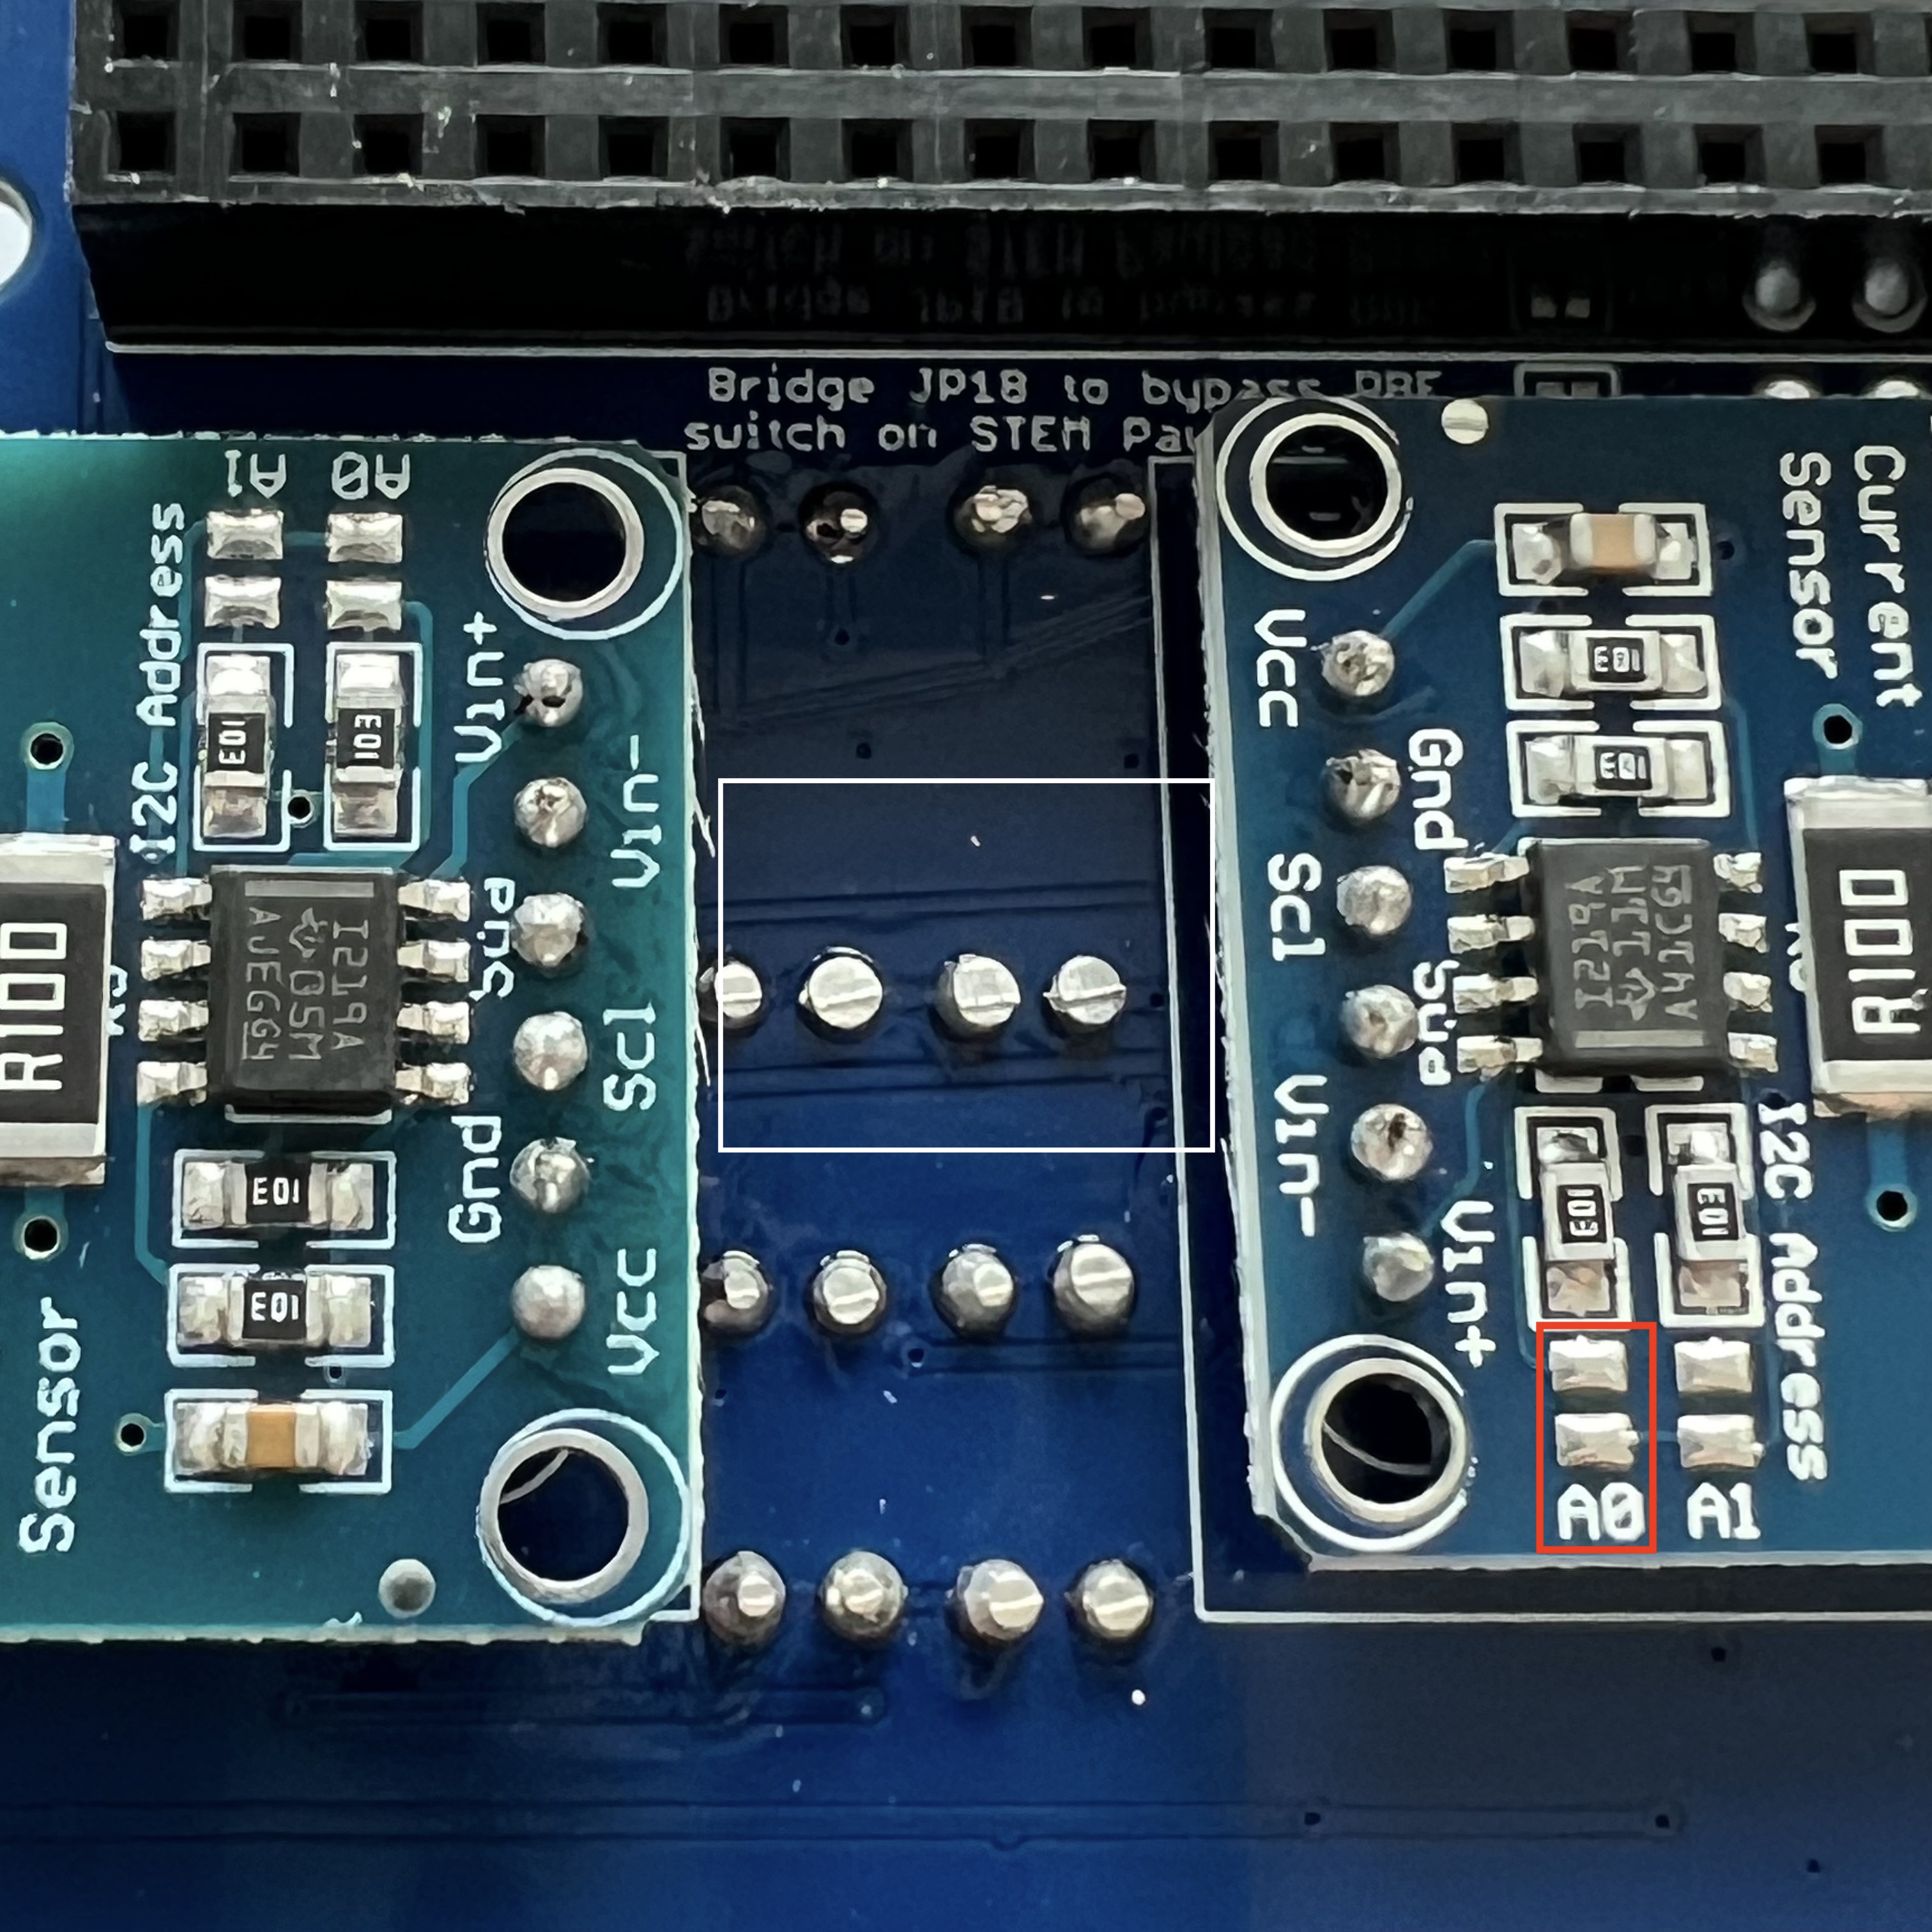
Add a small blob of solder on the pad so that it is bridged (shorted):
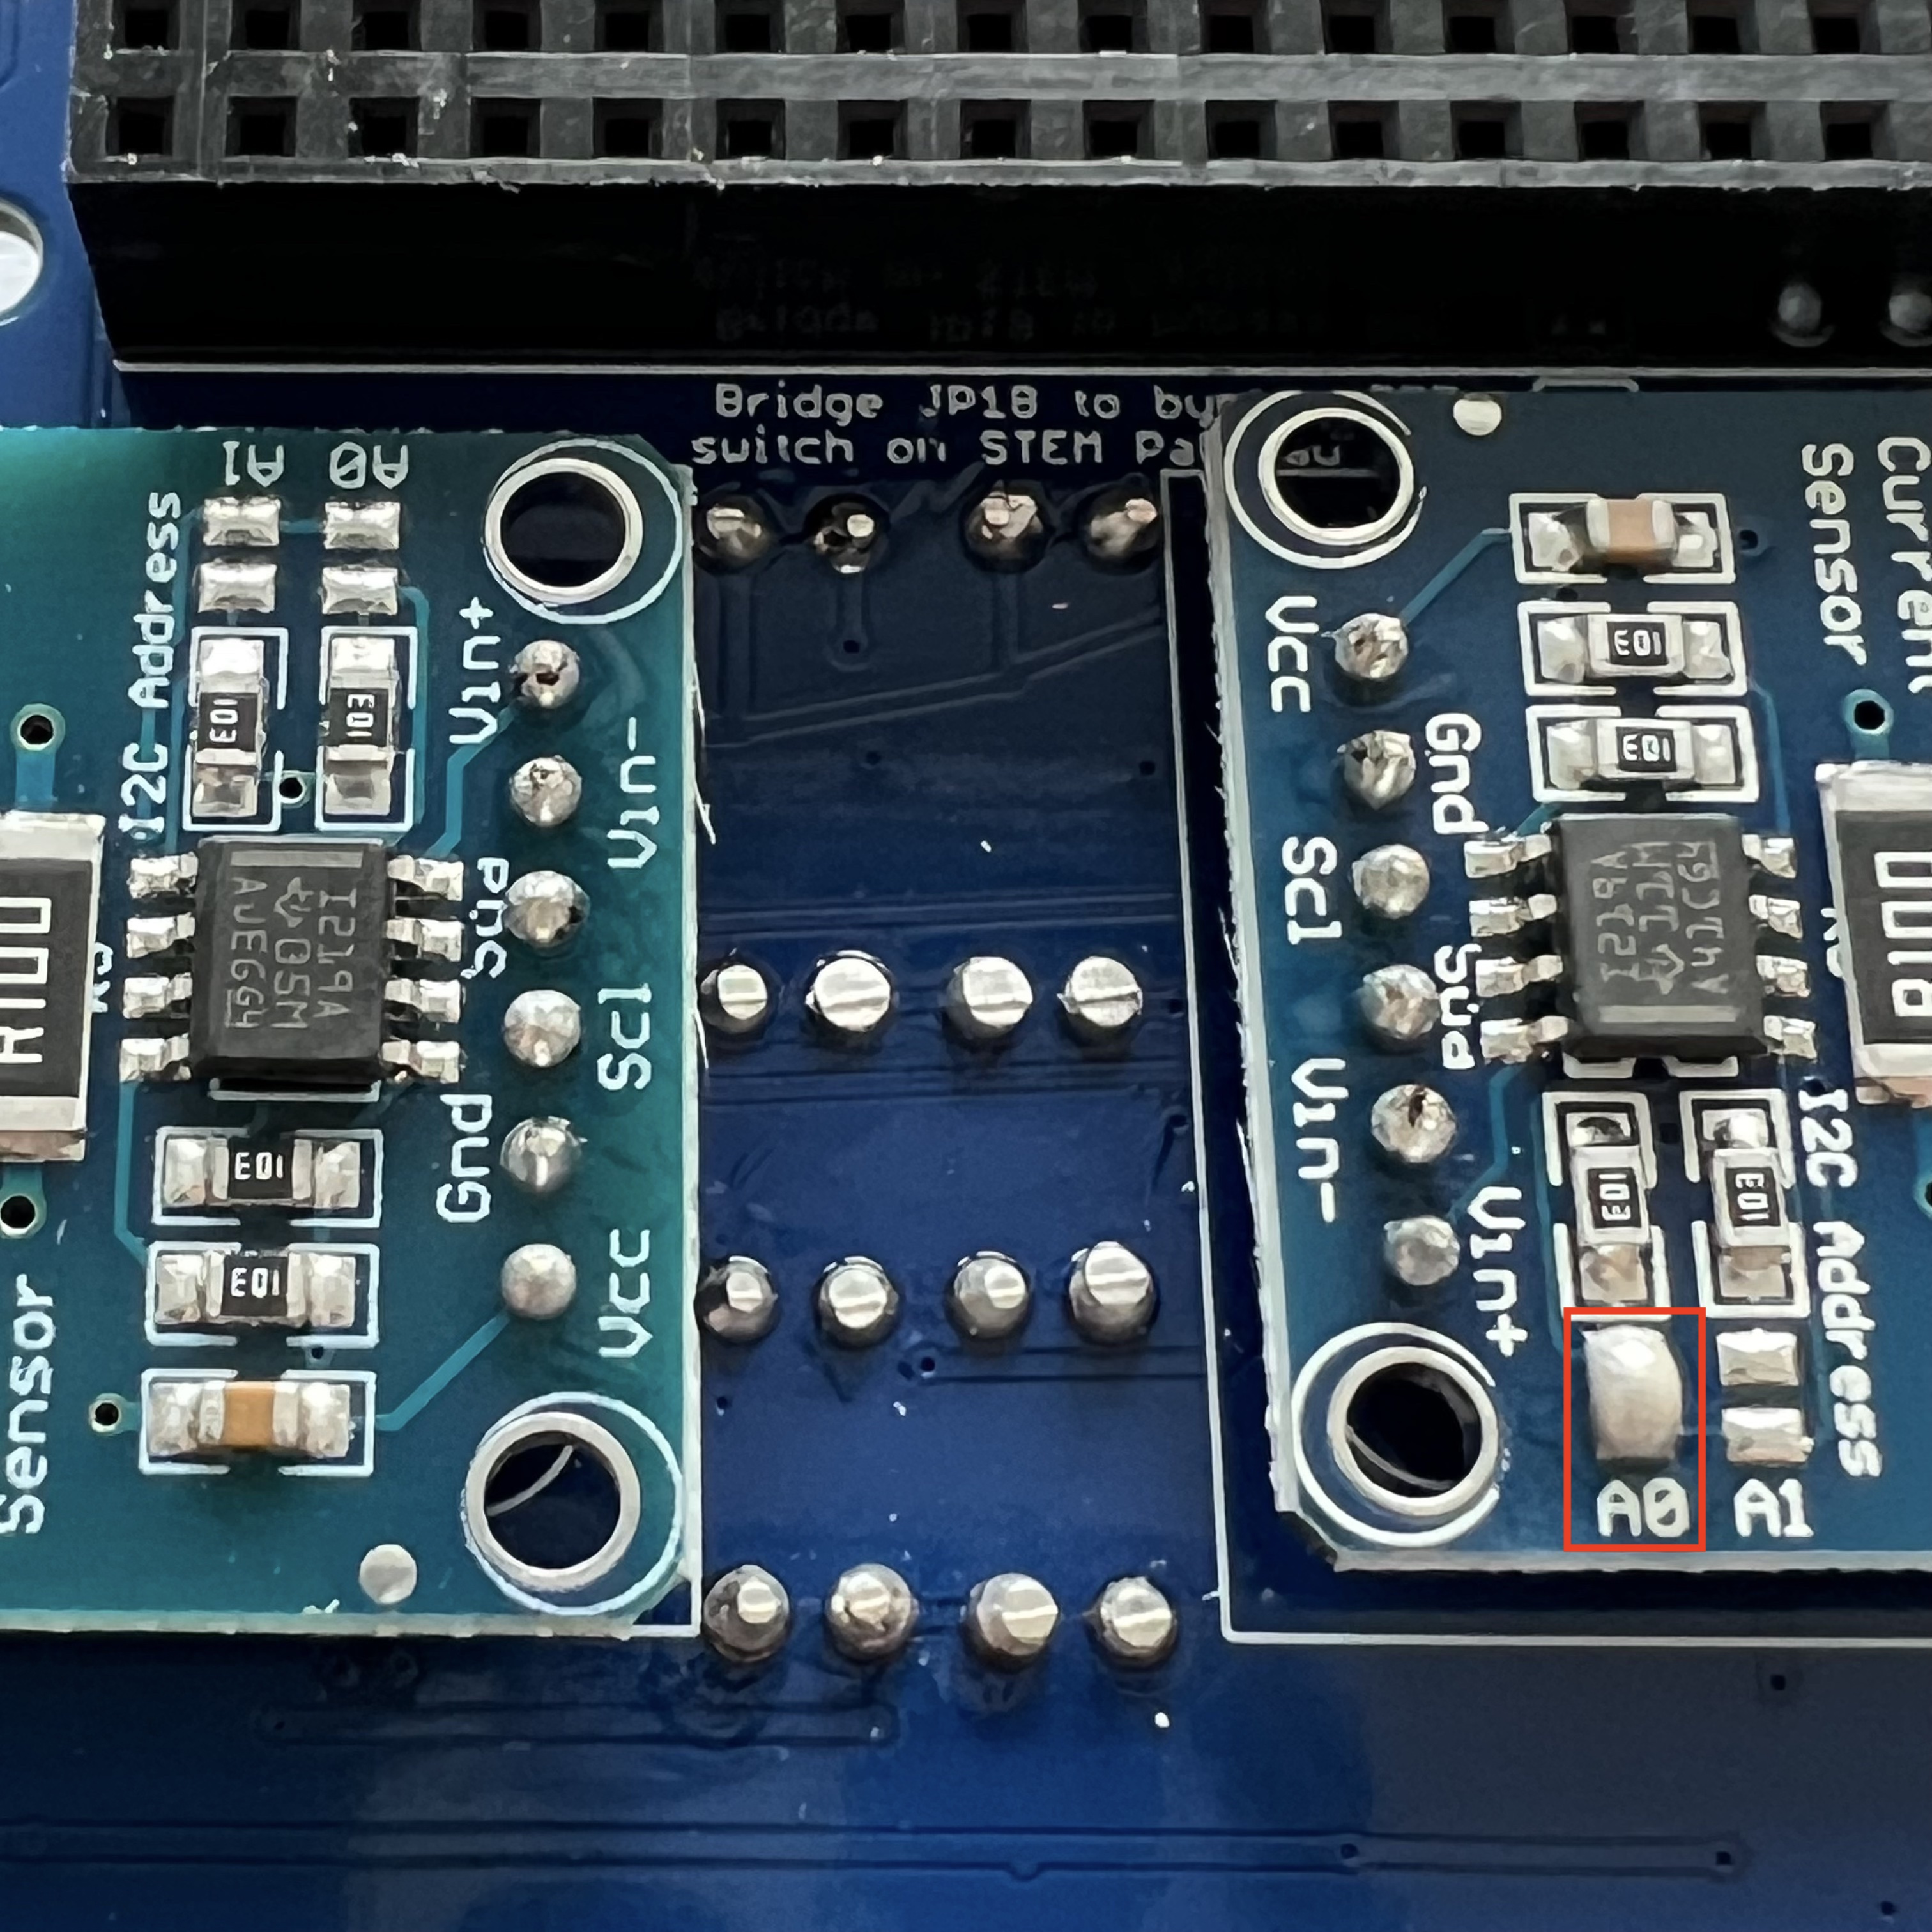
This completes the bottom of the PCB.

Flip the PCB to the top and install the four INA219 boards CJMCU-219 U5, U6, U7, and U8 and their 1x6 male pin headers.

Insert the pin headers, the long side of the pins into the board. Hold in place with blue putty then solder on the bottom:
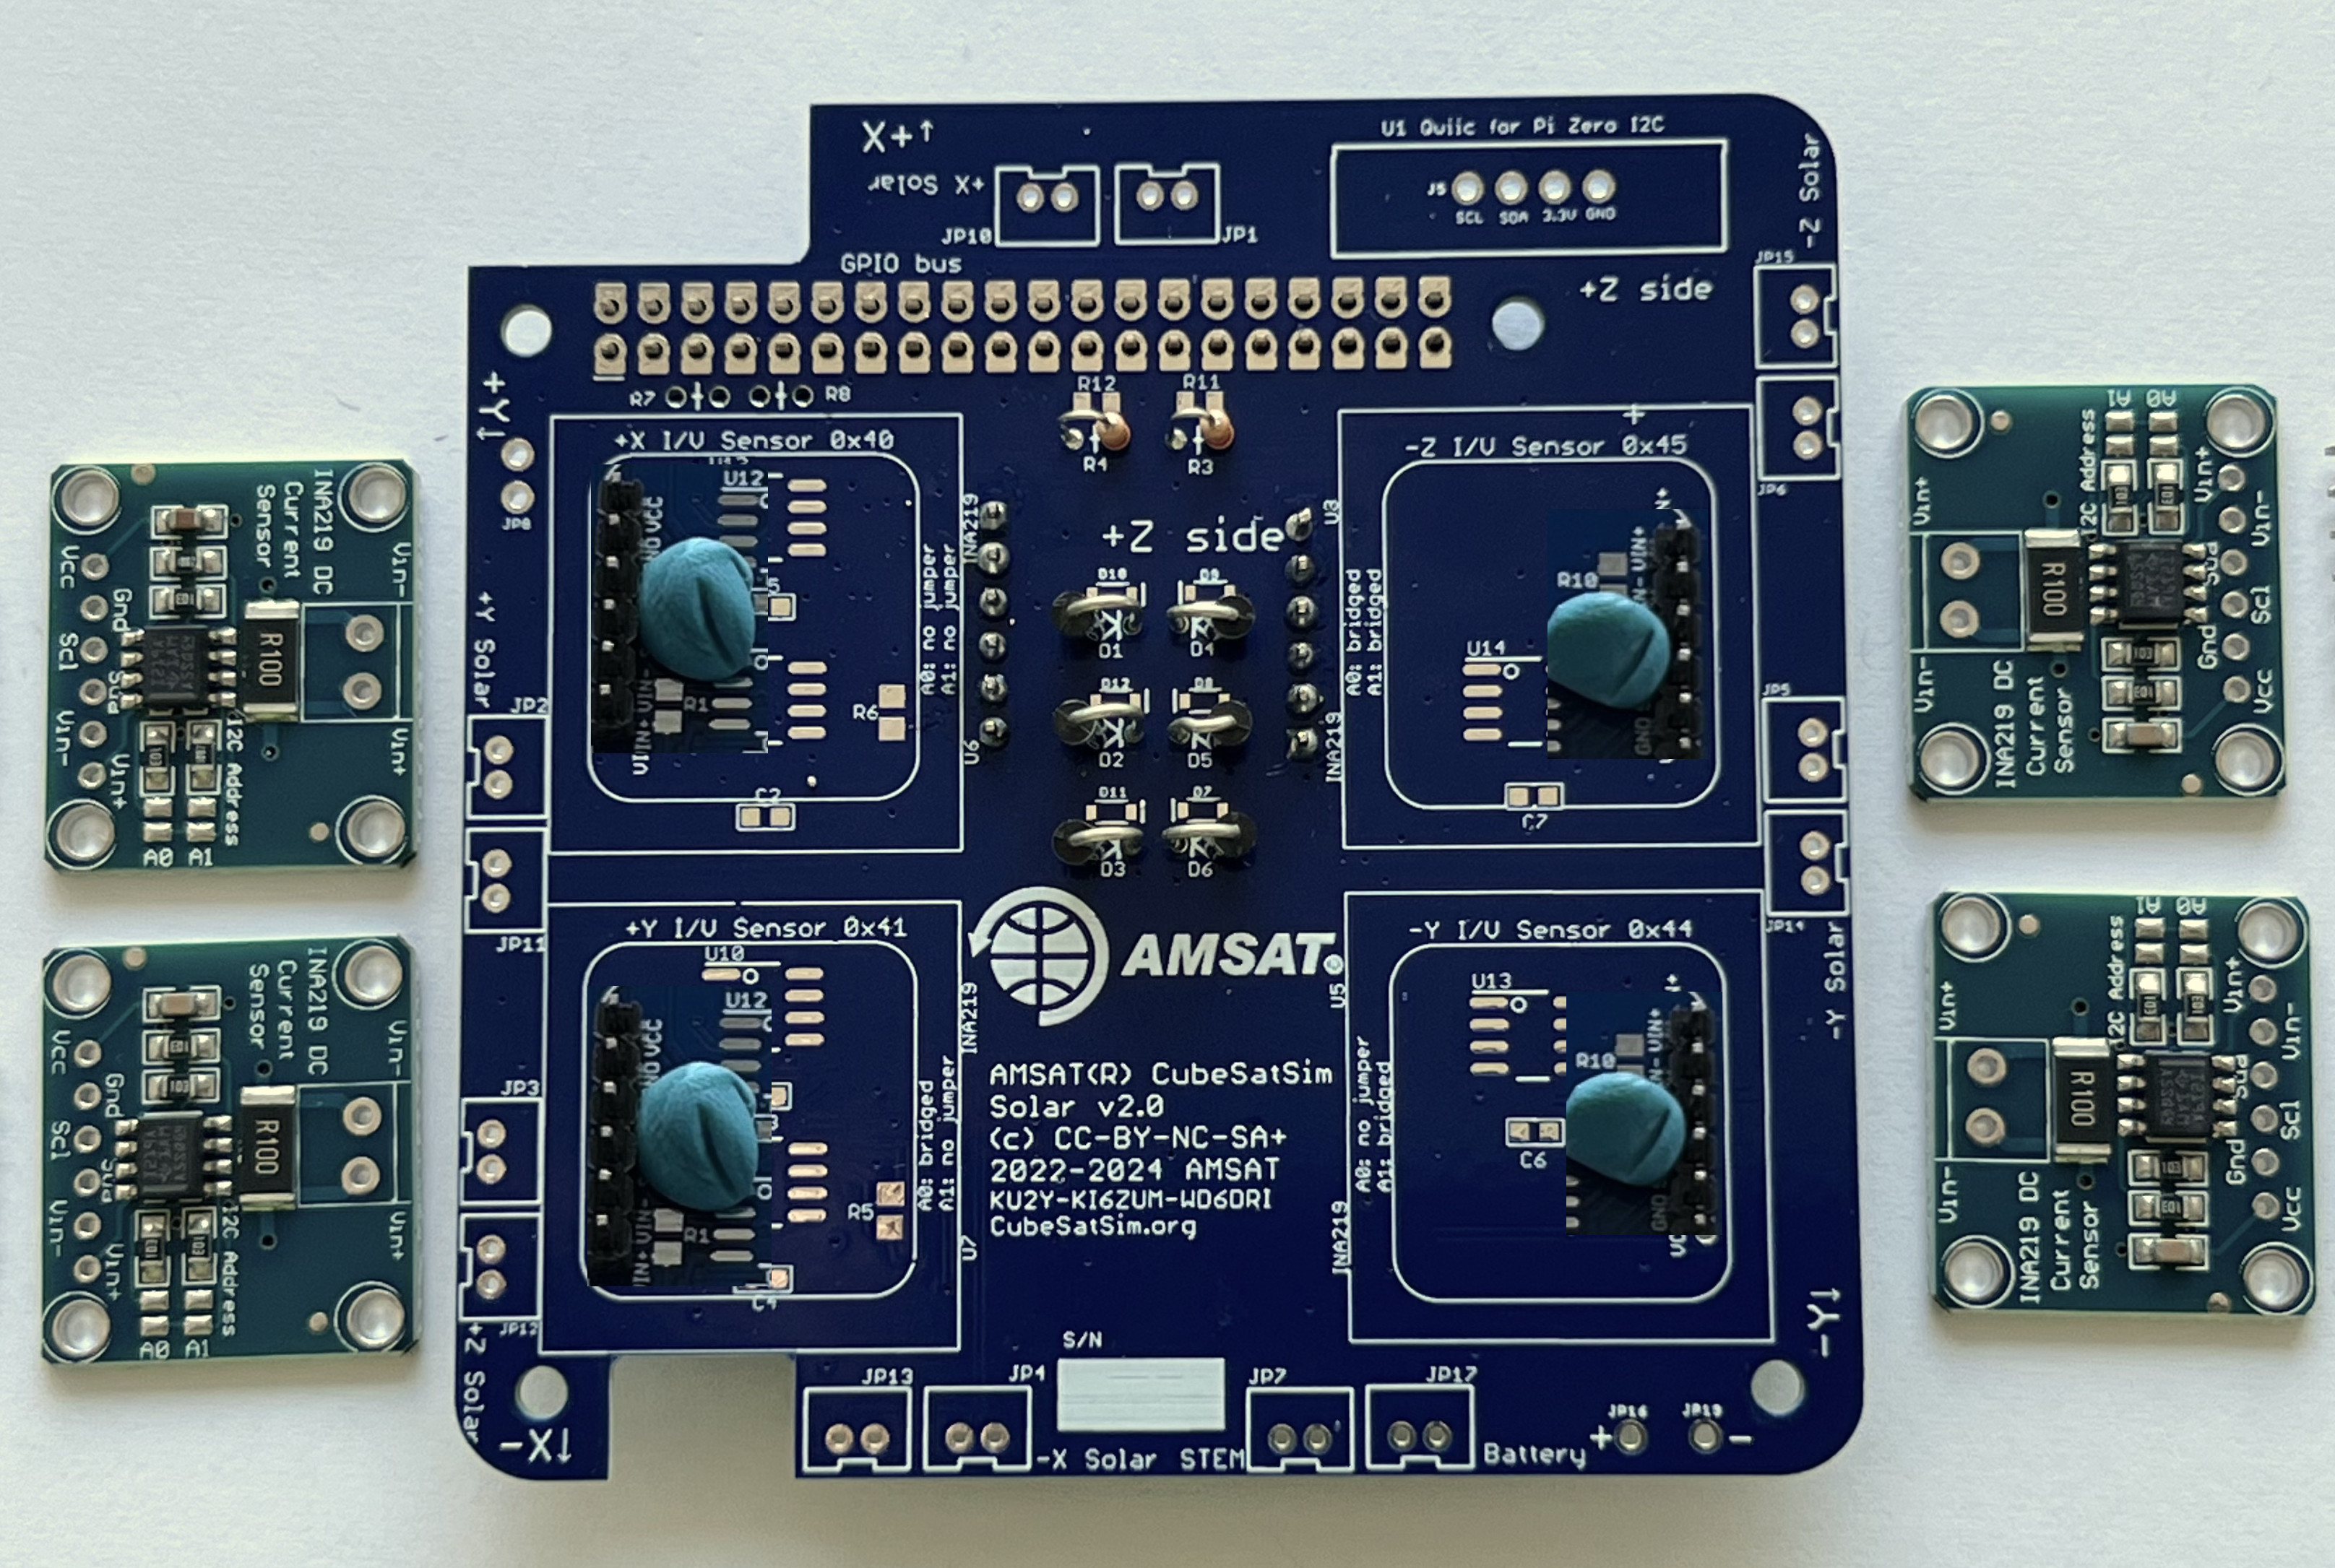

On the PCB top, place the INA219 boards on the pin header and hold straight and in place with blue putty:

Solder one pin on each, check for straightness, then solder the rest:

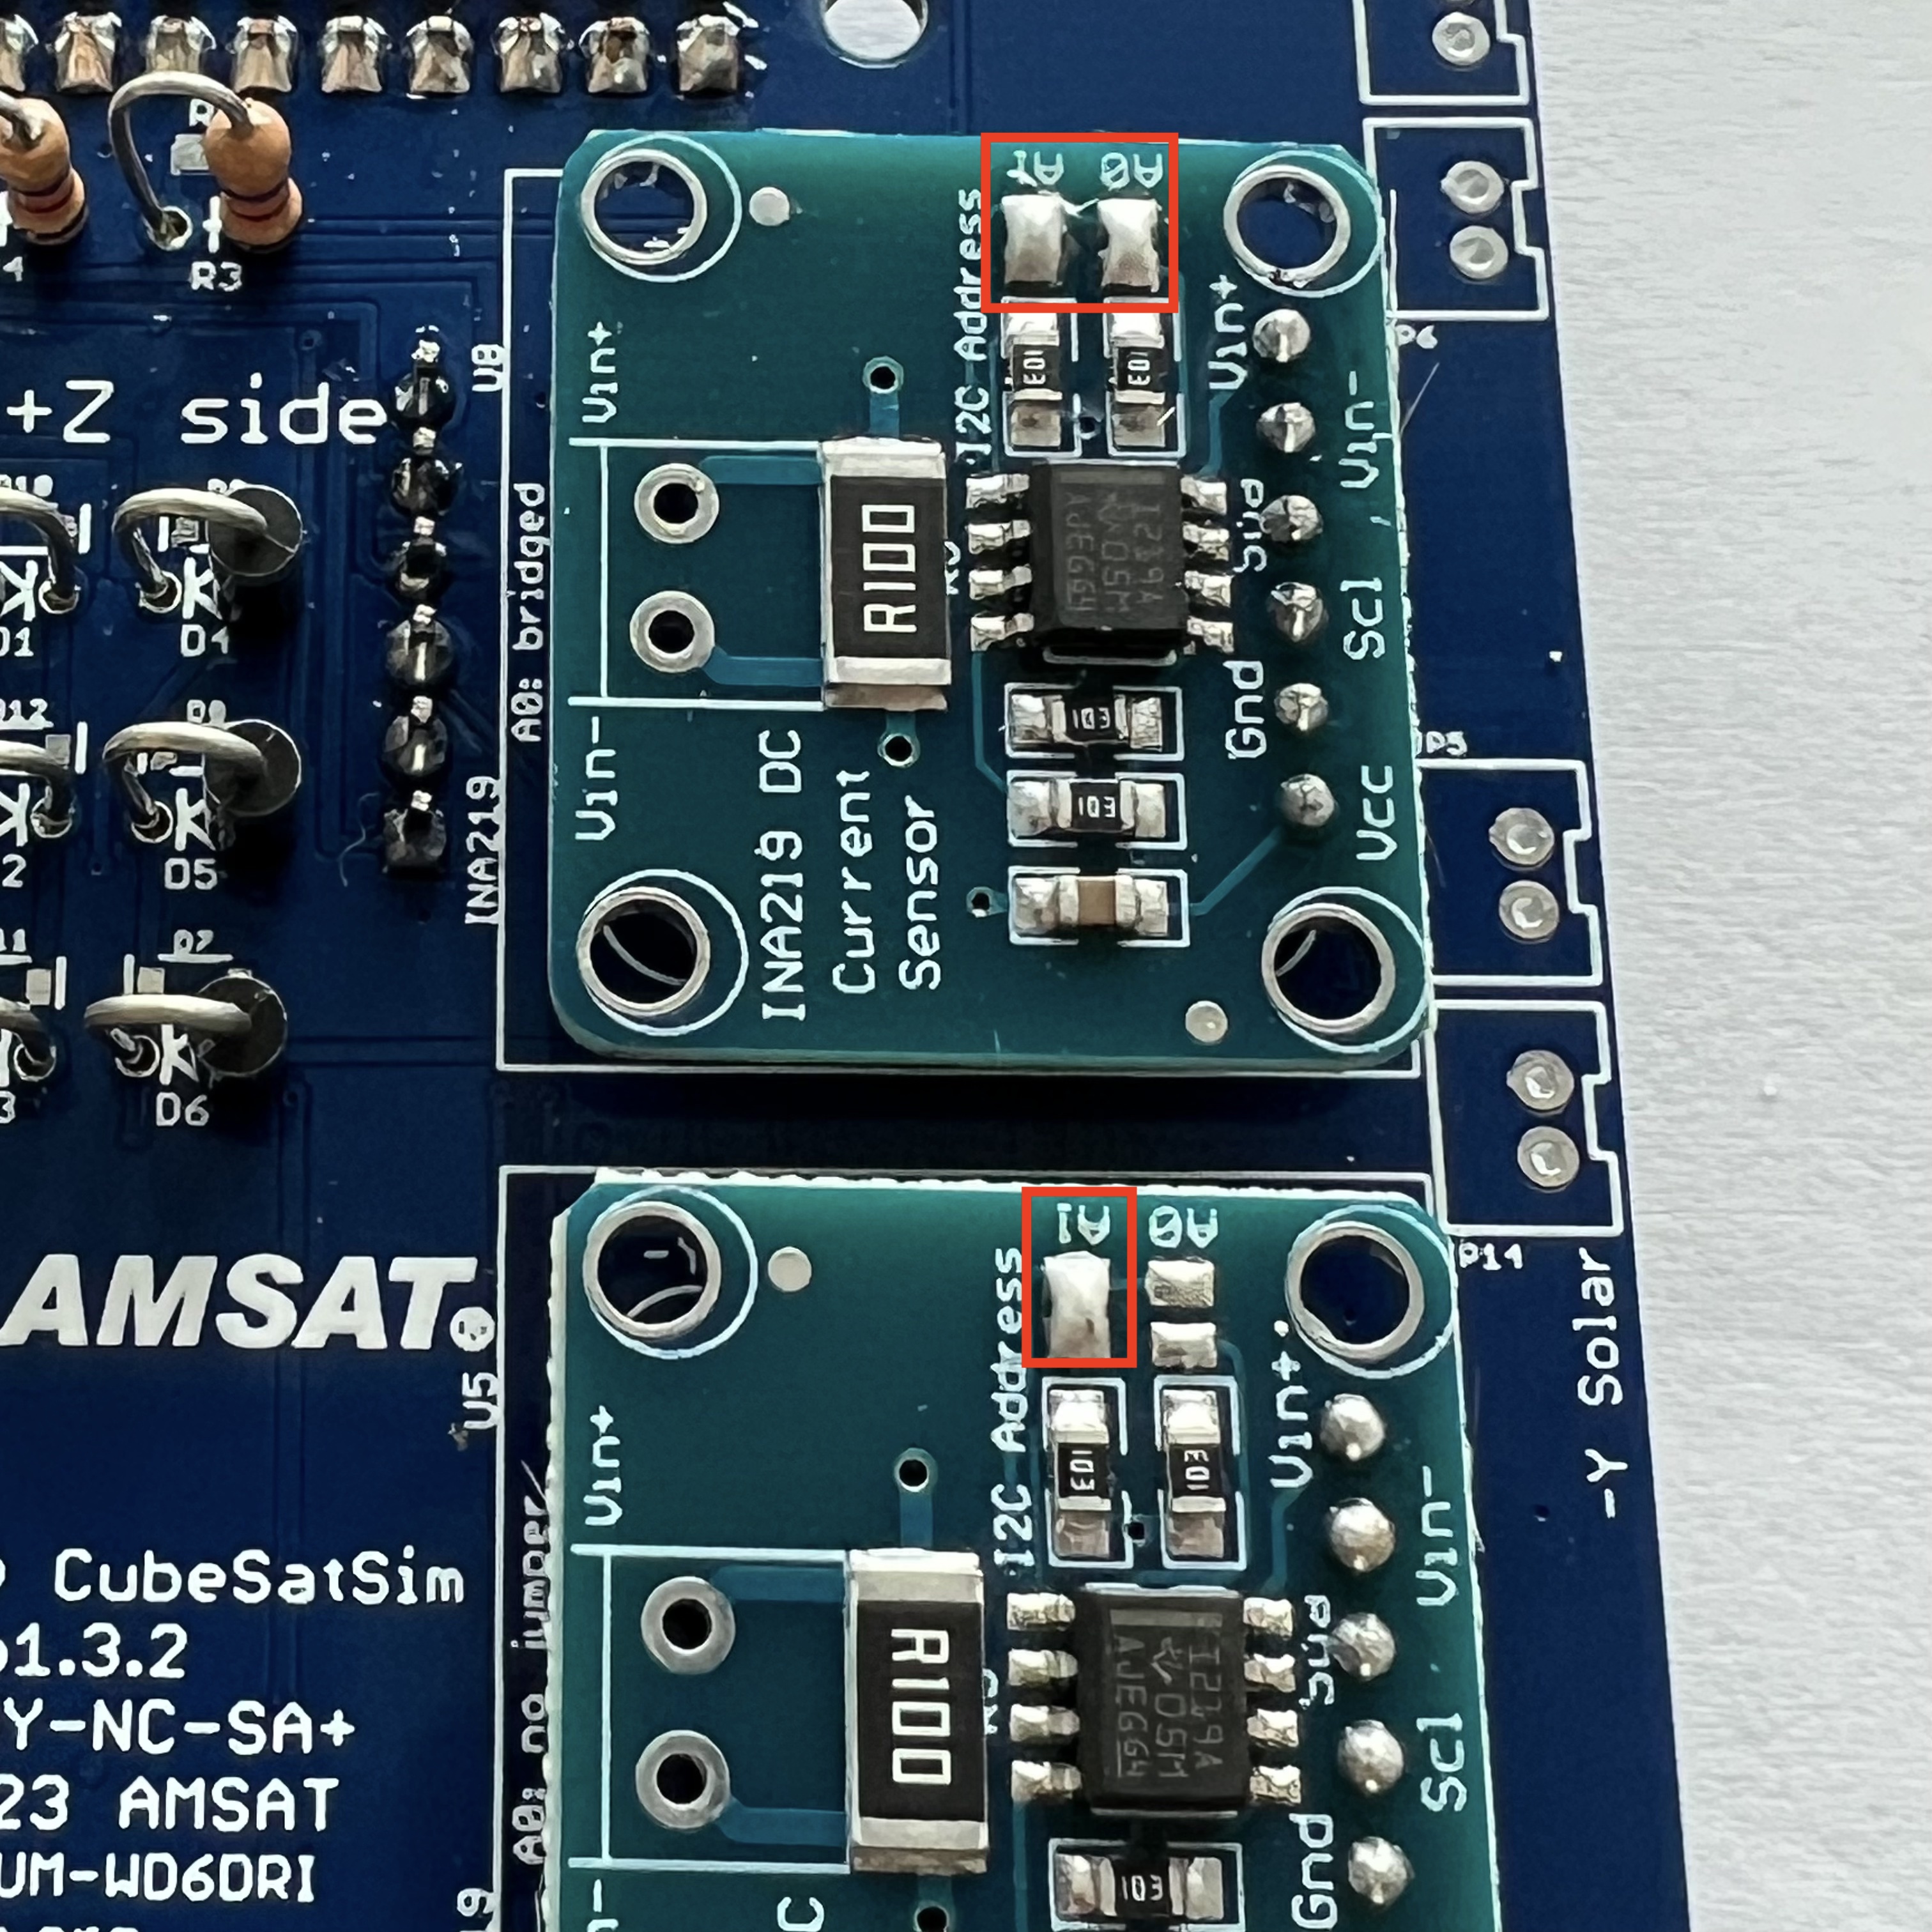
Next, the jumpers need to be set. On the right side, 3 jumpers need to be bridged:
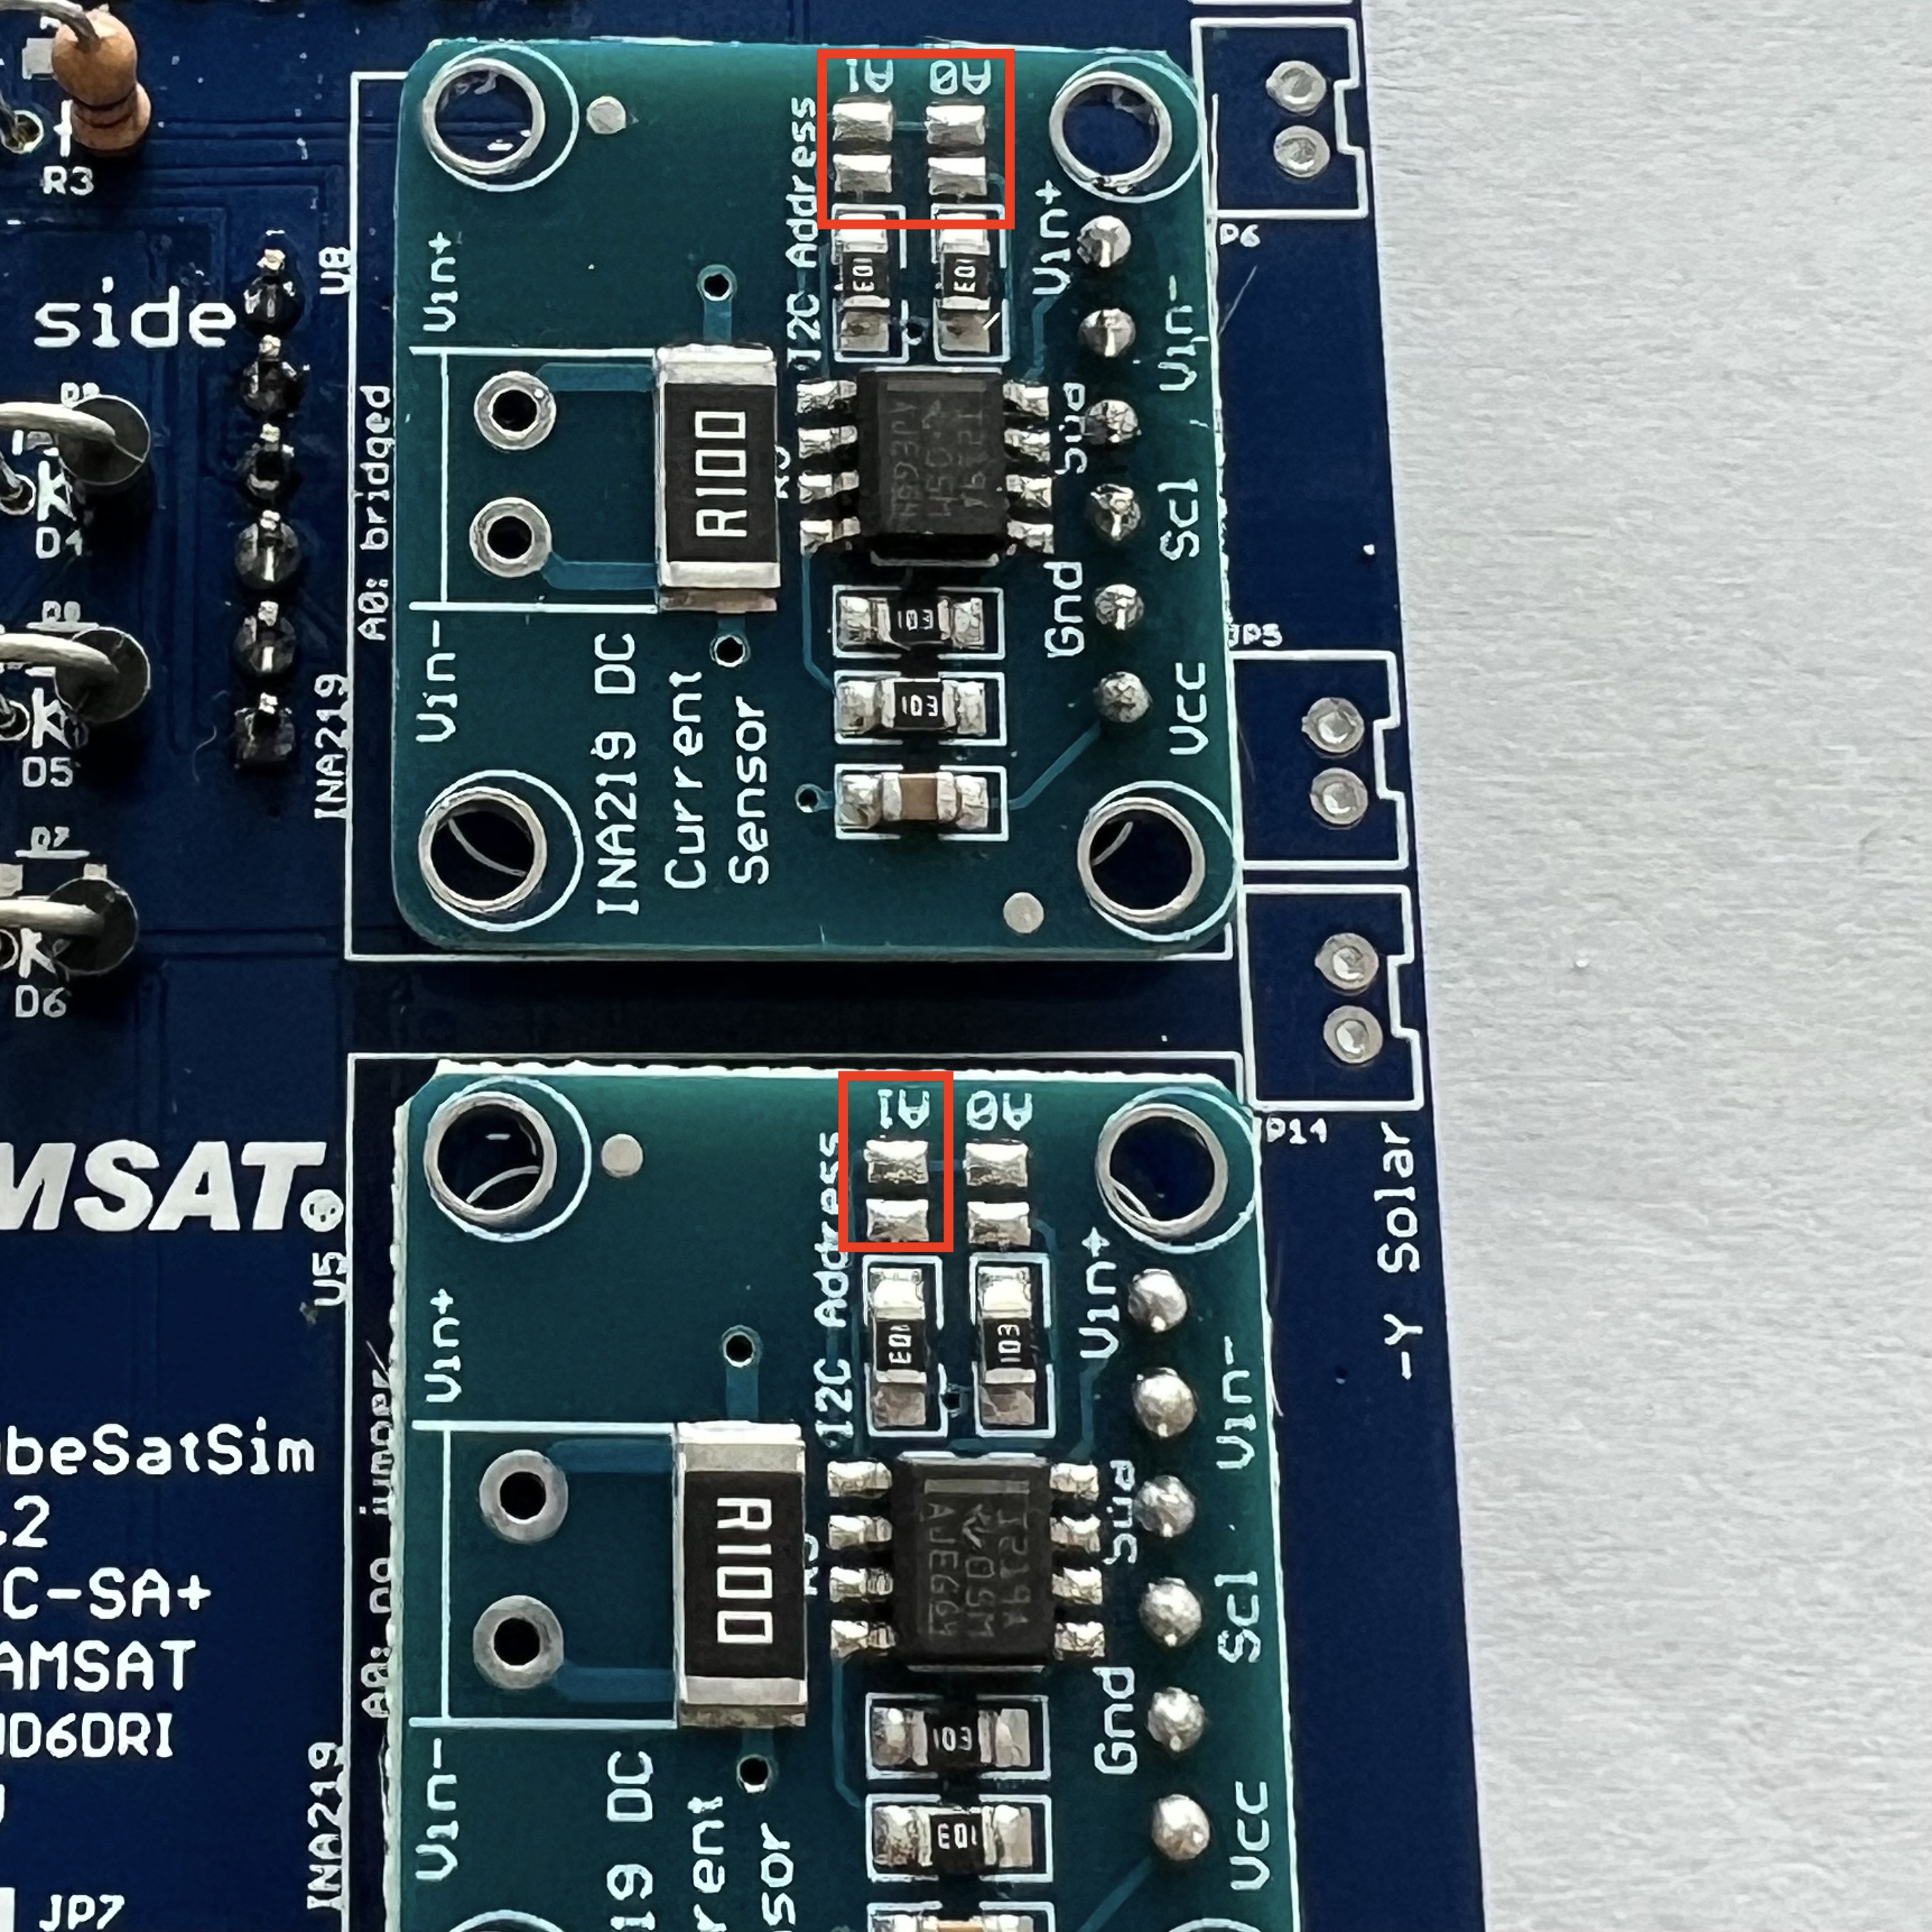
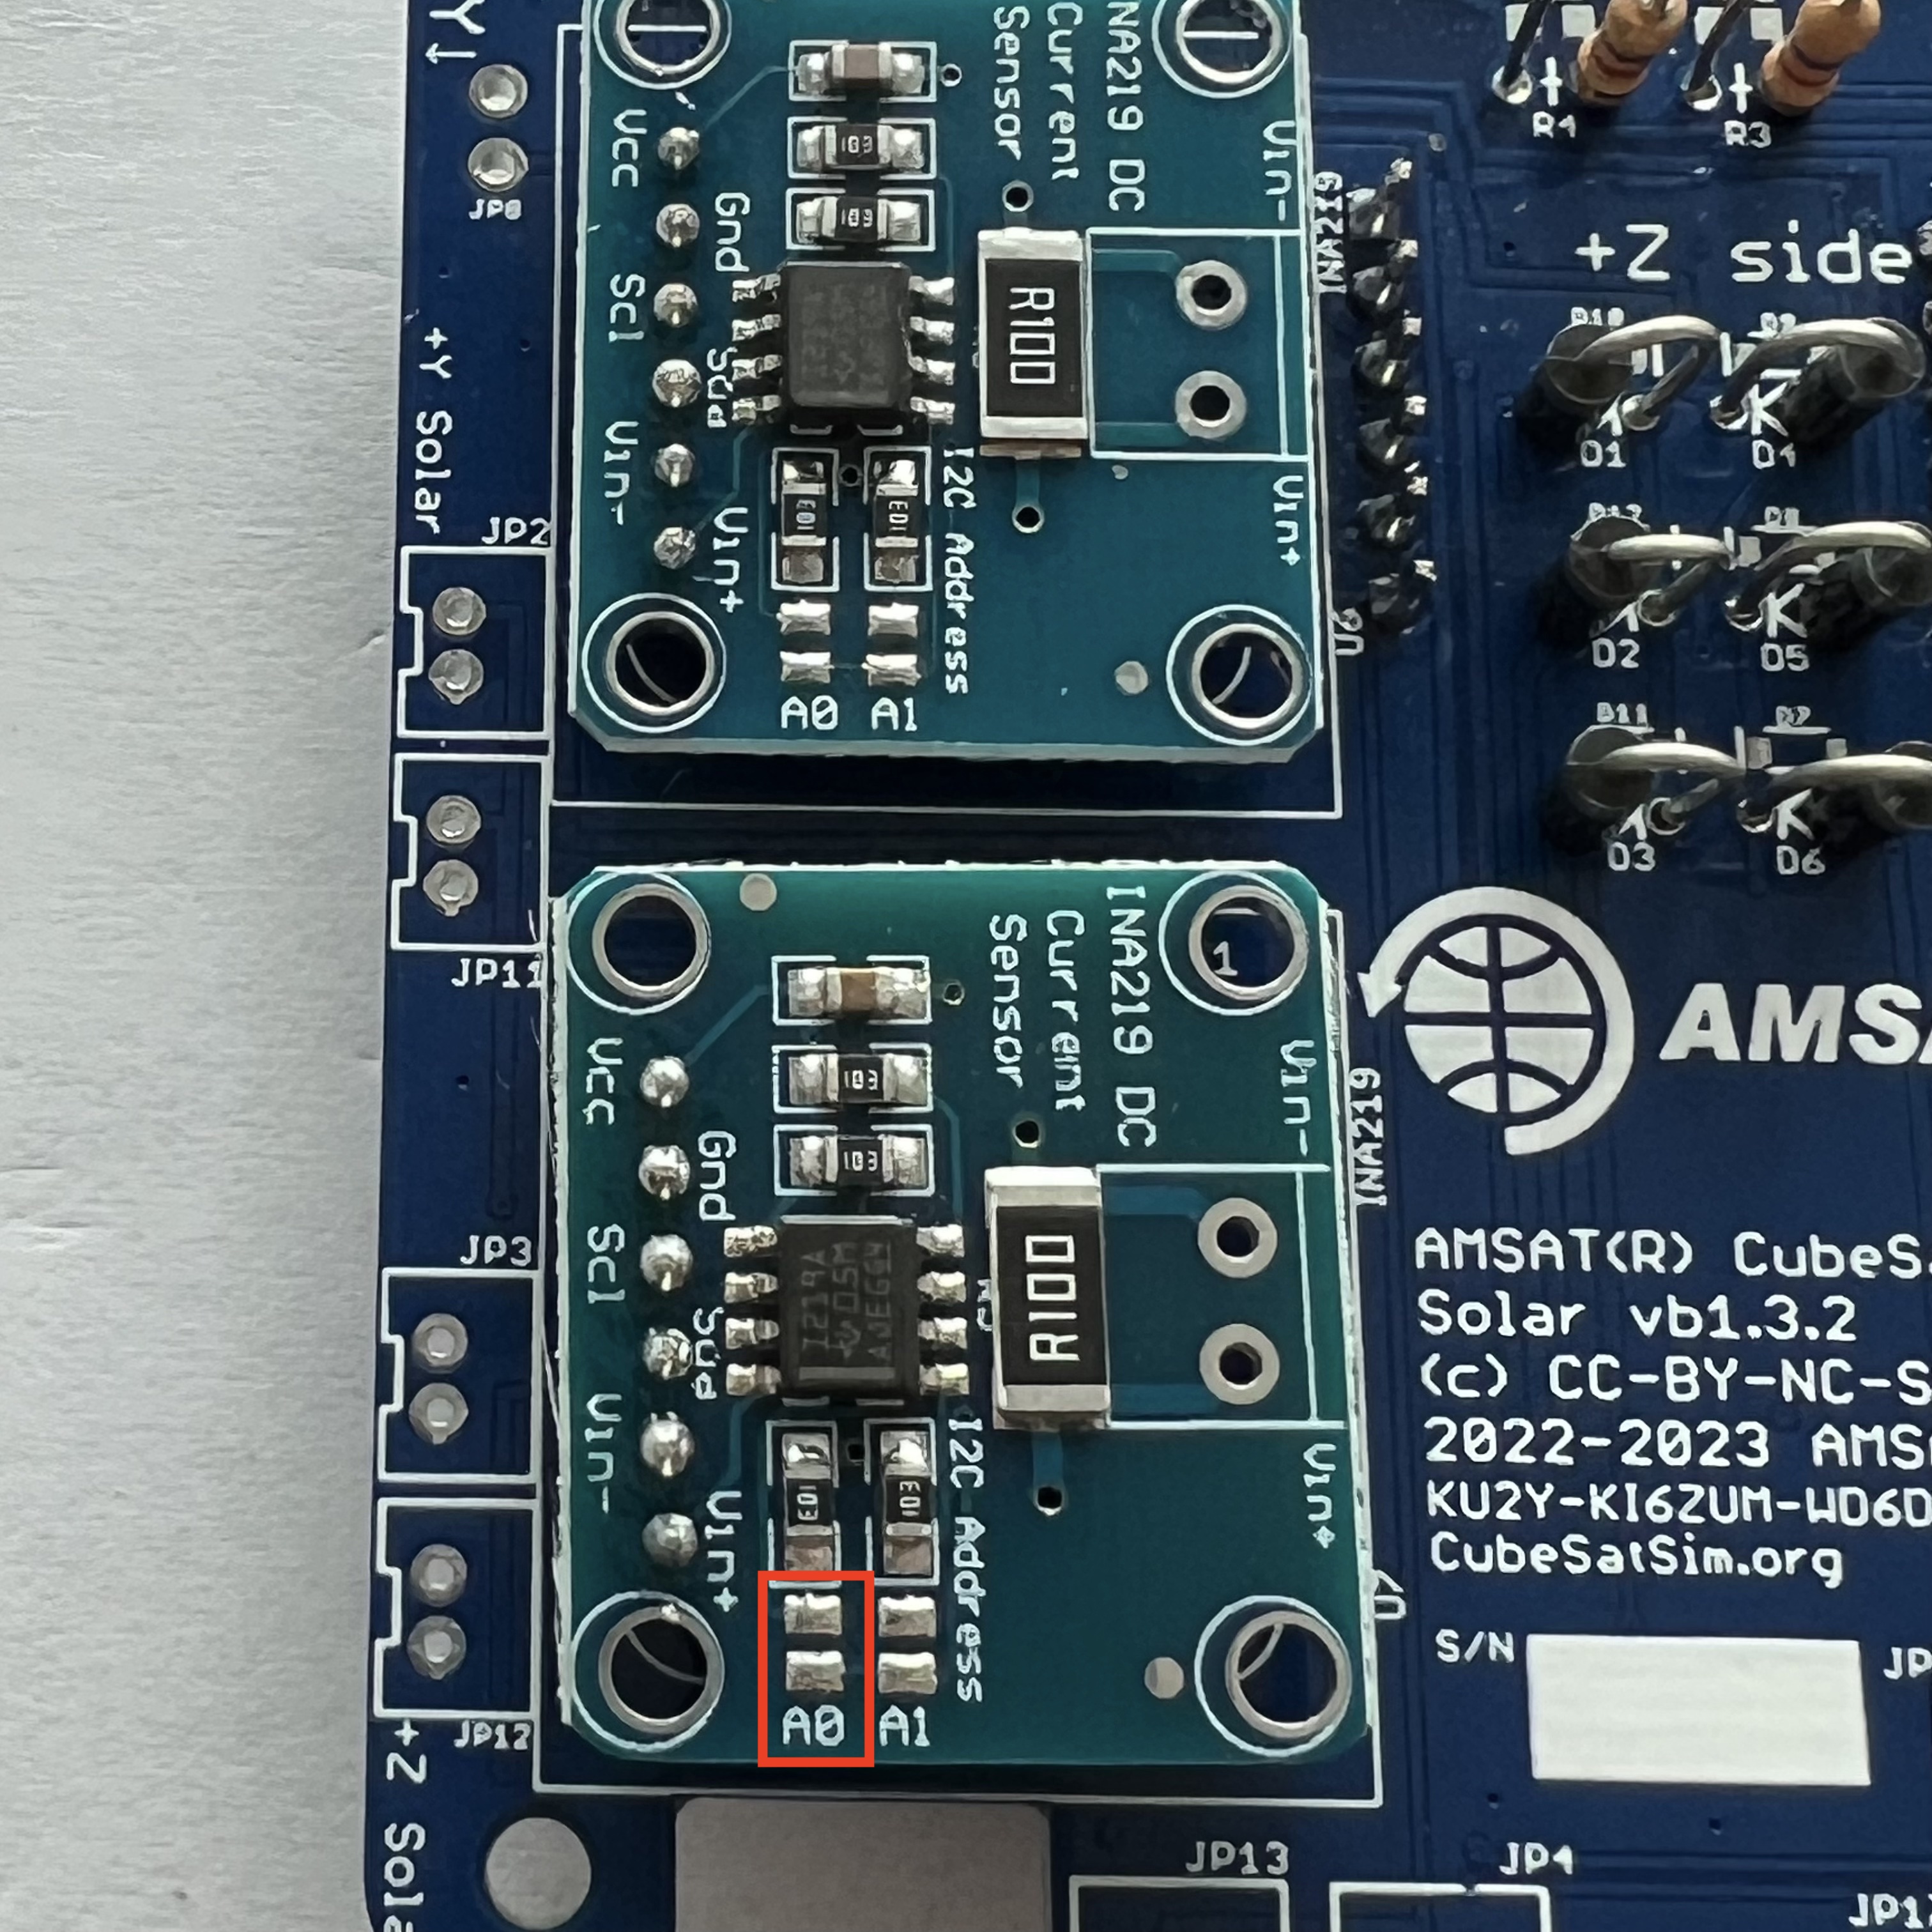
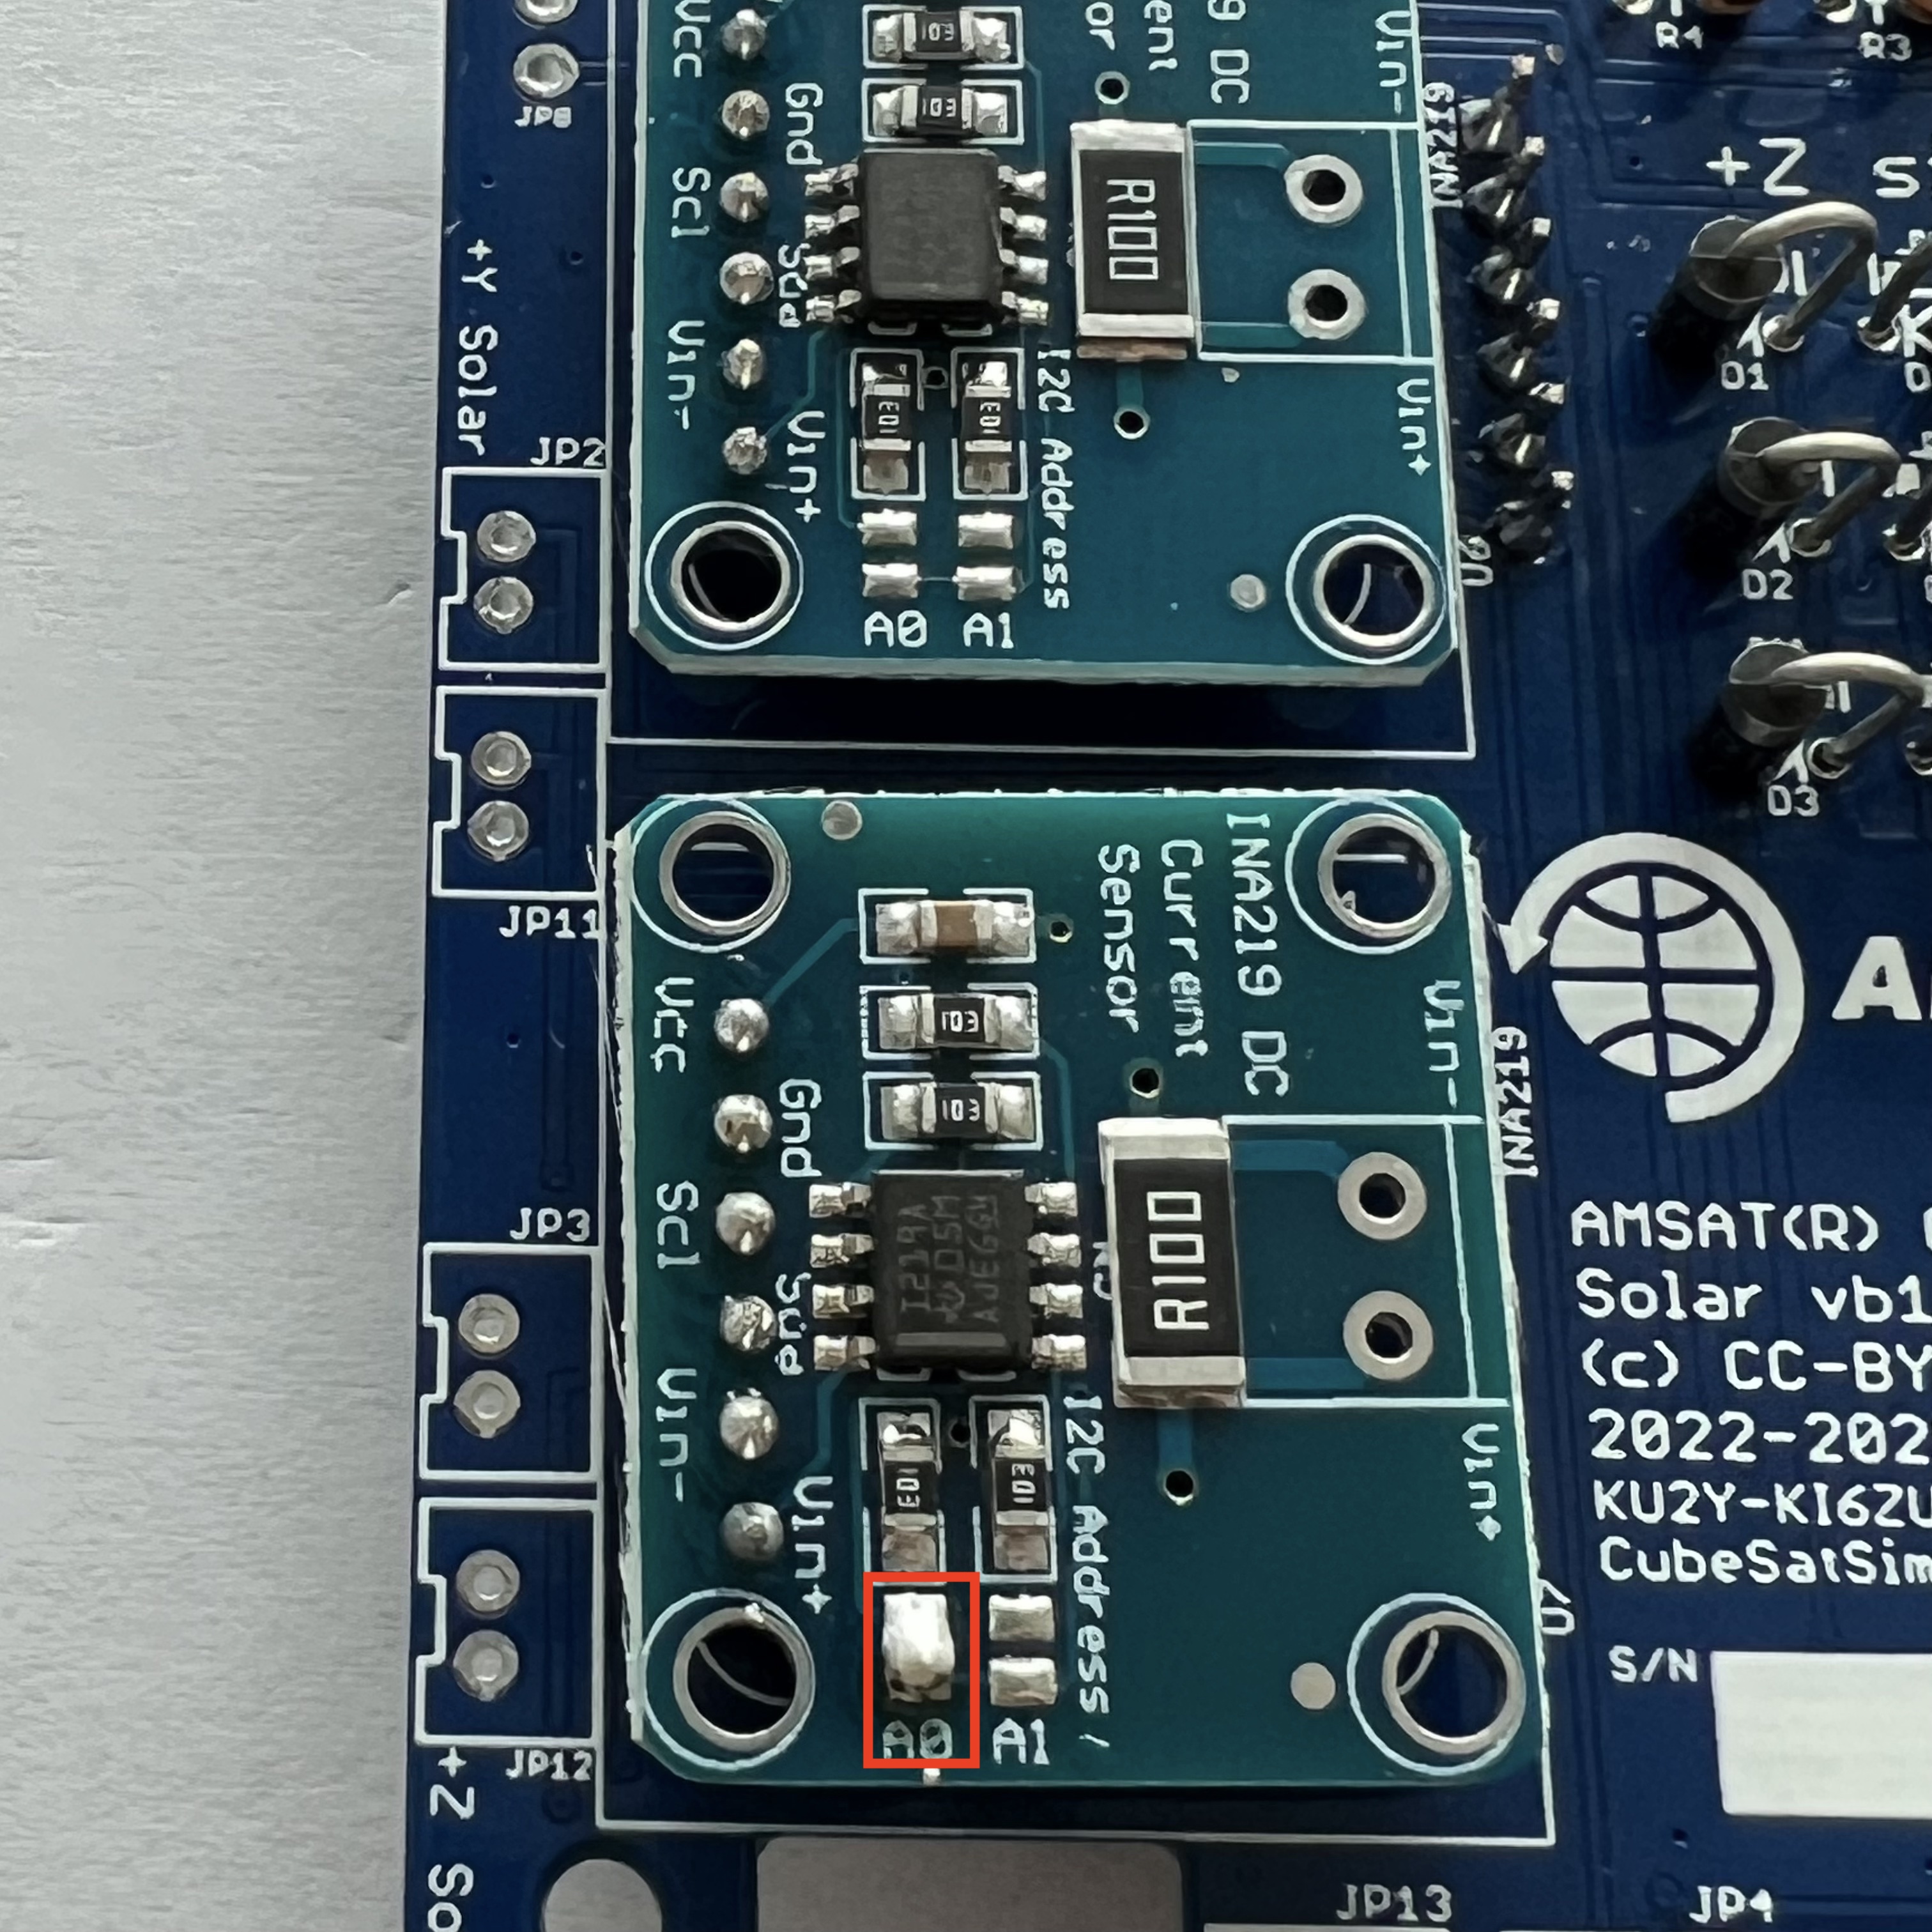
On the left side, one jumper needs to be bridged:
Next, install the JST connectors JP1, JP2, JP3, JP4, JP5, JP6, JP7, JP10, JP11, JP12, JP13, JP14, JP15, and JP17 on the top of the PCB. Some connectors click in place. If yours don't, you should add a drop of superglue gel or other adhesive to secure it to the PCB so it won't pop out when you are unplugging solar panels:

Note that these connectors have a polarity. Make sure the slot in the connector faces to the outside of the PCB:

Here's how the board looks with them all installed:

Next, install the Qwiic connector (red board) using the 1x4 pin male header J5.


Here's the complete board:
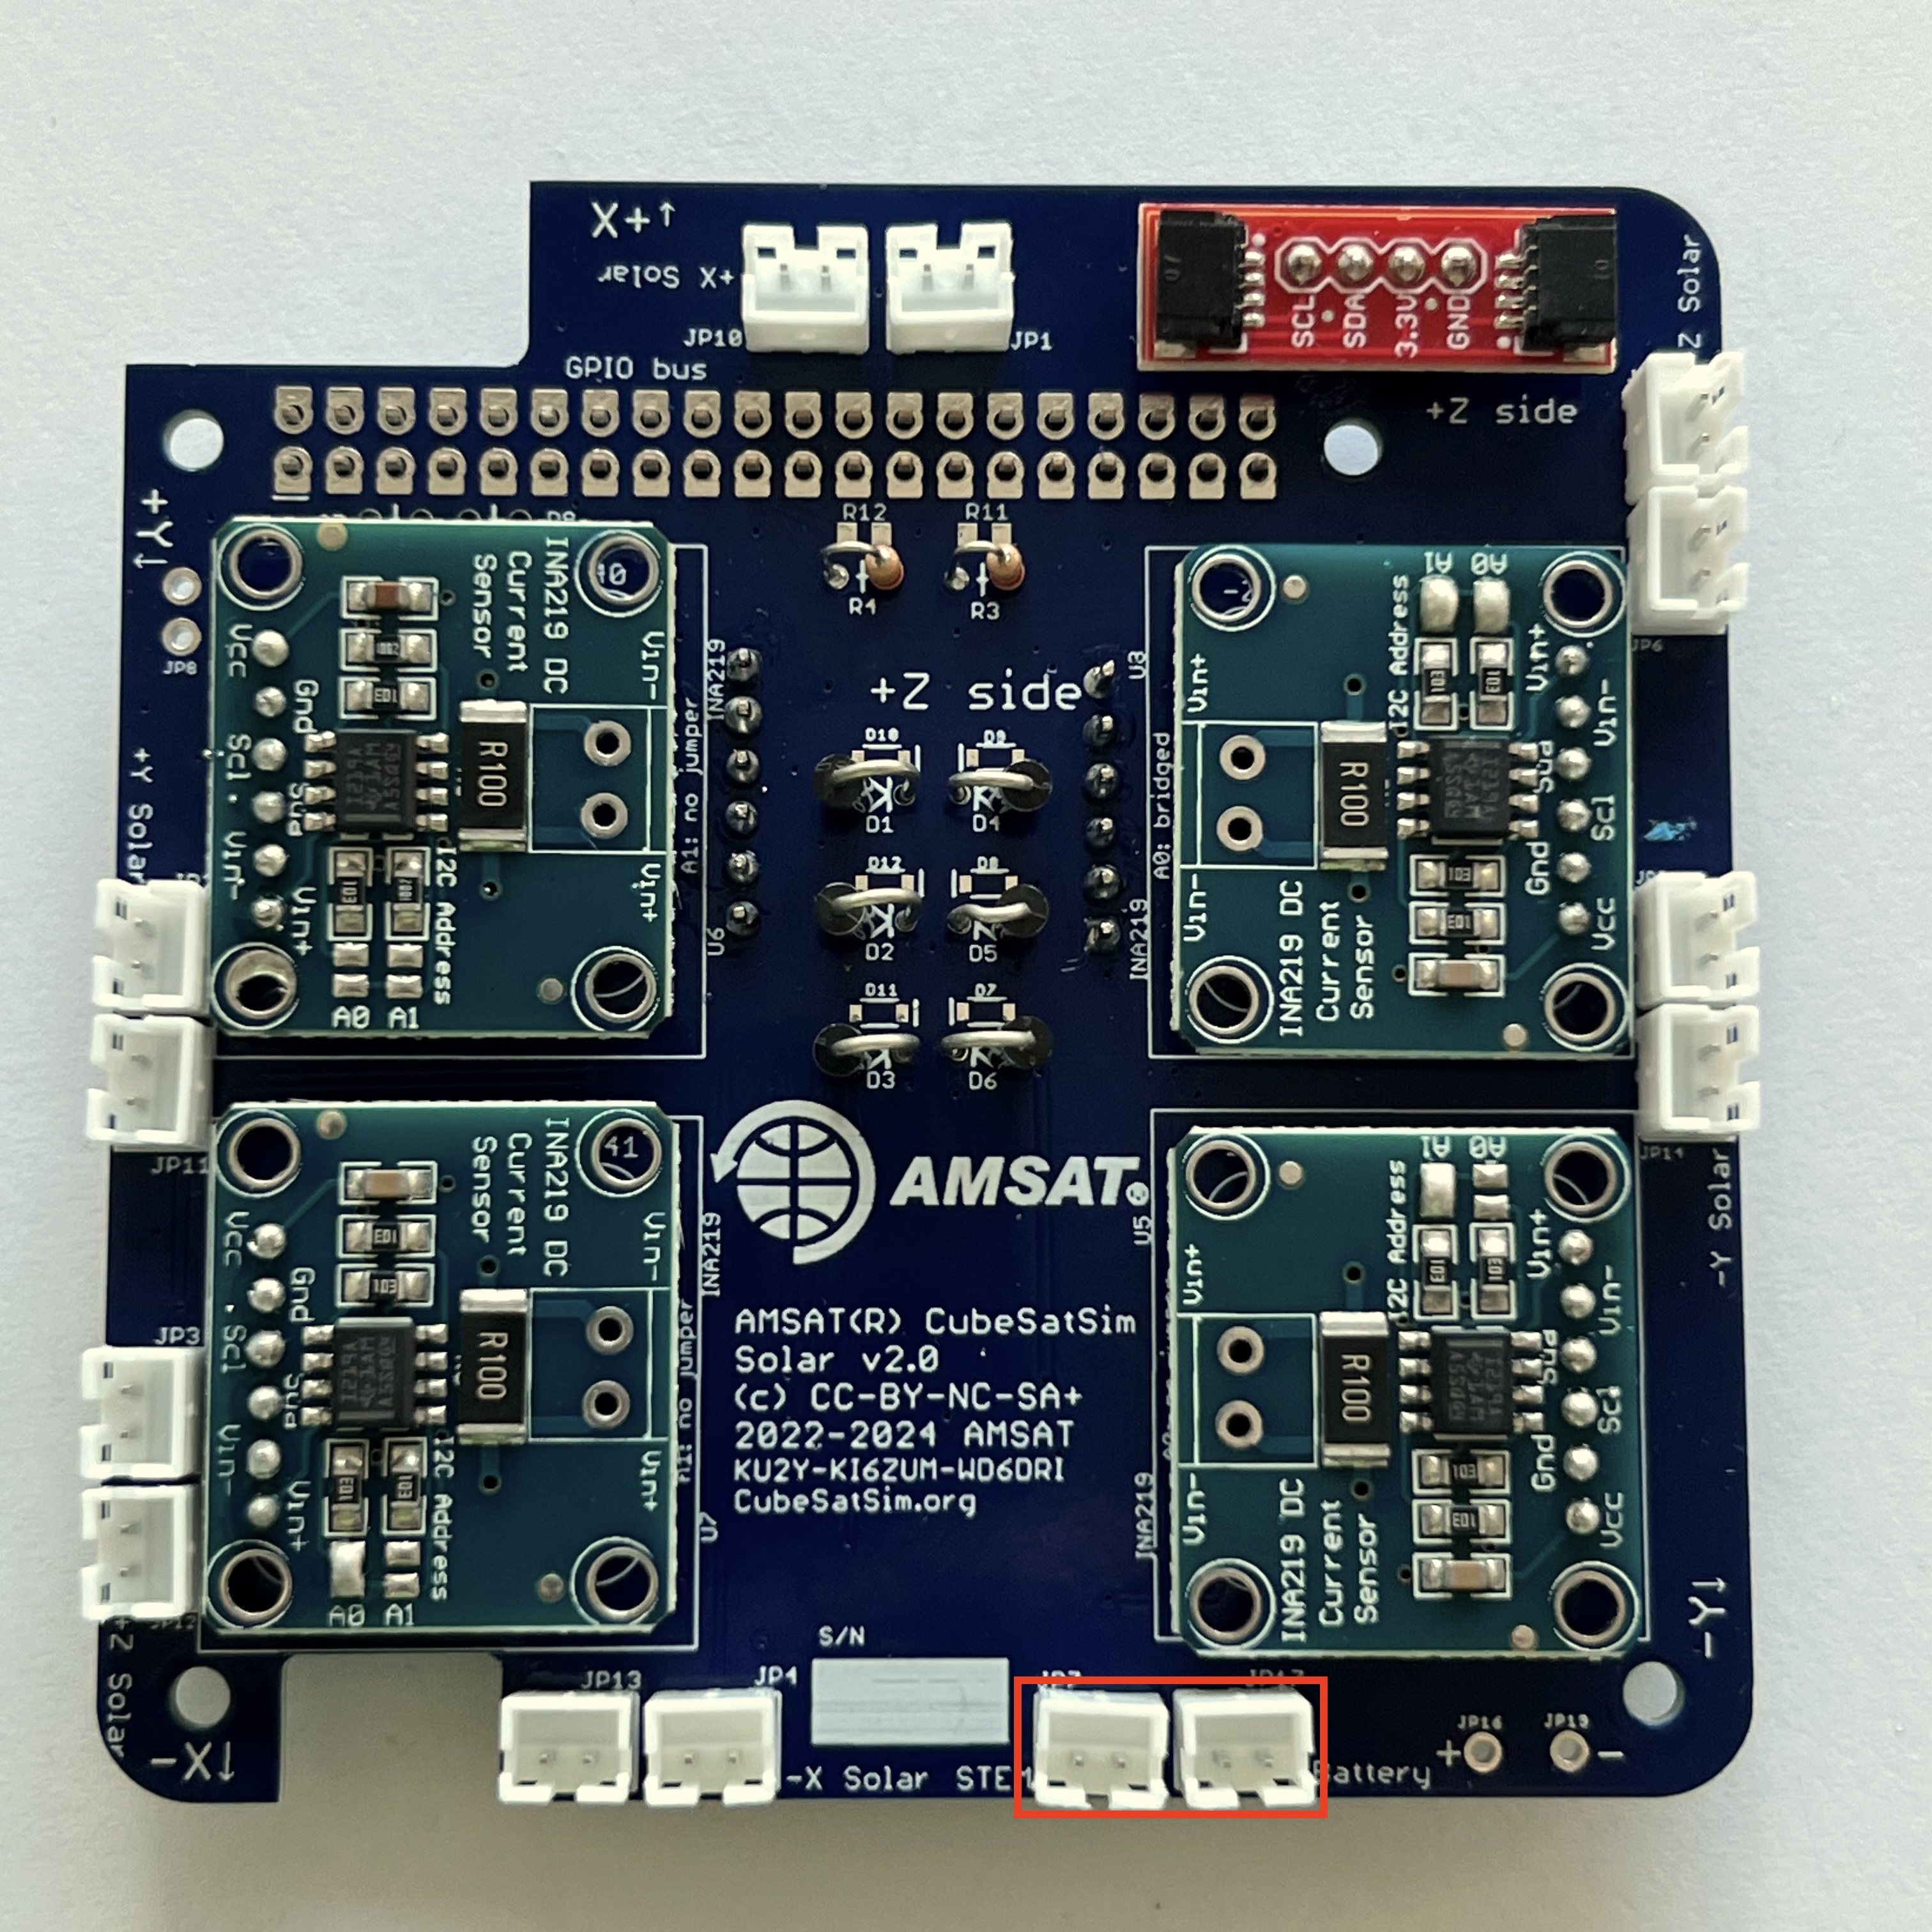
The two JST in the red box are for the JST jumpers to the Battery and Main boards that you will connect in the Board Stack step. Both connectors are the same - it doesn't matter which is used. Plug the JST cable into one of the connectors. You will plug in the other end into the STEM Payload board when you build the board stack.

If you have an old v1.3.2 STEM Payload PCB without the 2.5mm jack on it, you can add a 3.5mm plug to this PCB. You will make a 3.5mm plug out of a JST wire with these parts. See Command and Control information for the details.
The next step is Step 7. Solar Panels and Camera