Widget Store - akumina/AkuminaTraining GitHub Wiki
Overview
With the arrival of AppManager 4.0.0.0 features to allow developers to share widgets across different Site Collections are now available. The Widget Store is a portal on the AppManager that allows Akumina and Partners to make available new widgets for use on sites using the Akumina Framework. The Widget Import-Export Feature allows developers to export and import widgets within AppManager. When exporting a widget, a Widget Package .zip file is created. This file can be imported to the Widget Store on any AppManager with version 4.0.0.0 or higher and contains the following information about a widget.
- Widget Definition Properties (defined as json)
- Widget Instances built with the Widget Definition (defined as json)
- Widget Definition javascript
- All Views associated with the Widget
- CSS associated with the Widget
Installing a Widget from the Widget Store
This is a simple process.
- In the Management Apps tab of AppManager, click on the Widget Manager. In the Manage Widgets window, click Widget Store.
- Find the Widget you want to add to your site. Click Install.

- Navigate back to the Manage Widgets window. Your Widget will be installed there.
Exporting a Widget
For the sake of example, we will export the custom HelloWorldWidget defined in this article. The same process also works with any widget defined within the Widget Manager
How to Export
- Copy the (Widget Definition)[https://github.com/akumina/AkuminaTraining/wiki/Building-A-Custom-Widget:-Hello-World-Widget#widget-definition] from your digitalworkplace.custom.js into a new file within a text editor. Save this file as HelloWorldWidget.js.
- Upload HelloWorldWidget.jsto the /Style Library/DigitalWorkPlace/JS/widgets/ directory.
- Create a new file within a text editor. Save this file as HelloWorldWidget.css.
- Upload HelloWorldWidget.css to the /Style Library/DigitalWorkPlace/CSS/ directory.
- In the Management Apps tab of AppManager, click on the Widget Manager. In the Manage Widgets window, find HelloWorld and click the Edit button. Ensure the WidgetJS and WidgetCSS fields have the values defined in the Properties specific for Export section. Click Export Widget.
- In the following Export Widget Pop Up, click Download. A zip file will be downloaded.
Properties specific for Export
Within the Edit Widget view the WidgetJS and WidgetCSS classes will be found at the bottom of the view. These currently require JSON objects detailing the Name and WidgetFileUrl of associated javscript and css files.

WidgetJS
[{ "Name": "HelloWorldJS", "WidgetFileUrl": "/Style%20Library/DigitalWorkPlace/JS/widgets/HelloWorldWidget.js"}]
WidgetCSS
[{ "Name": "HelloWorldCSS", "WidgetFileUrl": "/Style%20Library/DigitalWorkPlace/CSS/HelloWorldWidget.css"}]
Exporting Specific Widget Instances
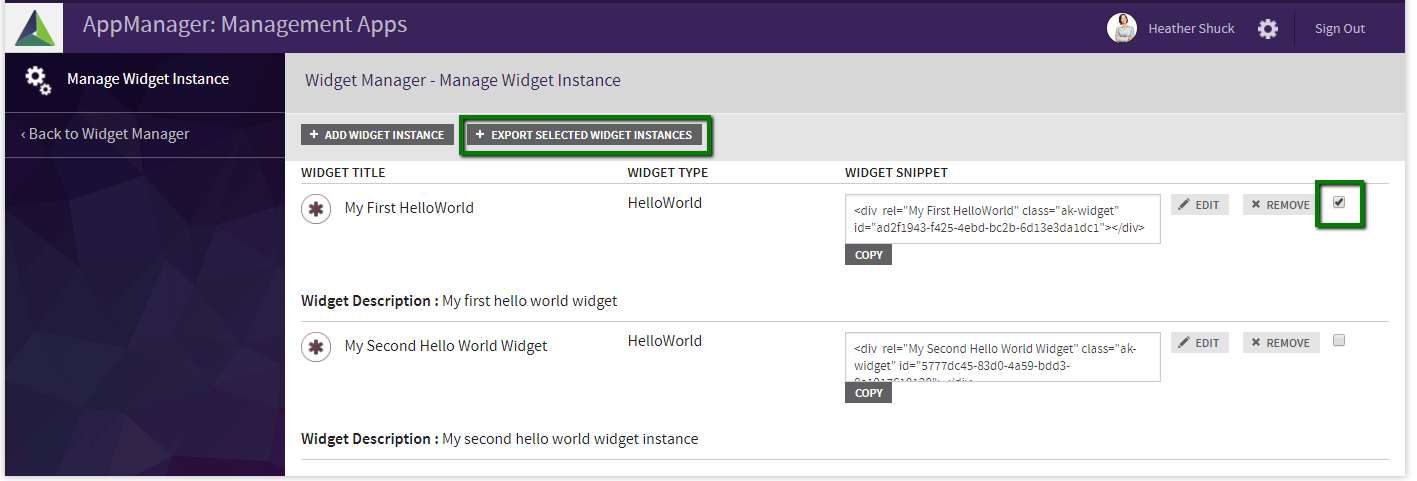
When a Widget is exported all of its instances are are encoded in the Widget Instances JSON attached to the package. However, the Widget Export feature also supports exporting a widget with a subset of the Widget Instances. To do so, follow the steps below.
- Go through steps 1-5 of the How to Export section.
- In the Manage Widgets window, find HelloWorld and click its View Instances button. Click + Export Selected Widget Instances. A zip file will be downloaded.

Importing a Widget
In this example we will import the Widget exported in the previous section.
How to Import
- In the Management Apps tab of AppManager, click on the View Manager. Click + Import Widget.
- Click Choose File. Choose the HelloWorld.zip file created earlier. Click Import Zip.
- Navigate back to the Manage Widgets view. Your HelloWorld widget will be installed as a widget. If you click on its View Instances button you will find the Widget Instances imported as well.