People Sync: Adding Attributes to the People Directory View - akumina/AkuminaTraining GitHub Wiki
Akumina Foundation 3.3.0.0 and later
The Akumina People Directory Widget is shipped to display the following attributes
- givenname
- surname
- jobtitle
- department
- officelocation
- usageLocation
- businessphones
- mobilephone
- facsimiletelephonenumber
However, it can easily tailored to display additional user attributes. In we will following document we will display the aboutme within the People Directory Widget View.

First, we will need to ensure the aboutme attribute must exist within the user tags inside of the aadusers.xml file.

We will need to edit the view to include the aboutme property that we want to be displayed. Fortunately, the property is easily incorporated into the view by simply referring to the property name as it appears in the aadusers.xml surrounded by handlebars, as shown below.
{{aboutme}}In this example we will need to create a new view based off of the existing People Directory view and paste the following lines within.
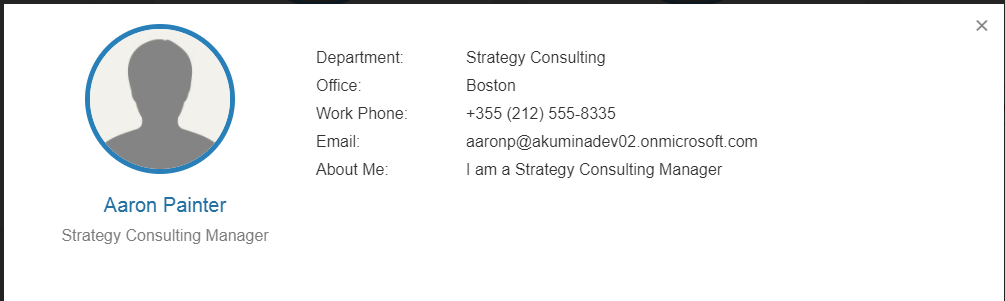
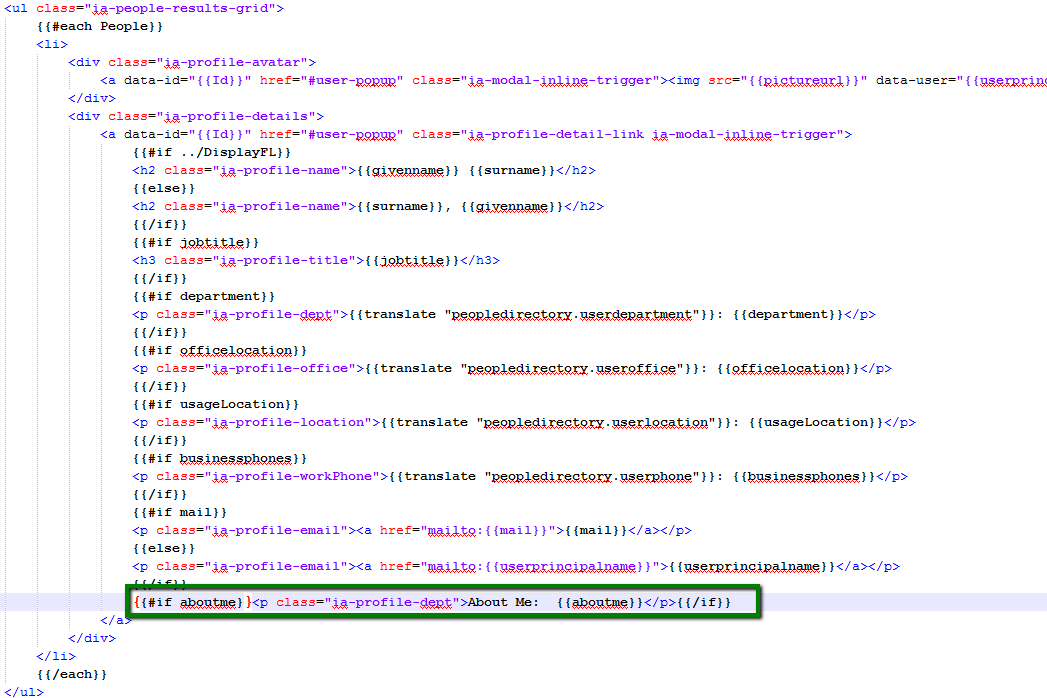
{{#if aboutme}}<p class="ia-profile-dept">About Me: {{aboutme}}</p>{{/if}}The above line will be inserted twice, within the two ia-people-results-grid lists in the view
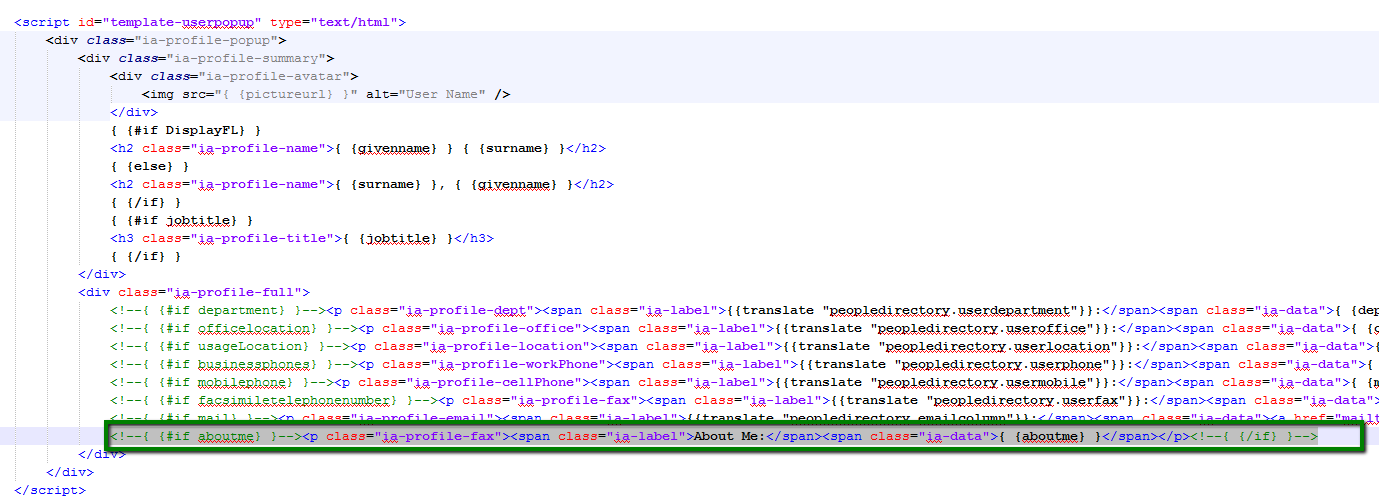
<!--{ {#if aboutme} }--><p class="ia-profile-fax"><span class="ia-label">About Me:</span><span class="ia-data">{ {aboutme} }</span></p><!--{ {/if} }-->The above line will be inserted within the template-userpopup script tag
Follow the steps below to Deploy the solution
- Navigate to your aadusers.xml file. Edit it with a text editor.
- If the aboutme property does not exist within any user tags, just manually add it via the text editor so the example will work for the user that has it.
- Download the /Style Library/DigitalWorkPlace/Content/Templates/PeopleDirectory/Default.html file.
- Copy the file as custom-default.html.
- In the Management Apps tab of Interchange, click on the View Manager. Click ""Add New". In the left pane navigate to **/DigitalWorkplace/Content/Templates/PeopleDirectory" for the folder path. Click Choose File, navigate to your custom template (custom-default.html). Click "Save".
- In the Management Apps tab of Interchange, click on the Widget Manager app. In the Manage Widgets window, find the PeopleDirectory and click its 'Edit' button. Add the view created in the previous section to the widget's views. Click "Save & Exit" button.
- In the Manage Widgets window, find PeopleDirectory and click its "View Instances" button. Then click on "Edit" for the only item there, which should be the default. In the "WidgetOptions" section, select the new view as the display and the selected view. Click "Save & Exit".