How to: Add the Google Analytics tag to an Akumina site - akumina/AkuminaTraining GitHub Wiki
Akumina 3.4.0.0 and later
This article explains how to properly add the Google Analytics tag to an Akumina site.
This code will be placed right after the
tag in the master page.
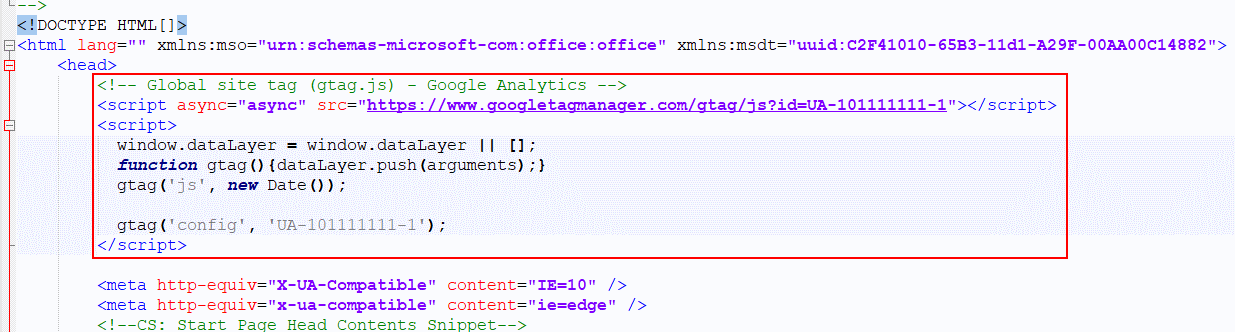
The google analytics code is below; replace 'UA-101111111-1 with your correct identifier.
	<!-- Global site tag (gtag.js) - Google Analytics -->
	<script async="async" src="https://www.googletagmanager.com/gtag/js?id=UA-101111111-1"></script>
	<script>
	  window.dataLayer = window.dataLayer || [];
	  function gtag(){dataLayer.push(arguments);}
	  gtag('js', new Date());

	  gtag('config', 'UA-101111111-1');
	</script>
Note that we change async to include a value, to prevent an error inside SharePoint
<script async src=
becomes:
<script async="async" src=
- Identify the current master page used by the site. You can go to [siteurl]/_layouts/15/ChangeSiteMasterPage.aspx and see what is listed for "Site Master Page".
- Locate the master page in the Master Page Gallery, and download the same. For an Akumina Foundation site, the master page is located at [siteurl]/_catalogs/masterpage/DigitalWorkPlace/digitalworkspace.html
- Paste the code (witg correct identifier) right after the tag in the master page.
- Re-upload the updated master page into the master page gallery.
- Publish the master page to ensure that all users can see it.