Digital Workplace Core Site Development: Building your First Widget - akumina/AkuminaTraining GitHub Wiki
Overview
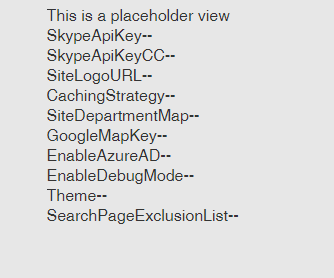
Adding a Widget to a site with only the Digital Workplace Core Site deployed follows a similar process as adding widgets on an Akumina Foundation Site. In the following walkthrough, we are going to deploy a simple Generic List Widget that will display values from the DigiConfigurationIDS_AK list.
Walkthrough
Creating Widget Instance
First, log into AppManager on your site with the Digital Workplace Core Site deployed. Click on the Management Apps tab. Click on the Widget Manager App.
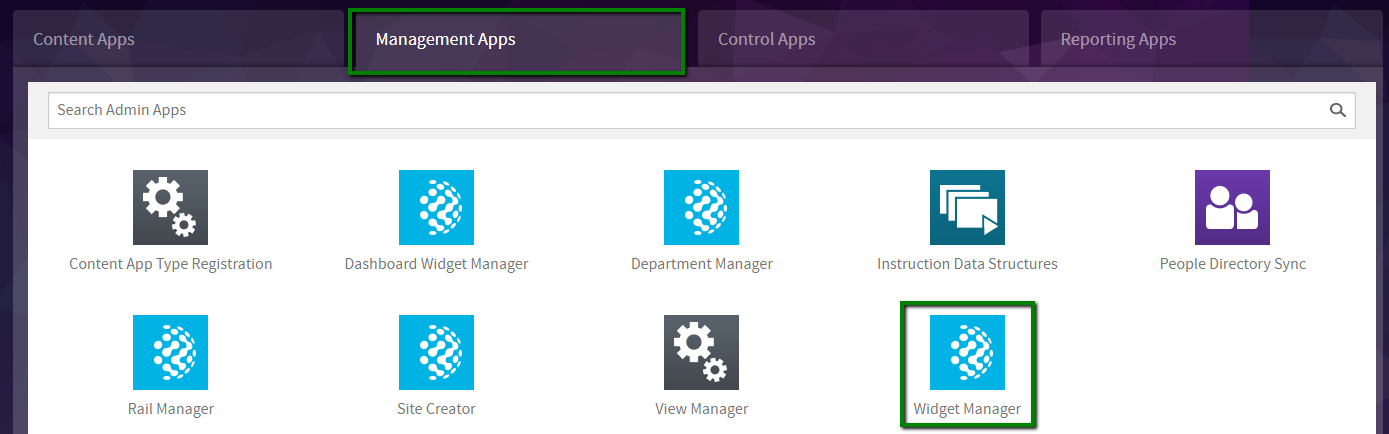
Find the GenericList Widget in the Widget Definition view. Click View Instances

Click + Add Widget Instance
Widget Instance Properties
Fill in the properties as shown below
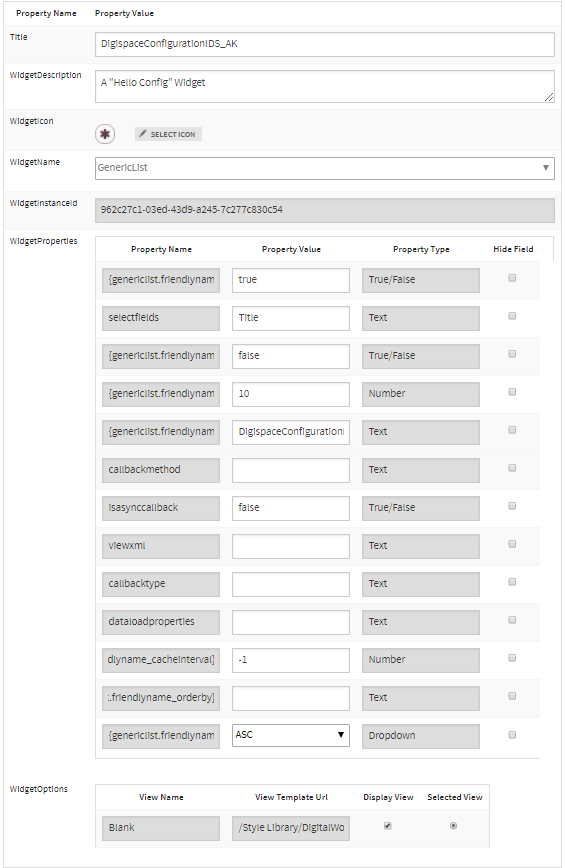
- Title
- DigispaceConfigurationIDS_AK
- WidgetDescription
- A "Hello Config" widget
- {genericlist.friendlyname_isroot}
- true
- selectfields
- Title
- {genericlist.friendlyname_enablepaging}
- false
- {genericlist.friendlyname_itemsperpage}
- 10
- {genericlist.friendlyname_listname}
- DigispaceConfigurationIDS_AK
- isasynccallback
- false
- {genericlist.friendlyname_cacheinterval}
- -1
- {genericlist.friendlyname_orderdirection}
- ASC
For the WidgetOptions, ensure Blank view is checked and selected. Click Save & Exit.
Refreshing Cache
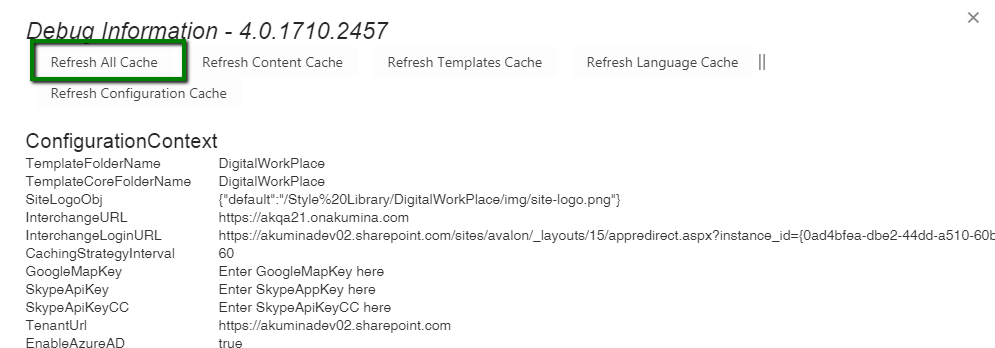
On the front end site, navigate to the page you want to add the widget to. Bring up the Debug Window (CTRL + UP ARROW). Click Refresh All Cache
Adding Widget to Page - Sandbox.aspx
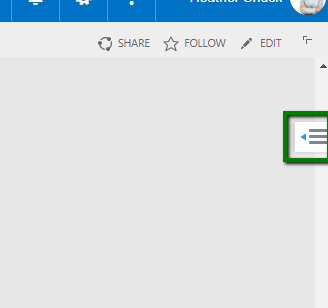
If you are adding you Widget to SitePages/Sandbox.aspx you will be able to add widgets via the Page Builder. While on SitePages/Sandbox.aspx, you can access that page builder by clicking on the tab appearing on the right side of your browser.
Once you open the page builder window, click Edit Page to begin adding widgets.
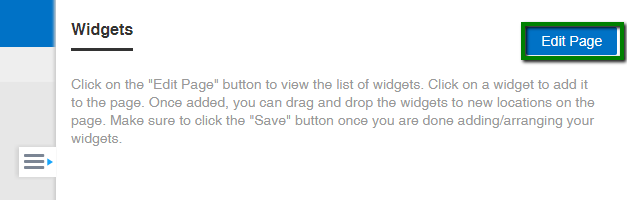
Once you are editing the page, you can add widgets to the page by click on them in the page builder window. Afterwards you can arrange them on the page or delete them. When in Edit Page mode, widgets will be surrounded by a green box. Click and drag the widget to relocate it on the page. Click on the x icon to remove that widget from the page. Once you are satisfied with your edits click Save to preserve your page edits.
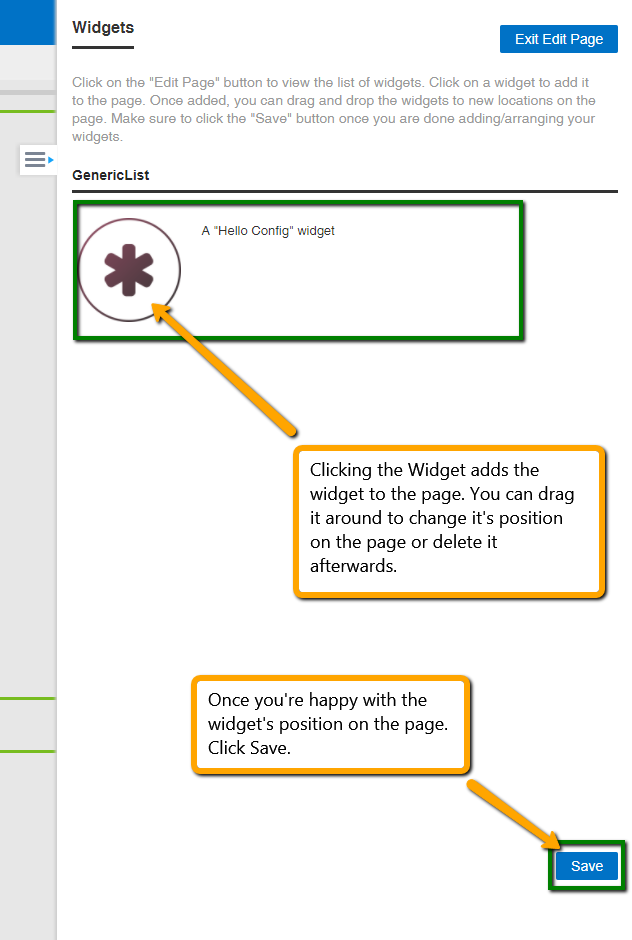
Your widget is added.
Adding Widget to Page - Publishing Page
If you are adding your widget to a Publishing Page, we will use the same process as on publishing pages within the Digital Workplace Foundation Site. The Digital Workplace Core Site does not provision publishing pages out of the box so you will have to add them. Publishing pages can be added by navigating to the Pages library from Site Contents, clicking Files on the ribbon and then clicking New Document. Once you select the name and layout for the page, click Create.
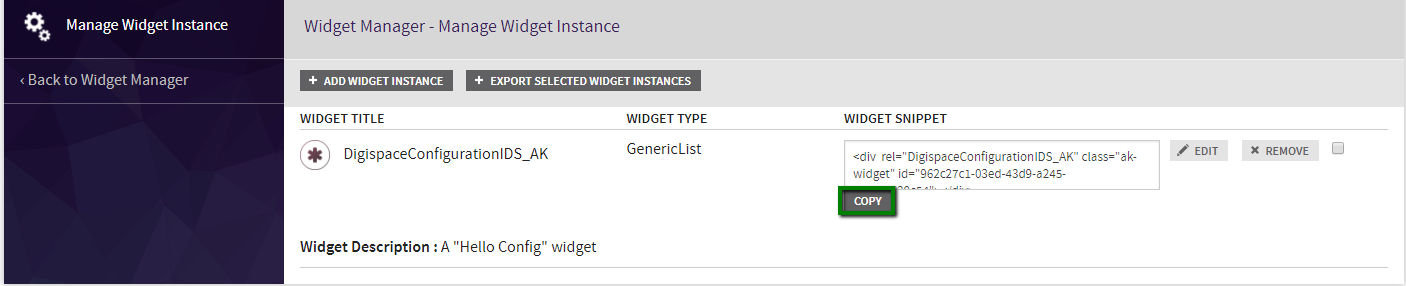
Once you have a publishing page to add your widget to, navigate back to the Widget Instances of the GenericList widget. Find the DigispaceConfigurationIDS_AK Widget Instance. Click its associated Copy button.
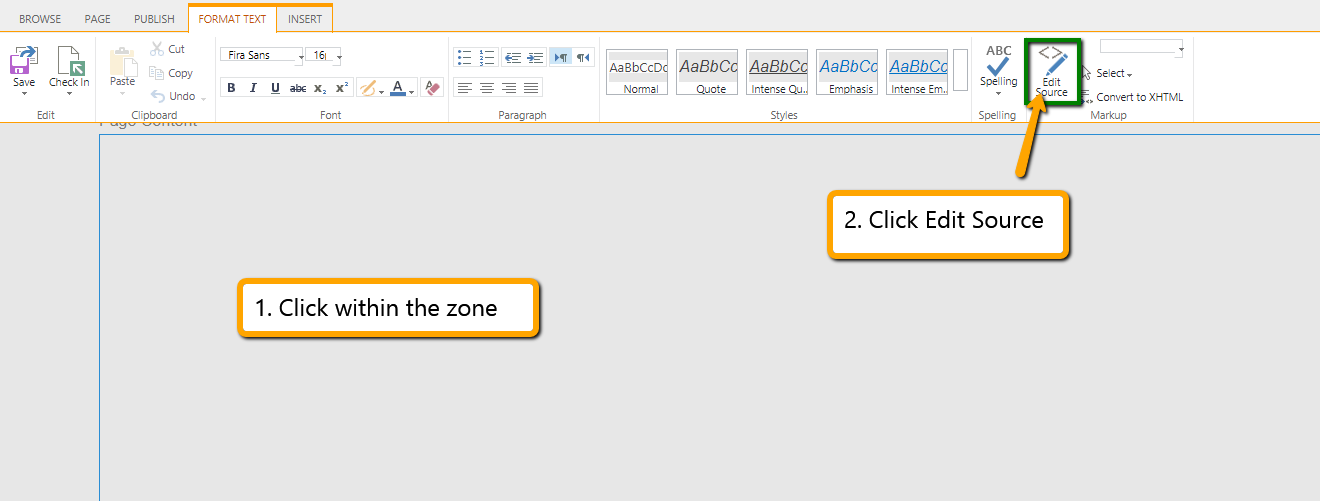
Navigate to your publishing page. Click on the top right gear in the SharePoint ribbon, select Edit Page from the dropdown. Click inside of the zone on the page. Click Edit Source in the the top ribbon.
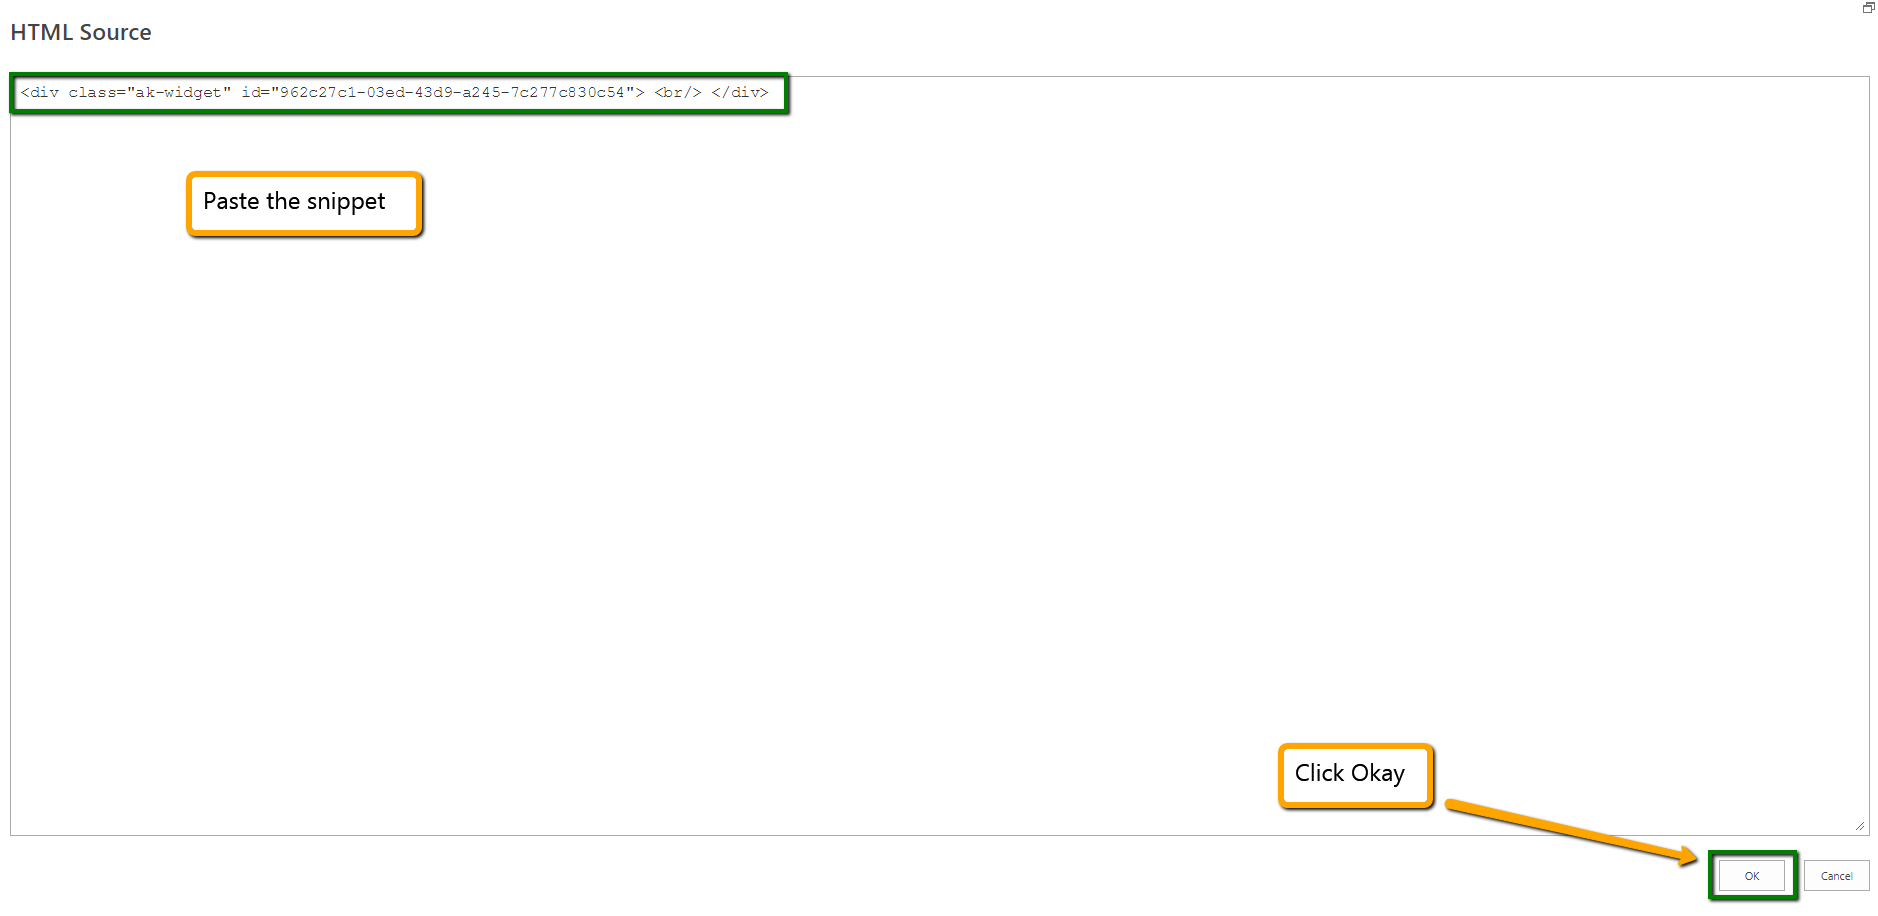
Inside of the Html Source window, paste the snippet you just copied. Click OK.
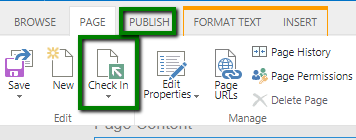
Checkin or publish the page.
Your widget will appear.