Vaultwarden Setup Guide - ajgillis04/GillisDockerDepot GitHub Wiki
Vaultwarden is a more efficient re-implementation of the Bitwarden server API aimed at self-hosting. It is compatible with Bitwarden clients and provides a secure way to manage passwords.
- Docker installed
- Vaultwarden container running in your Docker stack
- A domain name and SSL certificate (optional but recommended for security)
- Open your browser and navigate to
http://<your-ip-address>:<port>.
**
⚠️ Hint: Depending on your setup you might not be able to reach by IP and need to use the domain name (i.e. vault.example.com)
- Log in with your Vaultwarden credentials.
- If everything looks ok go to the admin page to configure Valutwarden's settings
http://<your-ip-address>:<port>/admin`.
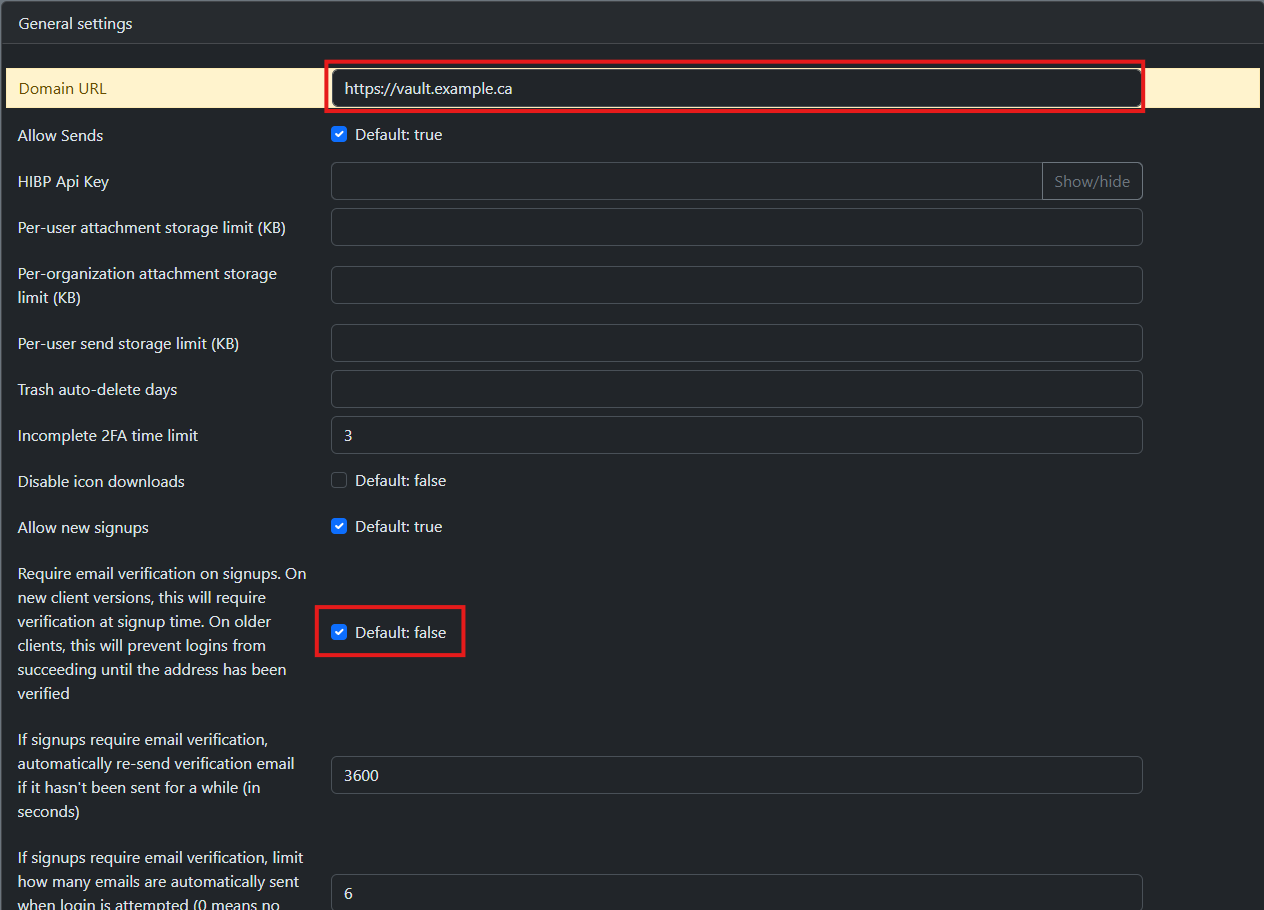
- Once the admin page is open go to the
General settingsblade - Domain URL: https://vault.example.com
- Require email verification on signups: Enable
- Save
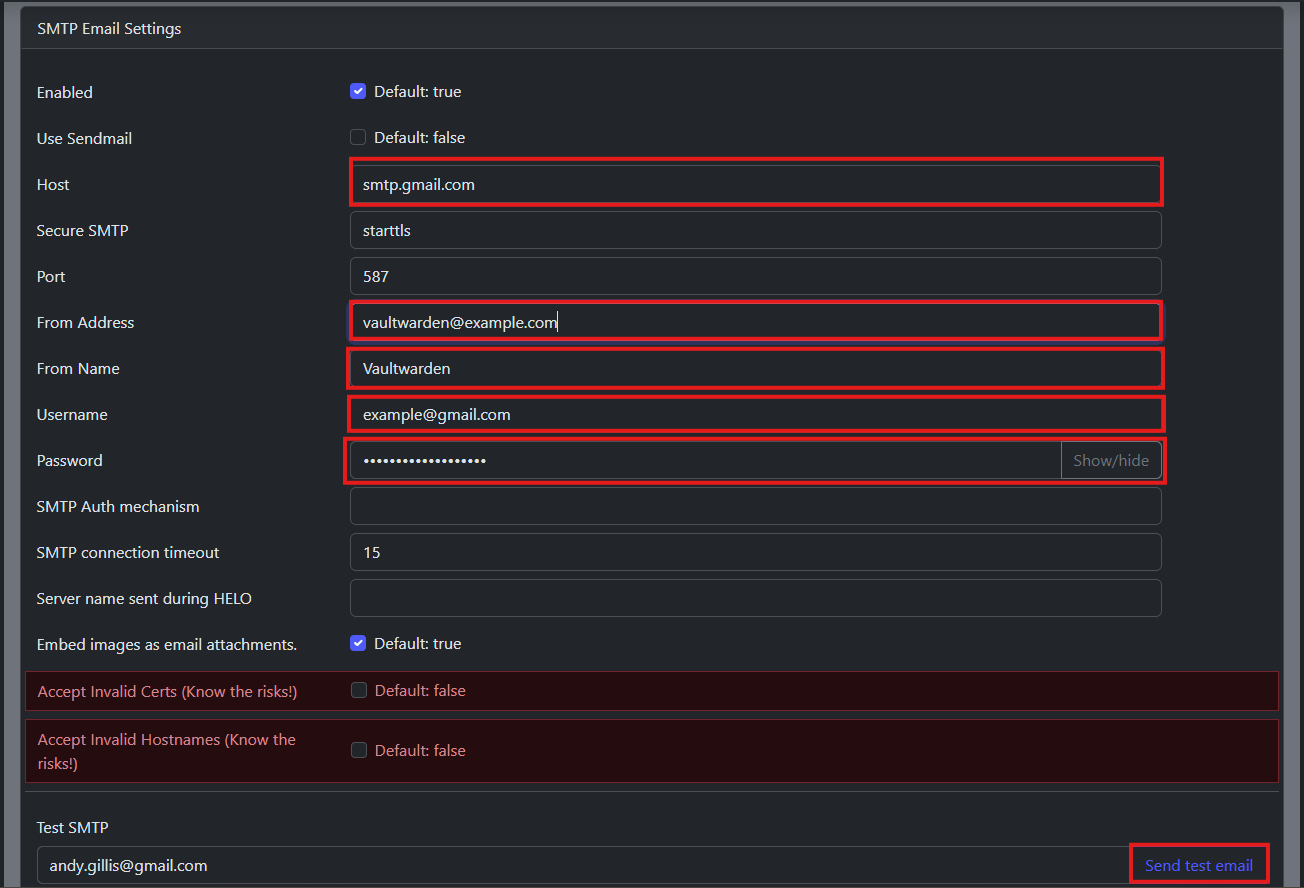
- Navigate to the
SMTP Email Settingstab. - Host: smtp.gmail.com
- From Address: [email protected]
- Port: 587
- From Name: Vaultwarden
- Username: [email protected]
- Password:
- Save
- select
Send test email
- Navigate to the
Userstab. - Add new users by filling the users email and clicking invite

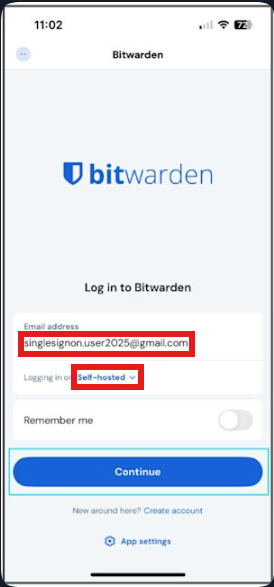
To connect the Bitwarden mobile app to your self-hosted Vaultwarden instance:
- Open the Bitwarden app on your phone.
- Tap Log In.
- Enter your email address.
- Tap Self-Hosted Environment.
- Enter your server URL (e.g.,
https://192.168.1.50:${Port Used}, or if you setup secure accesshttps://valutwarden.example.com). - Tap Save, then enter your master password to unlock your vault.
💡 If you're using mTLS, make sure your
.p12certificate is imported, there is option at the bottom of the server configuration.
- Go to the
Dashboardtab. - Monitor the status of your Vaultwarden instance, including active users and any errors.
- Use the logs to troubleshoot issues.
Secure Vaultwarden behind a Cloudflare Tunnel using client certificate authentication. This assumes your Cloudflare Tunnel is already set up.
- Cloudflare Tunnel for
vaultwarden.example.com - Access to Cloudflare Zero Trust (Applications + Client Certificates)
- Client certificate issued via Cloudflare Managed CA (certificate and key copied from dashboard)
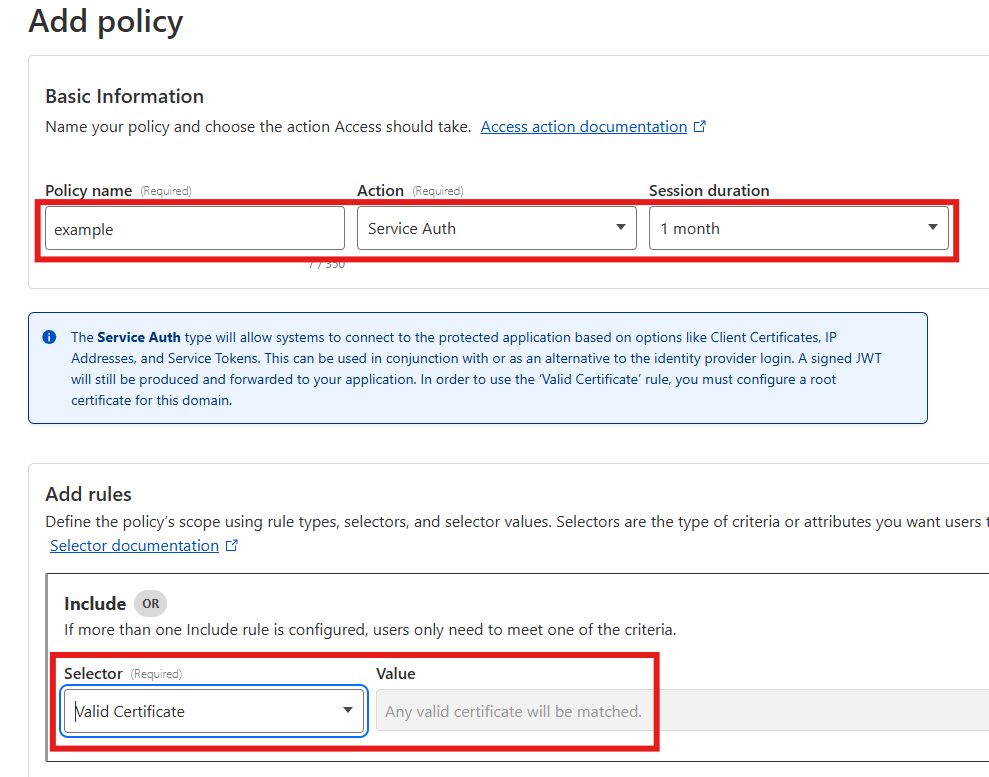
- Access → Applications → open your Vaultwarden app (or catch‑all
*.example.com). - Add a policy:
- Action: Service Auth
- Include: Valid Certificate → Any valid certificate
- Ensure this policy is listed above identity policies (e.g., Google Auth).
- Save.
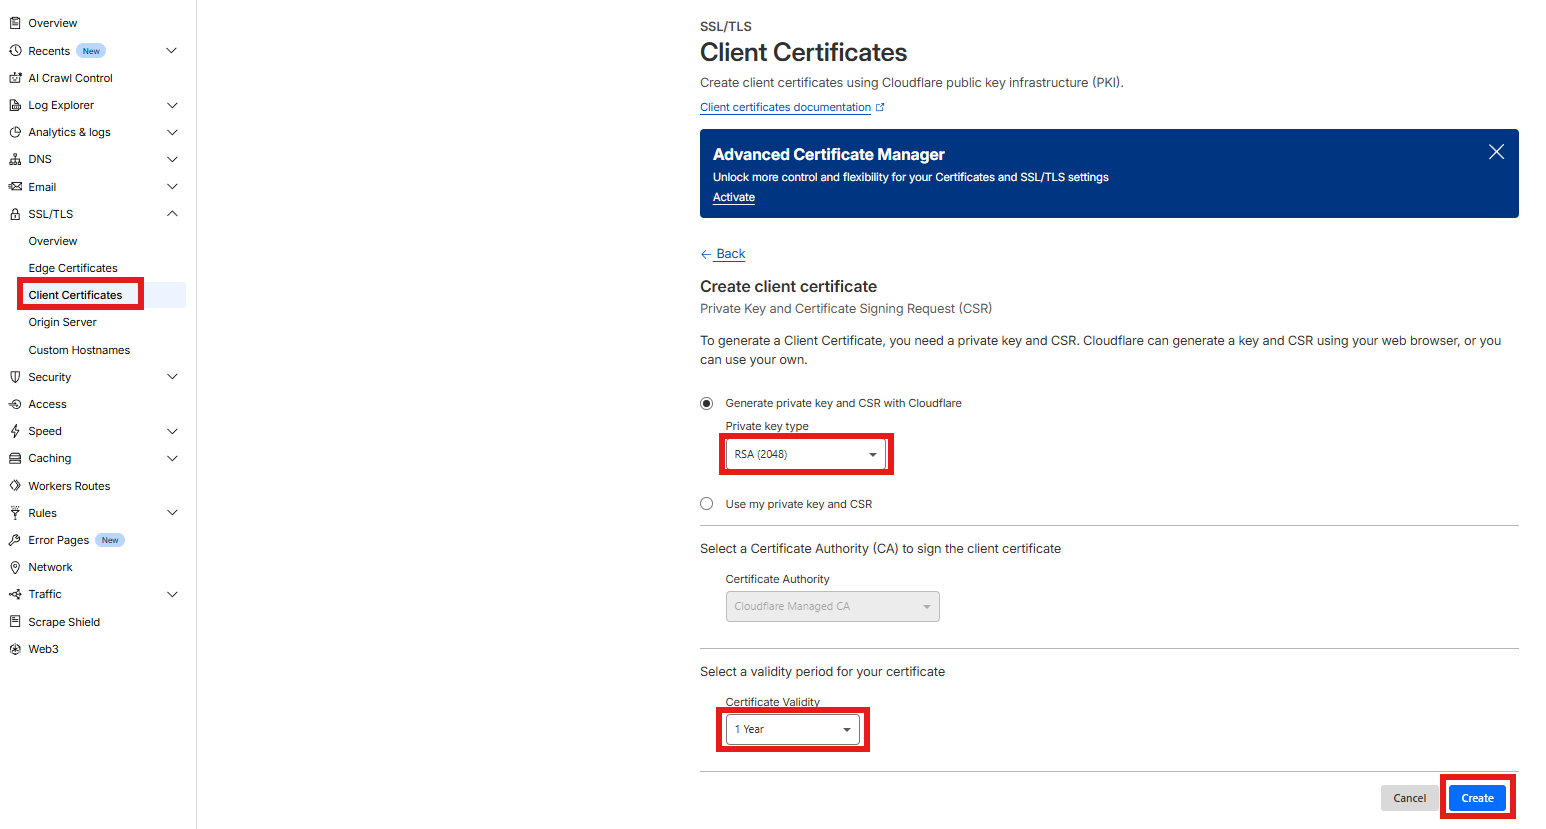
- Go to Zero Trust → Access → Client Certificates.
- Click Create Certificate.
- Key type: RSA (2048)
- Validity: Choose your preferred duration (e.g., 1 year)
- Click Create.
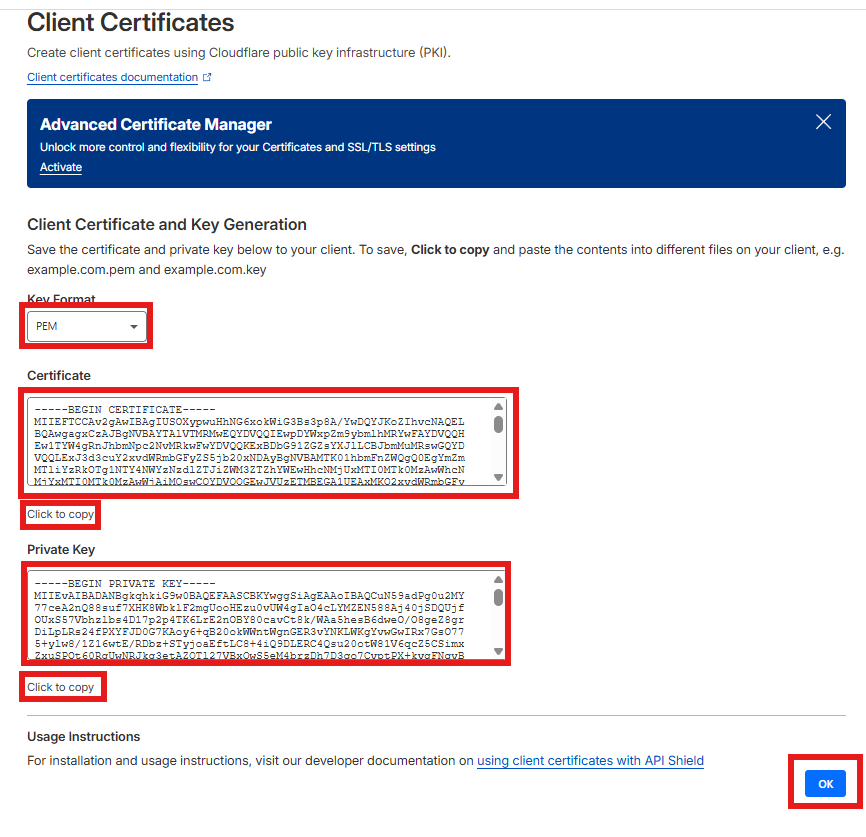
- Copy the PEM blocks shown:
- Paste the certificate into
example.crt - Paste the private key into
example.key
- Paste the certificate into
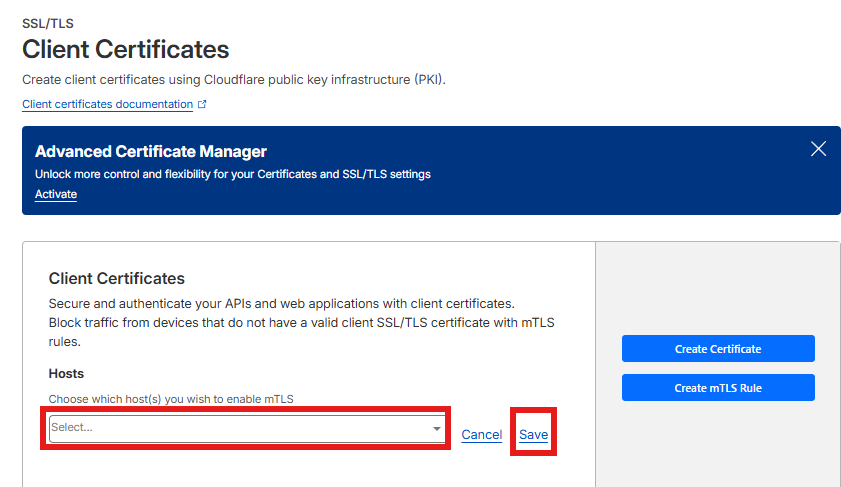
- Create host to enable mTLS
- Edit and type the name of your sub domain
openssl pkcs12 -export \
  -inkey example.key \
  -in example.crt \
  -out example.p12 \
-name "Example Cloudflare"- Use formats appropriately:
-
Mobile/Windows apps: Import
example.p12into Windows → Current User → Personal, then enable automatic client certificate selection in the app. -
CLI/scripts: Use
example.crtandexample.key.
-
Mobile/Windows apps: Import
curl -v https://vaultwarden.example.com/api/accounts/prelogin --cert example.crt --key example.keyExpected output:
{"Kdf":"PBKDF2_SHA256","KdfIterations":100000}-
Browsers without a client cert will fall back to identity login (e.g., Google Auth) if that policy is placed below the Service Auth rule.
-
For Windows apps, importing
.p12into the Current User → Personal store avoids file‑path and parsing issues.
- Ensure all paths and environment variables are updated in the
vaultwarden.yamlfile. - Regularly backup your
configdirectory to save your settings and user data.
- Common Issues: List common issues and solutions.
- Logs: Check Vaultwarden logs for error messages.
- Support: Link to the Vaultwarden community and support resources.