Nextcloud AIO Setup Guide - ajgillis04/GillisDockerDepot GitHub Wiki
Nextcloud AIO Setup Guide
Introduction
Nextcloud AIO (All-In-One) provides a convenient way to deploy and maintain a full Nextcloud installation, including all necessary services, in a single Docker container.
Prerequisites
- Docker installed
- Nextcloud AIO container running in your Docker stack
Configuration Steps
Step 1: Accessing and setting up the Nextcloud AIO UI
-
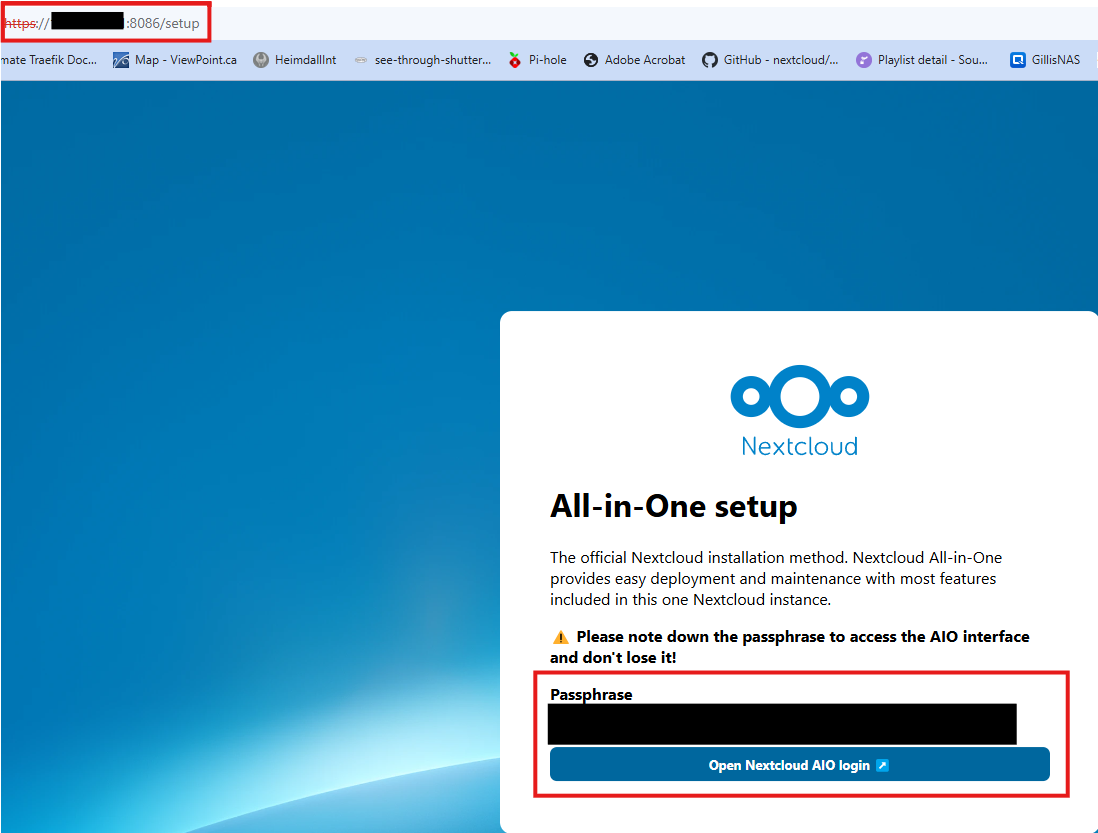
Open your browser and navigate to
http://<your-ip-address>:8086/setup. -
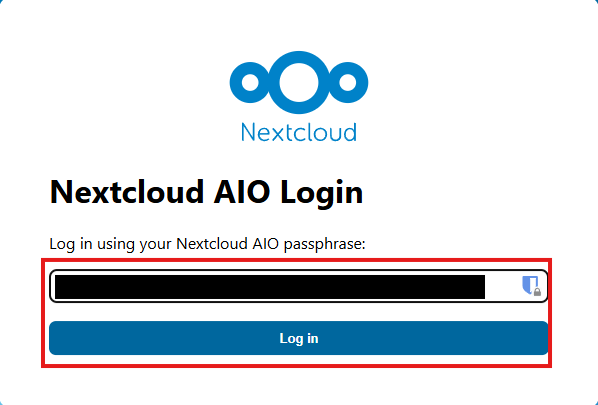
Copy the passphrase to a safe place and click "Open Nextcloud AIO Login."
-
On the next screen, login using the password from step 2.
-
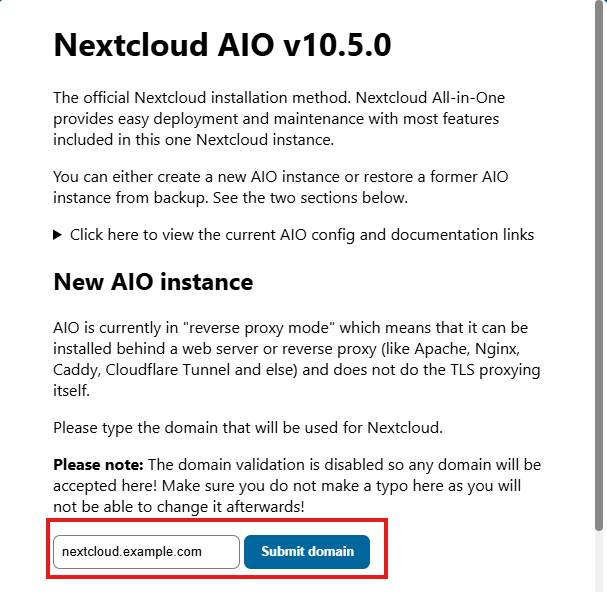
Enter your domain name and click "Submit domain."
-
Select your optional containers, save, submit timezone, and choose download and start containers.

Note: Ensure to add mediaserver network to the nextcloud-aio-apache container if required. -
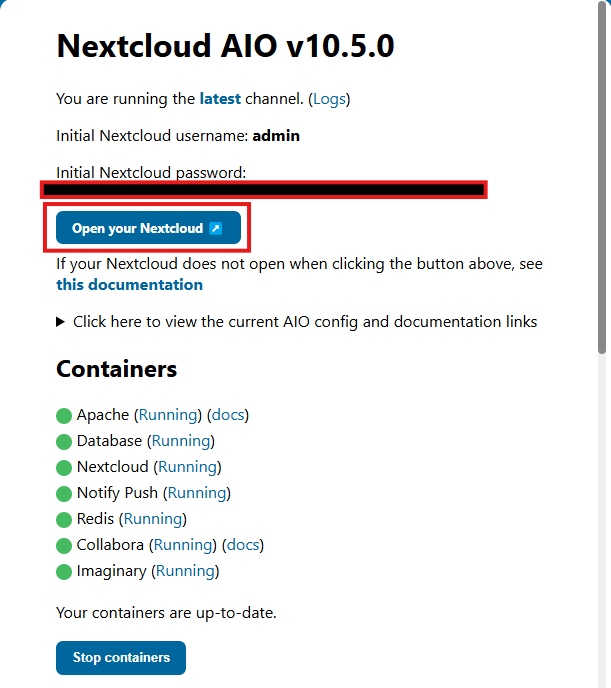
Initial setup complete. Copy (and save) the Initial Nextcloud password and select "Open Your Nextcloud."
Step 2: Configuration Nextcloud
-
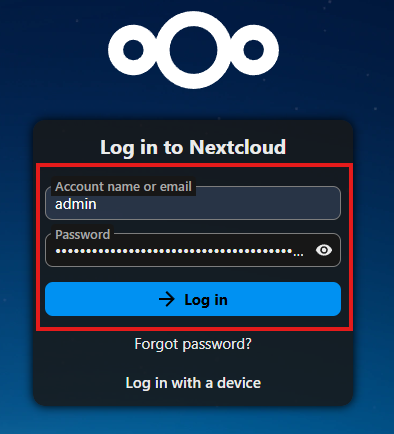
For account name or email, type "admin," and the password from the last step. Click "Login."
Note: You can go through the "What's new," or click the X at the top right. -
Set up a whitelist for your IP. Top right, select the A, administrative settings, security, brute-force IP whitelist, Add a new whitelist. Add your ISP assigned IP. I use
/24in case my ISP changes my IP.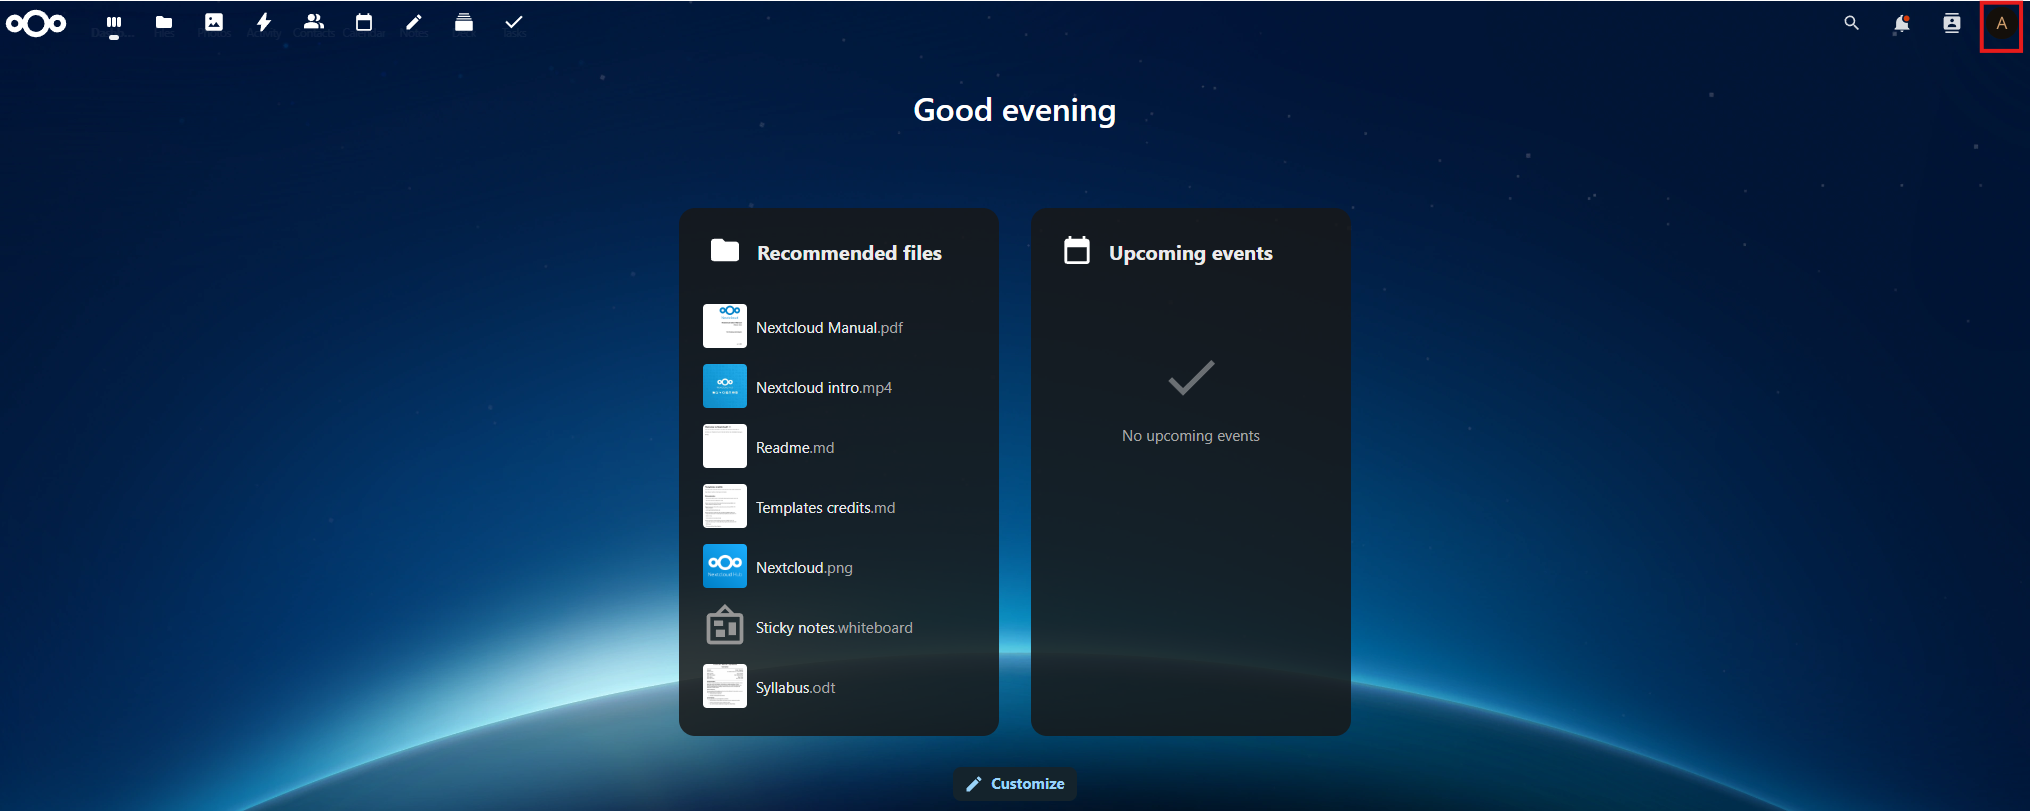
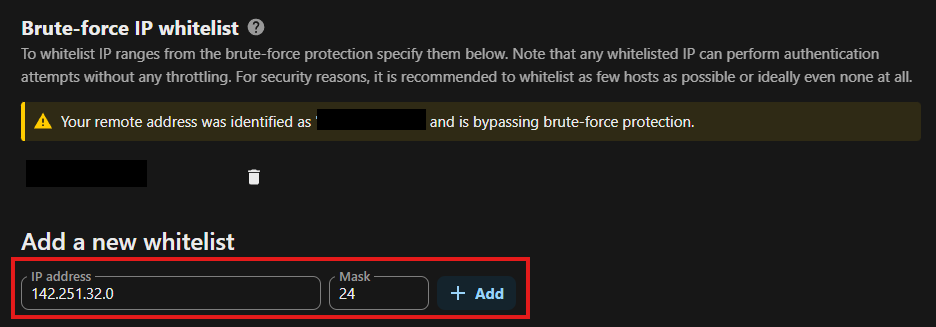
Note: This helps prevent locking yourself out in case of misconfiguration. -
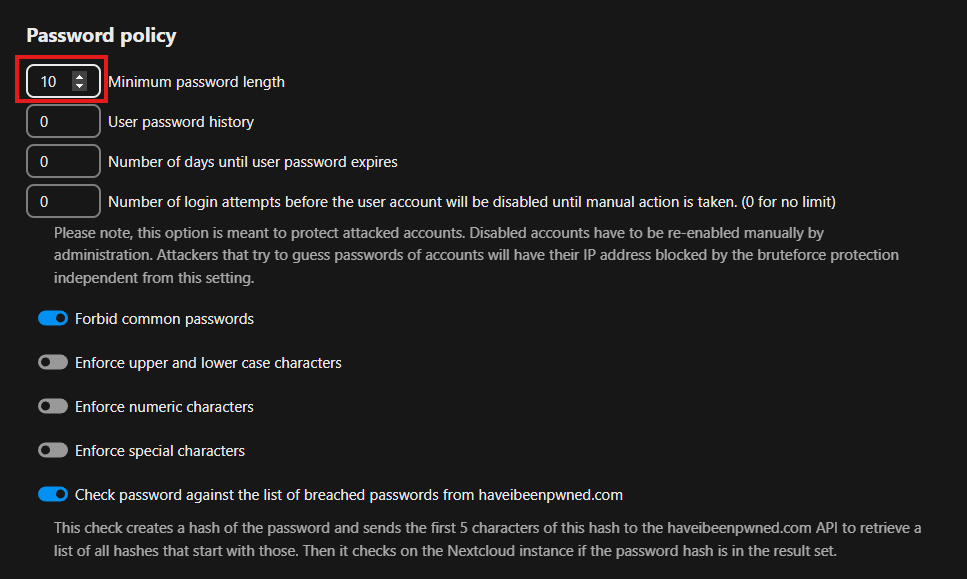
Set password policy as per your requirements.
-
Set up the email server. From the administration, go to basic settings, email server, and enter the settings.
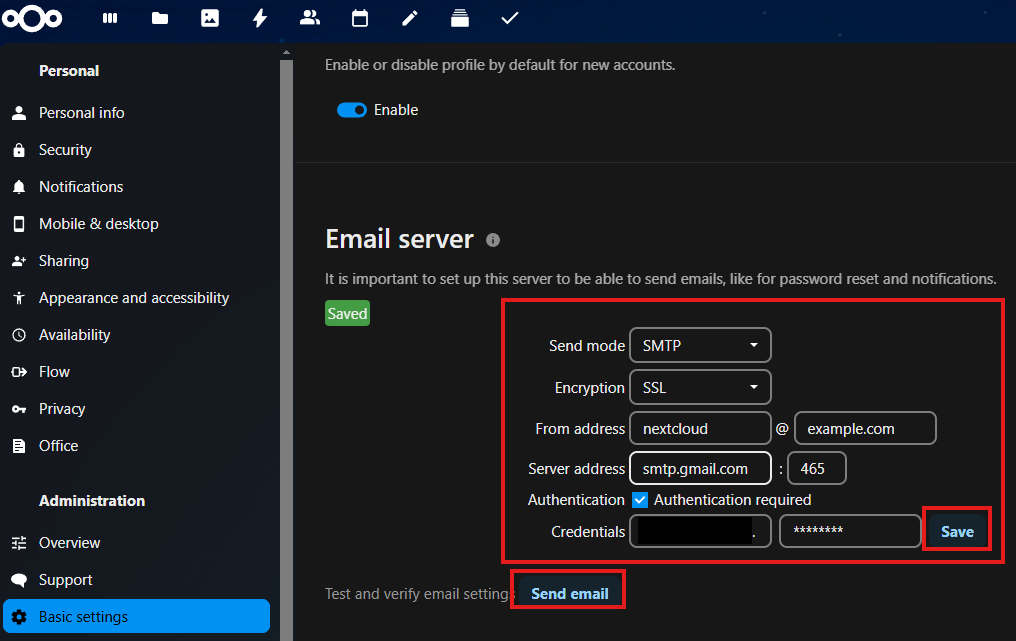
Note: This ensures users receive messages when their accounts are created. -
Set up users and groups. Click on the A at the top right, then accounts.
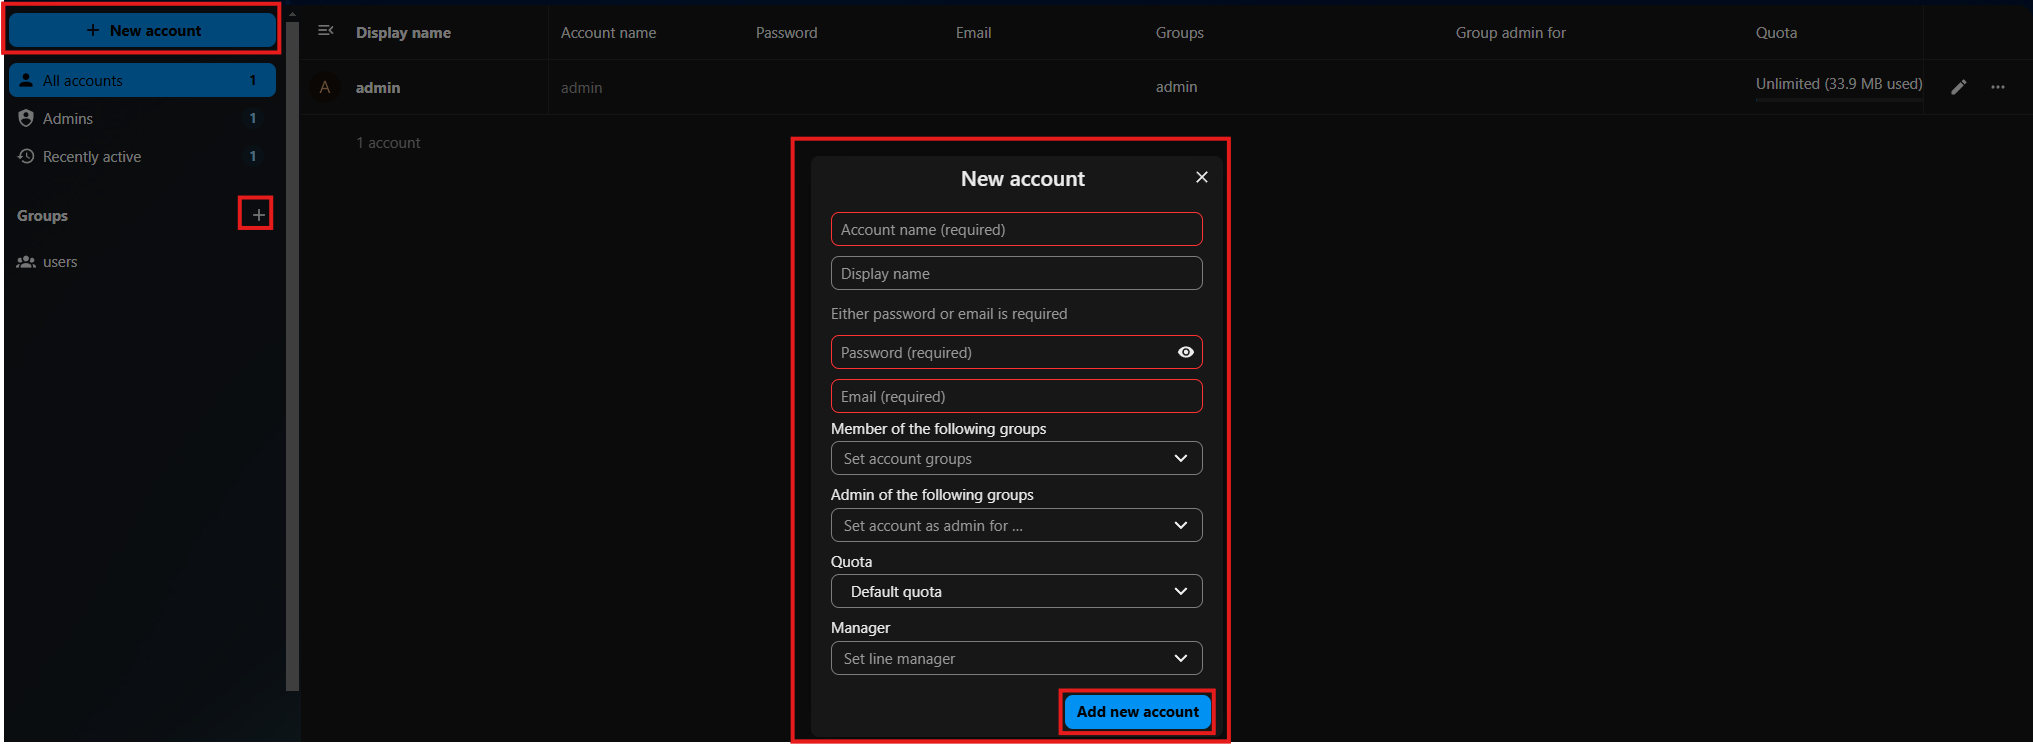
Note: I use a script to create my accounts, e.g.,
export OC_PASS=whateverpassword /var/www/html/occ user:add --password-from-env --display-name="Test User" --group="users" [email protected] -
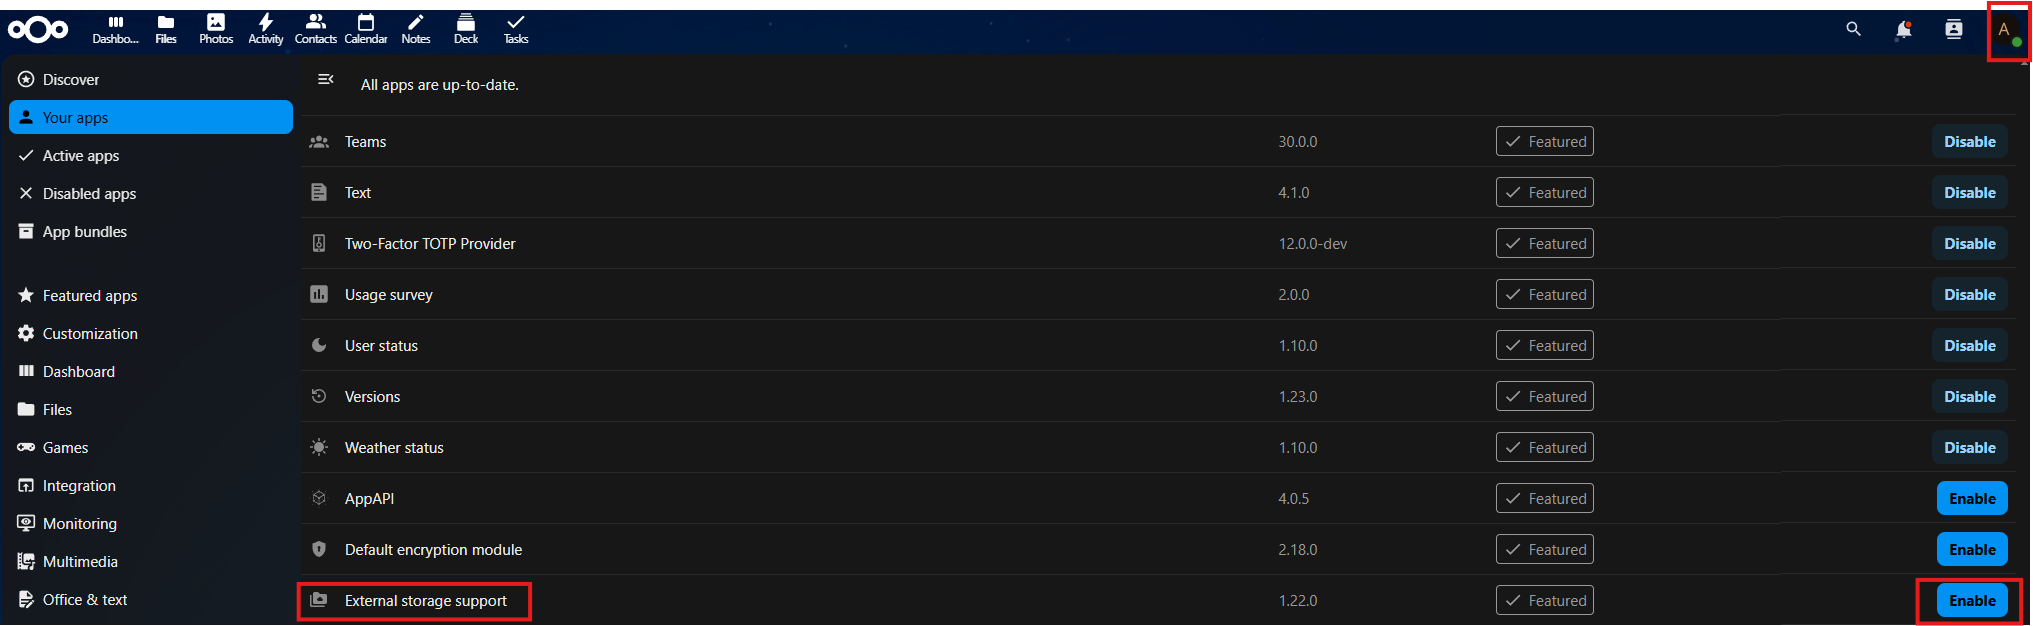
Setup external storage, Click on the A top right, apps, your apps, scroll to bottom and enable External storage
- Go to
External storagesunder theAdministrationsection and set your external storage.
 I create a Documents folder for each user on the NAS that points back to their home drive and a few others
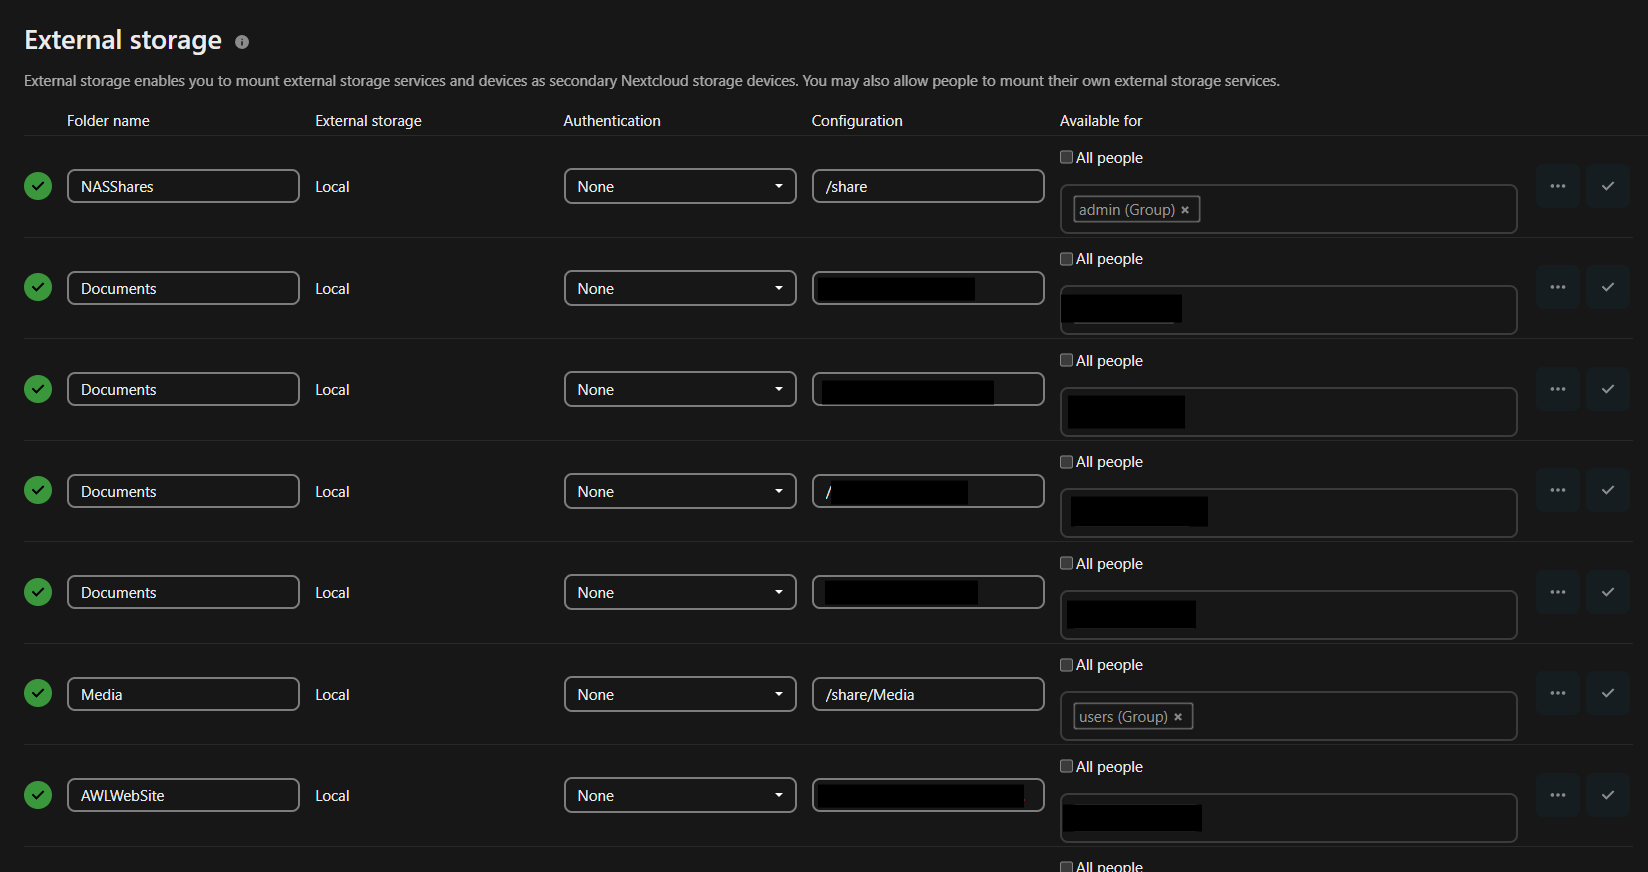
Note: For NASShares I also turn on enable sharing allowing me to create shares for others. - Go to
-
Last step I do is add my domain, local IP, and phone code to the config.php
sudo docker run -it --rm --volume nextcloud_aio_nextcloud:/var/www/html:rw alpine sh -c "apk add --no-cache nano && nano /var/www/html/config/config.php"

Setting Up Phone for Auto Backups
- Open the Nextcloud app and enter the Server address
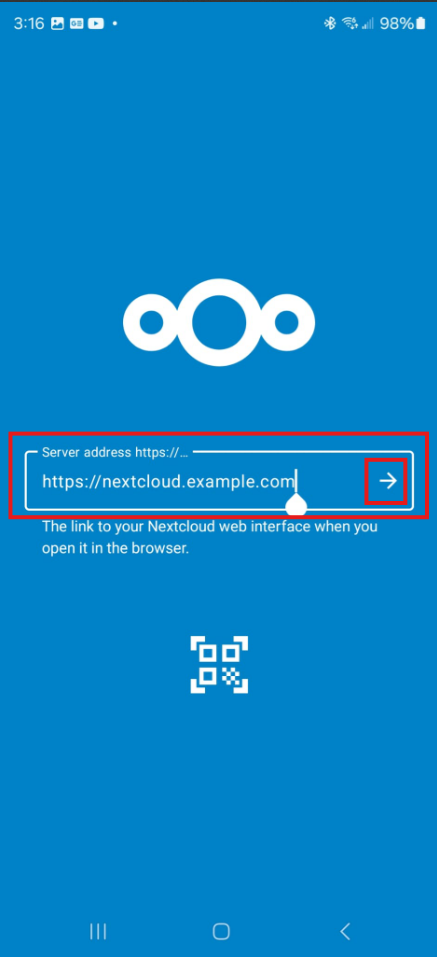
*Note: You will be redirected to your browser to enter your Nextcloud credentials.
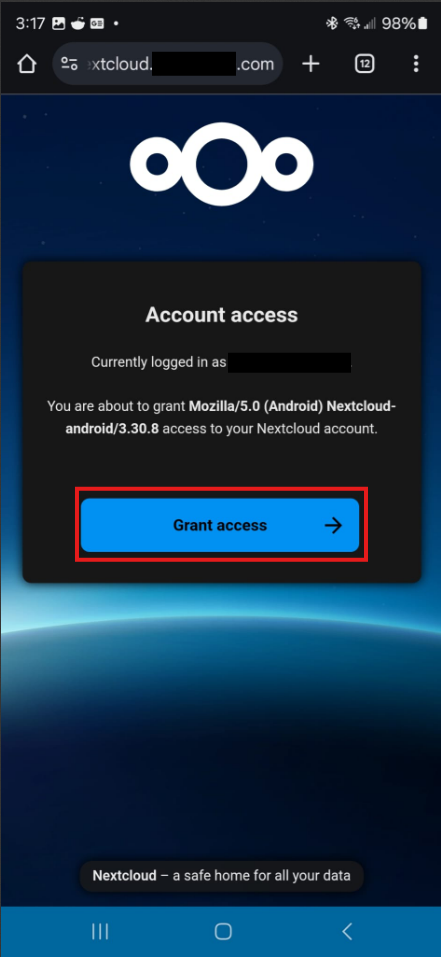
- Connect to your account.
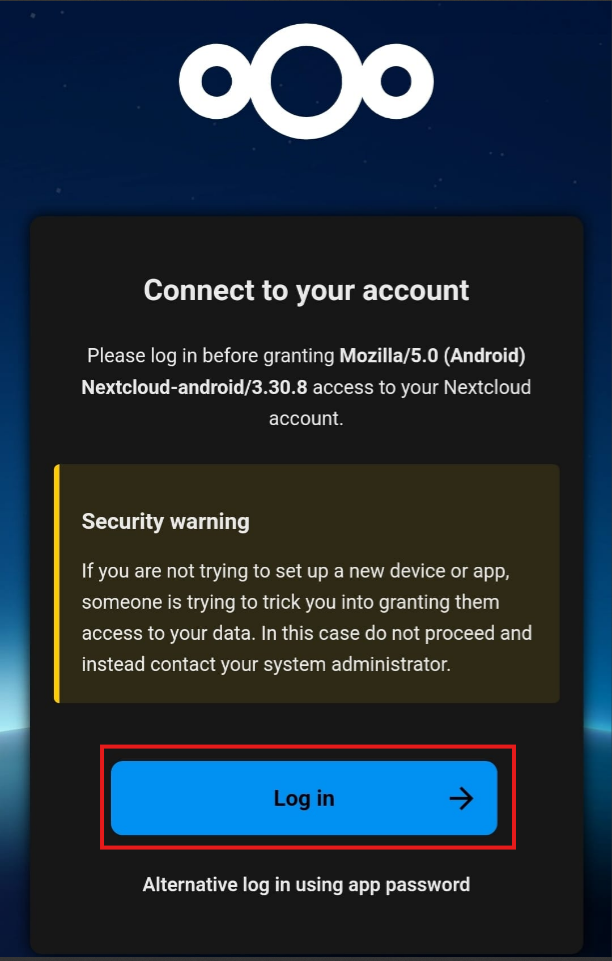
-
Grant Access
-
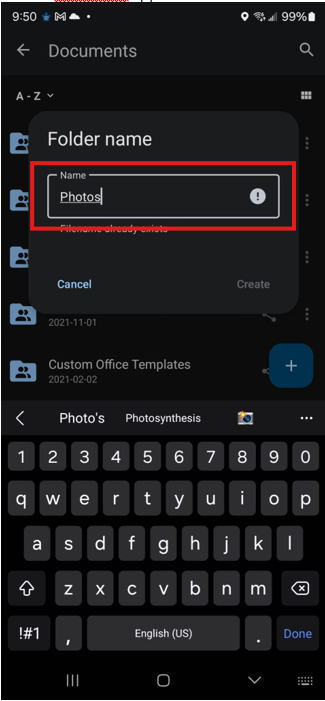
Navigate to Documents.
-
Tap + and select Create new Folder.
-
Name the new folder Photos.
-
Go back twice.
-
Open the Burger menu.
-
Go to Settings.
-
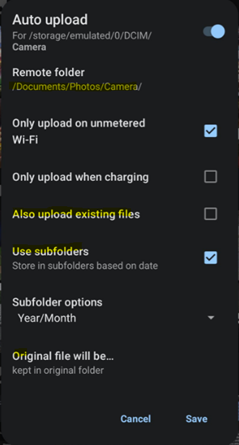
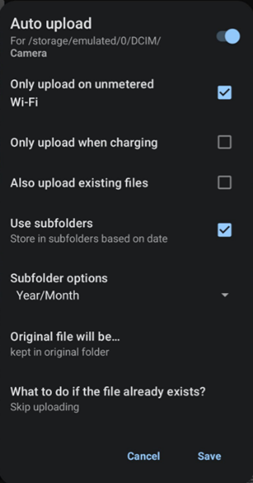
Select Auto upload.
-
Tap … (ellipsis) and configure the folder you want to upload.
-
Enable Auto upload.
-
Change the Remote folder to the newly created Photos folder.