Guacamole Setup Guide - ajgillis04/GillisDockerDepot GitHub Wiki
Apache Guacamole is a clientless remote desktop gateway. It supports standard protocols like VNC, RDP, and SSH and allows you to access your desktop from a web browser.
- Docker installed
- Guacamole container running in your Docker stack
Before setting up Sonarr, consider deploying the following containers first to simplify integration and avoid jumping between configuration steps:
The official guacamole/guacamole Docker container runs with:
-
User ID (uid):
1001 -
Group ID (gid):
1001
To enable persistent storage for the Guacamole container, map host directories to the container, adjust ownership, and set proper permissions.
volumes:
  - ${DOCKERDIR}/guacamole/etc:/etc/guacamole
  - ${DOCKERDIR}/guacamole/home:/home/guacamole
  - ${DOCKERDIR}/logs/guacamole:/var/log
-
Create Host Directories:
mkdir -p ${DOCKERDIR}/guacamole/etc mkdir -p ${DOCKERDIR}/guacamole/home mkdir -p ${DOCKERDIR}/logs/guacamole -
Set Directory Ownership: Update ownership to match the container's user (
1001:1001):sudo chown -R 1001:administrators ${DOCKERDIR}/guacamole/etc sudo chown -R 1001:administrators ${DOCKERDIR}/guacamole/home sudo chown -R 1001:administrators ${DOCKERDIR}/logs/guacamole -
Set Directory Permissions: Ensure proper read, write, and execute access:
sudo chmod -R 770 ${DOCKERDIR}/guacamole/etc
sudo chmod -R 770 ${DOCKERDIR}/guacamole/home
sudo chmod -R 770 ${DOCKERDIR}/logs/guacamole
-
Ensure a user 'guacamole' is created in MariaDB.
-
Create a database for 'guacamole' with appropriate permissions.
-
Use the following SQL commands:
< * Hint:⚠️ It is not recommend you use ! in your passworddocker exec -it mariadb.${HOST_NAME} /usr/bin/mariadb -u root -p CREATE DATABASE guacamole; CREATE USER 'guac_user'@'%' IDENTIFIED BY 'your_password'; GRANT ALL PRIVILEGES ON guacamole.* TO 'guac_user'@'%'; FLUSH PRIVILEGES; quit; docker cp /path/to/scripts/guac_initdb.sql mariadb.${HOST_NAME}:/guac_initdb.sql docker exec -i mariadb.${HOST_NAME} bash -c "/usr/bin/mariadb -u guac_user -p'YOURPASSWORD' guacamole < /guac_initdb.sql" docker restart guacamole.<Host_Name>
- Open your browser and navigate to
http://<your-ip-address>:8080/guacamole. - Log in with the default credentials (
guacadmin/guacadmin).
-
Navigate to the
Userstab. -
Select New User, and fill in all the required info. Ensure you select all permissions, Save
< * Note:⚠️ Create all other users you require. Best practice is to give them minimal permissions.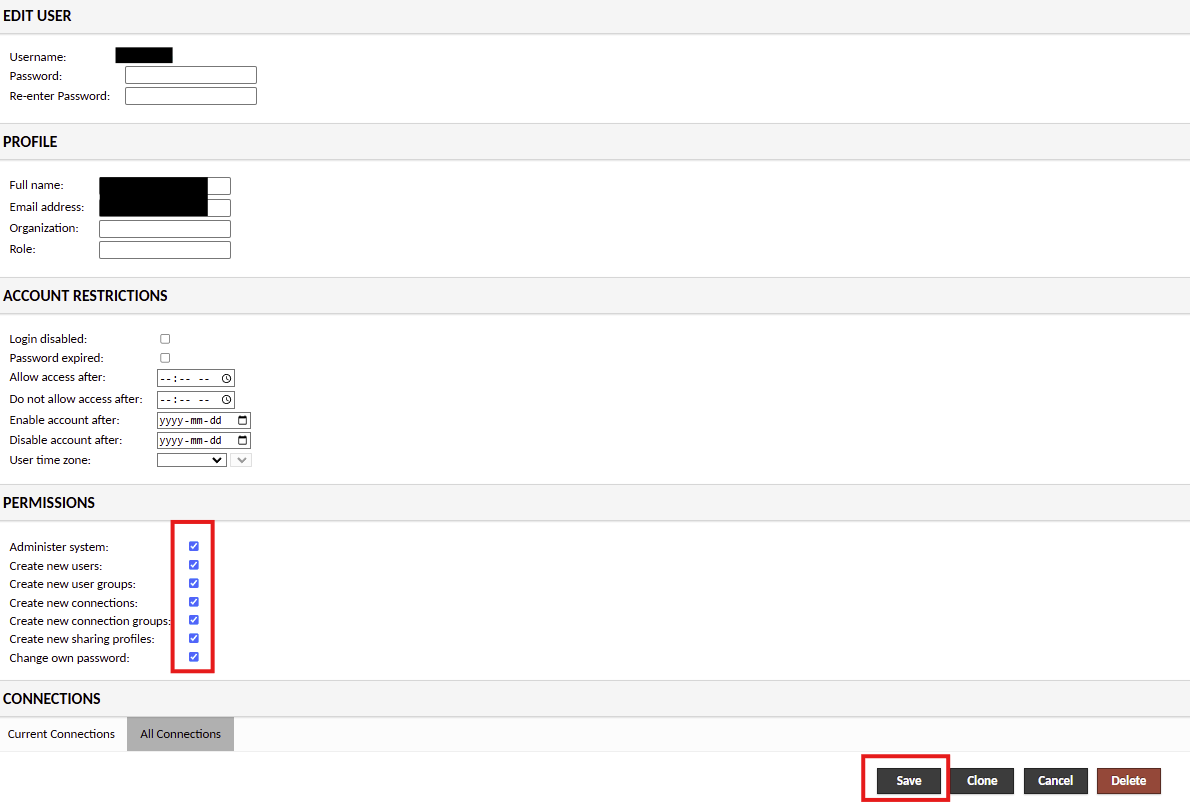
-
Logoff, and Login as the new Admin user, Settings, Users, Select guacadmin, and enable Login Disabled, Save
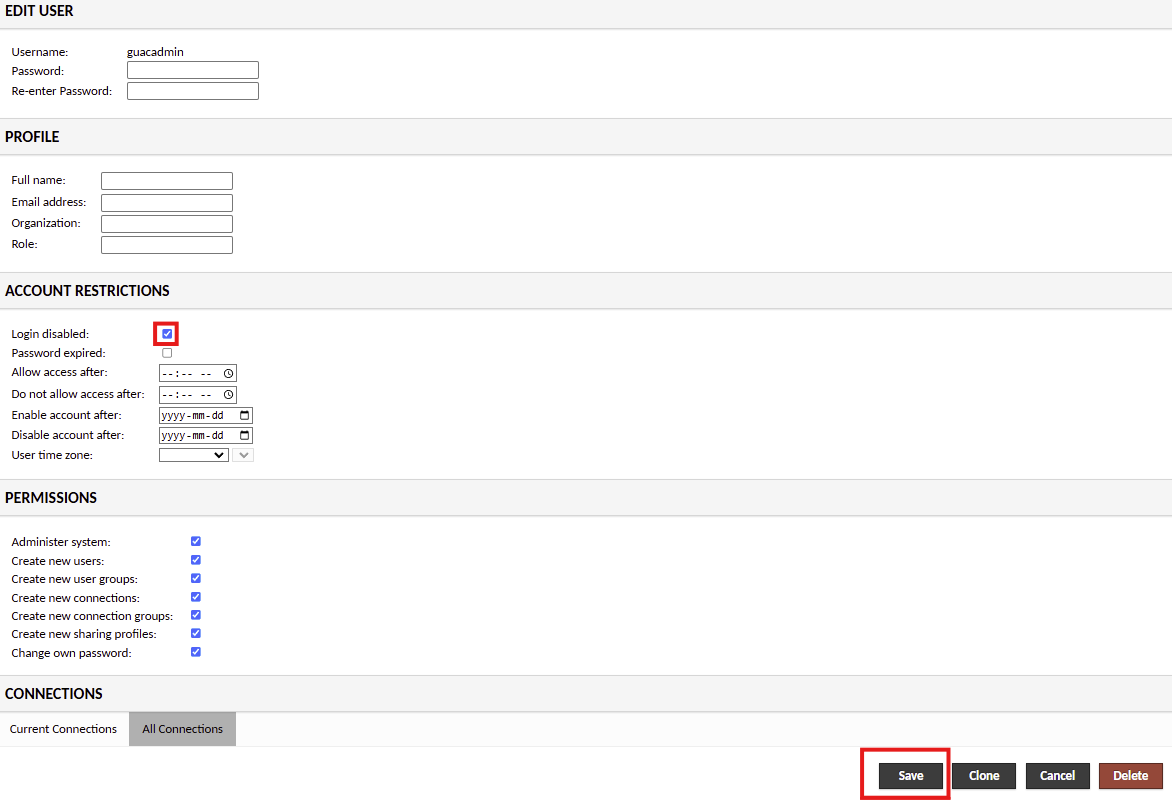
-
Navigate to the
Connectionstab. -
Click
New Connection. -
Configure the connection settings:
- Name: Give your connection a meaningful name.
- Protocol: Choose the protocol (VNC, RDP, SSH).
- Parameters: Enter the necessary parameters (hostname, port, username, password).
Linux:
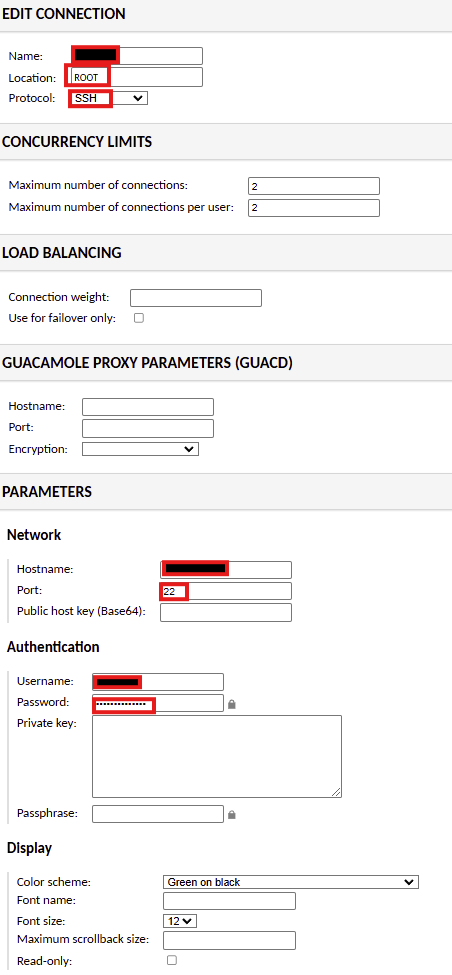
Windows:

-
Click
Save.
-
Go to the
Userstab. -
Click on the user you want to assign connections to.
-
At the bottom of the page choose All Connections, and enable which the clients you wish
-
Click
Save.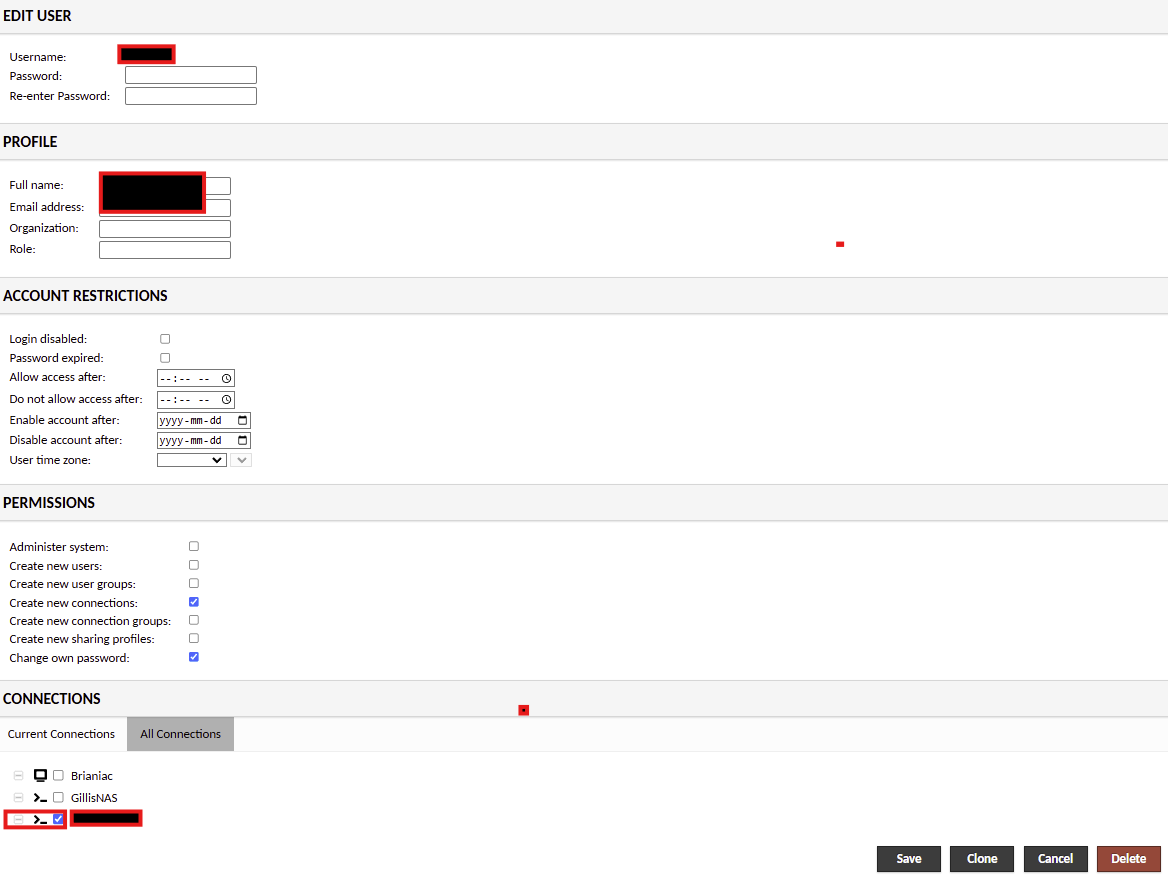
- Navigate to the
Settingstab. - Customize global settings according to your preferences (e.g., theme, language).
- Click
Save.