Cloudflared Tunnel Setup - ajgillis04/GillisDockerDepot GitHub Wiki
This guide outlines how to secure self‑hosted services (e.g., Bazarr, Radarr, Plex, Nextcloud) using Cloudflare Tunnel (cloudflared) and Cloudflare Access. I’ve moved away from Traefik in favor of this simpler setup, which reduces moving parts while shifting authentication and routing to Cloudflare’s edge. An added benefit is that Cloudflare Tunnel works seamlessly behind CGNAT (such as with Starlink and other providers), eliminating the need to expose ports or manage complex NAT rules.
By routing traffic through Cloudflare’s edge, you gain:
- Encrypted connections without exposing ports directly
- Optional Zero Trust authentication (Google OAuth, GitHub, etc.)
- Centralized DNS and certificate management
This setup now applies to all services under *.example.com (production) and *.dev.example.com (development).
- Cloudflare account managing example.com
- Zero Trust dashboard enabled
- Docker installed on your host
- A valid tunnel token
- DNS CNAME records pointing subdomains to your tunnel UUID (a1b2c3d4-5678-90ab-cdef-1234567890ab.cfargotunnel.com)
Run the login command:
docker run -it --rm cloudflare/cloudflared:latest tunnel loginCreate a named tunnel (e.g. MyServerName), then copy the generated credentials JSON into your mounted volume (appdata/cloudflared/a1b2c3d4-5678-90ab-cdef-1234567890ab.json).
Replace ${HOST_NAME} with your server name based on the variable from the .env file.
tunnel: MyServerName
credentials-file: /home/nonroot/.cloudflared/a1b2c3d4-5678-90ab-cdef-1234567890ab.json

ingress:
  - hostname: bazarr.example.com
    service: http://bazarr.${HOST_NAME}:6767
  - hostname: plex.example.com
    service: https://plex.${HOST_NAME}:32400
    originRequest:
      noTLSVerify: true
  - hostname: sonarr.example.com
    service: http://sonarr.${HOST_NAME}:8989
  - service: http_status:404
Each hostname maps a public FQDN to an internal container or LAN IP.
Use originRequest.noTLSVerify: true for services with self‑signed certs.
File available in the compose/templates folder.
services:
  cloudflared:
    image: cloudflare/cloudflared:latest
    container_name: cloudflared.${HOST_NAME}
    command: tunnel --config /home/nonroot/.cloudflared/config.yml run ${HOST_NAME}
    volumes:
      - ${DOCKERDIR}/cloudflared:/home/nonroot/.cloudflared
      - ${DOCKERDIR}/logs/cloudflared:/var/log
    restart: always
    networks:
      - mediaserver
    security_opt:
      - no-new-privileges:true
    healthcheck:
      test: ["CMD", "cloudflared", "--version"]
      interval: 30s
      timeout: 10s
      retries: 3
    labels: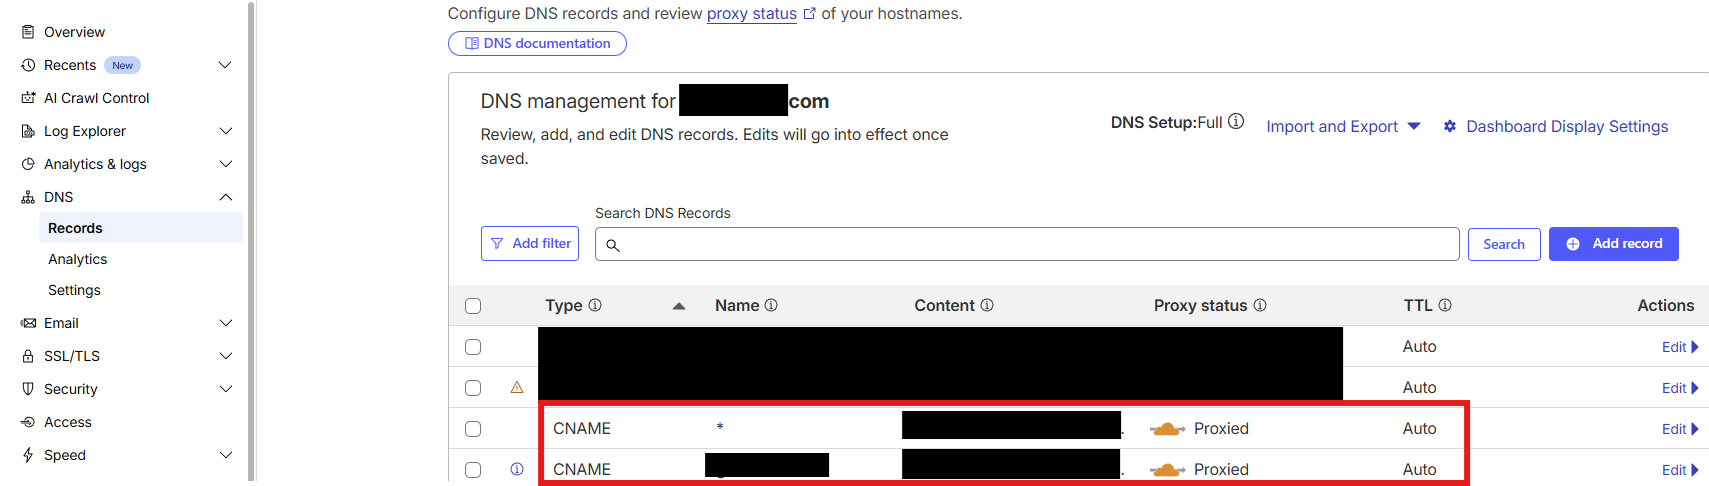
- "com.centurylinklabs.watchtower.enable=true"Open a browser and go to https://dash.cloudflare.com. Log in, select your domain, and navigate to the DNS tab.
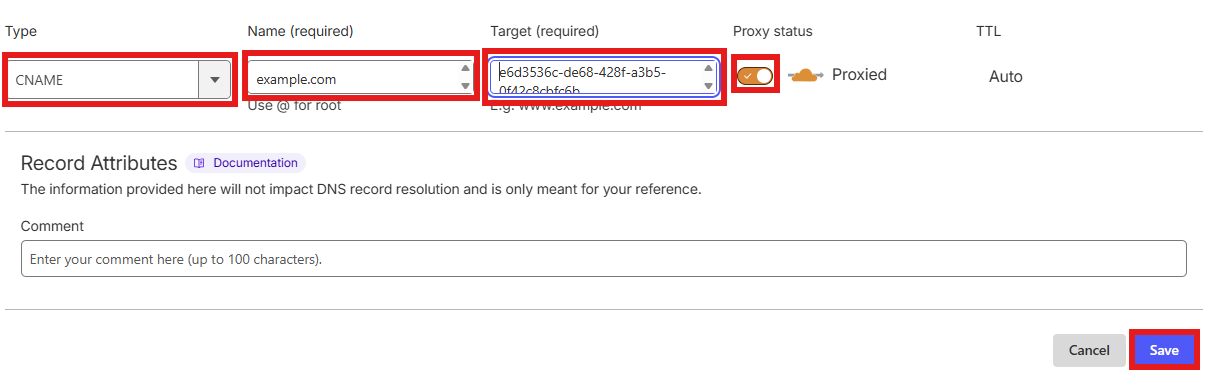
Create two proxied CNAME records pointing to your tunnel UUID (a1b2c3d4-5678-90ab-cdef-1234567890ab.cfargotunnel.com):
-
*.example.com
Enables wildcard routing for subdomains likeradarr.example.com,sonarr.example.com, etc., without needing individual DNS entries. -
example.com
Allows access to the apex/root domain (https://example.com) through the tunnel. This is optional, but useful if you want to serve a homepage, redirect, or catch unmatched requests.
Both records can safely point to the same tunnel UUID. This setup ensures:
- Subdomains are automatically routed through the tunnel.
- The root domain is available if configured in your
config.yml.
Make sure the Proxy status is set to Proxied (orange cloud) for both records.
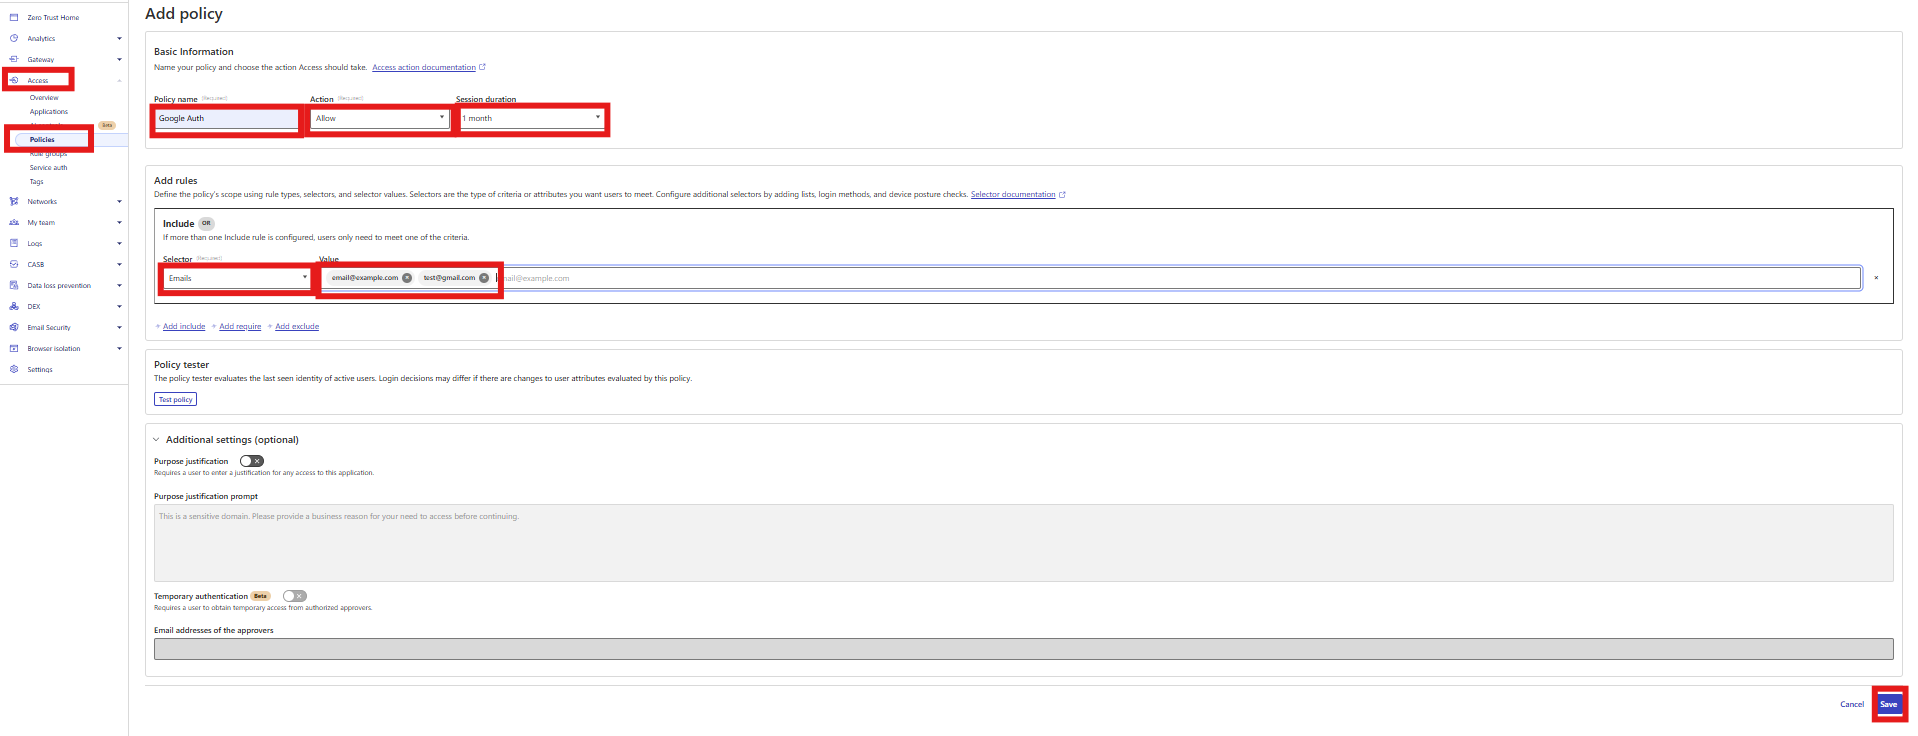
While in the Cloudflare dashboard, go to Access → Launch Zero Trust → Access Policies.
Create a new policy:
- Policy name: Google Auth
- Action: Allow
- Session duration: 1 Month
-
Include: Emails
-
Value: Any email address you want authorized to view your services (e.g.
[email protected],[email protected])
-
Value: Any email address you want authorized to view your services (e.g.
Optional:
-
Exclude: Common name
- Value: Any domain you want excluded from the authorization rules
Note:
To password‑protect the Plex login page, I add an extra subdomain plex.example.com with a path rule web/* under Cloudflare Access.
I also set up a bypass policy for the Plex application itself to ensure the media player and API traffic are not blocked by authentication — only the login page is gated. The bypass policy must be listed first in the policy order.
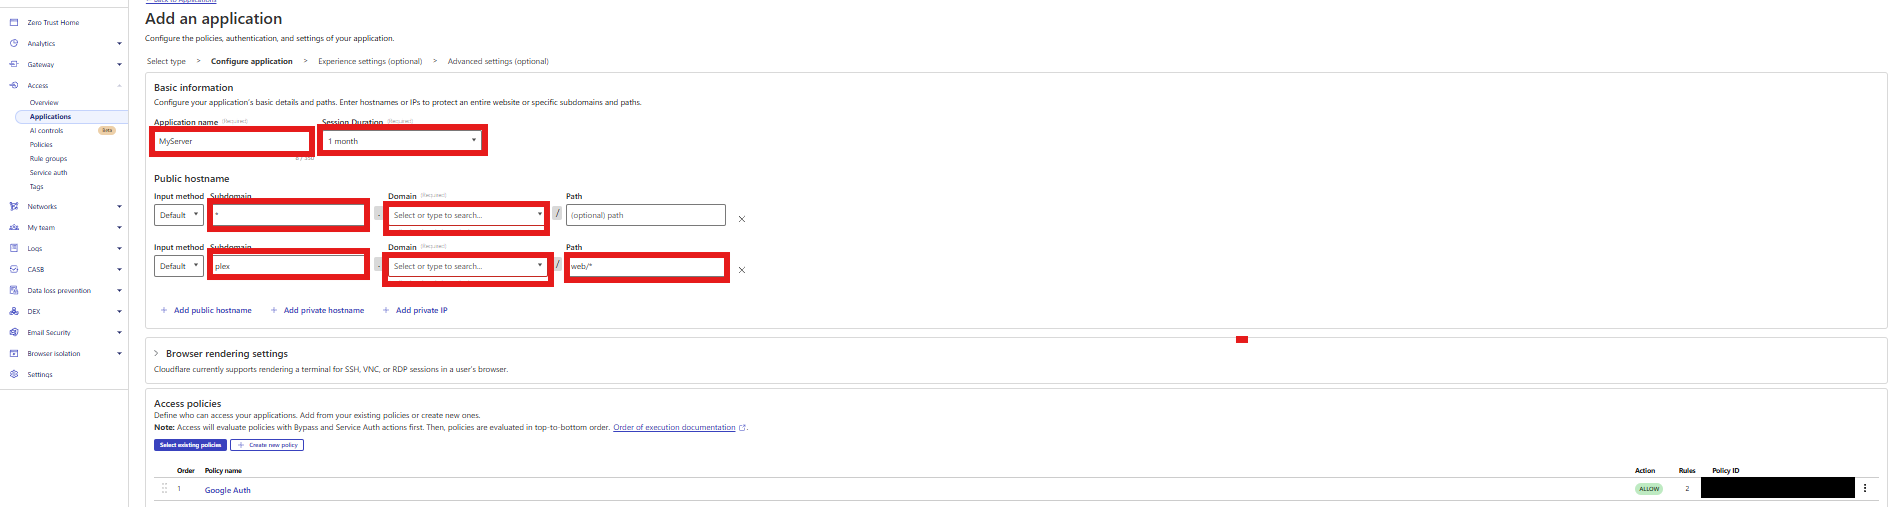
While in Cloudflare, go to Access → Launch Zero Trust → Applications.
- Select Self-hosted
- Application name: My Services
- Session duration: 1 Month
-
Public hostname:
*.example.com - Attach an Access policy (e.g. Google OAuth)
Note:
To password‑protect the Plex login page, I create a dedicated Access application for plex.example.com with a path rule like web/*. This ensures that only the login interface is gated behind authentication.
To prevent Cloudflare Access from interfering with Plex’s internal API and media playback, I also set up a second Access application for plex.example.com with a bypass policy. This second app has no path restriction and allows unauthenticated access to everything else (e.g., /, /video/*, /library/*), ensuring full functionality for the Plex client while still protecting the login page.
Once your tunnel configuration is complete and DNS records are in place, it's time to start the Cloudflared container. This step activates the secure connection between your local services and Cloudflare's edge network.
Use the following command to launch the container using your main stack (e.g., mediaserver):
docker compose -p mediaserver -f docker-compose-server<NUM>.yaml up --detachThis will:
- Start the Cloudflared container defined in your Compose file
- Register the tunnel with Cloudflare using your credentials and config
- Begin routing traffic for all defined hostnames in
config.yml
Once running, Cloudflare will proxy requests to your internal services securely — no exposed ports, no NAT rules, and no public IP required.
Note:
If you make changes to config.yml (e.g., add or remove services), you must restart the container for updates to take effect:
docker restart cloudflared.${HOST_NAME}Start or restart the tunnel container:
docker compose -f docker-compose-cloudflared.yaml up -d
docker compose -f docker-compose-cloudflared.yaml restart cloudflared
Check logs and health:
docker logs -f cloudflared.MyServer
docker exec -it cloudflared.MyServer cloudflared --version
Update image (if not using Watchtower):
docker pull cloudflare/cloudflared:latest
docker compose -f docker-compose-cloudflared.yaml up -d- Traefik is still useful for internal routing, but Cloudflare Access now handles edge authentication.
- Use separate tunnels for prod and dev to avoid accidental policy bleed‑over.
- Always include a final
http_status:404rule inconfig.ymlto catch unmatched requests. - If you update
config.yml, you must restart the container:
-
ERR_TOO_MANY_REDIRECTS → Check
httpvshttpsin service definitions. -
Access challenge on prod → Confirm prod vs dev split (
*.example.comvs*.dev.example.com). - Cert transparency alerts → Staging certs are harmless; ensure ACME requests the correct wildcard.