Overview - aelassas/bookcars GitHub Wiki
In this section, you'll see the main pages of the frontend, the admin panel, and the mobile app.
From the frontend, the user can search for available cars, choose a car, and checkout.
Below is the main page of the frontend where the user can choose pickup and drop-off points and time, and search for available cars.

Below is the search result of the main page where the user can choose a car for rental.

Below is the checkout page where the user can set rental options and checkout.
If the user is not registered, they can checkout and register at the same time. They will receive a confirmation and activation email to set their password if not registered yet.

Below is the sign-in page. On production, authentication cookies are httpOnly, signed, secure, and strict sameSite to prevent XSS, CSRF, and MITM attacks. Authentication cookies are also protected against XST attacks via a custom middleware.

Below is the sign-up page.

Below is the page where the user can see and manage their bookings.

Below is the page showing booking details.

Below is the contact page.

Below is the car rental locations page.

Below is the page where the customer can see and manage their notifications.

There are other pages, but these are the main pages of the frontend.
BookCars is supplier oriented, meaning there are three types of users:
- Admin: Has full access to the admin panel; can do everything.
- Supplier: Has restricted access; can manage only their cars and bookings.
- User: Has access only to the frontend and mobile app; cannot access the admin panel.
BookCars supports multiple suppliers. Each supplier manages their fleet and bookings via the admin panel. It also works with a single supplier if needed.
From the admin panel, admin users can create and manage suppliers, cars, locations, users, and bookings.
When an admin creates a new supplier, the supplier automatically receives an email to create their account and access the admin panel.
Below is the admin panel sign-in page.

Below is the dashboard page where admins and suppliers can see and manage bookings.

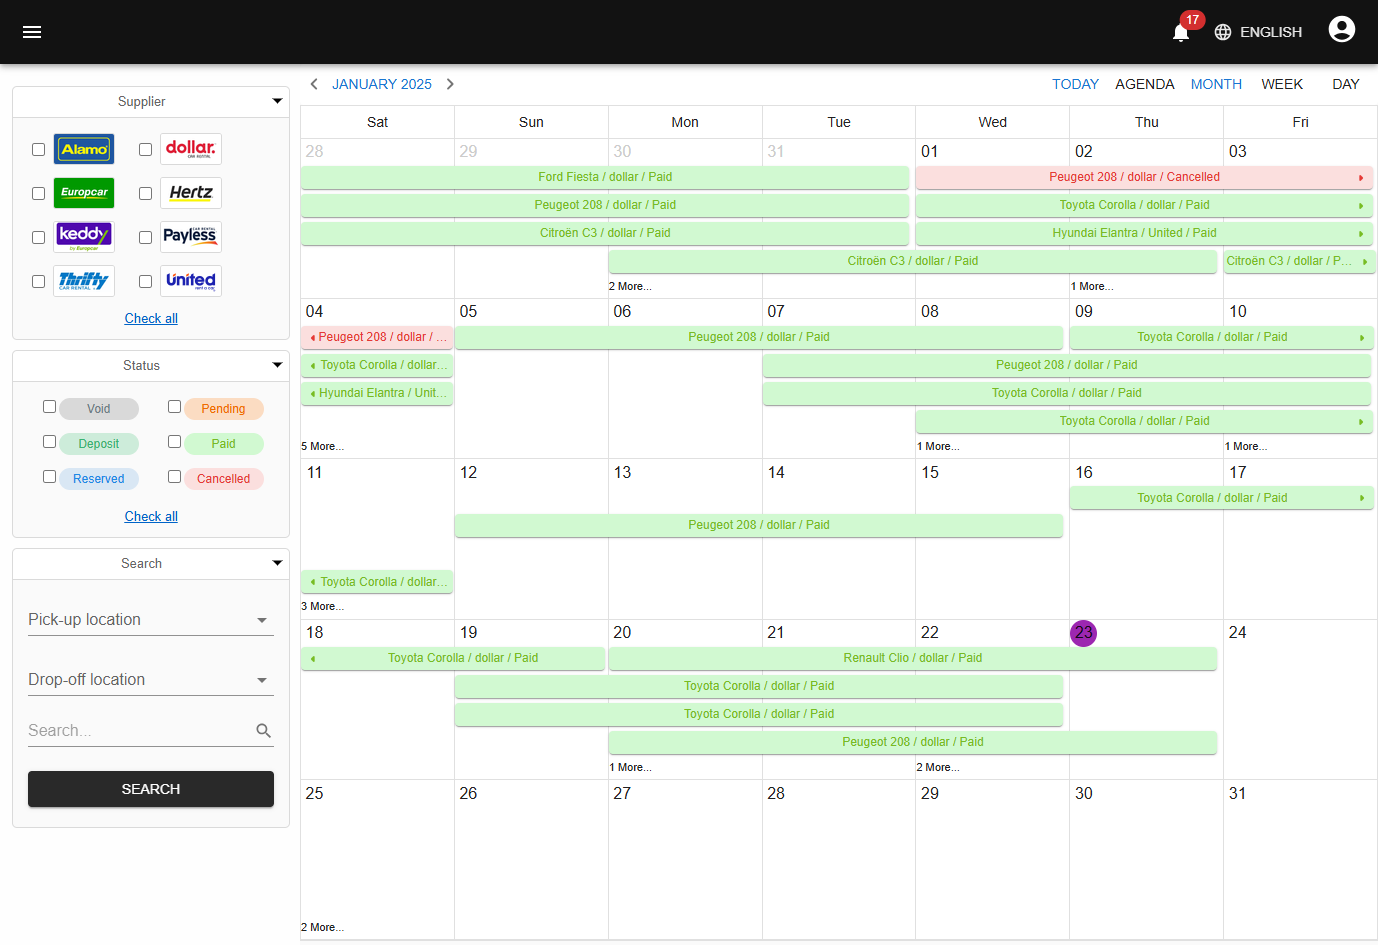
Below is the vehicle scheduler page.
Below is the car fleet management page.

Below is the page to create new cars by providing images and info.
For car options: set 0 for free options, set a price for paid options, or leave empty to exclude.

Below is the page to edit cars.

Below is the page where admins manage platform users.

Below is the booking edit page.

There are other pages, but these are the main ones in the admin panel.
From the mobile app, users can search for available cars, select a car, and checkout.
Users can also receive push notifications when their booking status updates.


Below is the search result page where the user can choose a car for rental and proceed to checkout.


Below are the sign in and sign up pages.


Below are pages where the user can see and manage their bookings.


Below are pages where the user can update profile info, change password, and see notifications.


That's it for the main pages of the mobile app.