B1 : Send Custom Data : Profile Parameters - adobe-target/serverside-testing GitHub Wiki
| Level | Intermediate |
|---|---|
| Time | 10 mins |
We are going to create an XT activity where we will have two different experiences, depending on profile parameter. The profile parameter will represent a transformer type (autobot or decepticon).
Step 1 : Your unique user number
Make sure you know your unique user number. Your unique user number is on the paper on your work station. If you don't have one, please inform the instructor or one of the teaching assistants.
Step 2 : Create the Target Location (mbox) in the react app
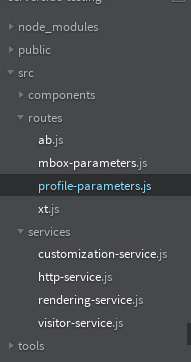
2a. Open Brackets and navigate to src > routes > profile-parameters.js
2b. In the profile-parameters.js file, a1-serverside-profileparams is the name of the target location. Replace a1 with your unique user number.
2c. Hit Cmd + S to save the file.
Step 2 : Create your XT Activity in the Target UI - Select your location
2a. Go to the Target UI.
2b. Click the blue 'Create Activity' button and then select Experience Targeting.
2c. Select the 'Form' option and click Next.
2d. Rename your activity. Prefix your activity with your user number followed by L4242. (Eg: K7-L4242 XT).
2e. Select or type your location (eg: k7-serverside-profileparams) in the box. If your location isn't showing up in the dropdown, that is alright.
Step 3 : Create your XT Activity in the Target UI - Add your audience and content
3a. Click on the three small dots and select 'Change Audience'. This will open the Audience library
3b. In the audience library, select the L4242 - Transformer Type Autobot audience and click 'Save'.
3c. Click the small arrow after 'Default Content' and select 'Change Offer'. This will open the Offer Library.
3d. Select the offer with the title L4242 - Autobot
3e. Click on 'Add Experience Targeting', repeat the previous 2 steps and similarly add Decepticon audience and offer.
3f. Click on 'Next' and you will be taken to the 'Target' step of the workflow.
Step 4 : Create your XT Activity in the Target UI - Set up your goal
4a. Click 'Next' to go to the Goal & Settings screen. On this screen, select 'Adobe Analytics' as your reporting source, 'westeros' as your report suite and Bounce rate as the success metric.
4b. Click on 'Next', wait a few seconds for the activity to sync. Then click 'Activate'
Step 4 : Restartthe node app and verify your XT activity
4a. Open your terminal and press Control + C. The control key is on the bottom left right corner. This will terminate your current app. Your terminal should look like this once you terminate. Look for ^C
4b. Run the app
4b. Go to http://localhost:5000/profile-parameters in your browser or refresh the page if you already have it open.
4c. You should now be seeing one of the two experiences. The app randomly sets the tranformer type!