A5. VEC and SPA Websites - adobe-target/clientside GitHub Wiki
In this exercise, we will learn about some of the gotchas in a SPA implementation and solve them.
Step 1: Navigating a SPA
- Navigate to the link
Transformer Familyon the React App

- Click on the
Homelink to go back to the homepage - Notice that the personalization on this page has been reverted and is no longer visible. Let's solve this problem that would happen on most Single Page Applications.
Step 2: Working with Route Changes
Routers in React are like the URLs for the SPA website. Each route maps to a particular SPA page or view. Unlike traditional website, where navigating across links would lead to a page load, SPAs do not refresh the page. There is however an easy way to let Target know when these changes happen.
- Go to the Brackets app that you have opened before
- Click on the
index.js(under src) file from the left panel. - Uncomment the block from Line 33 to 41 so that by removing lines 33 and 41. Leave rest of the code intact.
- Notice that we have added a CustomEvent named
at-view-startwhenever the history (represented as routes) of the page changes. We will use Launch to add a listener to this event so that we can call the right Target methods.
- Notice that we have added a CustomEvent named
Step 3: Add a new Rule to Launch
- Go to the Launch Tab
- Open your property
quick-start-XXthat you created in Exercise 3. - Go to the Rules tab in Launch and click on
+ Add Rule. - Give this rule a name :
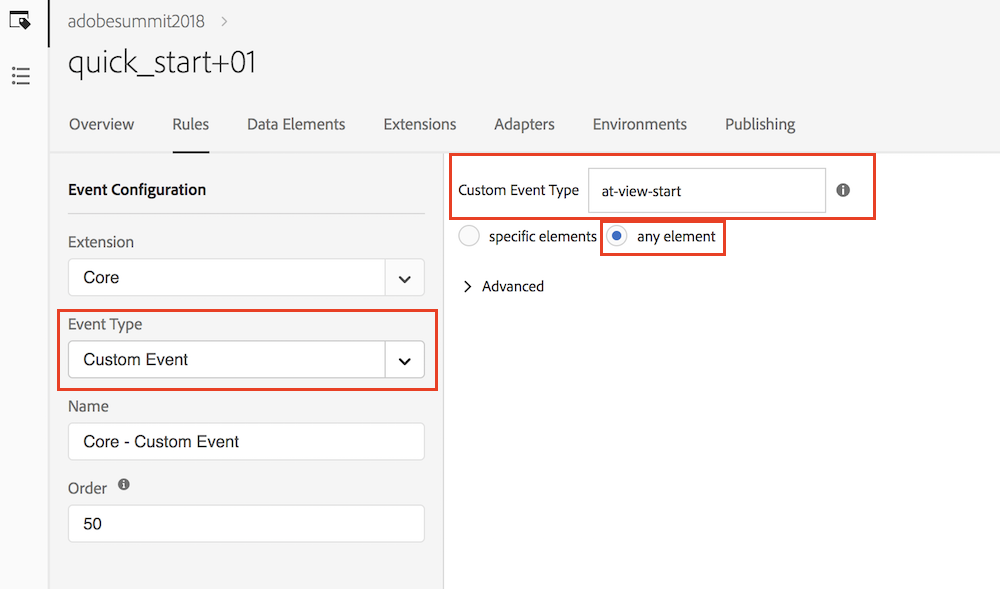
spa-target-rule-XX. Note that XX is your Participant ID. - Under the Events section add a custom event. In the Event Configuration, select following options and save.
- Extension:
Core - Event Type:
Custom Event - Custom Event Type:
at-view-start - Select
any element - Click on
Keep Changes
- Extension:
- Under the Actions section add the actions that we want to perform.
- Click on
+ Add. In the Action Configuration, add- Extension:
Adobe Target - Action Type:
Add Params to Global Mbox - Set Name and Value as accountId and XX respectively. XX is your participant ID.
- Save by clicking on
Keep Changes
- Extension:
- Click on
+ Addto trigger the Global Mbox call.- Extension:
Adobe Target - Action Type:
Fire Global Mbox - Leave Body Hiding as Enabled.
- Save by clicking on
Keep Changes
- Extension:
- Save the Actions
- Click on
- Save the Rule by clicking on the
Savebutton. - Publish your changes
- Go to
Publishingtab - Click on the small
Down Arrownear your library - Hit on
Editoption

- Under the
New Resourcessection below, click onAdd All Changed Resources. This adds all the changes to your Launch library. - Then click on
Save & Build for Developmentbutton

- Go to
The new rules for supporting your SPA website has now been published.
Step 4: Confirm on your SPA App
Navigate across your SPA app navigation links and return back to home. You will notice that the experience is now consistently visible as you navigate back-and-forth from the homepage.