A3. Deploy AT.js using Adobe Launch - adobe-target/clientside GitHub Wiki
Adobe Launch is a platform to develop and deploy Dynamic Tag Management extensions. In this exercise we will learn how to use Adobe Launch for deploying Adobe Target on your website.
This lab exercise has two parts:
- Setting up Adobe Launch for your website
- Add Target to your deployment using the Launch interface
First, we will set up Adobe Launch for our website.
- Open https://launch.adobe.com in a new tab.
- Click on
Sign in with Adobe ID - Type the username and password provided on the sheet.
- Once you login, make sure you are in the
Target Summit Laborganization as displayed in the top-right corner of the page.
-
After you have logged in successfully you should be able to see the Adobe Launch UI. Notice in the right upper corner, the logged in user details, organization and Adobe Products associated.
-
Click on the
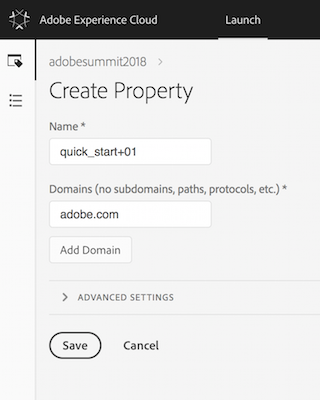
Add New Propertybutton. -
Name your property —
quick_start+XX, XX is your Participant ID written on the sheet. -
Use
adobe.comas the domain -
Don’t change any Advanced Settings.
-
Click on
Savebutton
-
A new property can be seen on the Properties page.
An Adapter refers to the destination(s) where you want to deploy your Launch libraries — on Adobe’s Akamai instance or on your own web servers. For our Lab we'll use the Akamai Adapter.
- Click on the property you just created.
- You should see a panel like this:
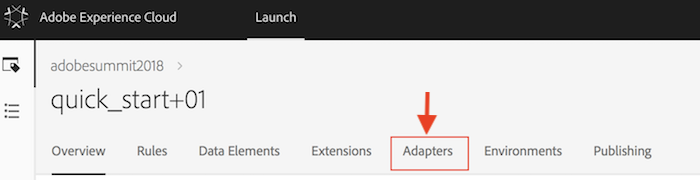
- Click on the
Adapterstab - Click on
Create New Adapterbutton.- Enter adapter name:
akamai+XX - Choose an Akamai Adapter type
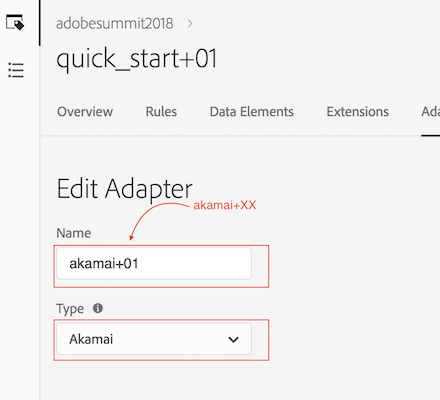
- Click on
Savebutton
- Enter adapter name:
An environment is a destination for deployment. An environment has a 1:1 relationship with an embed code.
- Choose
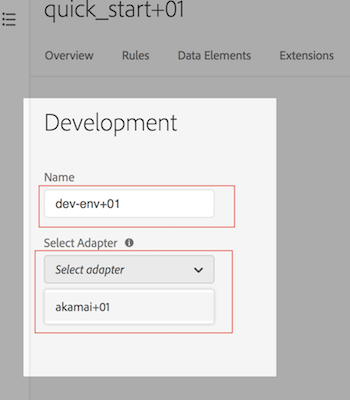
Environmentsfrom the top navigation tabs and then clickCreate New Environment. - In this lab, we will be creating a development environment. Under
DevelopmentclickSelectto choose a development environment. - Enter an environment name:
dev-env+XXand choose from the adapters dropdown the adapter that you've created in Step 3akamai+XXand click the create button.
The Create archive option is a feature used for self-hosting, which we will not be using in this Lab.
Note that as soon as you select the Adapter and hit the create button, the embed code for that environment is created and displayed. Each environment will have its own unique embed code.
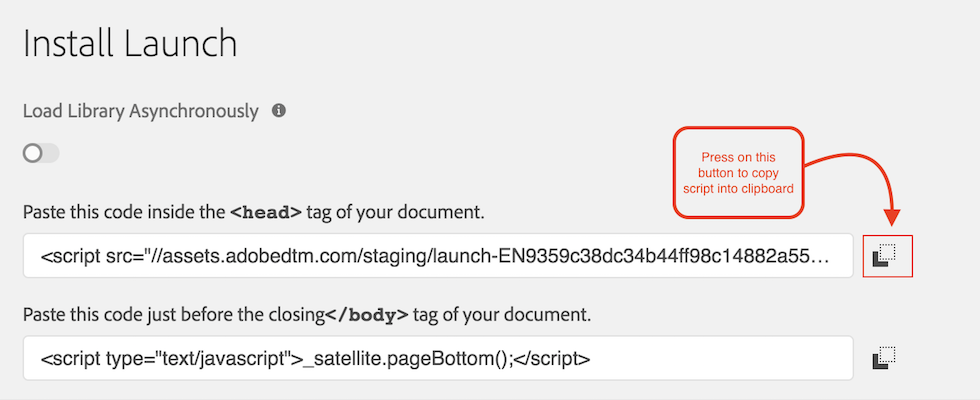
- Copy the embed codes from the environment that you just created.
- Open Brackets Window with your react sample app, expand
srcdirectory and click ontemplate.htmlfile. - In your
template.htmlfile find the<head> </head>section and paste your embed code before<head>html tag closes. PressCommand+Sto save the html file. Yourtemplate.htmlfile should look similar to: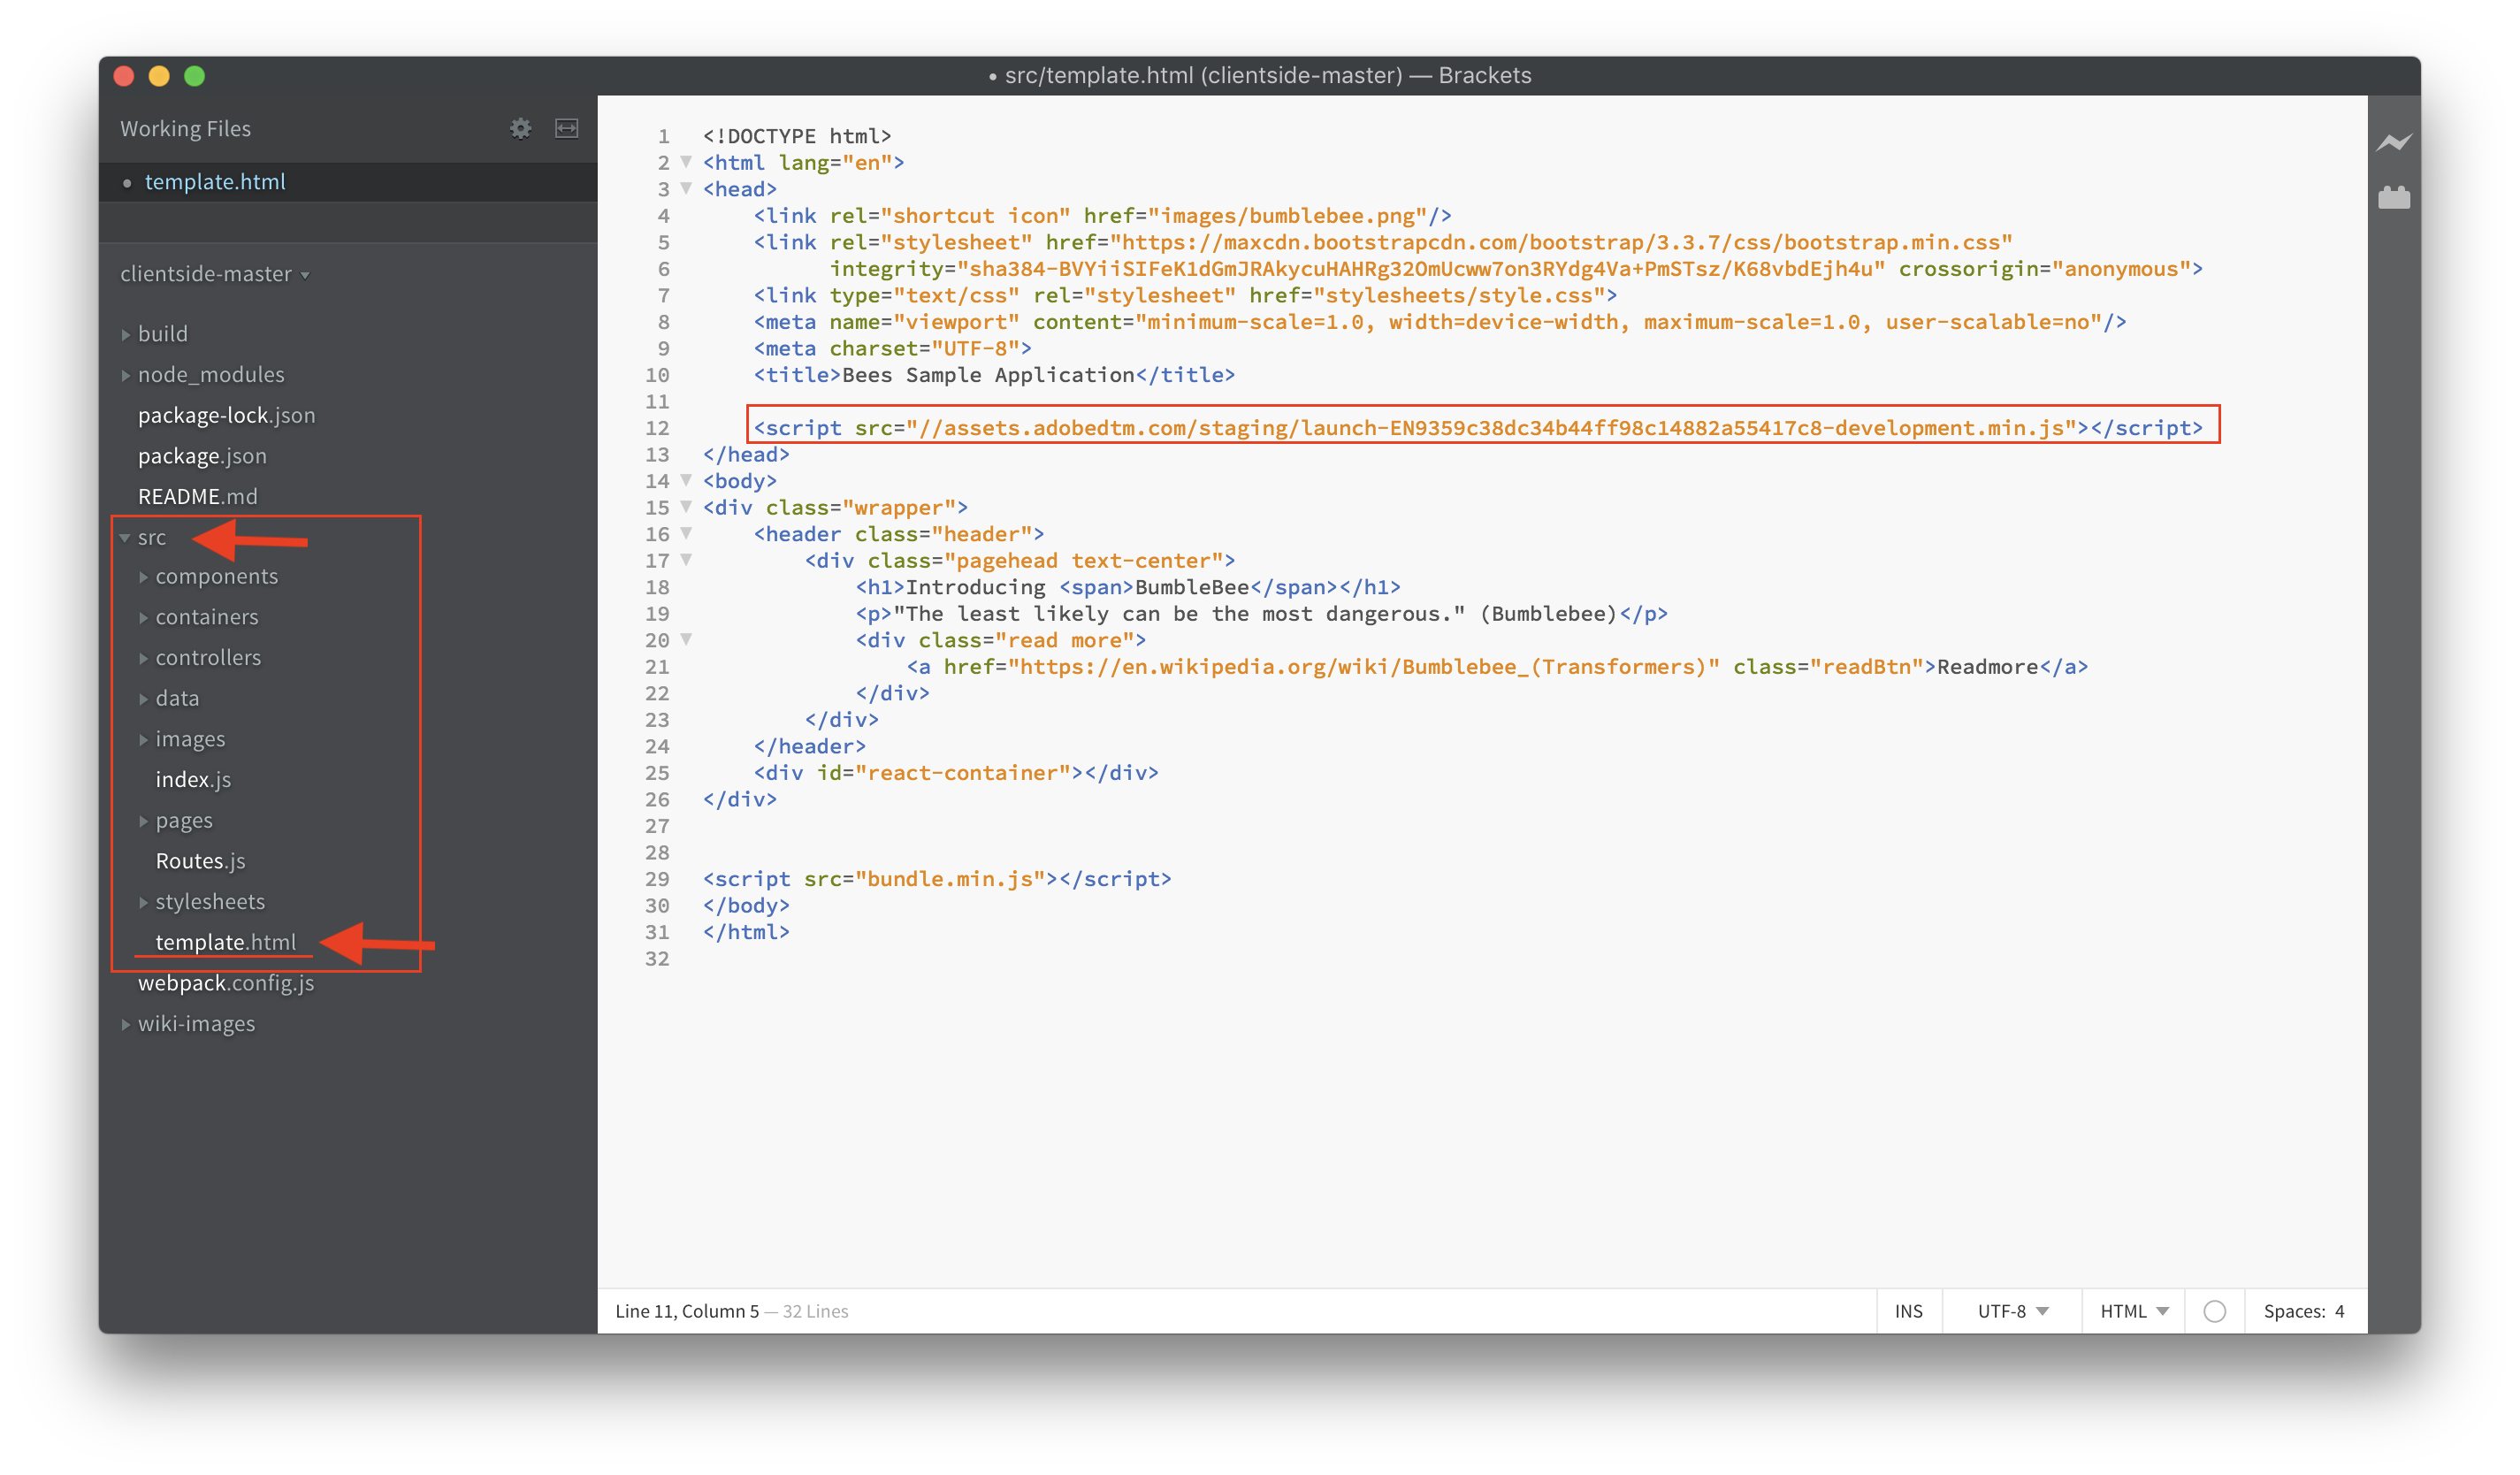
We are now one step away from publishing the dynamic tag created using Adobe Launch. Go to the Adobe Launch browser tab in the Google Chrome window.
- Go to the
Publishingtab in Adobe Launch and click onAdd New Librarybutton.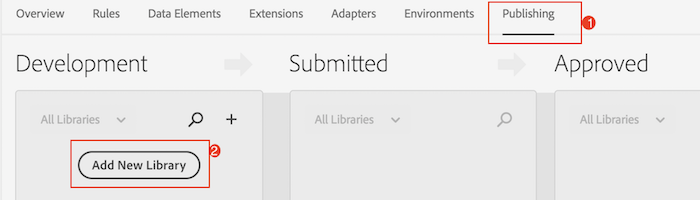
- Add New Library
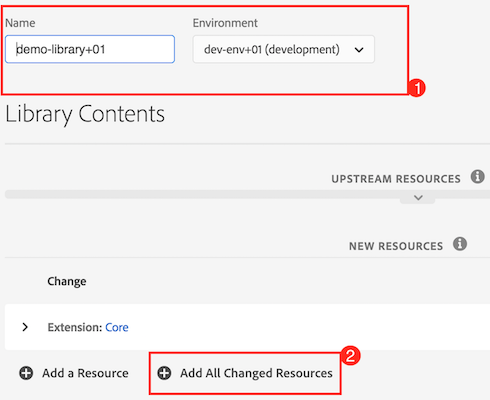
- Enter a name for your Library:
demo-library+XX - Choose the development environment that you've created in Step 4
- Enter a name for your Library:
- Add All the Changes to build by clicking on
Add All Changed Resourcesbutton - Click on
Savebutton .
- Your library is now created. Build the library with the following steps:
- Click on the small arrow next to the yellow bullet
- Choose
Build for developmentoption
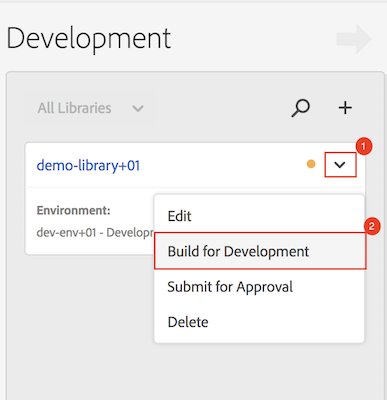
- A build for your library was started and instead of yellow bullet you now should see a loading spinner.
Once the bullet turns green in color, your library has been successfully build and your changes are deployed to Akamai.
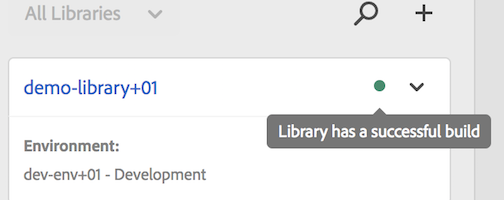
Note: If bullet has red color, then the library build failed. Please let your TA know.
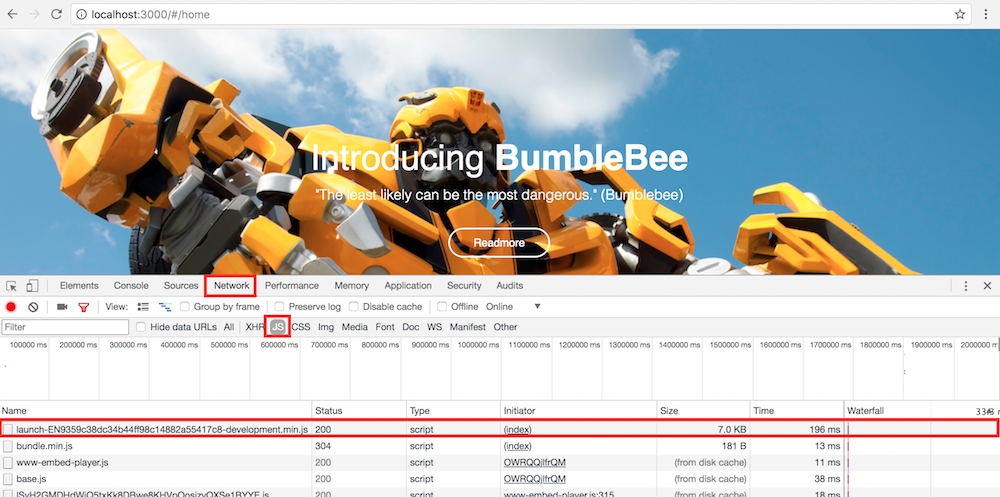
The Dynamic Tag is now ready for use in your web applications. Go to your sample react application browser window and refresh the page.
Open the Chrome Developer Tools(alt+command+I) on the chrome window with Sample React Application and go to the Network tab. Make sure you have selected JS requests type. Now you should see the launch-bundle successfully loaded.
NOTE: If your application doesn't run, repeat Steps 3 and 4 from A2: Download and Run the React app
Congratulations! You've just deployed and integrated your first Launch Dynamic Tag.
Now that we have set up Adobe Launch on our website, it allows us to deploy any Javascript Library using the Launch interface. We will set up AT.js, Target Client Library, for our website using Launch.
To achieve this, we will be using the Launch extension capability. An extension is a packaged set of code that extends the Launch interface and the library functionality. Launch is the platform, and extensions are like apps that run on the platform.
- Open your chrome tab with Adobe Launch and go into your property.
- Click on
Extensionstab. There are two tabs -InstalledandCatalog.-
Installed- All currently installed extensions are listed here. You will see theCOREextension there. This includes common Launch capabilities. -
Catalog- The latest versions of all available Launch Extensions are available here.
-
- Click on the
Catalogtab and findAdobe Target Extensioncard, once you found it click on install button.
- This opens the
Adobe Target Extensionconfiguration page. This allows us to configure the AT.js deployment.- Confirm that the
Client Codeis set totargetsummitlab, the organization for this lab. - If you see any other value, please seek help from a TA in this lab.
- Confirm that the
- The Adobe Target Extension is now installed for your Launch Property.
Launch is a rule-based system. It looks for user interaction and associated data. When the criteria outlined in your rules are met, the rule triggers the extension, script, or HTML you identified. We will create the necessary Target rules for our Launch integration.
- Go to the
Rulestab and click on theCreate New Rulebutton. - Give it a name -
target-rule+XX, where XX is your participant ID
- We will create a Target rule that performs a set of actions (such as loading the AT.js library) when an event (such as page load) happens.
We will add an event that loads the Target Library at the top of the page.
- To set up an event hit the
Addbutton underEventssection.
- In the event configuration container:
- Leave
ExtensionasCore - In the
Event Typeselect theLibrary Loaded(Page Top)event underPage Loadsection at the end of the dropdown. - Click on
Keep Changesbutton to save the event configuration
- Leave
-
Core - Library Loaded (Page Top)should now be visible under the Events section
We will add three actions - Loading the Target Library, Adding a Global Mbox parameter and Firing the Global Mbox.
- Click on
Addunder Actions - In Action Configuration, select
Adobe Targetunder Extension - Select
Load Targetunder Action Type - Click on
Keep Changes - Click on the
+icon under Actions to add another action - In Action Configuration, select
Adobe Targetunder Extension - Select
Add Params to Global MBoxunder Action Type - In the action configuration, you will see a name, value pair you can add. Add
accountIdin Name andXXin Value.- Parameters to a Target MBox are send to every Target Request and can be used to personalize the experience. In this example, we will be sending the parameter accountId with every Target request.

- Parameters to a Target MBox are send to every Target Request and can be used to personalize the experience. In this example, we will be sending the parameter accountId with every Target request.
- Click on
Keep Changes - Click on the
+icon under Actions to add another action - In Action Configuration, select
Adobe Targetunder Extension - Select
Fire Global MBoxunder Action Type - Notice that the action configuration has
Body Hidingenabled.- When Target is deployed on the client-side, content on your web page is personalized. This happens once the relevant page elements are available for a change. In order to give visitors a consistent experience and not cause a flicker on the page, it is advisable to hide the page or page elements. Target makes them visible after the personalization has been applied.
- Click on
Keep Changes
Your actions are now configured and your Target Rule should look like this.

Click on the Save button and your Rule is ready to be used.
Publishing is all about getting your extensions, data elements, and rules to work for you, collecting the data you want them to collect and providing the experience you want to provide for your users. The following steps will publish all our changes to Adobe Launch.
- Go to
Publishingtab - Click on the small
Down Arrownear your library - Hit on
Editoption

- Under the
New Resourcessection below, click onAdd All Changed Resources. This adds all the changes to your Launch library. - Then click on
Save & Build for Developmentbutton

You have successfully deployed AT.js to your React App using Adobe Launch
