Using the Tab Manager - adobe-dmeservices/custom-metadata GitHub Wiki
Using the Tab Manager
Metadata Views can be organized into Tabs. Each tab has a corresponding View, defined by a View JSON file. When you create a new Tab, you must include a View. You can load a View JSON that had been exported by another user, load a pre-defined View from the example Views, or enter a URL to load a View JSON from a network location.
-
To open the Tab Manager, navigate to Preferences and click on the Tab Management button. The Tab Manager will open in a new window.
-
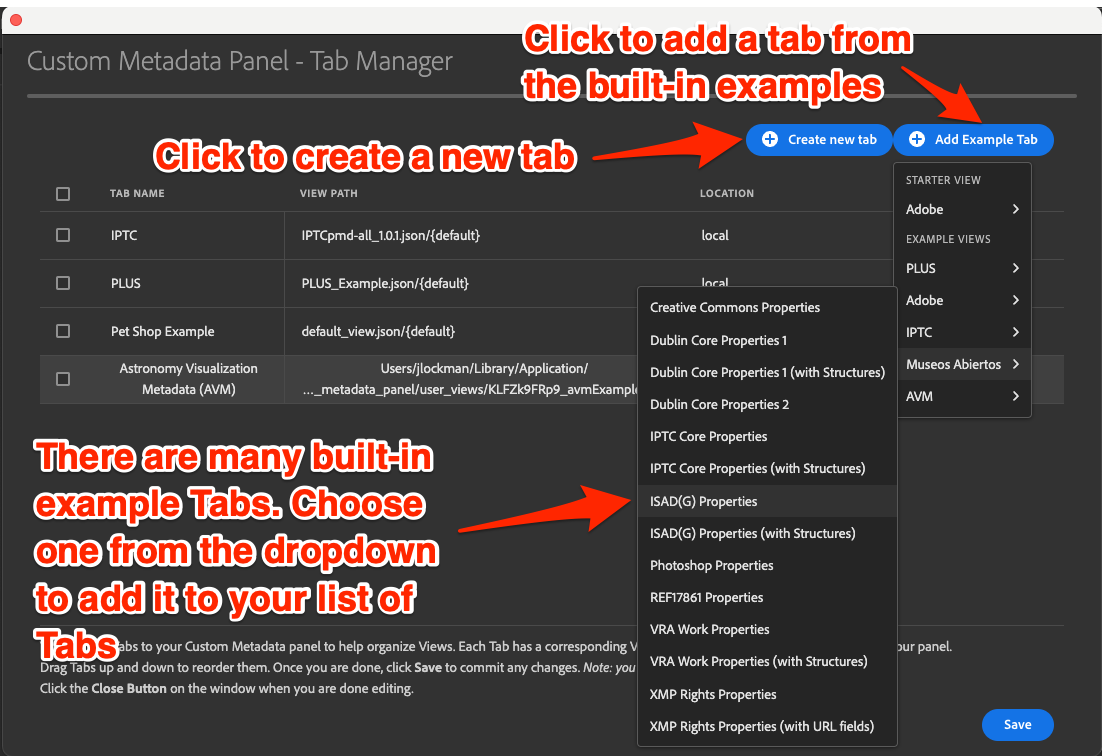
Click (+ Create New Tab) to add a new empty Tab. Click (+ Add Example Tab) to choose a tab fom the library of pre-built Tabs. This is the easiest way to get started with Custom metadata Panel. You can also edit an existing Tab's details by clicking on its pencil icon.
-
Each Tab requires a name and a JSON definition file for its associated View, which can be stored on a Network location or locally. If you create a Tab using the pre-built examples, then the name will be pre-populated and the JSON will be created automatically.
-
If you choose Local, you can then either import an existing JSON via drag and drop or by clicking on the drop area, or you can create a new one. To create a new View, click Create New. This will open the View Editor. When you are finished creating a new View, Save the View and close the window.
-
If you choose Network, enter a URL that resolves to a View JSON file. You may need to provide access credentials, based on your server settings. We recommend that View JSON be publicly available to your users to avoid any access issues. Using URL-based View definition makes it easy for an administrator to centrally manage a View for a workgroup. When the administrator updates the View, everyone in the workgroup gets the updated View when they next launch their Creative Cloud applications.
Important note: URL-based Views may not be editied directly using the View Editor. It is possible to save the JSON locally, and then edit it.
-
You can delete Tabs by selecting one or more Tabs, and then clicking on the red Delete Selected button.
-
You can reorder tabs by selecting one or more Tabs, and then dragging them up and down.
-
When you are done adding, editing, reordering or deleting Tabs, click Save. This will close the Tab Manager. You will need to click Done.
NOTE: The three default Tabs' Views cannot be edited. You can reorder them. delete them, copy fields from them, or export the JSON files. These are included in the built-in Tabs/Views, so you can always recreate them.