Layout Building - adamjberg/RIME_InstrumentBuilder GitHub Wiki
#Instrument Builder - Layout Building
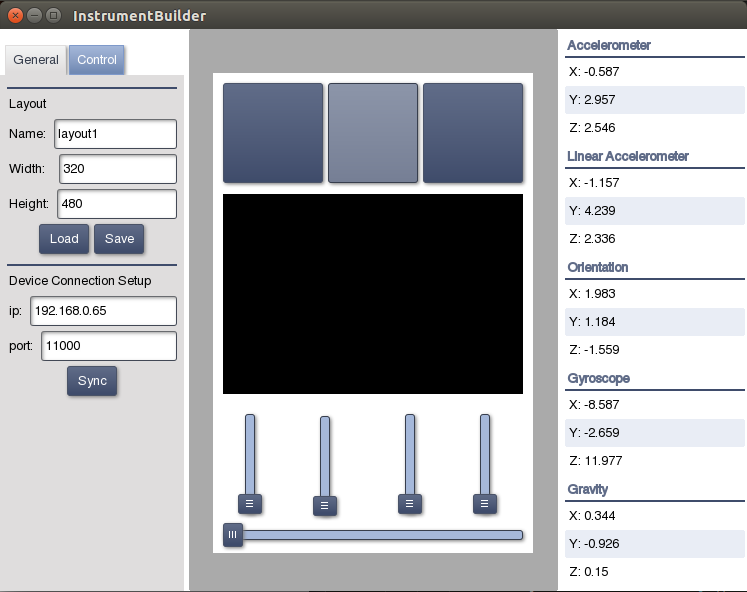
##Layout Setup The sidebar can be used to adjust the sizing of the layout. This helps accommodate different resolution screens. The name will be used to identify this layout when saving and loading.
###Saving Pressing save will save the current layout with the name in the "name" field.
###Loading Pressing Load will bring up a popup with all previously saved layouts. Once one is selected it will immediately be loaded into the Instrument Builder.
##Adding a control Controls can be added by clicking a location in the middle white square (This represents the phone). A popup will appear listing the available controls. Once one is selected it is placed with the top-left corner where the mouse was originally clicked.
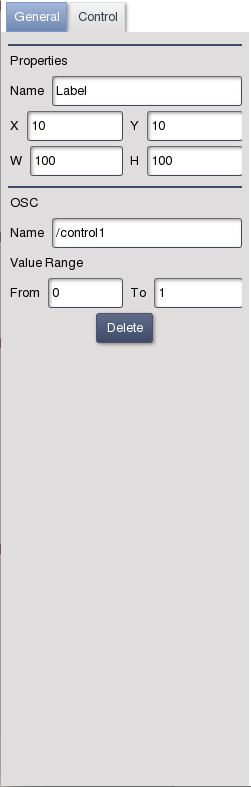
##Control Sidebar images/ControlSidebar.png
##Moving a control ###Click and Drag Controls can be moved simply by clicking and dragging the control to its new position. ###Sidebar A control can also be positioned using the text fields in the "Control" tab of the sidebar, for finer control.
##OSC settings
###Address Pattern Each control is associated with an OSC address pattern. When the control is modified, it will send out an OSC message with that address pattern and the new value[s] of the control.
###From and To values By default, all controls will send float values ranging from 0 to 1. For example, a button will send a 1 when pressed or a 0 when not pressed. If these values need to be different, they can be updated in the "Value Range" section of the Control sidebar.
##Deleting a Control In order to delete a control, click on the desired control to remove. The "Control" tab will appear, and the "Delete" button will remove the button from the layout.
Now that you have a layout head to the Connection Setup page to learn how to connect to the mobile application.