How to fork - accetto/ubuntu-vnc-xfce-g3 GitHub Wiki
How to fork this repository
Version: G3v2
Updated: 2022-11-04
Introduction
This page describes what you need to create and configure after forking or cloning this GitHub repository, if you want to use the same building pipeline.
Before reading this page it can be helpful to read the pages Concepts of building, Building stages, How building works and How CI works first.
This GitHub repository contains a simple, self-contained and CI/CD capable engine for building sets of configurable Docker images that are published to the Docker Hub.
It's the second version (G3v2) of the project that is described here. You can learn more about the changes on the Wiki page Project versions.
Engine parts
The complete engine consist of the following parts:
- One main GitHub repository containing all the resources except the selected Docker image metadata
- One or more building stages. A building stage is a Linux or Windows computer with
DockerorDocker Desktopinstalled (Mac OS has not been tested, but it should work equally well). It can also be some other environment, capable of building Docker images (e.g. the GitLab). - One or more Docker Hub repositories used as the deployment repositories for publishing the images
- One GitHub Gist belonging to the builder repository (actually to the building stage)
- One GitHub Gist belonging to all the deployment repositories together
GitHub repository
The main GitHub repository (actually this repository accetto/ubuntu-vnc-xfce-g3) is created by forking or cloning it from the GitHub the usual way.
The repository contains all necessary resources for building the Docker images except the selected image metadata, that are stored externally in the GitHub Gists by intention.
You can keep your cloned repository private or public.
Preparing environment
Before building the images you have to prepare the building environment. The easiest way to do it, is to prepare a file containing all the necessary environment variables and source it in the terminal at the beginning of the building session.
You can use the provided file example-secrets.rc as a template.
If you call the file secrets.rc and put it into the folder docker/hooks/, then it will be sourced automatically by the hook script env.rc.
Be careful to exclude the file from your public commits, because it probably contains the real secrets. Adjust the .gitignore file correctly.
This is actually the only file you have to adjust.
If you set the following essential environment variables, then no other adjustments are necessary. Unless you want them, of course.
Essential environment variables:
DOCKER_BUILDKITREPO_OWNER_NAMEGIST_IDDEPLOY_GIST_IDDEPLOYMENT_REPODEPLOYMENT_REPO_CHROMIUMDEPLOYMENT_REPO_FIREFOXBUILDER_REPOSHARED_G3_CACHE_PATH
Essential real secrets:
GIST_TOKENDOCKERHUB_USERNAMEDOCKERHUB_PASSWORD
GitHub PTA
After forking/cloning my repository you have to create one personal access token (PTA) in your cloned/forked GitHub repository (section Settings/Developer settings/Personal access tokens).
This PTA will be used for modifying the GitHub Gists that keep the off-line metadata of the images.
The name of this PTA is not important, but it must have the scope gist.
The value of this PTA should be assigned to the environment variable GIST_TOKEN.
It should be understood, that the personal access tokens (PTA) are created not per repository, but per GitHub account. These tokens could have access to all GitHub Gists, workflow and repositories of the same GitHub account (owner). Therefore they should be handled as secrets.
Also, if you already have such a PTA, then you don't need to create a new one, unless you want to.
GitHub Gists
Next you have to create two GitHub Gists.
One GitHub Gist will belong to the builder repository (actually to the building stage) and the other one to all the deployment repositories together.
It makes no difference in which order they are created or how they are named. The actual assignment is done by storing their ID values into the environment variables GIST_ID and DEPLOY_GIST_ID.
The GitHub Gist ID value can be extracted from its URL.
However, to make the GitHub Gist assignments more obvious, I recommend to create the first file in each GitHub Gist manually and use it as a GitHub Gist's quasi-name. Choose some name, which will be kept always on top (the gist's files are sorted alphabetically).
For example, in my current project it looks like this:
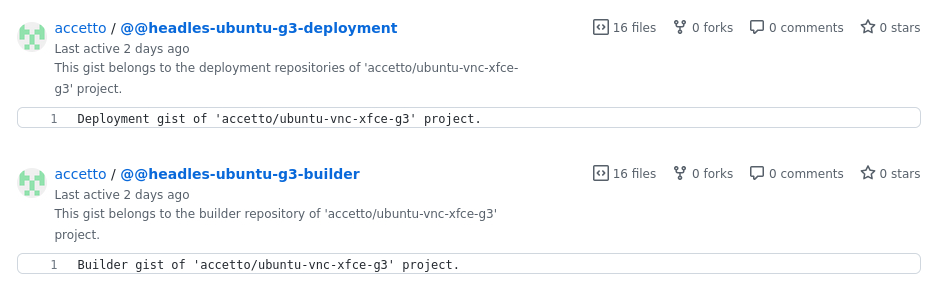
The GitHub Gists do not really have names, but such a way I've created the following quasi-names for them:
- @@headless-ubuntu-g3-builder for the builder repository
- @@headless-ubuntu-g3-deployment for the deployment repositories
The GitHub Gists require no further configuration and even creating the first file manually (quasi-naming them) is not really required. All content will be maintained automatically by the building pipeline.
You can keep both GitHub Gists public or secret.
However, be aware that even the secret GitHub Gists are not really secret, because you can always access them if you know their ID values. Those values are used, for example, in the badge links in the README files.
It should be understood, that the GitHub Gist belonging to the deployment repositories merely stores the off-line metadata (e.g. badge endpoints) of the published images. It is maintained by the building pipeline, but it does not participate in the decision making if a particular image needs to be refreshed or not. Only the verbose version sticker values from the GitHub Gist belonging to the builder repository are taken into consideration.
Docker Hub deployment repositories
At last, you have to create one or more Docker Hub deployment repositories where the images will be published.
For example, my project uses the following deployment repositories:
- for the base images it's accetto/ubuntu-vnc-xfce-g3
- for the images featuring the Chromium Browser it's accetto/ubuntu-vnc-xfce-chromium-g3
- for the images featuring the Firefox Browser it's accetto/ubuntu-vnc-xfce-firefox-g3
The deployment repositories can be public or private and they do not require any further configuration.
The also do not need to be connected to the GitHub repository.