How to - accetto/ubuntu-vnc-xfce-firefox-plus GitHub Wiki
Updated: 2019-06-10
Table of content
- How to create containers?
- How to use headless containers?
- How to override VNC password?
- How to override VNC resolution?
- How to override VNC user?
- How to override VNC blacklist parameters?
- How to use pre-configured Firefox preferences?
- How to use pre-configured Firefox profiles?
- How to build images with pre-configured Firefox preferences?
- How to build images with pre-configured Firefox profiles?
- How to run containers in foreground?
How to create containers?
Created containers will run under the privileged root user by default.
The following container will listen on the host's TCP ports 25901 (VNC) and 26901 (noVNC):
docker run -d -p 25901:5901 -p 26901:6901 accetto/ubuntu-vnc-xfce-firefox-plus
The following container wil create or re-use the local named volume my_Downloads mounted as /home/headless/Downloads. The container will be accessible through the same TCP ports as the one above:
docker run -d -p 25901:5901 -p 26901:6901 -v my_Downloads:/home/headless/Downloads accetto/ubuntu-vnc-xfce-firefox-plus
or using the newer syntax with --mount flag:
docker run -d -p 25901:5901 -p 26901:6901 --mount source=my_Downloads,target=/home/headless/Downloads accetto/ubuntu-vnc-xfce-firefox-plus
How to use headless containers?
There are two ways, how to use the created headless containers. Note that the default VNC user password is headless.
Over VNC
To be able to use the containers over VNC, a VNC Viewer is needed (e.g. TigerVNC or TightVNC).
The VNC Viewer should connect to the host running the container, pointing to the host's TCP port mapped to the container's TCP port 5901.
For example, if the container has been created on the host called mynas using the parameters described above, the VNC Viewer should connect to mynas:25901.
Over noVNC
To be able to use the containers over noVNC, an HTML5 capable web browser is needed. It actually means, that any current web browser can be used.
The browser should navigate to the host running the container, pointing to the host's TCP port mapped to the container's TCP port 6901.
However, since the version 1.2.0 the containers offer two noVNC clients. Additionally to the previously available lite client there is also the full client with more features. The connection URL differs slightly in both cases. To make it easier, a simple startup page is implemented.
If the container have been created on the host called mynas using the parameters described above, then the web browser should navigate to http://mynas:26901.
The startup page will show two hyperlinks pointing to the both noVNC clients:
http://mynas:26901/vnc_lite.htmlhttp://mynas:26901/vnc.html
It's also possible to provide the password through the links:
http://mynas:26901/vnc_lite.html?password=headlesshttp://mynas:26901/vnc.html?password=headless
How to override VNC password?
The default VNC password is headless. To change it for a new container, simply provide its value through the environment variable VNC_PW:
docker run -d -P -e VNC_PW=newpassword accetto/ubuntu-vnc-xfce-firefox-plus
It's also possible to change the default VNC password for a new image using the build argument VNC_PW.
How to override VNC resolution?
The default VNC resolution is set to 1024x768 pixels. To change it for a new container, simply provide the new value through the environment variable VNC_RESOLUTION:
docker run -d -P -e VNC_RESOLUTION=1360x768 accetto/ubuntu-vnc-xfce-firefox-plus
How to override VNC user?
To run a new container under a non-root user 2017:2000, use the user parameter of the docker run command:
docker run -d -P --user 2017:2000 accetto/ubuntu-vnc-xfce-firefox-plus
There will be some user limitations inside the container because the actual user account is not created this way. Depending on the use case, it could be seen as an advantage or a disadvantage.
Note that in this case the user must be specified numerically (as uid or uid:gid).
The root user on the other hand can be specified numerically or by its name (as 0, 0:0, root or root:root) and it will not be limited in any way:
docker run -d -P --user root accetto/ubuntu-vnc-xfce-firefox-plus
Again, depending on the use case, running a container under the privileged root user could be seen as an advantage or a disadvantage. In any case, potential security risks should be carefully assessed.
How to override VNC blacklist parameters?
The VNC parameters BlacklistTimeout and BlacklistThreshold are configurable through the build arguments ARG_BLACKLIST_TIMEOUT/ARG_BLACKLIST_THRESHOLD and environment variables BLACKLIST_TIMEOUT/BLACKLIST_THRESHOLD. Their original default values have been:
BlacklistTimeout = 10
BlacklistThreshold = 5
However, since the version 1.1.3 they are set to the following values:
BlacklistTimeout = 0
BlacklistThreshold = 20
It effectively disables the built-in VNC blacklisting, mitigating the VNC connection problem "Too many security failures".
The original default values can be restored using the following command:
docker run -d -P -e BLACKLIST_TIMEOUT=10 -e BLACKLIST_THRESHOLD=5 accetto/ubuntu-vnc-xfce-firefox-plus
How to use pre-configured Firefox preferences?
Containers created from the image accetto/ubuntu-vnc-xfce-firefox-plus come with the configuration file user.js you can put your preferred Firefox preferences into. The file is editable by the non-root VNC user (headless:headless by default) and you can simply copy and paste your content into it.
The file user.js is stored in the folder /home/headless/.mozilla/firefox/profile0.default/. This folder is pre-created for the default Firefox profile (called default), but it contains only the user.js file at first (therefore a proto-profile). The actual profile content will be created by the Firefox itself on its first start.
You can rename the proto-profile folder if you don't like the default name. However, then you have to adjust the /home/headless/.mozilla/firefox/profiles.ini file accordingly:
[Profile0]
Name=default
IsRelative=1
Path=profile0.default
Default=1
Preferences put into the user.js will be forced for each new Firefox session. However, the file has only profile scope.
If the profile containing the user.js file is deleted or a new profile is created, then there will be no user.js file recreated automatically.
If you change your mind or you just made a mistake, you can use the proto-profile backup copy /home/headless/firefox.plus. Just get the user.js file from there.
Please note that Firefox 67 has changed default profile handling and therefore the pre-created folder profile0.default, which contains the file user.js with user preferences, will not be used automatically, until you explicitly choose the folder before the first Firefox start. The other option is to copy the user preferences afterwards using the provided script. You can find more information about it in the issue #3.
The following desktop launchers have been added for your convenience:
- FF Profile Manager starts the Firefox with the argument -P so you can choose Firefox profiles or create new ones conveniently. It is recommended to choose the pre-created profile folder
profile0.defaultbefore the first Firefox start. Note that it shows up as the default profile in the Profile Manager's list and that the actual profile data will be created by the Firefox itself. - Copy FF Preferences starts the script for copying the file user.js, containing your own Firefox preferences, to one or more Firefox profiles interactively. You can use it if you haven't chosen the profile before the first Firefox start or you have created new ones later.
The current default user.js content looks like this:
// Issue: Firefox tab crashes "Gah. Your tab just crashed."
// Mitigate the tab crashing problem by forcing the following preferences:
user_pref("browser.tabs.remote.autostart", false);

// Add the preferences you want to force here.
// The preferences will be forced for each session, but only in the profile containing this file.
// There is also a backup copy of this file in '/home/headless/firefox.plus'.
// The VNC user ('headless:headless' by default) gets permissions to modify or delete this file.
How to use pre-configured Firefox profiles?
Containers created from the images with Firefox (accetto/ubuntu-vnc-xfce-firefox-default or accetto/ubuntu-vnc-xfce-firefox-plus) can make use of the mounting point /home/headless/.mozilla and mount volumes on it.
Both named volumes and bind mounts can be used. Docker documentation explains the difference.
Firefox profiles on volumes of both kinds will survive container destruction.
Using named volumes is simpler, because they are managed by Docker itself.
The following container uses the named volume my_Firefox for the Firefox profile:
docker run -d -p 25901:5901 -p 26901:6901 --mount source=my_Firefox,target=/home/headless/.mozilla accetto/ubuntu-vnc-xfce-firefox-plus
This way is the best, if the profile will be created as new and then configured using the Firefox browser itself. However, pre-loading profiles on named volumes could be complicated, because they are not intended to be modified from outside.
If you want to use an already existing Firefox profile, then it's easier to use bind mounts. However, managing the access permissions could more complicated.
The following container uses the host's folder /share/homes/joe/fxprofile for the Firefox profile:
docker run -d -P -v /share/homes/joe/fxprofile:/home/headless/.mozilla accetto/ubuntu-vnc-xfce-firefox-plus
The host's profile folder can already be pre-loaded with some pre-configured Firefox profile data, or the default profile created during the first Firefox run can be overwritten afterwards.
Make sure that the container has the correct access permissions to the volume folder.
Be aware that the folder /share/homes/joe/fxprofile will be created if it hasn't existed yet. In that case it will belong to the local host user account creating the container. The access permissions to the volume folder must be adjusted afterwards, making sure that the user headless:headless from inside the container gets writing permissions to the folder. Otherwise Firefox fails to start ("Profile Missing" message). Note also that the volume folder will not be removed automatically after destroying the container.
How to build images with pre-configured Firefox preferences?
Copying Firefox user preferences into the file user.js after creating a new container is really easy. However, you may prefer to embed your favorite preferences into an image itself. Then you can create your very own browser containers even faster.
The ready-to-use Dockerfile-plus-preferences for creating such images is contained in the repository accetto/ubuntu-vnc-xfce-firefox-plus.
You have to put your preferences into the file user.js first. The file is expected in the folder ./src/firefox.plus because the Dockerfile contains the following two lines:
COPY [ "./src/firefox.plus/user.js", "./.mozilla/firefox/profile0.default/" ]
COPY [ "./src/firefox.plus/user.js", "./firefox.plus/user.js" ]
Then you can build the image like this (do not overlook the period at the end of line):
docker build -f Dockerfile-plus-preferences -t accetto/ubuntu-vnc-xfce-firefox-plus-preferences .
The new image accetto/ubuntu-vnc-xfce-firefox-plus-preferences will now include your very own Firefox preferences.
How to build images with pre-configured Firefox profiles?
Using the provided ready-to-use Dockerfile-plus-profile it's really easy to create Docker images containing pre-configured Firefox profiles.
If you want to prepare a new profile, you can begin by starting Firefox with parameter P (notice the capital 'P').
For example, on Linux type the following into the terminal window:
firefox -P
On Windows type something like the following into the command prompt window:
"C:\Program Files\Mozilla Firefox\firefox.exe" -P
Starting from the release 19.06 you can also use the desktop launcher FF Profile Manager starting the provided convenience script.
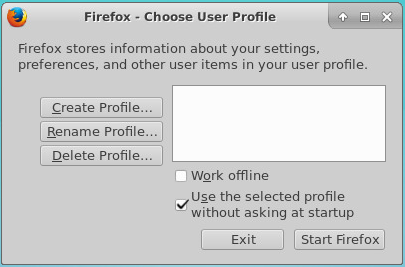
The Firefox start-up dialog shows up and you can create a fresh new Firefox profile in a folder of your choice:
Then you can start Firefox with the new profile and complete its configuration. You can even create the profile and configure it while working offline first.
Optionally, do some cleaning afterwards and copy the whole Firefox profile folder (the folder named firefox) into the working folder tree in which you will build the new image.
For example, the provided Dockerfile-plus-profile expects the Firefox profile data in the folder ./src/firefox/profile/ because it includes the following command line:
COPY ./src/firefox/profile/ $HOME/.mozilla/
Then you can build the new image like this (do not overlook the period at the end of line):
docker build -f Dockerfile-plus-profile -t accetto/ubuntu-vnc-xfce-firefox-plus-profile .
The new image accetto/ubuntu-vnc-xfce-firefox-plus-profile will now include your very own Firefox profile.
How to run containers in foreground?
The image supports the following container start-up options: --wait (default), --skip, --debug (also --tail-log) and --help. Their description is provided by the image itself.
The following container will print out the help and then it'll remove itself:
docker run --rm accetto/ubuntu-vnc-xfce --help
Excerpt from the output, which describes the other options:
OPTIONS:
-w, --wait      (default) Keeps the UI and the vnc server up until SIGINT or SIGTERM are received.
                An optional command can be executed after the vnc starts up.
                example: docker run -d -P accetto/ubuntu-vnc-xfce
                example: docker run -it -P accetto/ubuntu-vnc-xfce /bin/bash

-s, --skip      Skips the vnc startup and just executes the provided command.
                example: docker run -it -P accetto/ubuntu-vnc-xfce --skip /bin/bash

-d, --debug     Executes the vnc startup and tails the vnc/noVNC logs.
                Any parameters after '--debug' are ignored. CTRL-C stops the container.
                example: docker run -it -P accetto/ubuntu-vnc-xfce --debug

-t, --tail-log  same as '--debug'

-h, --help      Prints out this help.
                example: docker run --rm accetto/ubuntu-vnc-xfce
It should be noticed, that the --debug start-up option does not show the command prompt even if the -it run arguments are provided. This is because the container is watching the incoming vnc/noVNC connections and prints out their logs in real time. However, it is easy to attach to the running container like in the following example.
In the first terminal window on the host computer, create a new container named foo:
docker run --name foo accetto/ubuntu-vnc-xfce --debug
In the second terminal window on the host computer, execute the shell inside the foo container:
docker exec -it foo /bin/bash