Dexter USB Connection - abdullin/Dexter GitHub Wiki
Note: This is about the USB Micro B port on Dexter that makes it a peripheral, and NOT about the USB A port which allows Dexter to be a USB HOST for other peripherals such as serial adapters, modbus devices, web cams, audio adapters, etc...
The MicroZed processor board on Dexter has as Micro B USB connector at the bottom of the board, left of the CAT5 and USB A connector, directly in front of the SDCard slot, which provides a serial connection to a PC via a SiLabs CP2104 adapter. ("SiLabs" stands for "Silicon Labs", a manufacturer) To use it connect a USB A to USB Micro B cable between the PC and Dexter. Then install the CP2104 device driver, find the COM port number and use a terminal program like screen or PuTTY to log in. Details below.
Picture of USB A to USB Micro B cable
Note: As soon as you connect a USB cable between your PC and the MicroZed, it will be powered up and start booting. If Dexters power brick isn't plugged in, the motors, etc... will not be able to move and the software may be quite confused. Always power up Dexter first, THEN connect the USB cable. If you need to see the boot messages (to troubleshoot problems) use the Reset button (marked "SW2", next to the Blue LED, left side when Dexter is upright) on the MicroZed Board to restart.
Once the cable is connected, the driver should automatically be installed. It is commonly available and should be automatic on Windows, Mac, and most Linux distributions.
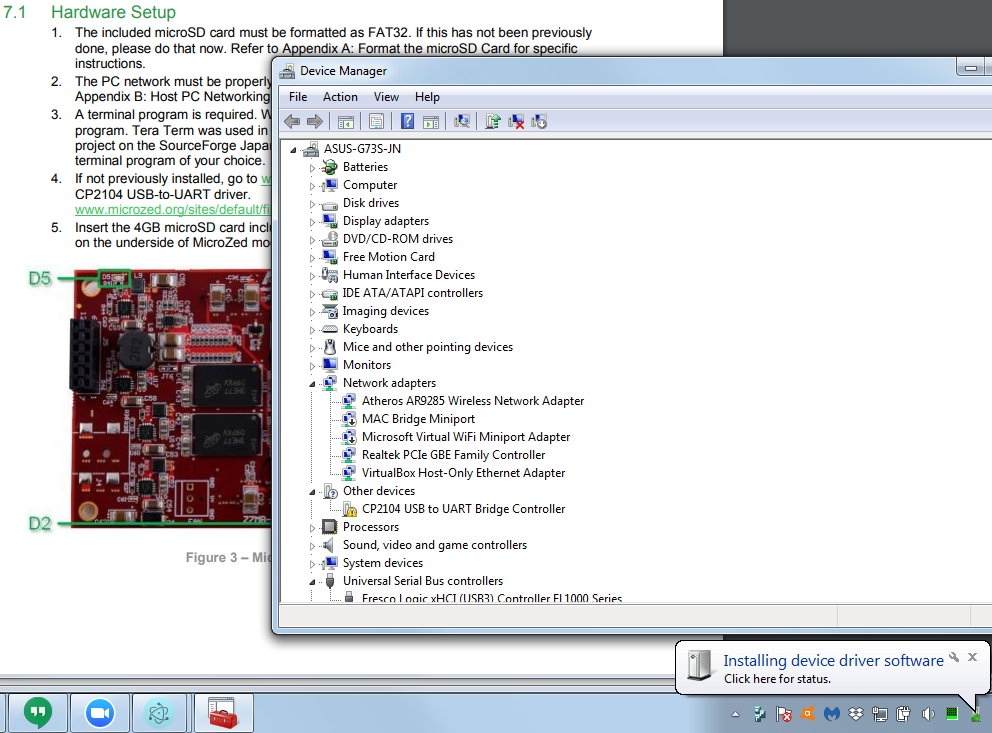
Installing the CP2104 USB adapter driver on Windows
If your computer doesn't find the driver, you can download it from
https://www.silabs.com/products/development-tools/software/usb-to-uart-bridge-vcp-drivers
CP2104 USB Port Installed
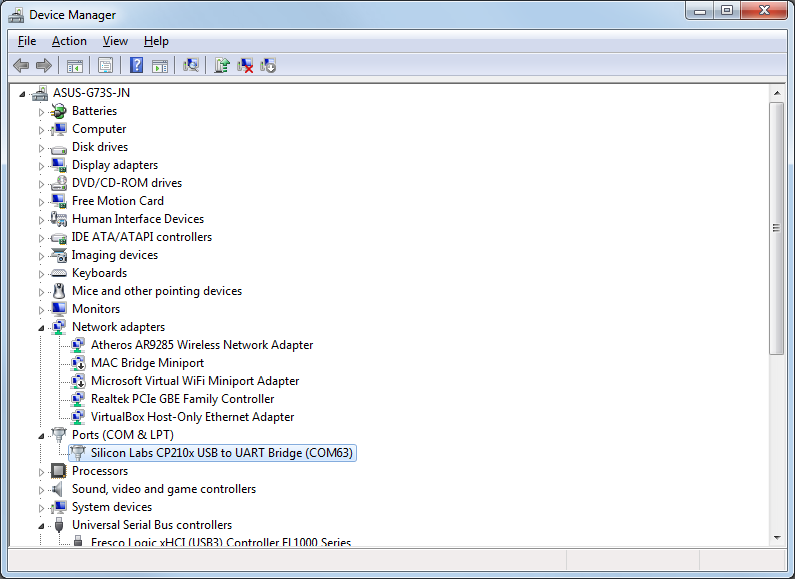
Once the driver is installed, click Start and enter devmgmt.msc, press enter. you should see it under Ports, as COM# where # is some number. E.g. COM63 in this case.
On Linux or Mac, from Terminal, ls /dev/tty* and then plug in the cable, wait a bit and repeat. Whatever showed up new is the correct port.
On a Linux (or mac?), from Terminal, the command line:
screen /dev/ttyUSB0 115200
will get you a connection, where ttyUSB0 is whatever port showed up when you plugged in. If you don't have "screen" you should be able to install it with sudo apt-get install screen
Note: To exit screen, press Ctrl+a then type :quit and press enter.
- In PuTTY, on the "Session" screen, select "Serial".
- Enter the port name (e.g. "COM" and the number as shown in the ports list. In the above image, this is the value of the comName field, i.e. "COM63".)
- change the "Speed" to 115200.
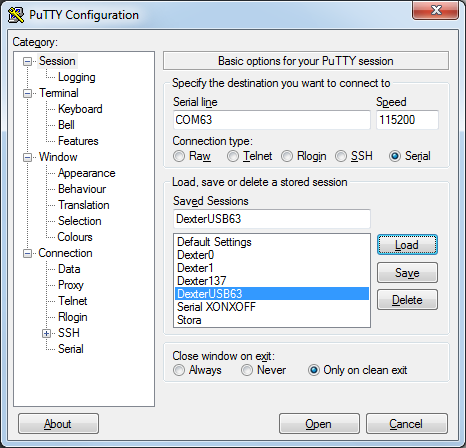
You can enter and name for this setting and save it here as well. - Under "Connection" on the "Serial" screen, make sure the "Data bits", "Stop bits" and "Parity" are 8, 1 and None.
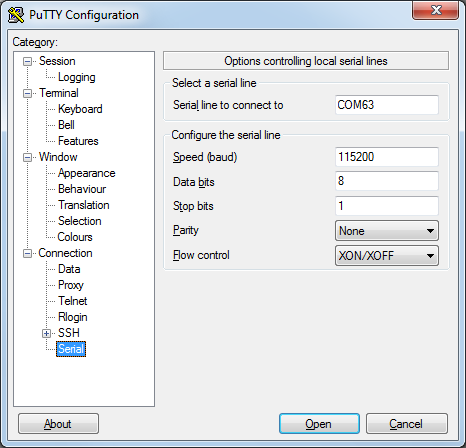
- Press "Open" and the connection should be made. You may not see any text, just press enter to get a prompt.
Eval result of serial_devices() before installing: INSPECTing A Array of 0
(Here an empty array indicates that there are no serial port devices. But more definitively,
there are no Silicon Labs devices so no Dexter's connected.)
Eval result of serial_devices() after installing:
 <    > Refresh INSPECTing  An Object of 7 properties
{comName: "COM63"
  locationId: "Port_#0001.Hub_#0006"
  manufacturer: "Silicon Labs"
  pnpId: "USB\\VID_10C4&PID_EA60\\01255890"
  productId: "EA60"
  serialNumber: "01255890"
  vendorId: "10C4"
}
Above we are inspecting the first element of the array returned by serial_devices.
Since it has a manufacturer of "Silicon Labs", we conclude that this is a Dexter.