Capability with Tools - Yellow-Spotted-Lizard/SERLER GitHub Wiki
This section will show evidence of the use of all tools used, including:
- screenshots
- set up instructions
- configuration files
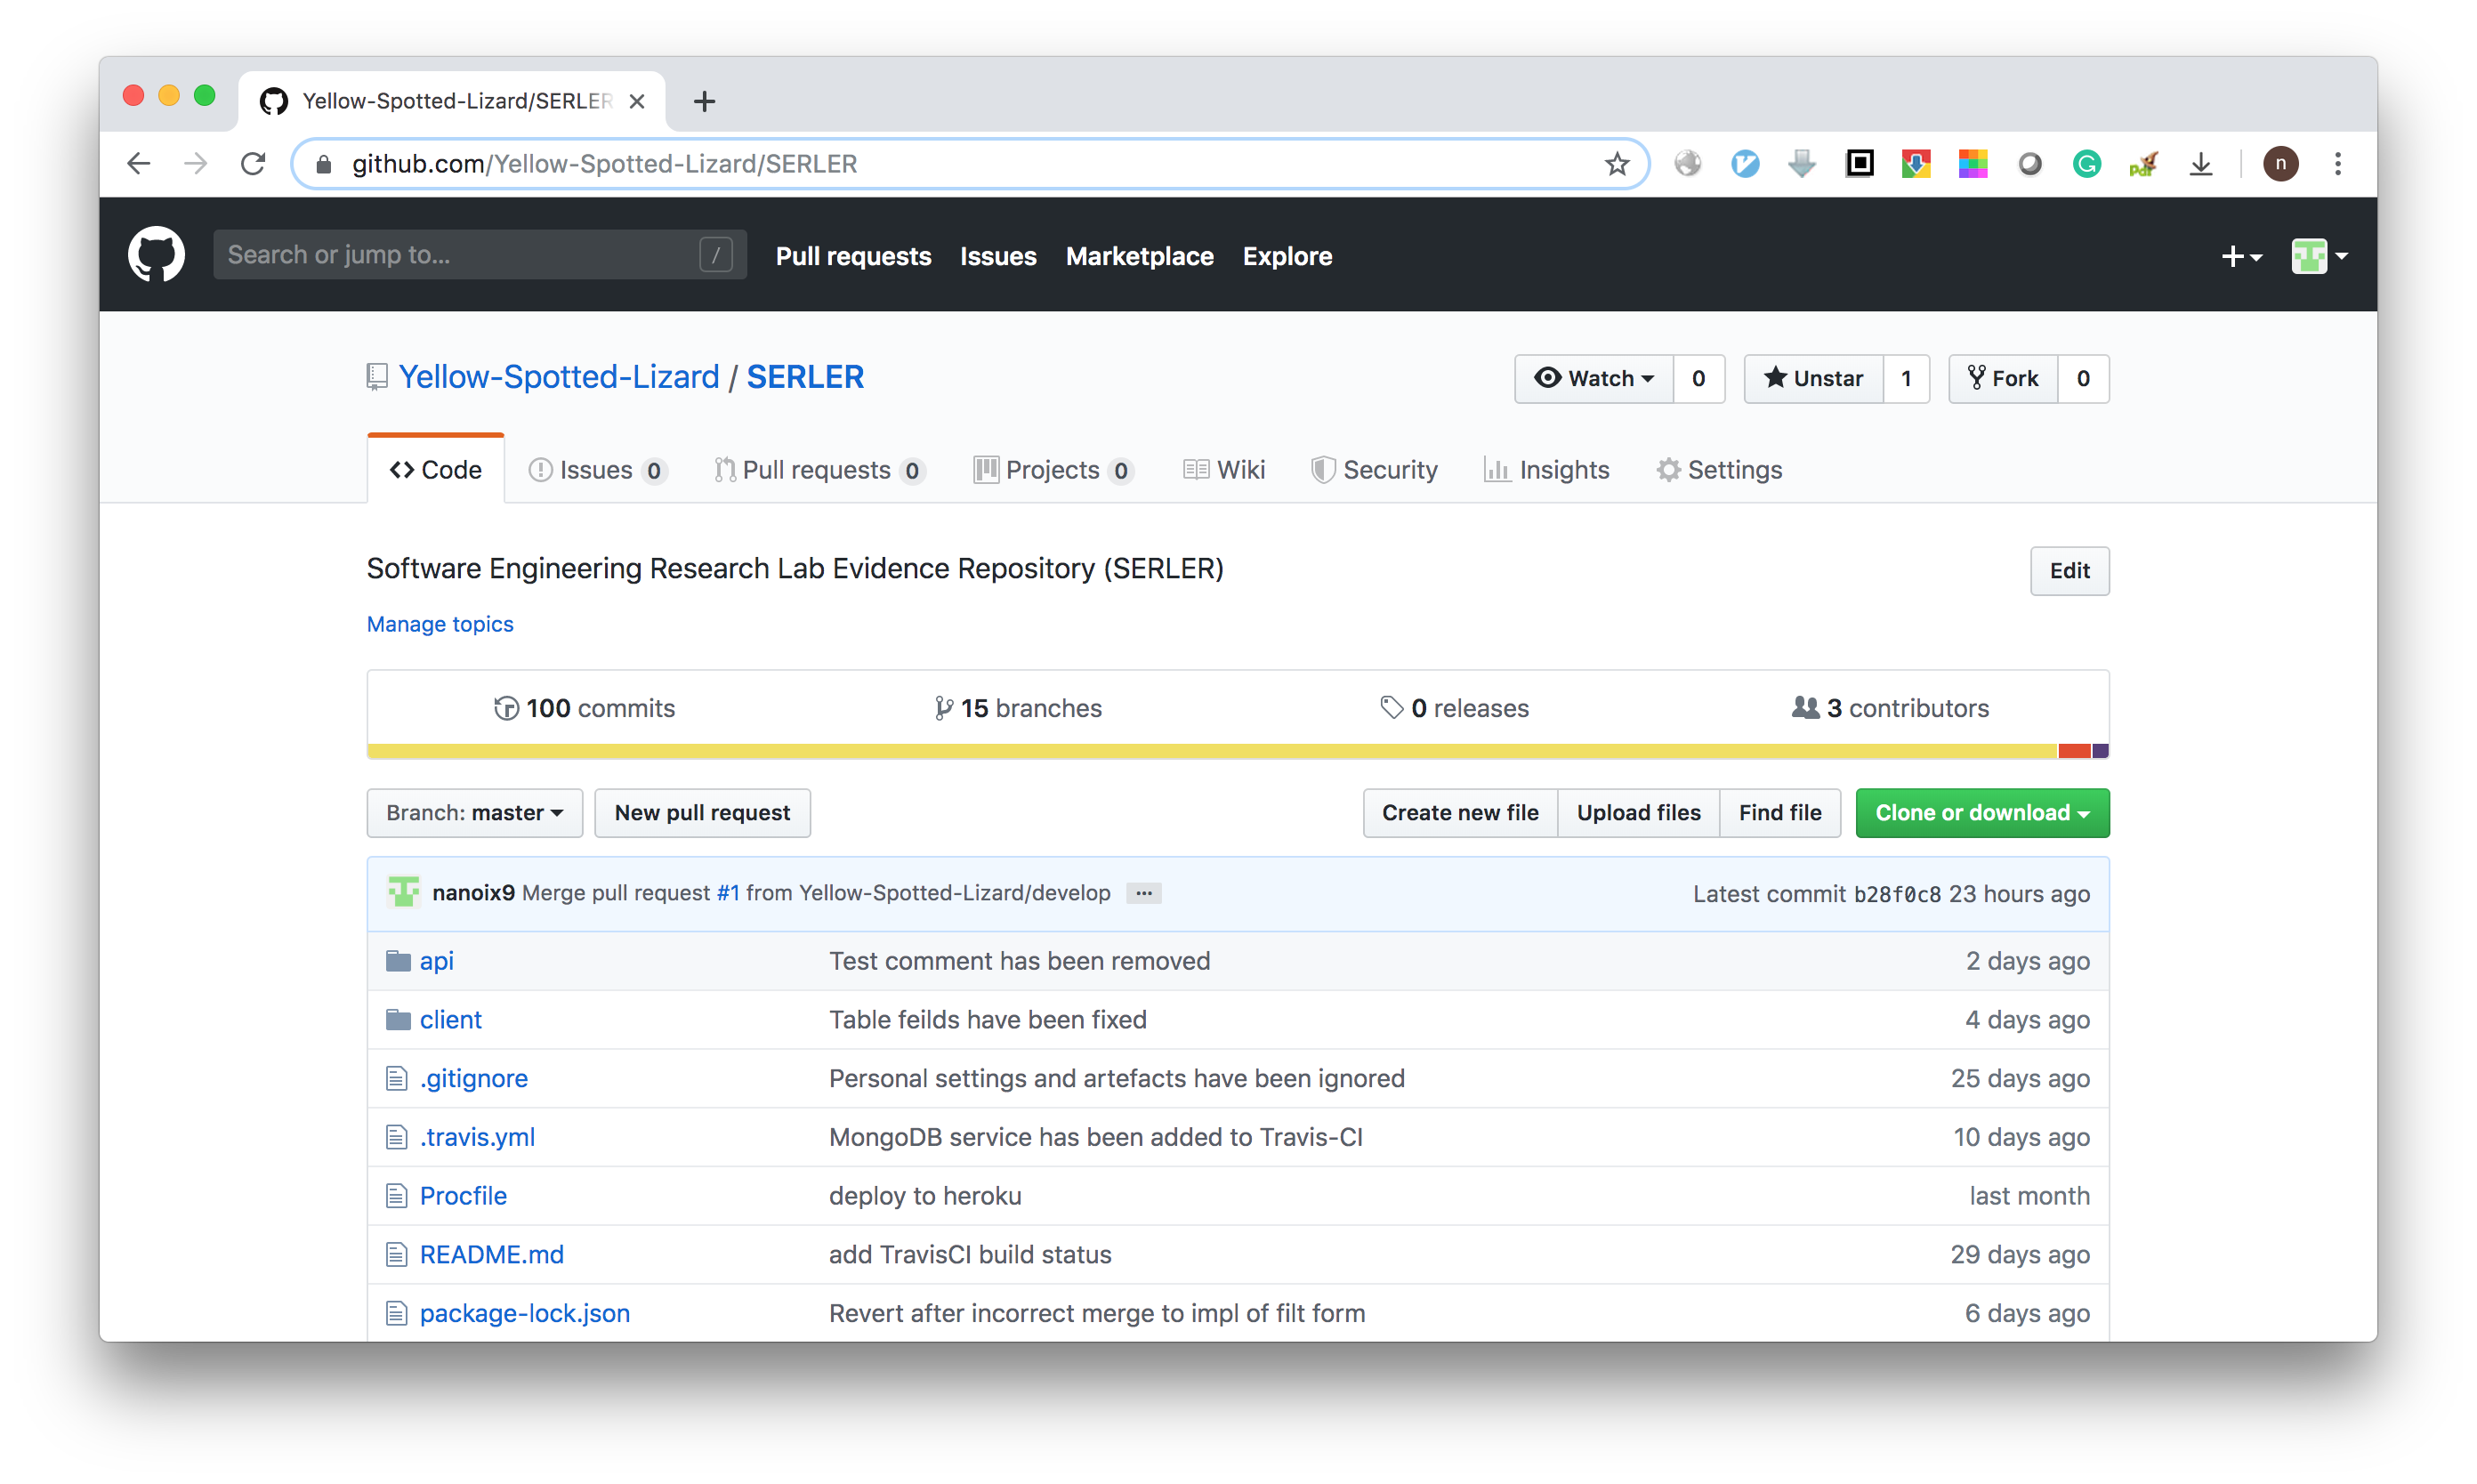
We use Git/Github for software version control and code hosting. The link is https://github.com/Yellow-Spotted-Lizard/SERLER
Github repository:
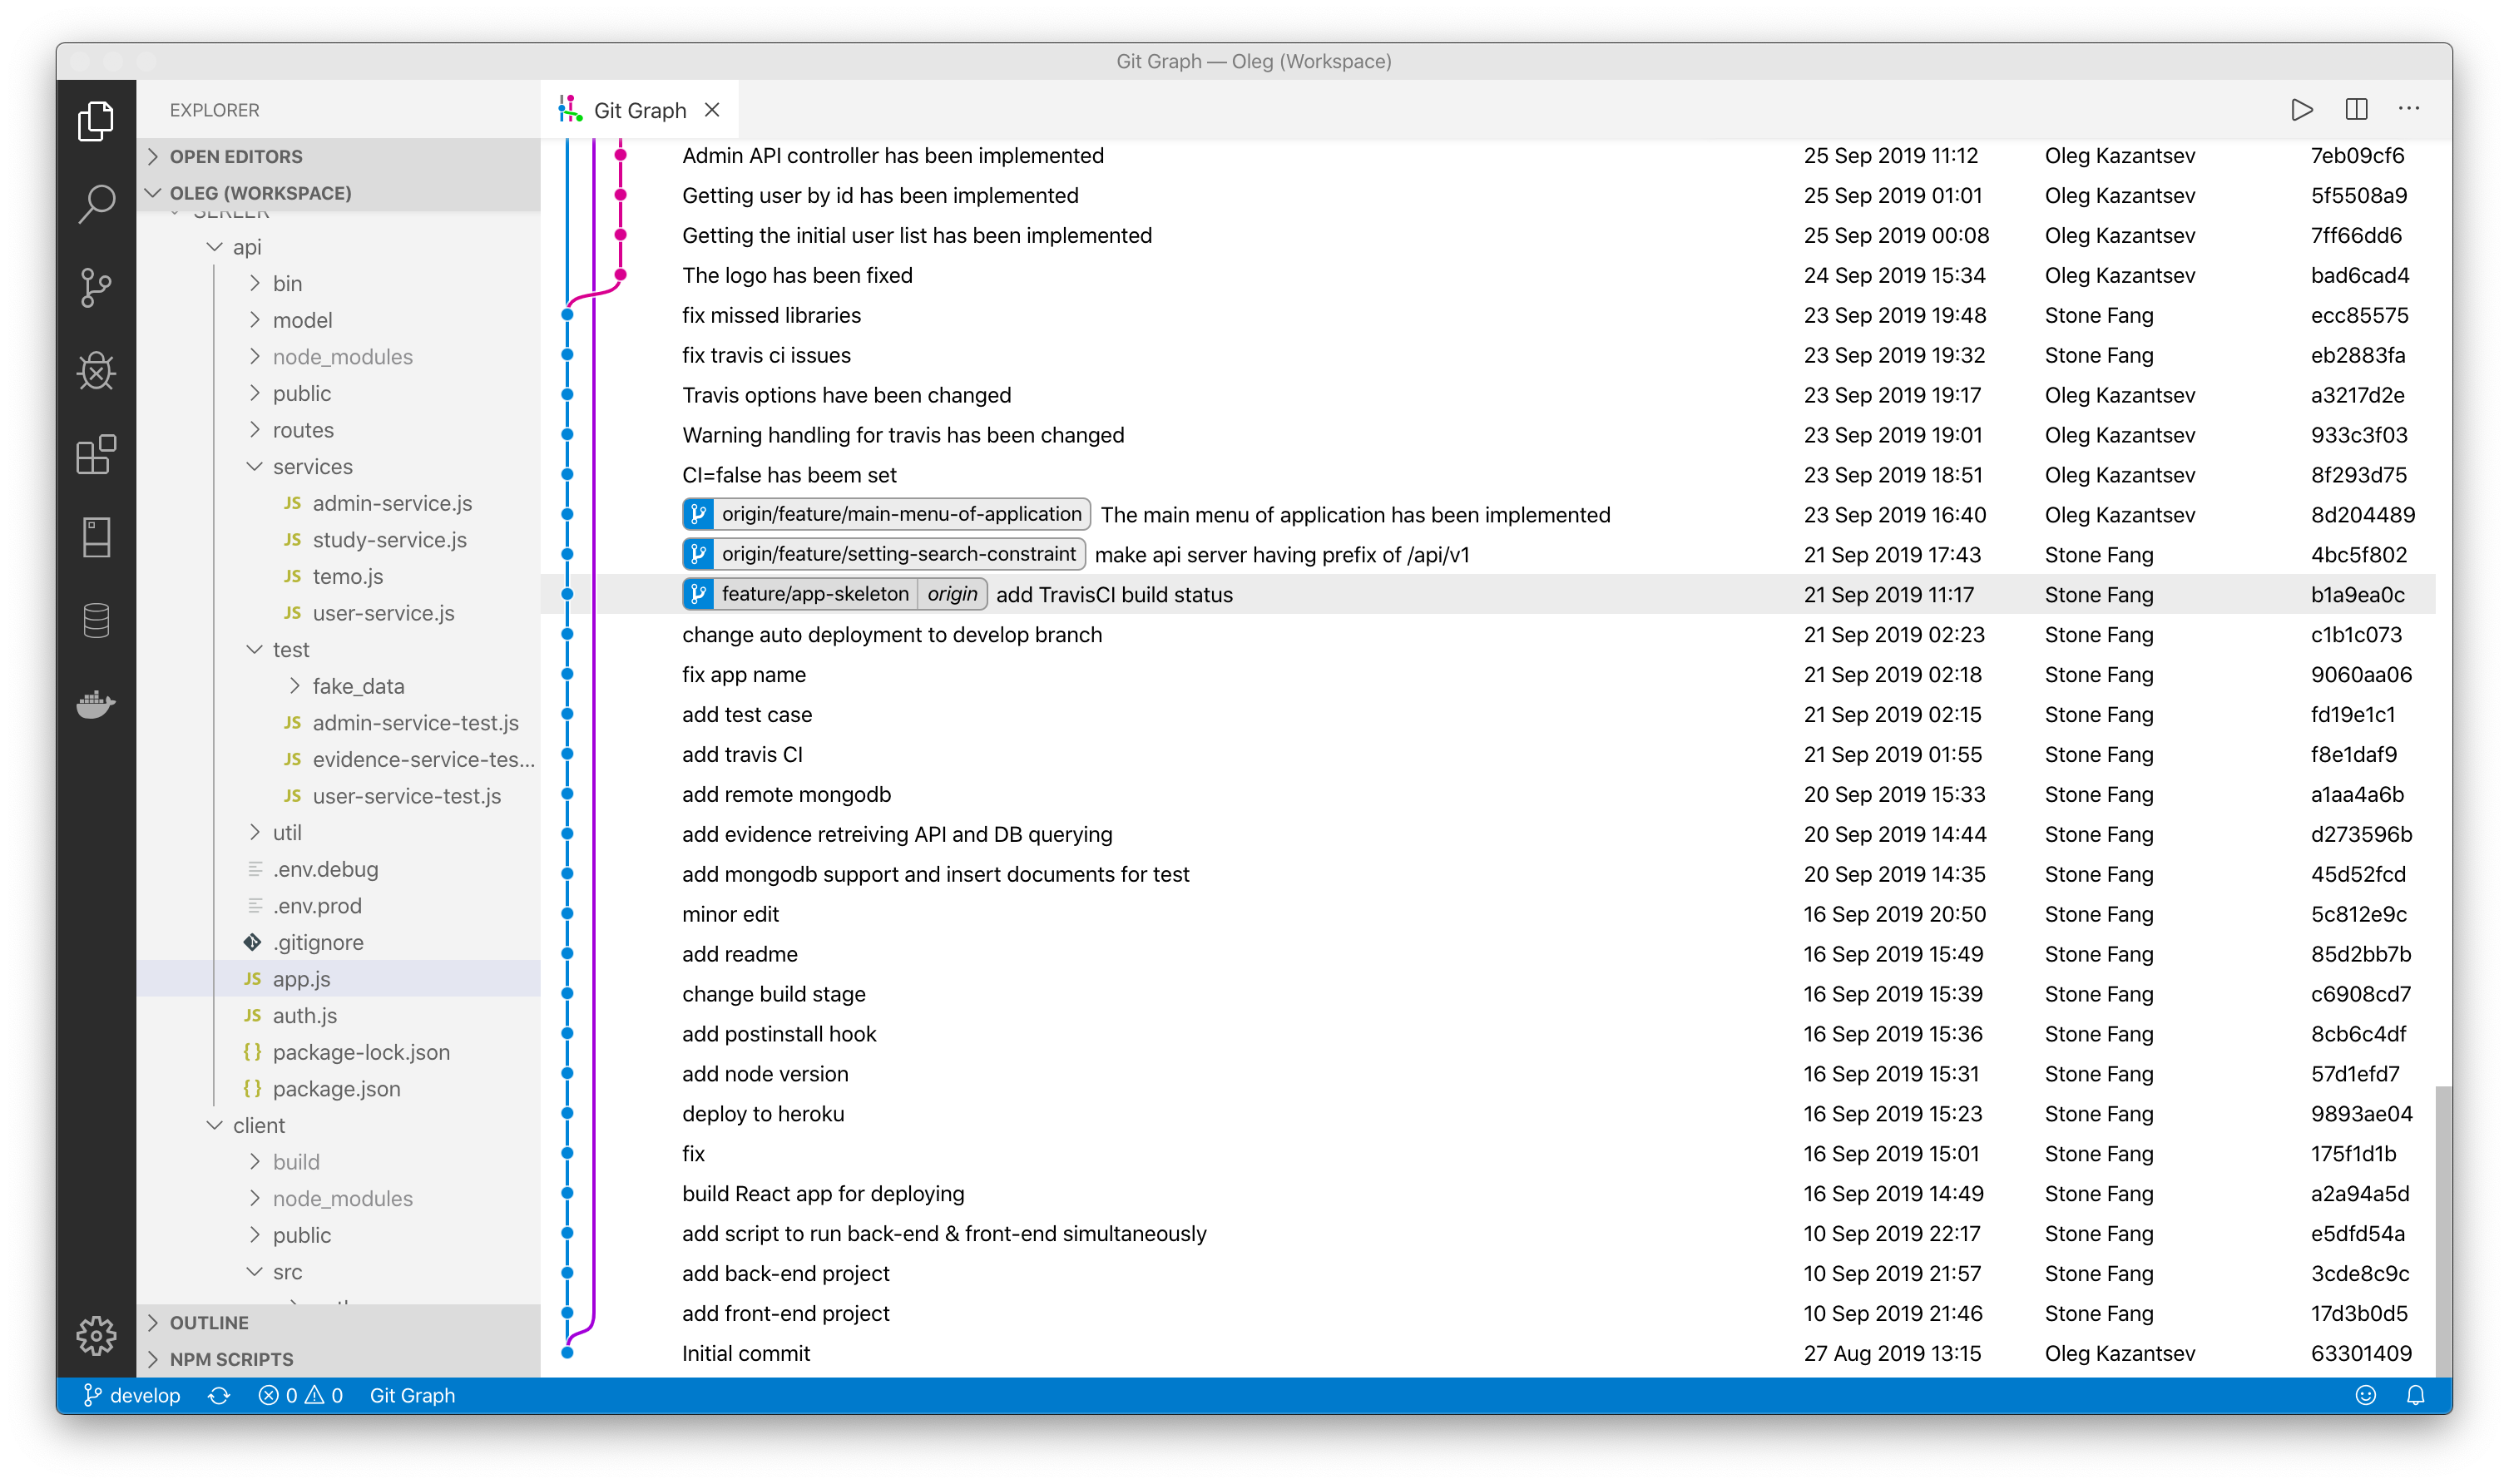
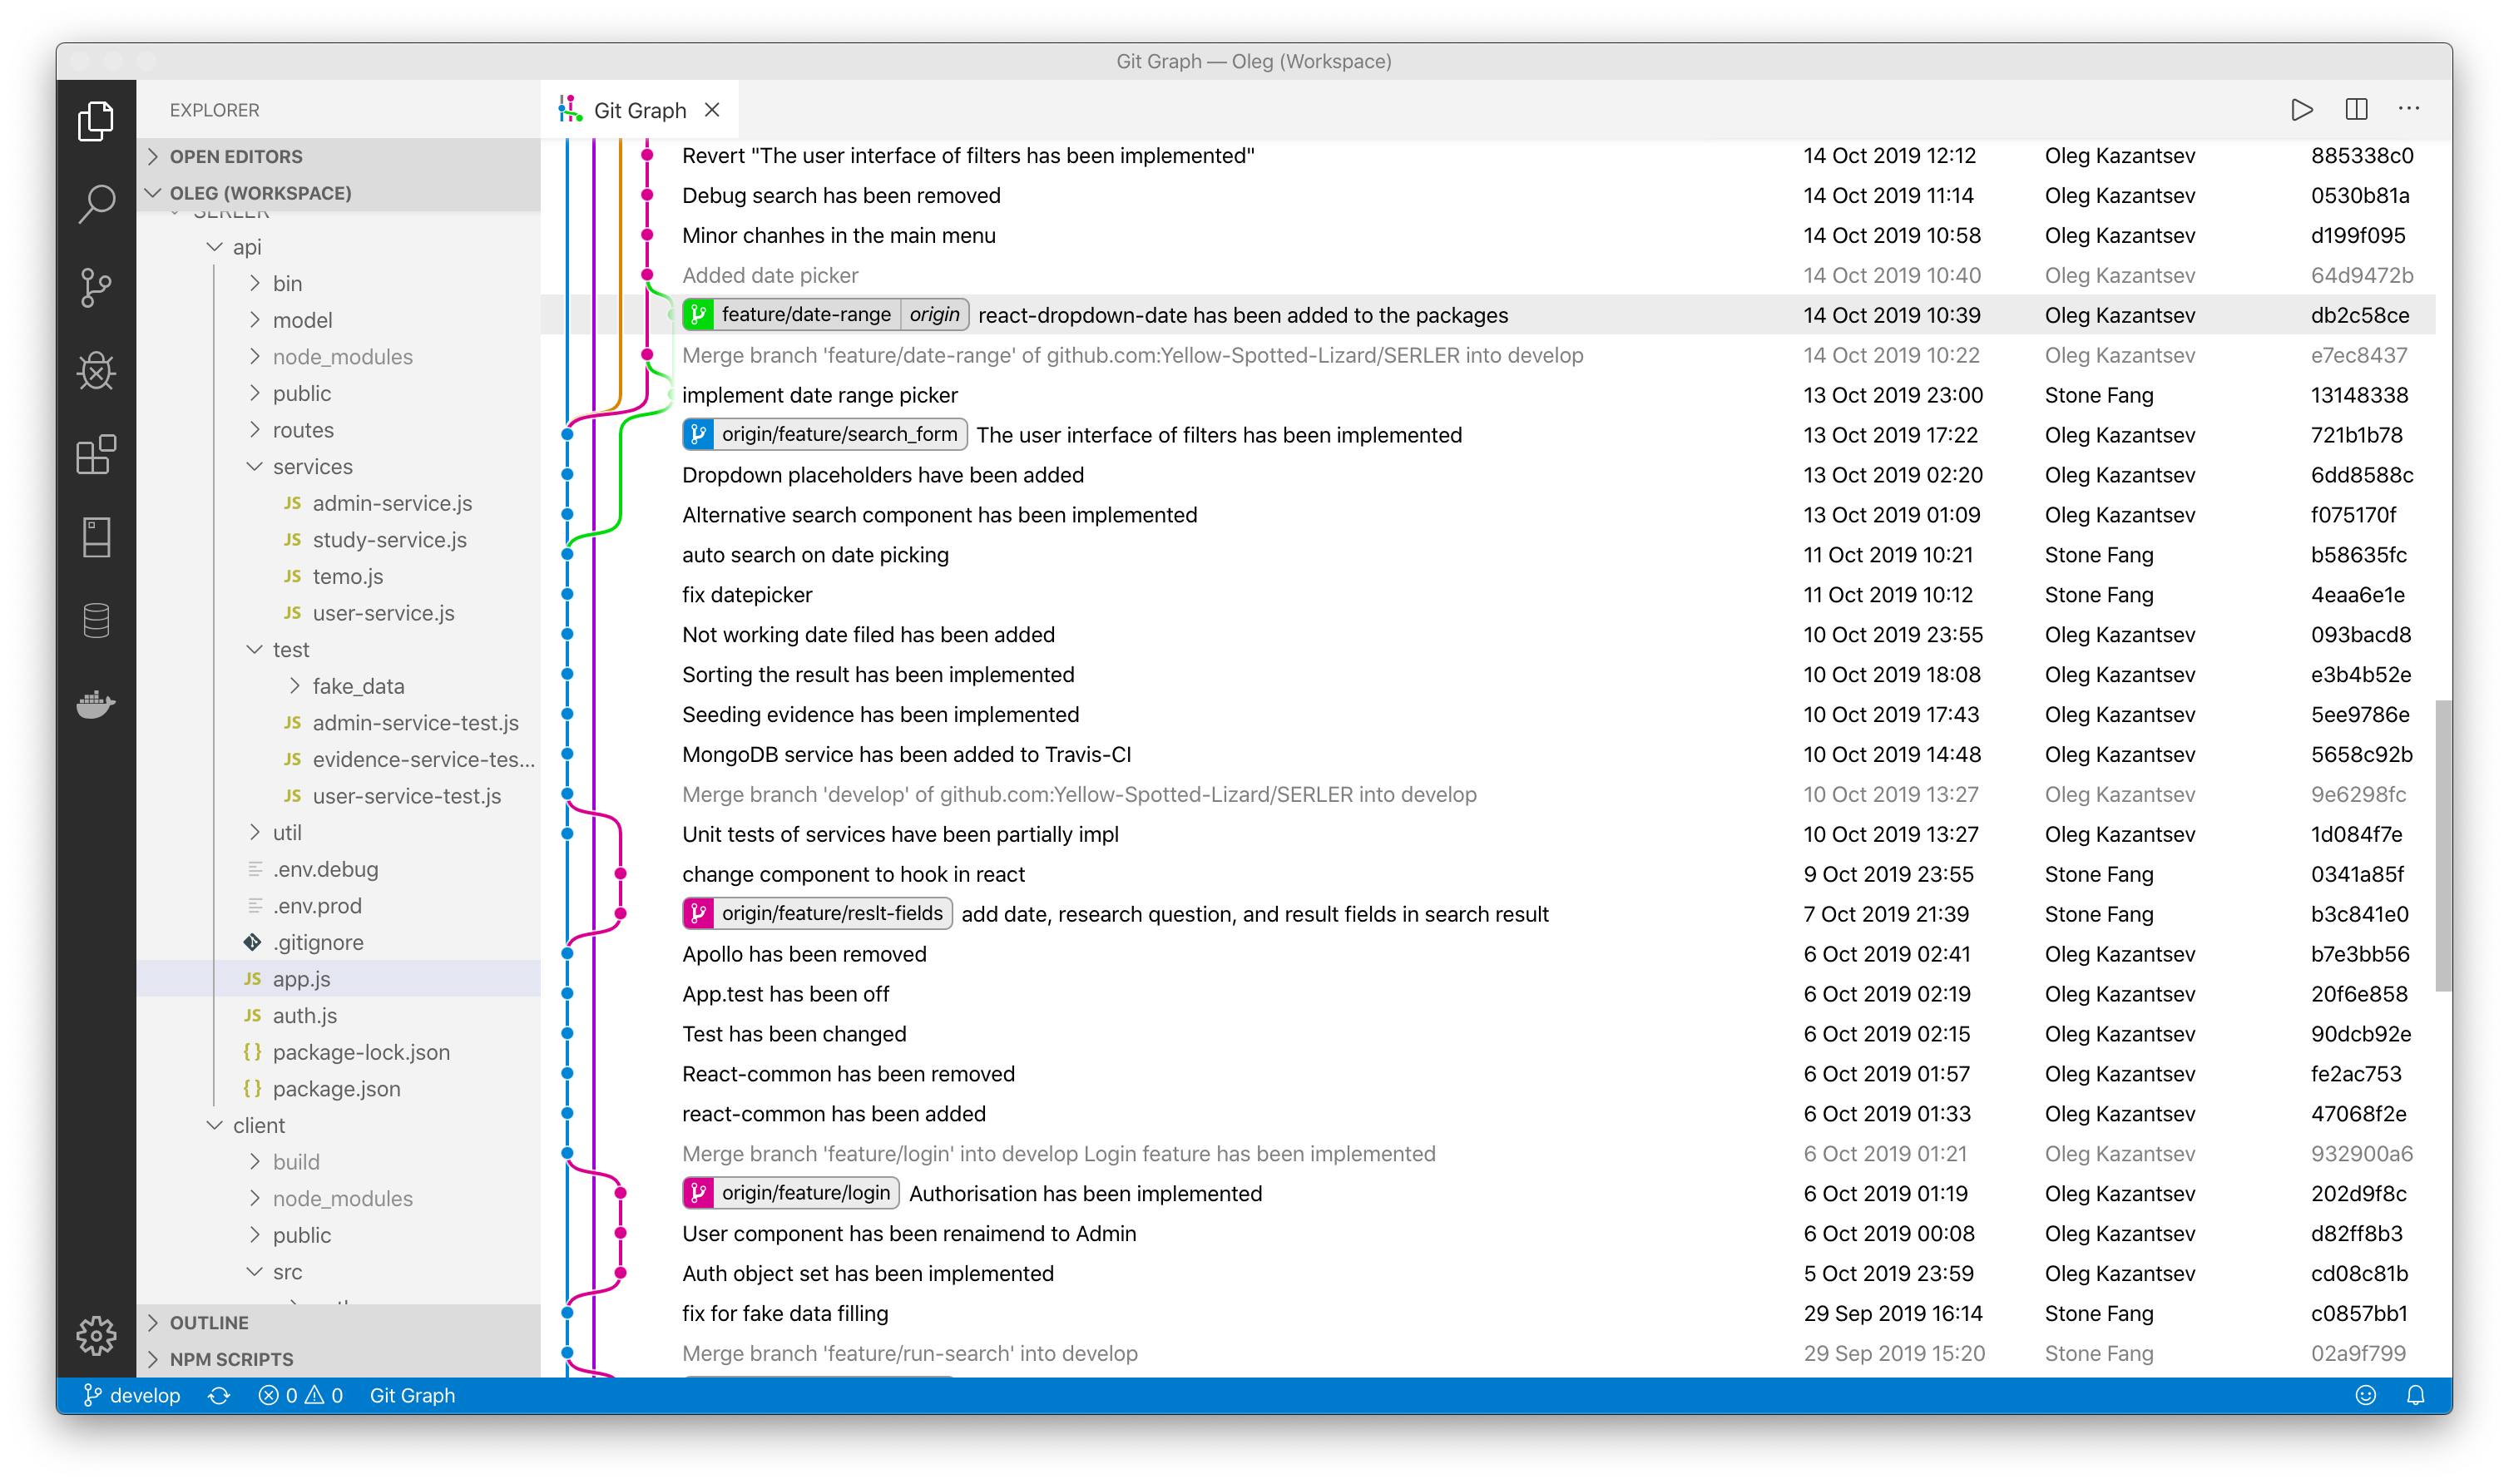
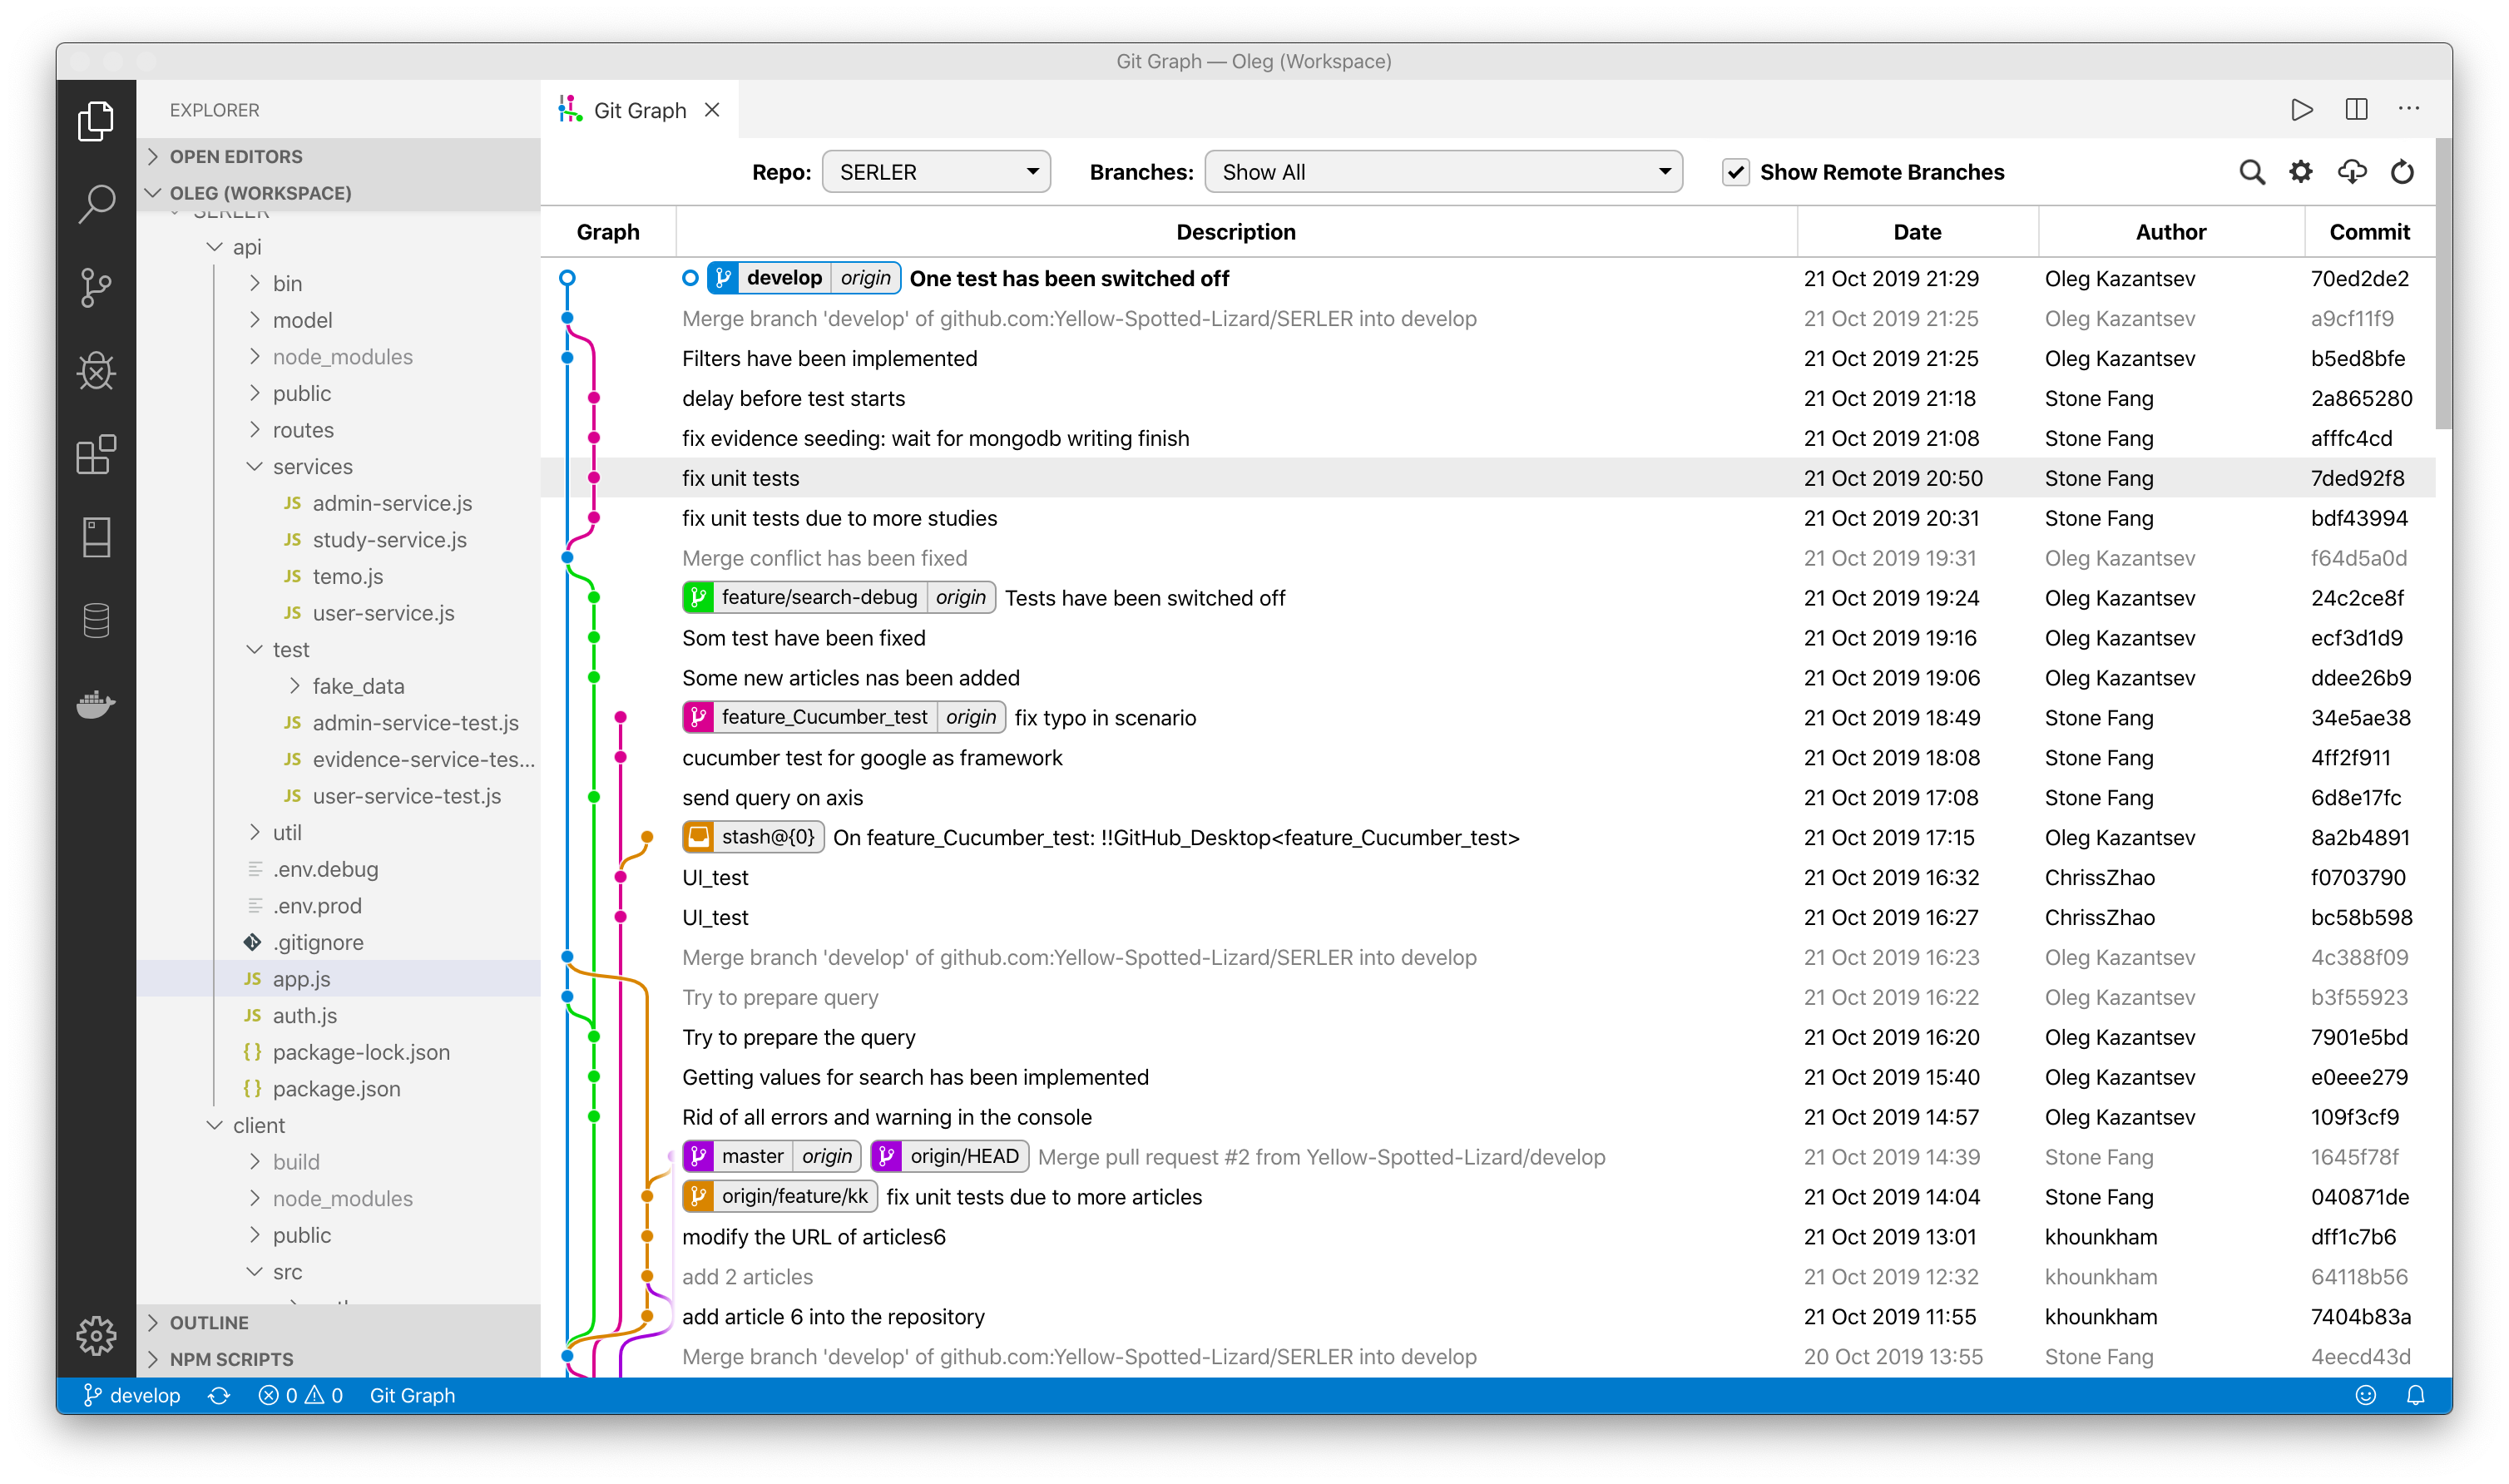
We installed VS Code extension of Git Graph to show Git history graphically. Here are the screenshots

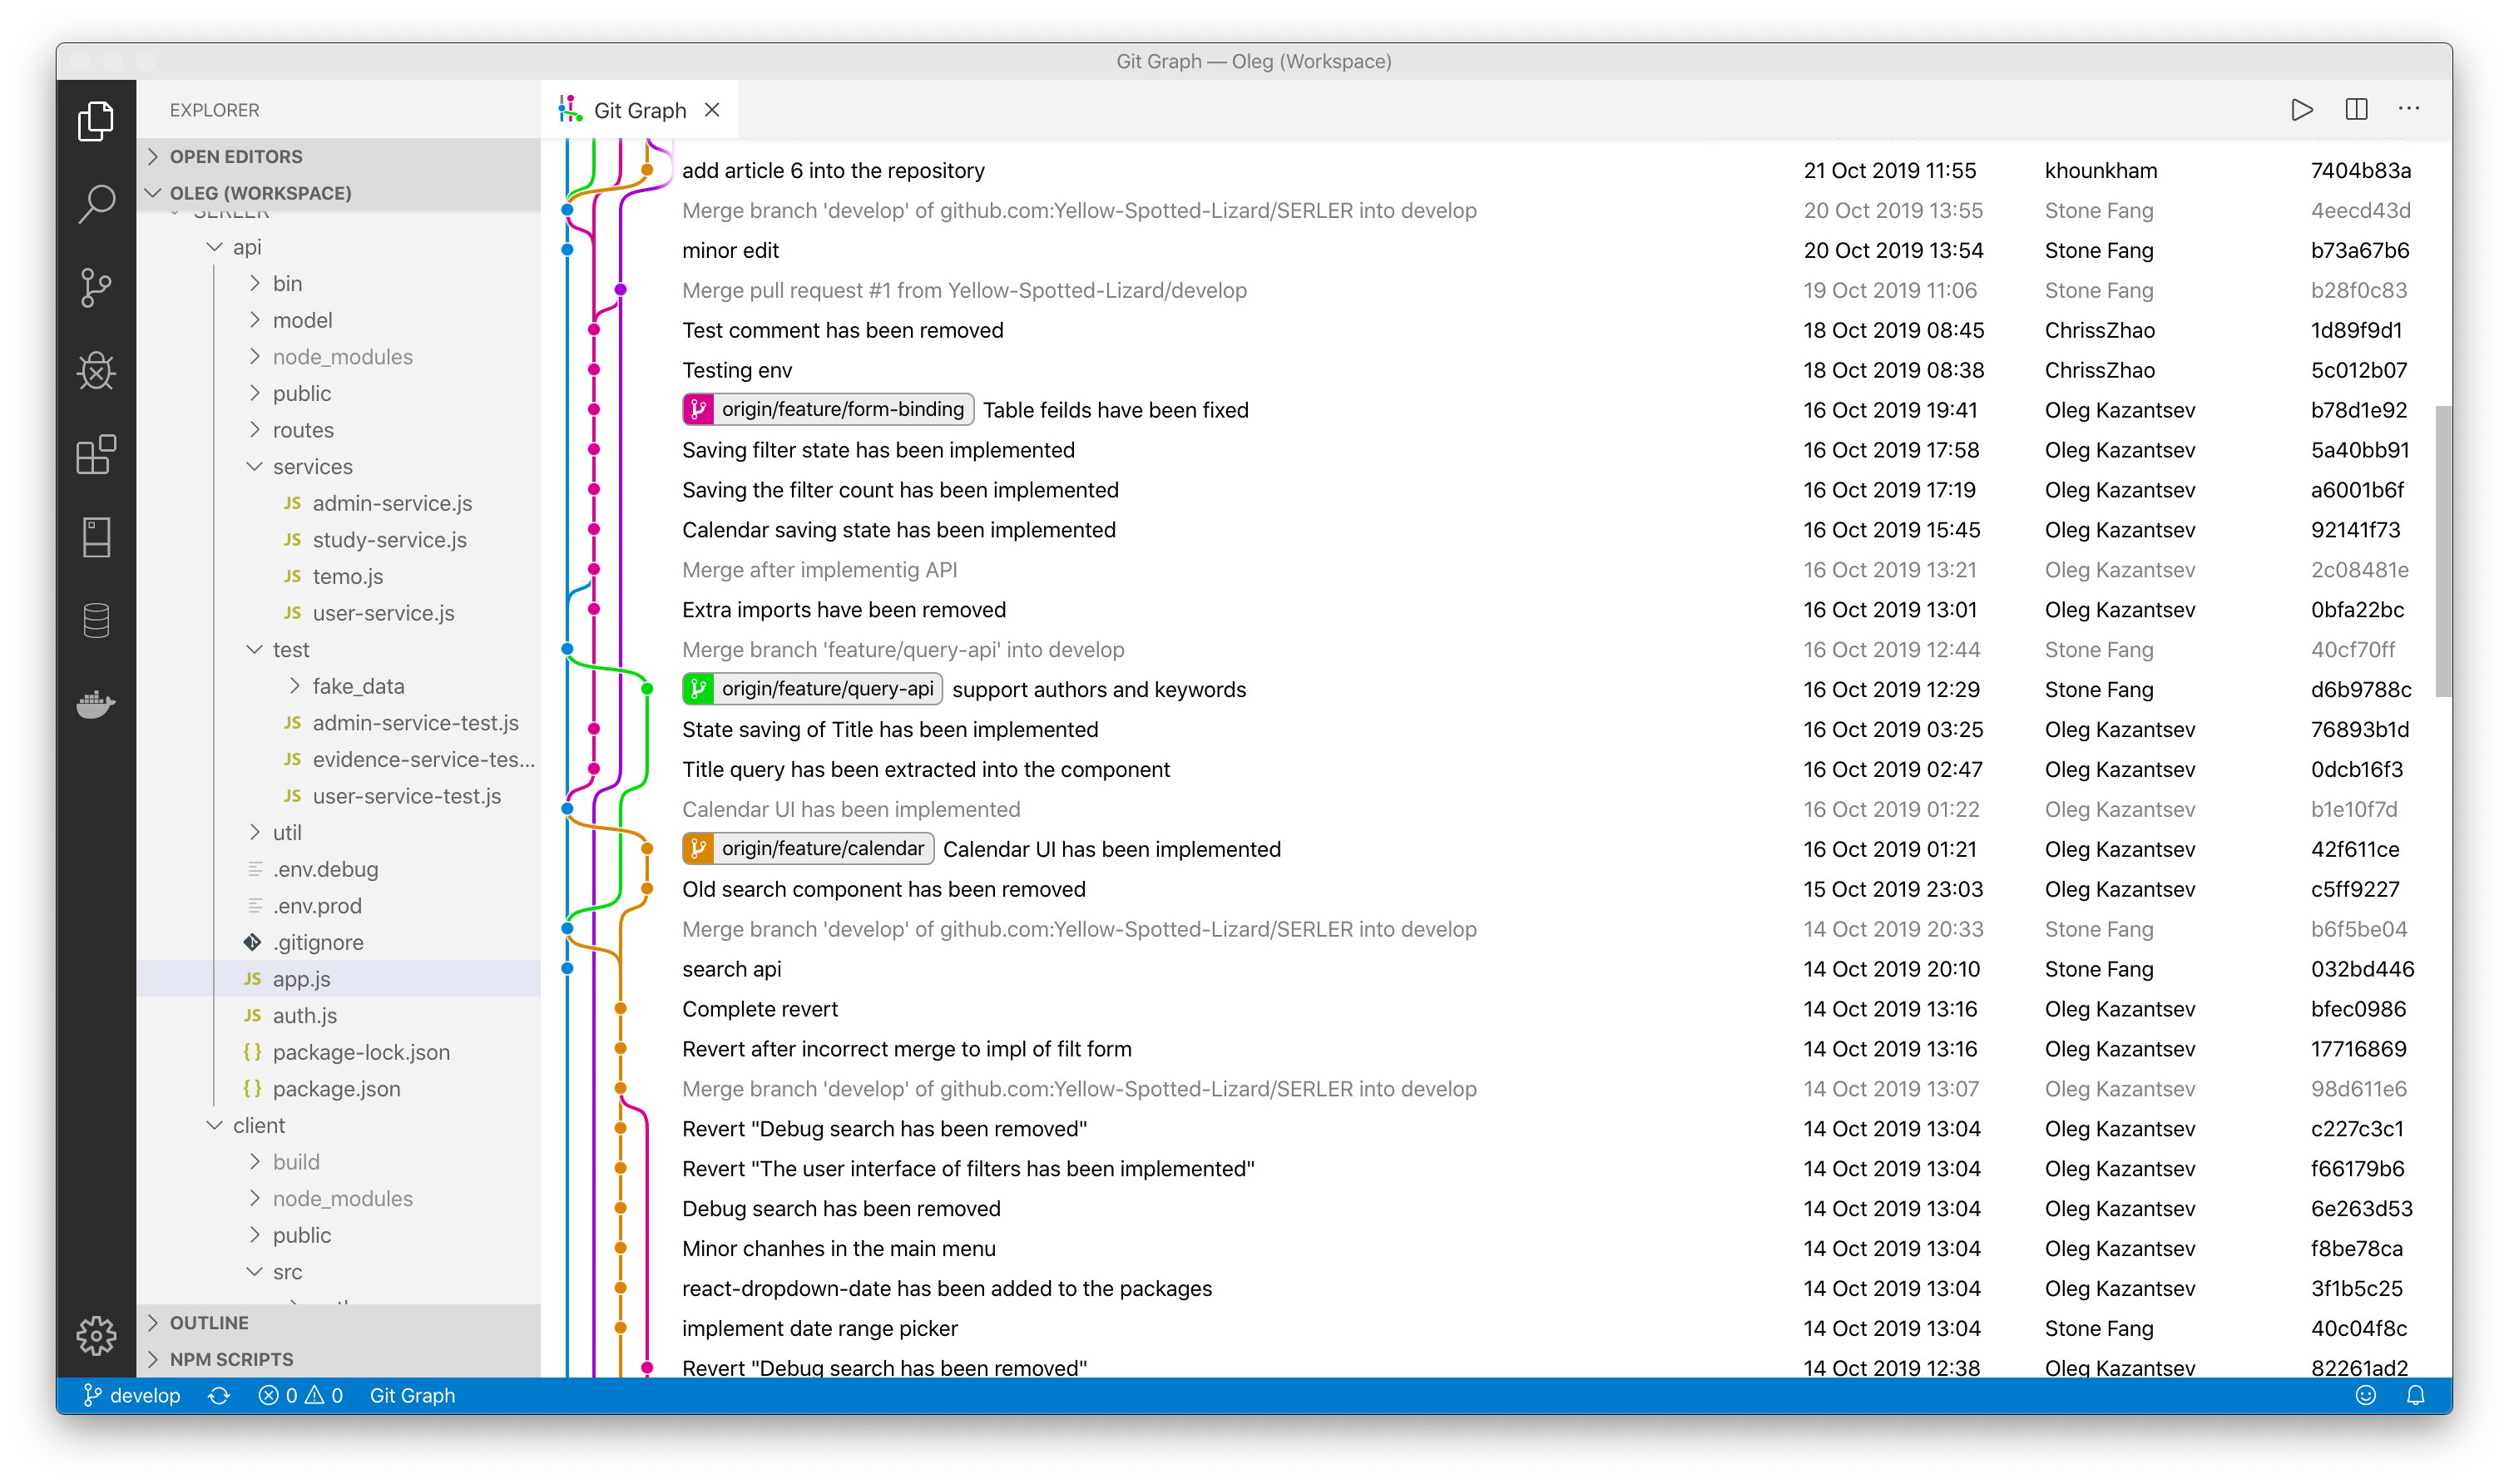
It is simple and handy to setup a github repository. First, to create a new repository on Github by clicking the "+" menu and then "New repository" item, and then setup the name, description and a few options. Second, clone the new created repository to local disk by [email protected]:Yellow-Spotted-Lizard/SERLER.git and it's ready for development.
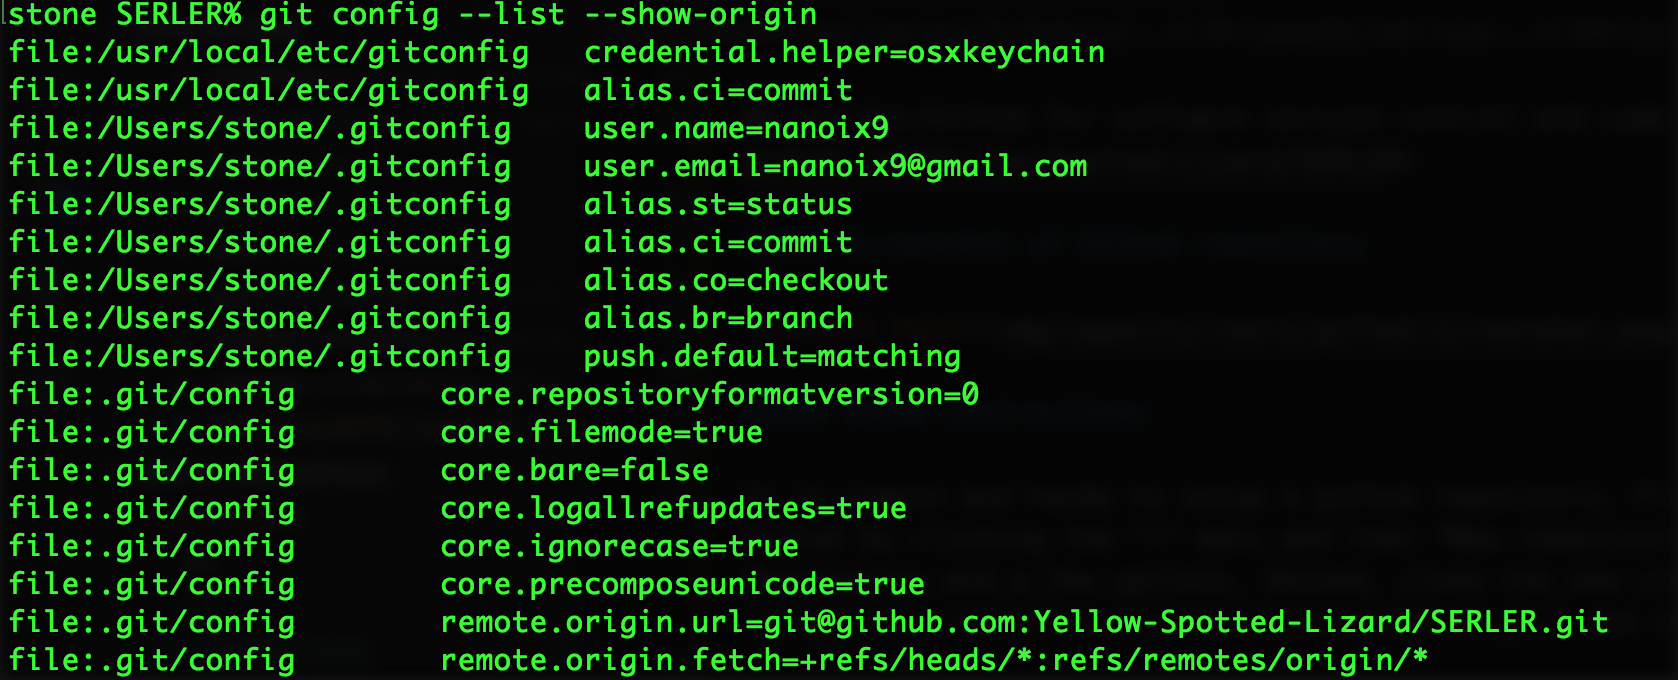
Git can be configured by the file $PREFIX/etc/gitconfig (system level, accessed by --system option), $HOME/.gitconfig (user level, accessed by --global option), $REPOSITORY/.git/config (repository or local level, default value if no option specified). The configuration at a more specific level can override previous ones.
The git config --list --show-origin show all configurations and source files (this screenshot only show part of configurations):
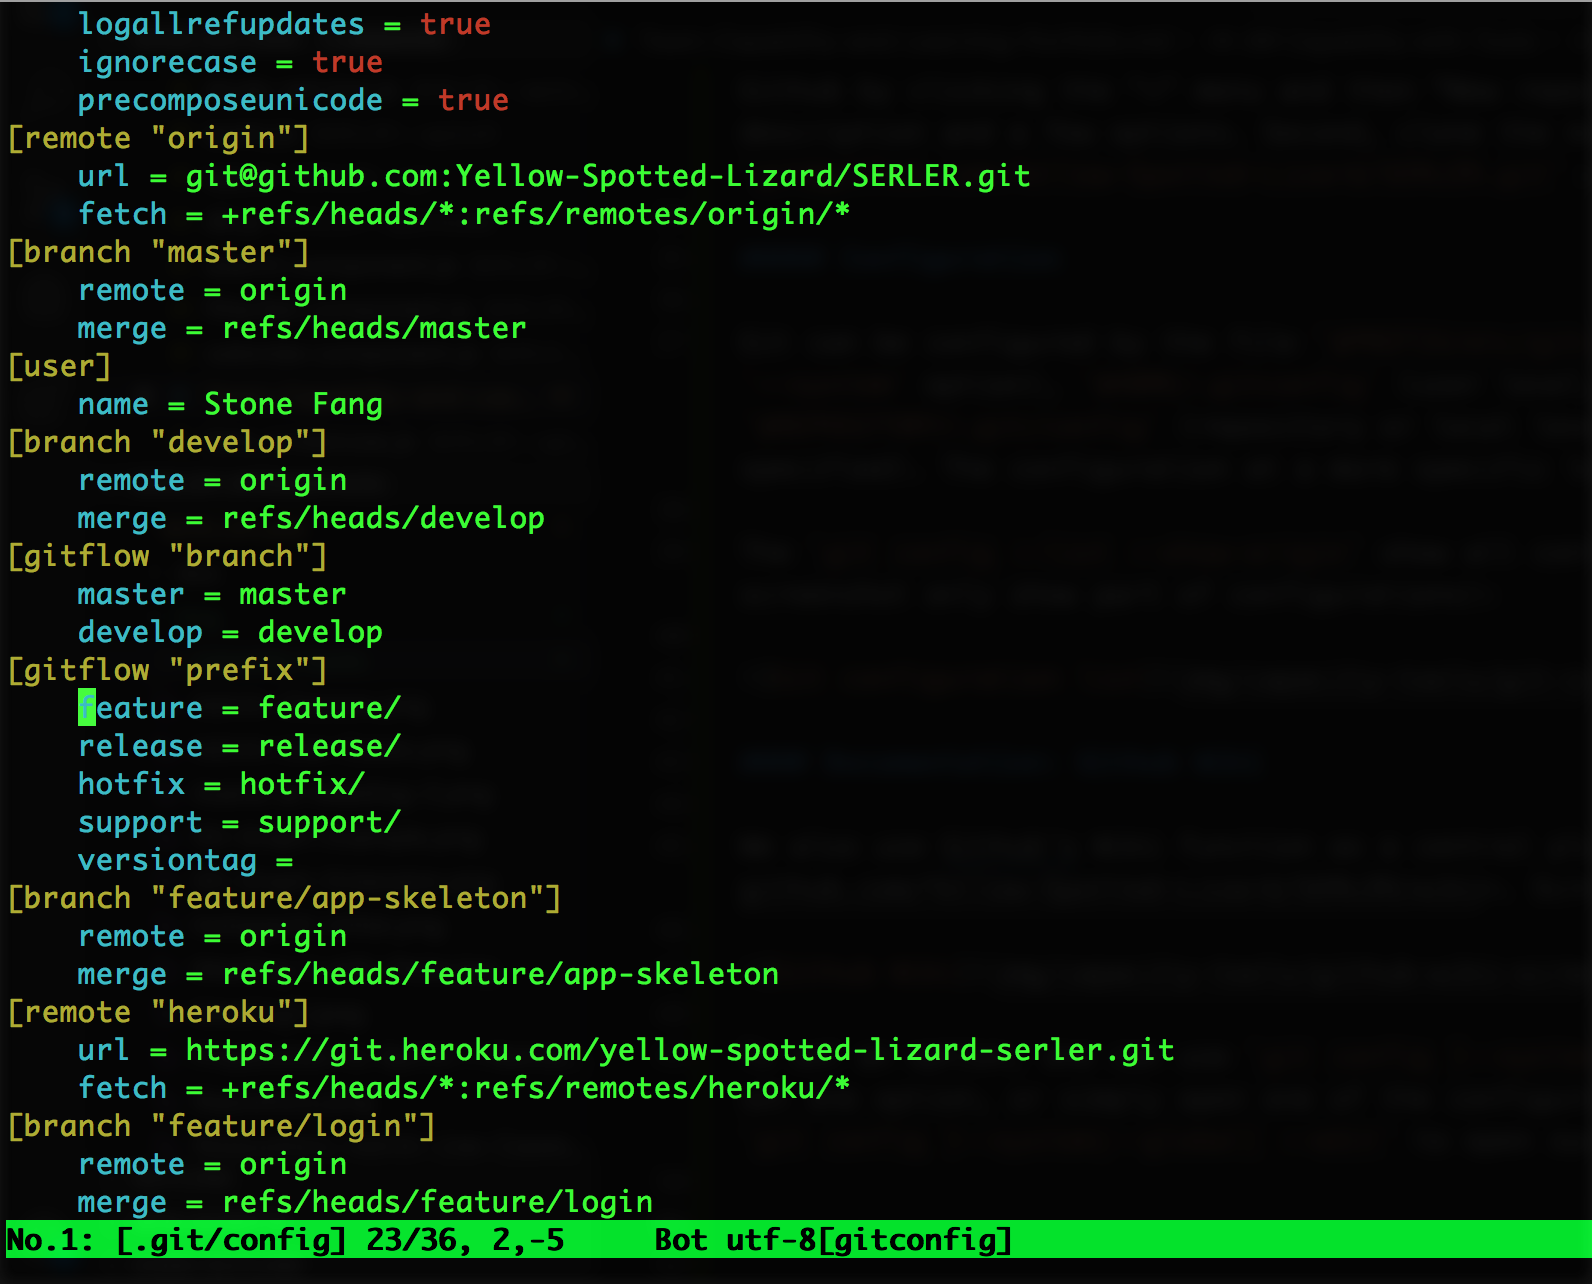
To set an option, one can use git config [--system|--global] <key> <value> command to set one option, or simply open one of the configuration files with any text edit (or with git config [--system|--global] --edit to open such files) and do the editing, like:
To tell git not to manage certain files into the repository, use a .gitignore file. Unlike the git config files, .gitignore file can be part of the repository (config files are not committed into the repository). Such file is a list of file path patterns with one pattern per line, and wildcard can be used. Example:
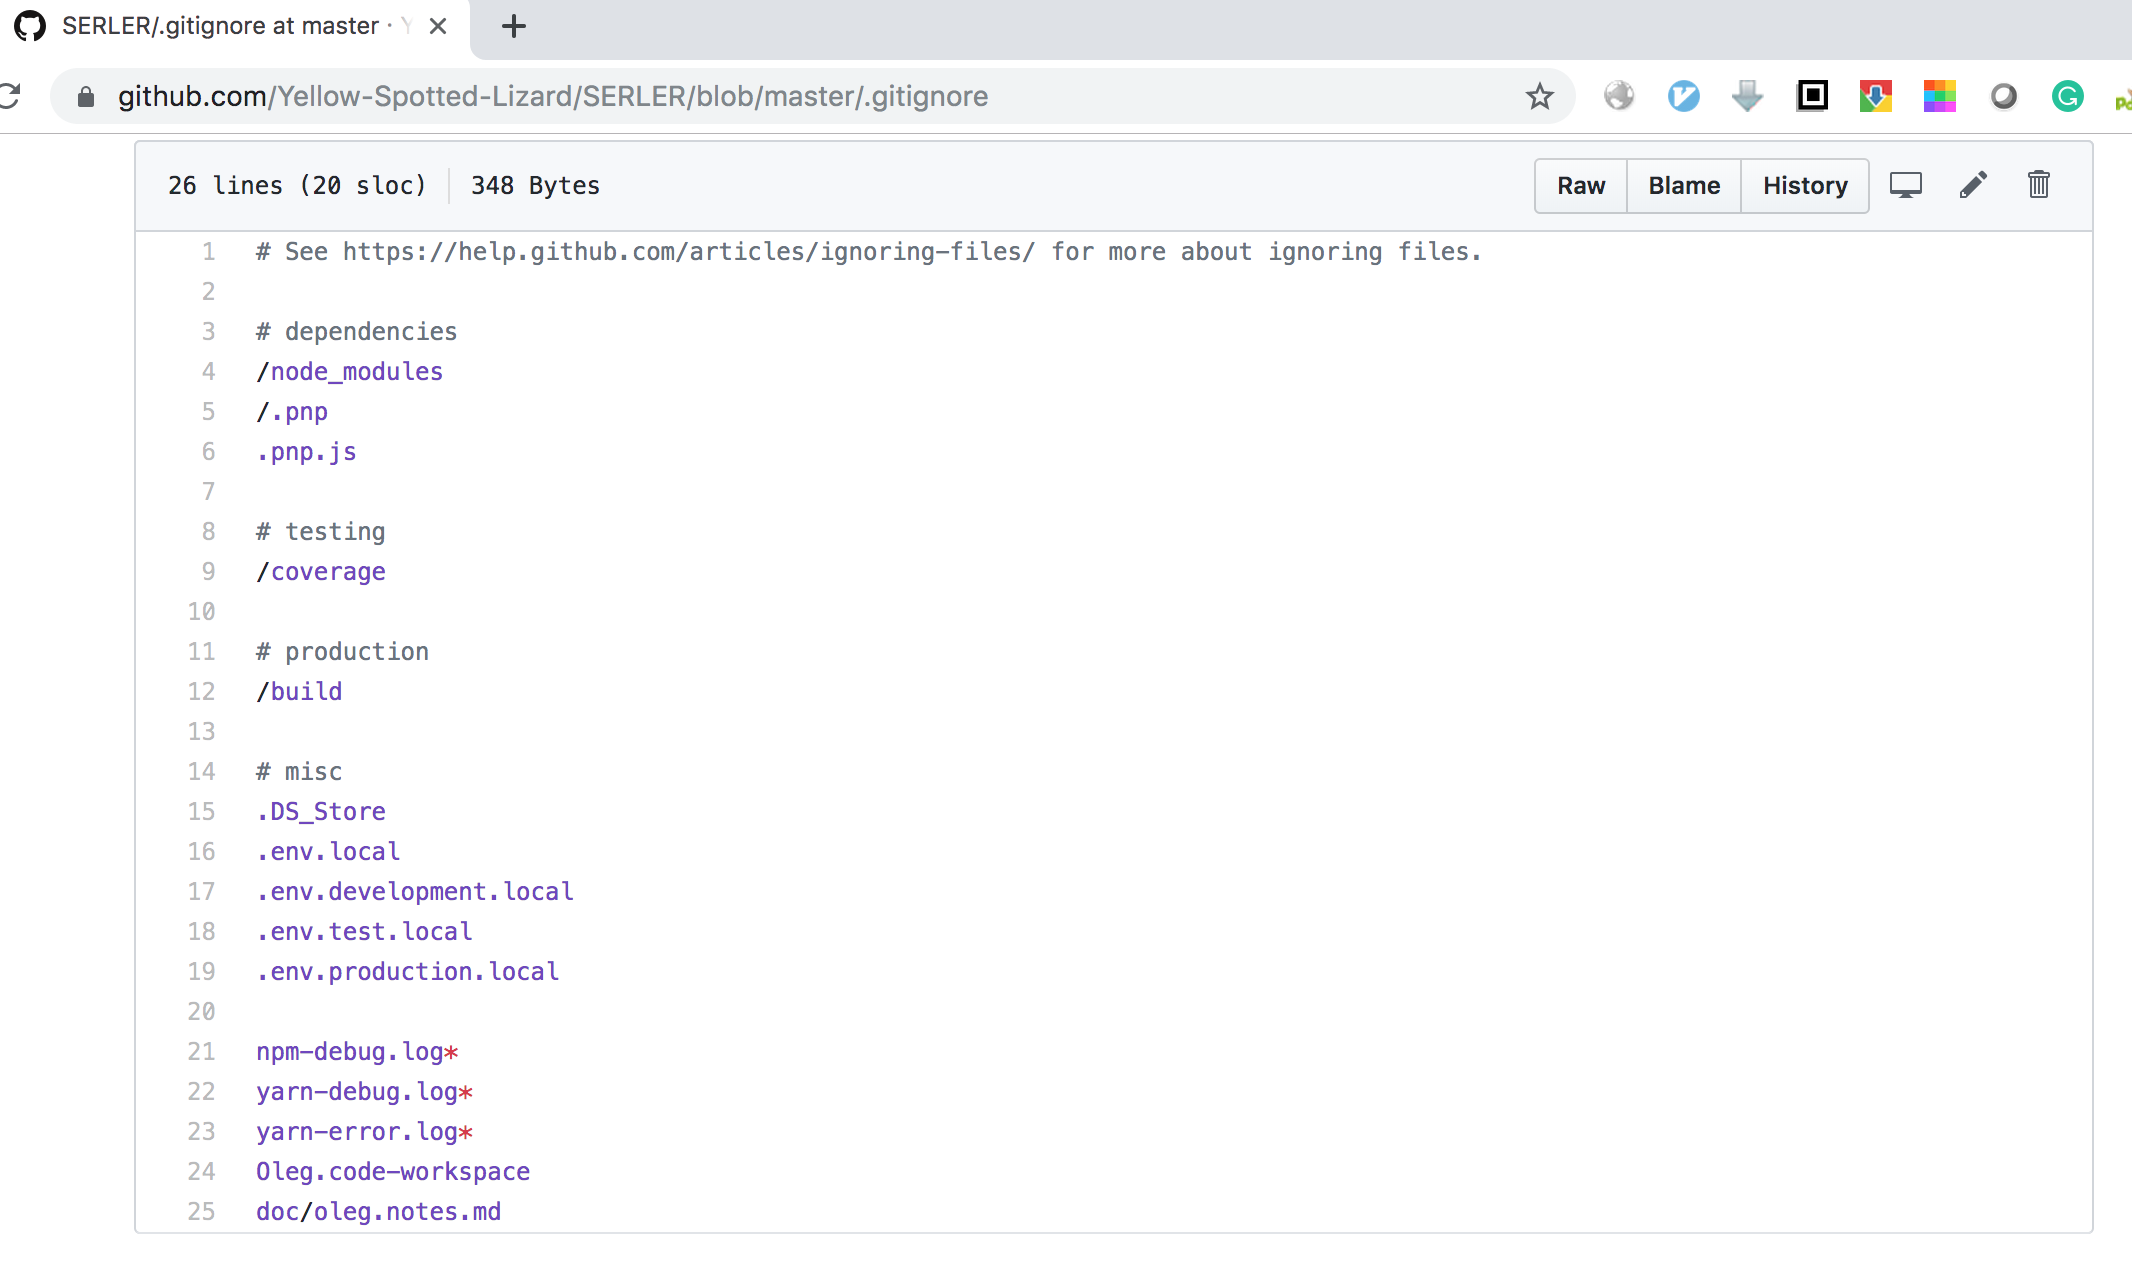
In this file we ignored several kinds of files: npm libraries (node_modules), build output (/build), local configuration files (.env.local, etc), log files (npm-debug.log*, etc), etc
We also use Github's Wiki function as a central place to keep our documents at https://github.com/Yellow-Spotted-Lizard/SERLER/wiki. Screenshot:

The convenience of Github wiki is that it is also a Git repository which can be cloned at https://github.com/Yellow-Spotted-Lizard/SERLER.wiki.git. It contains a list of wiki page files. We are using markdown format by it also support other formats like Mediawiki and Org-mode. Another way to edit Github Wiki is to edit it directly in the browser by clicking the "edit" button, like:
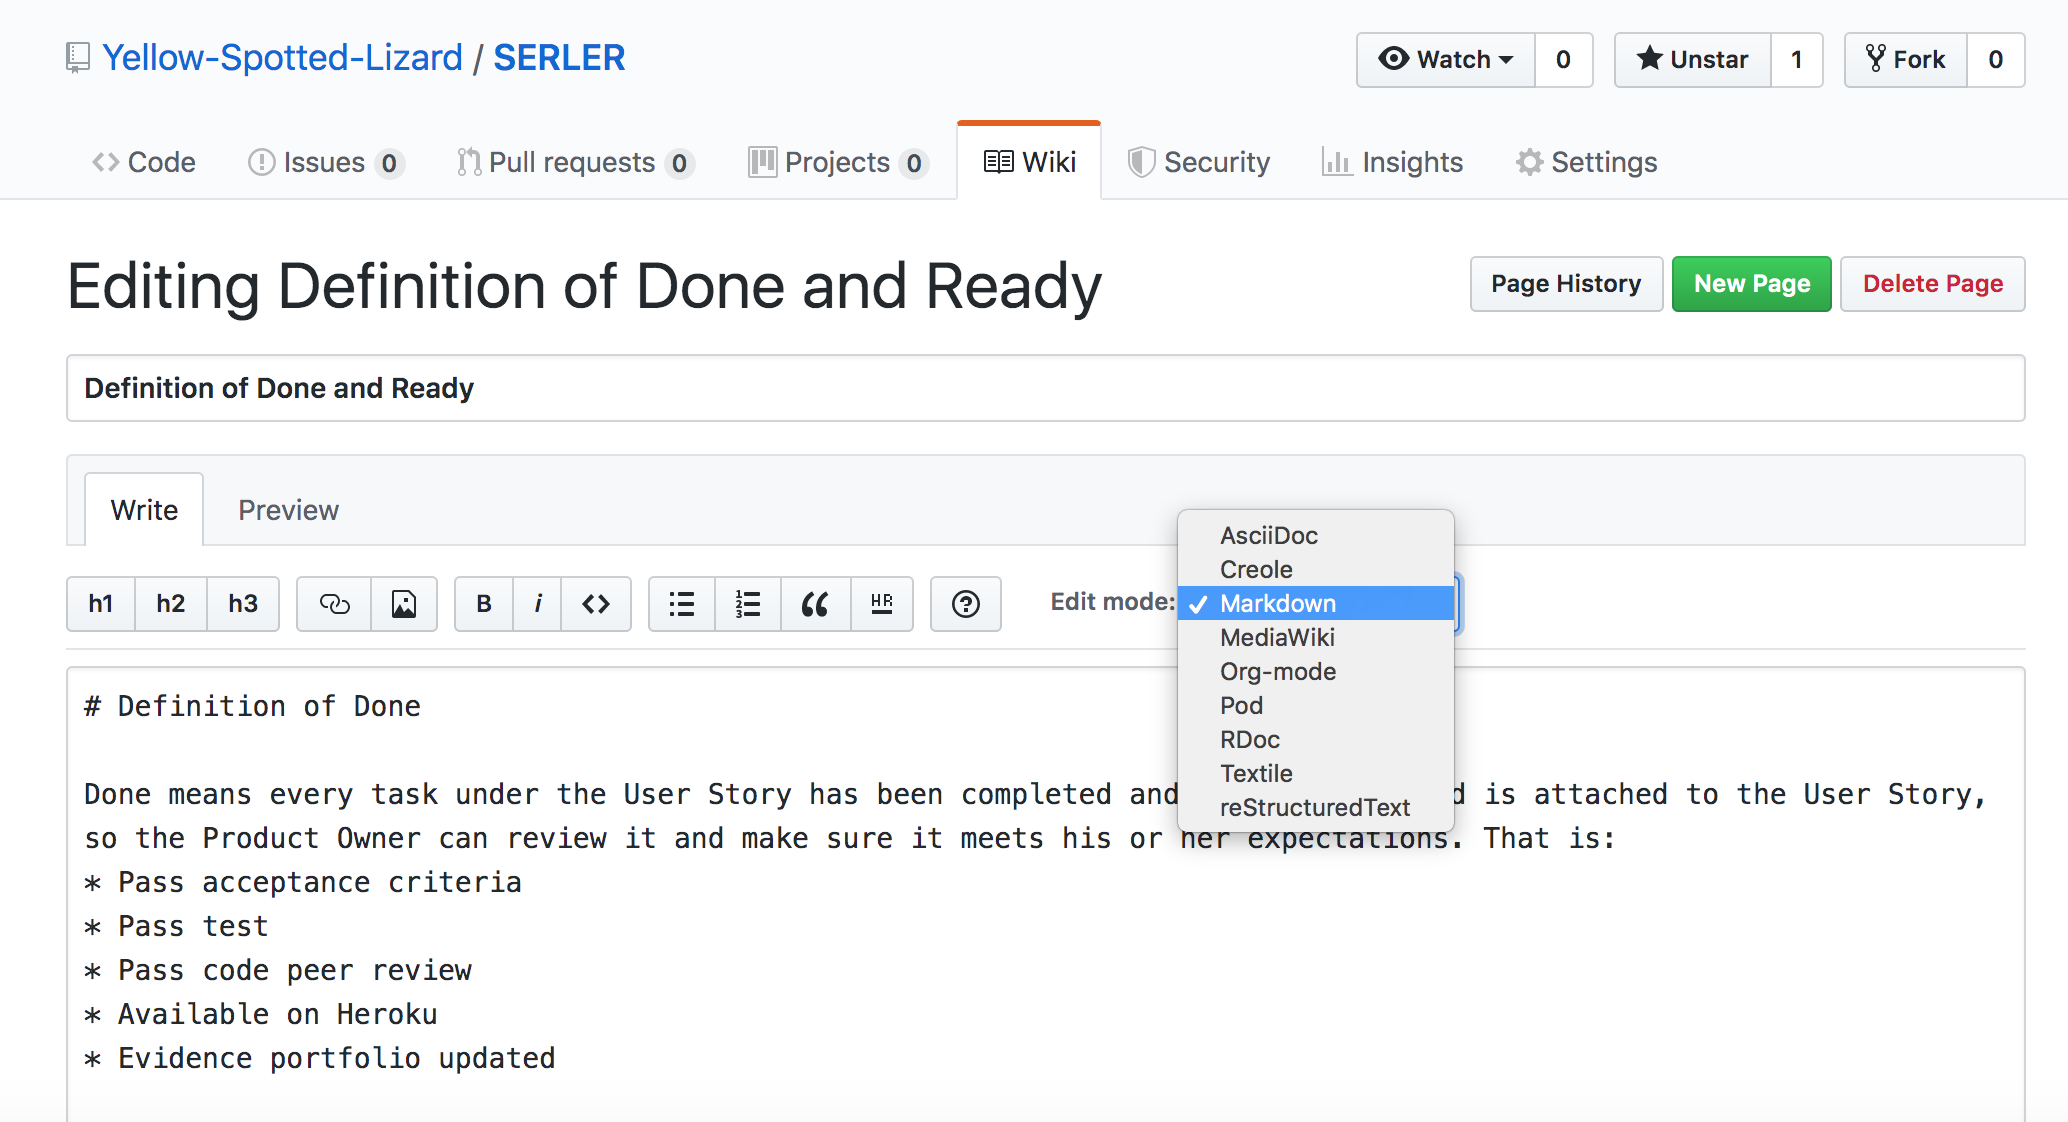
When we committed and pushed the changes, the Wiki page will be updated automatically.
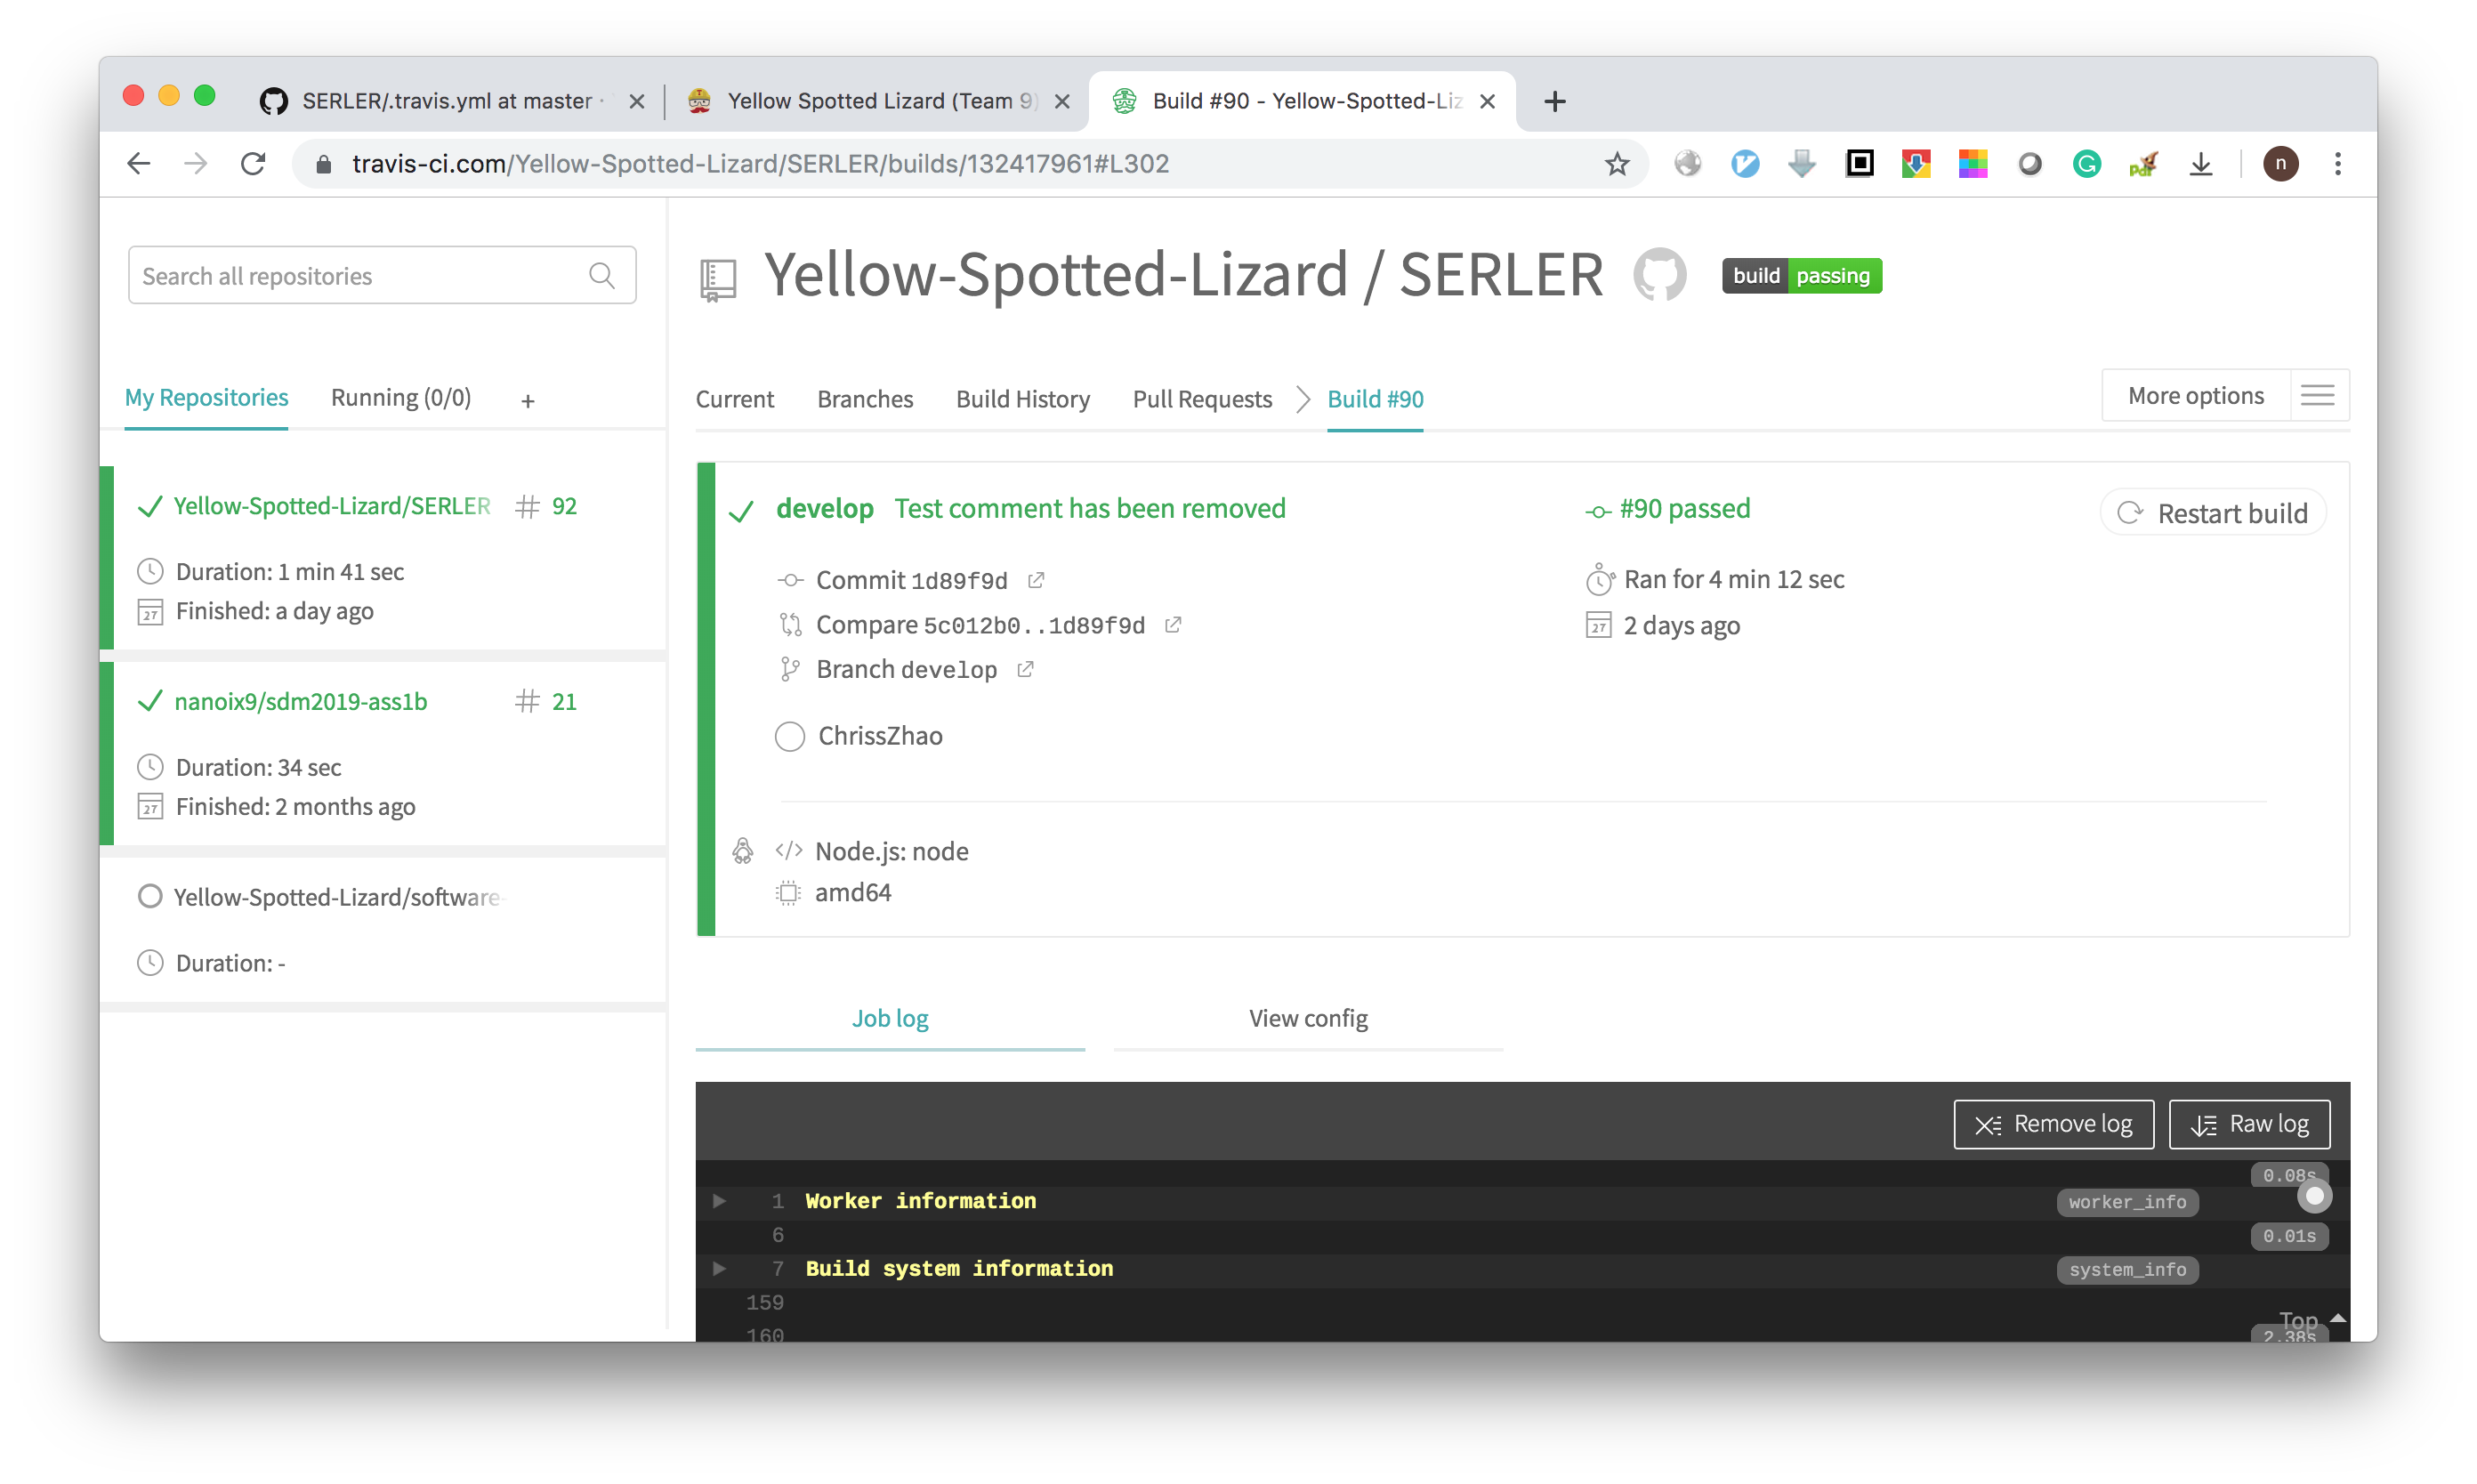
We use TravisCI as our Continuous Integration (CI) system. Simply speaking, when new changes are pushed to a branch or a new pull request is created, TravisCI job will be triggered automatically. The jobs typically contain automatic build and test, but can also be customized, e.g. we made automatic deployment on the develop branch after the success of testing. Here is a screenshot of recent runs:

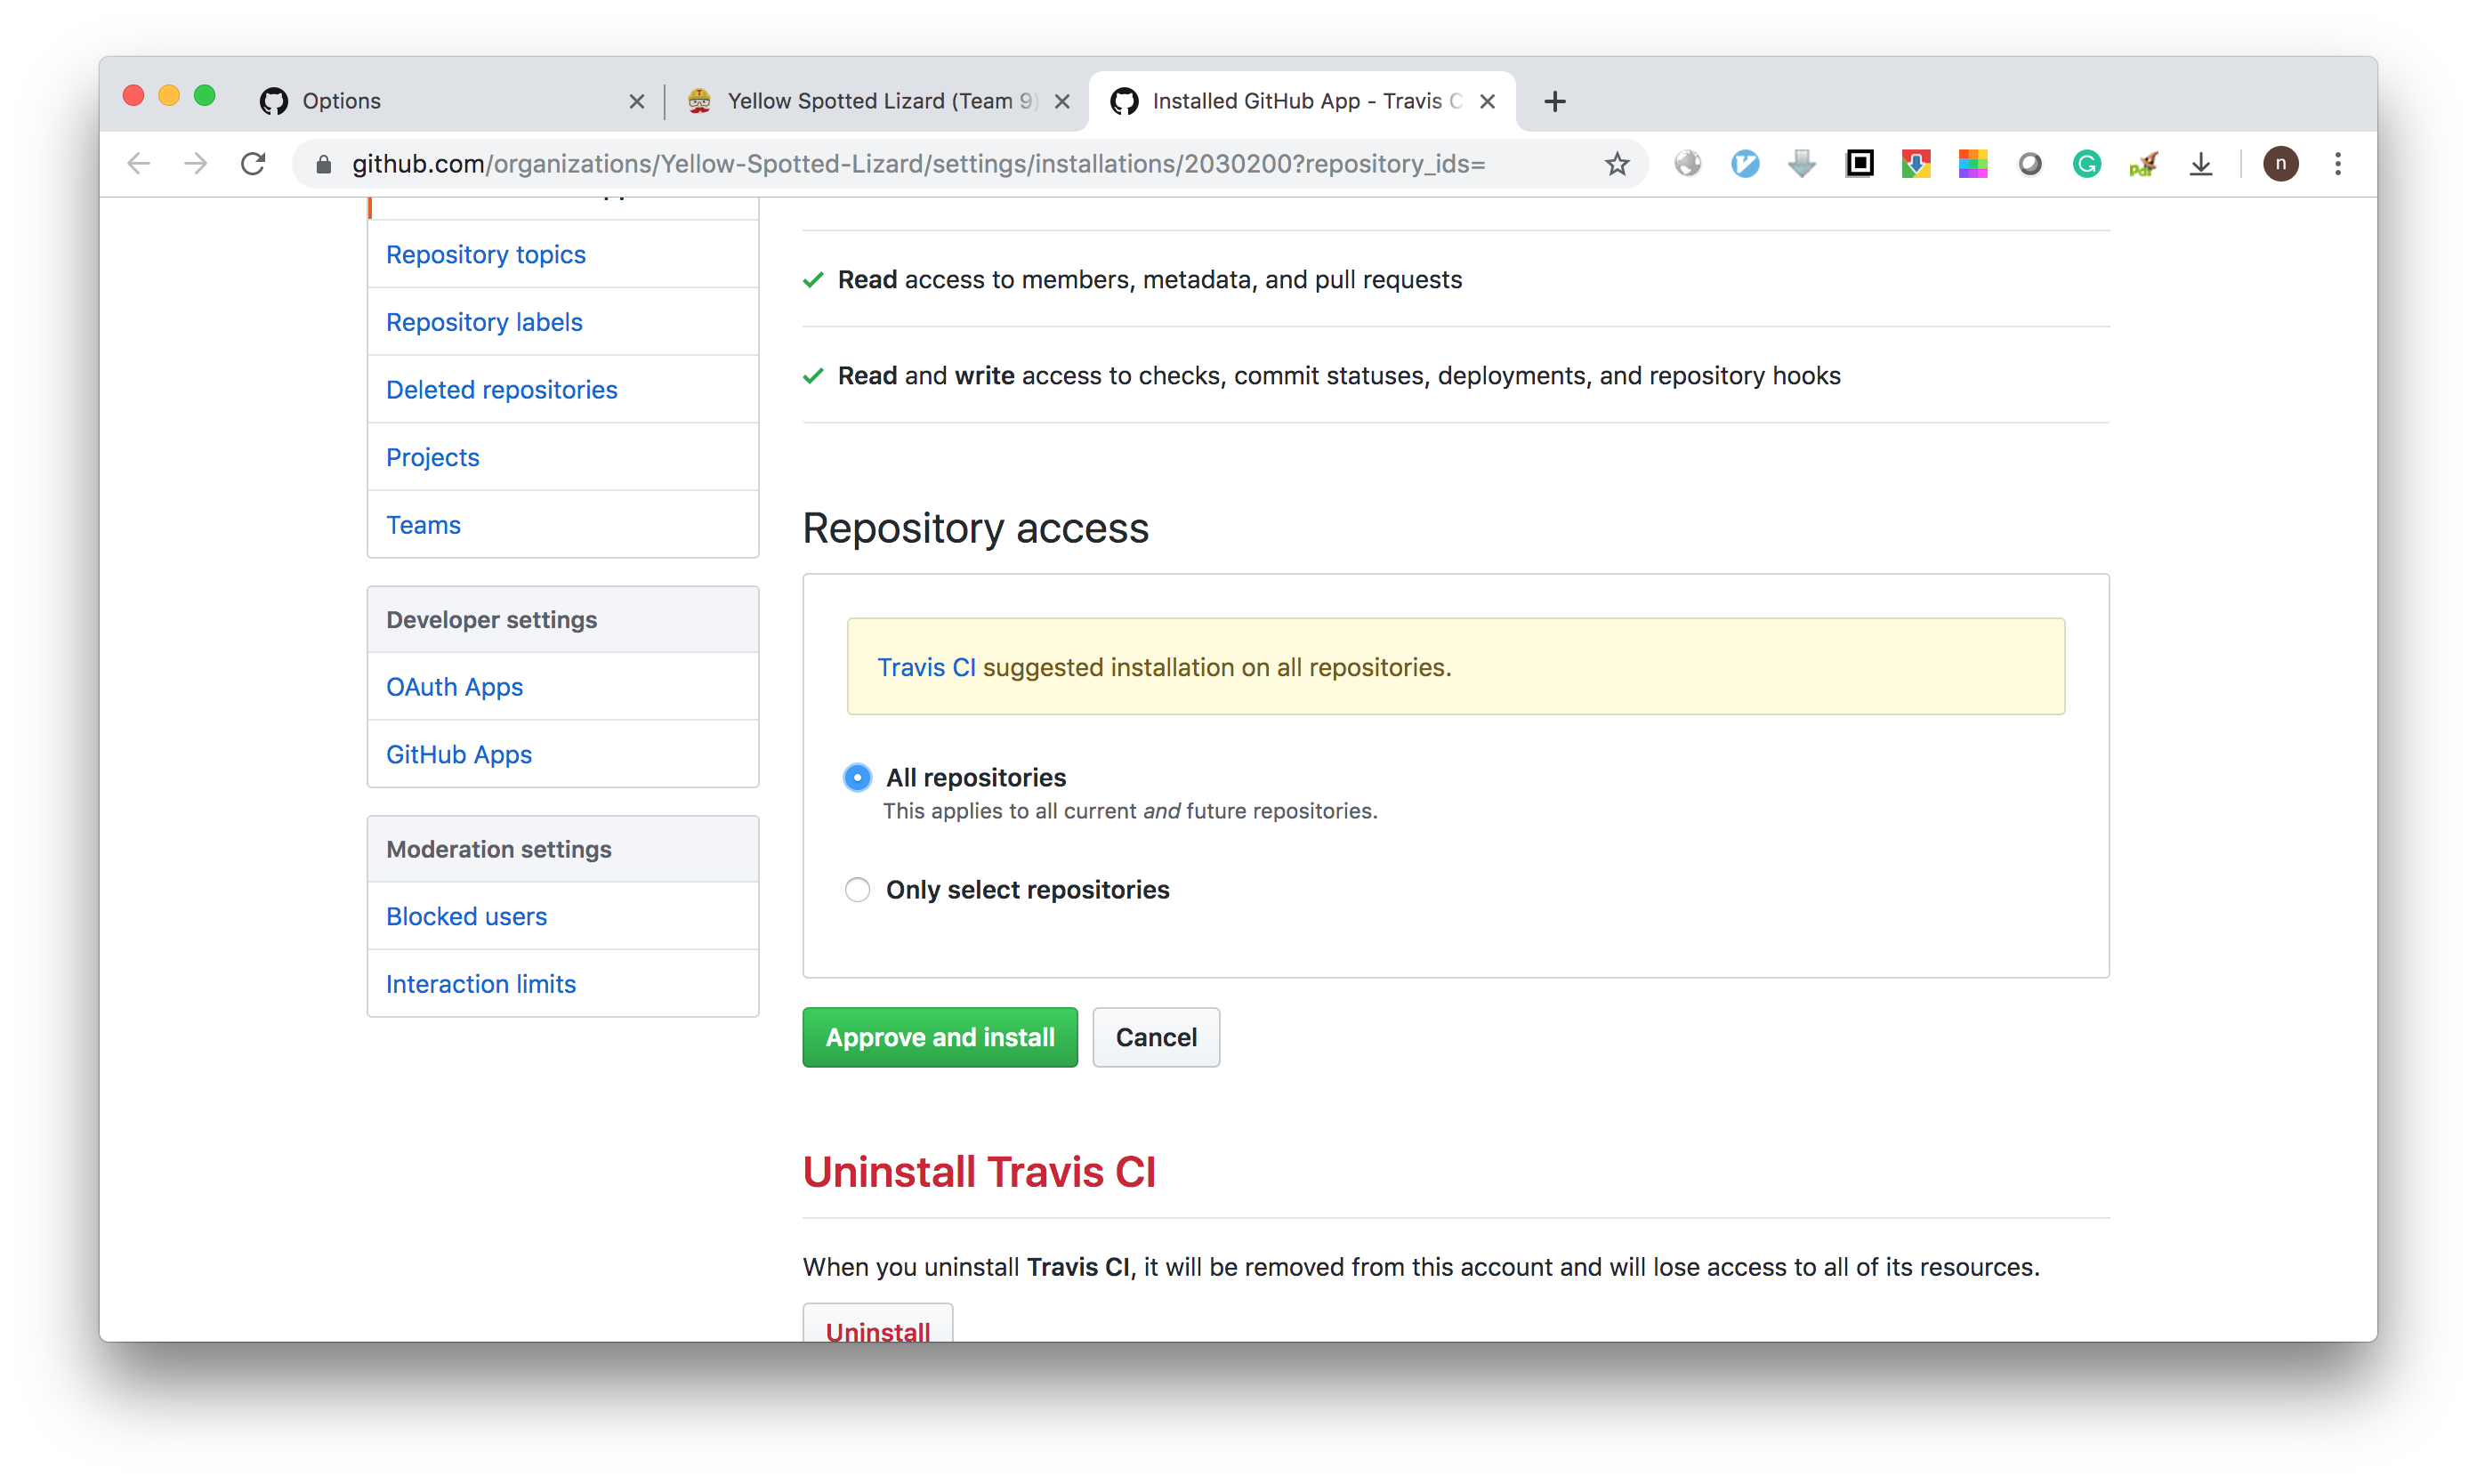
To setup TravisCI, first grant permission to Github repository. This can be done by clicking the "Manage repositories on GitHub" button at TravisCI's setting page, and then set "Repository access" at Github's setting page. It can be configured either apply TravisCI on all repositories, or only selected ones.
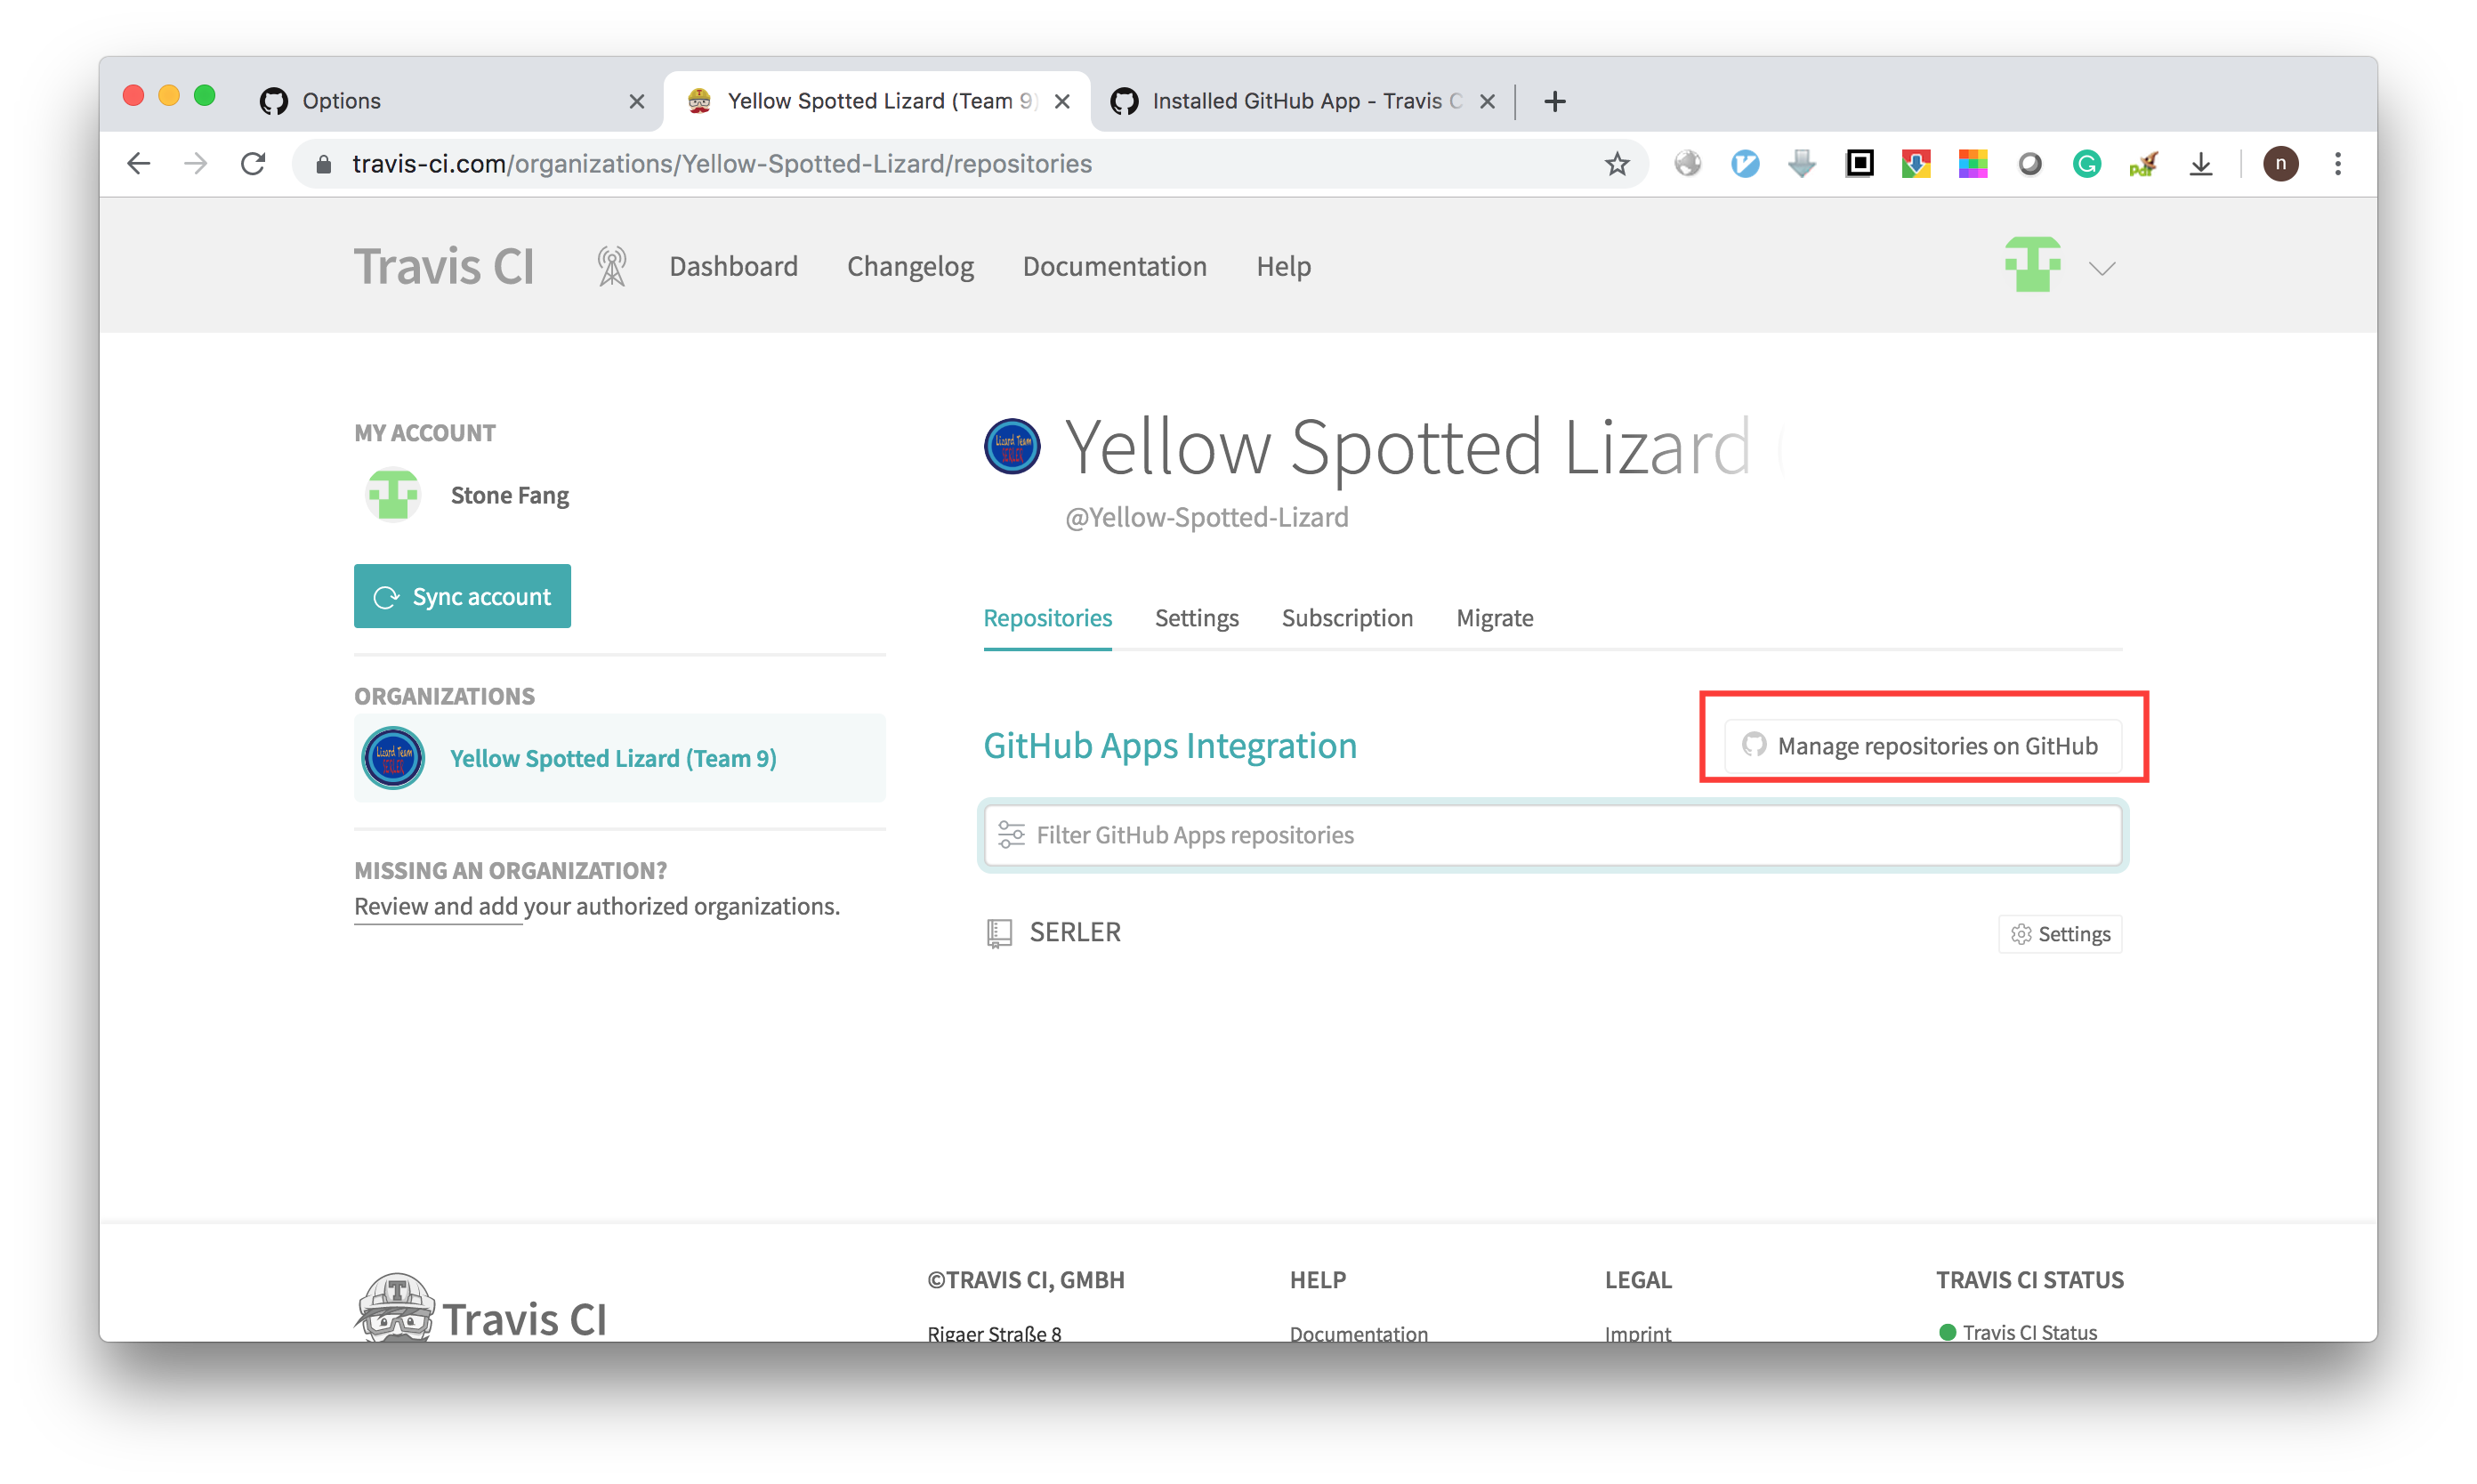
To run TravisCI jobs appropriately, it is required to setup the configuration file, as described in next section.
A '.travis.yml' file under the root of repository is required for TravisCI. Our .travis.yml file is here: https://github.com/Yellow-Spotted-Lizard/SERLER/blob/master/.travis.yml
First it is specified that this is a NodeJS project by
  language: node_js
  node_js:
    - "node"
We also specified the NodeJS version in "package.json" file:
  "engines": {
    "node": ">=10.0.0"
  },
Then it is declared the requirement of MongoDB:
  services:
    - mongodb
Then we add a "deploy" task to do automatic deployment once the build and test are successful. The following piece of code specified that the project will be deployed to Heroku, only on "develop" branch, and the Heroku application name is "yellow-spotted-lizard-serler".
deploy:
provider: heroku
api_key: 9439cfbd-fa1f-450e-b67e-ac3fcd9c252a
on: develop
app:
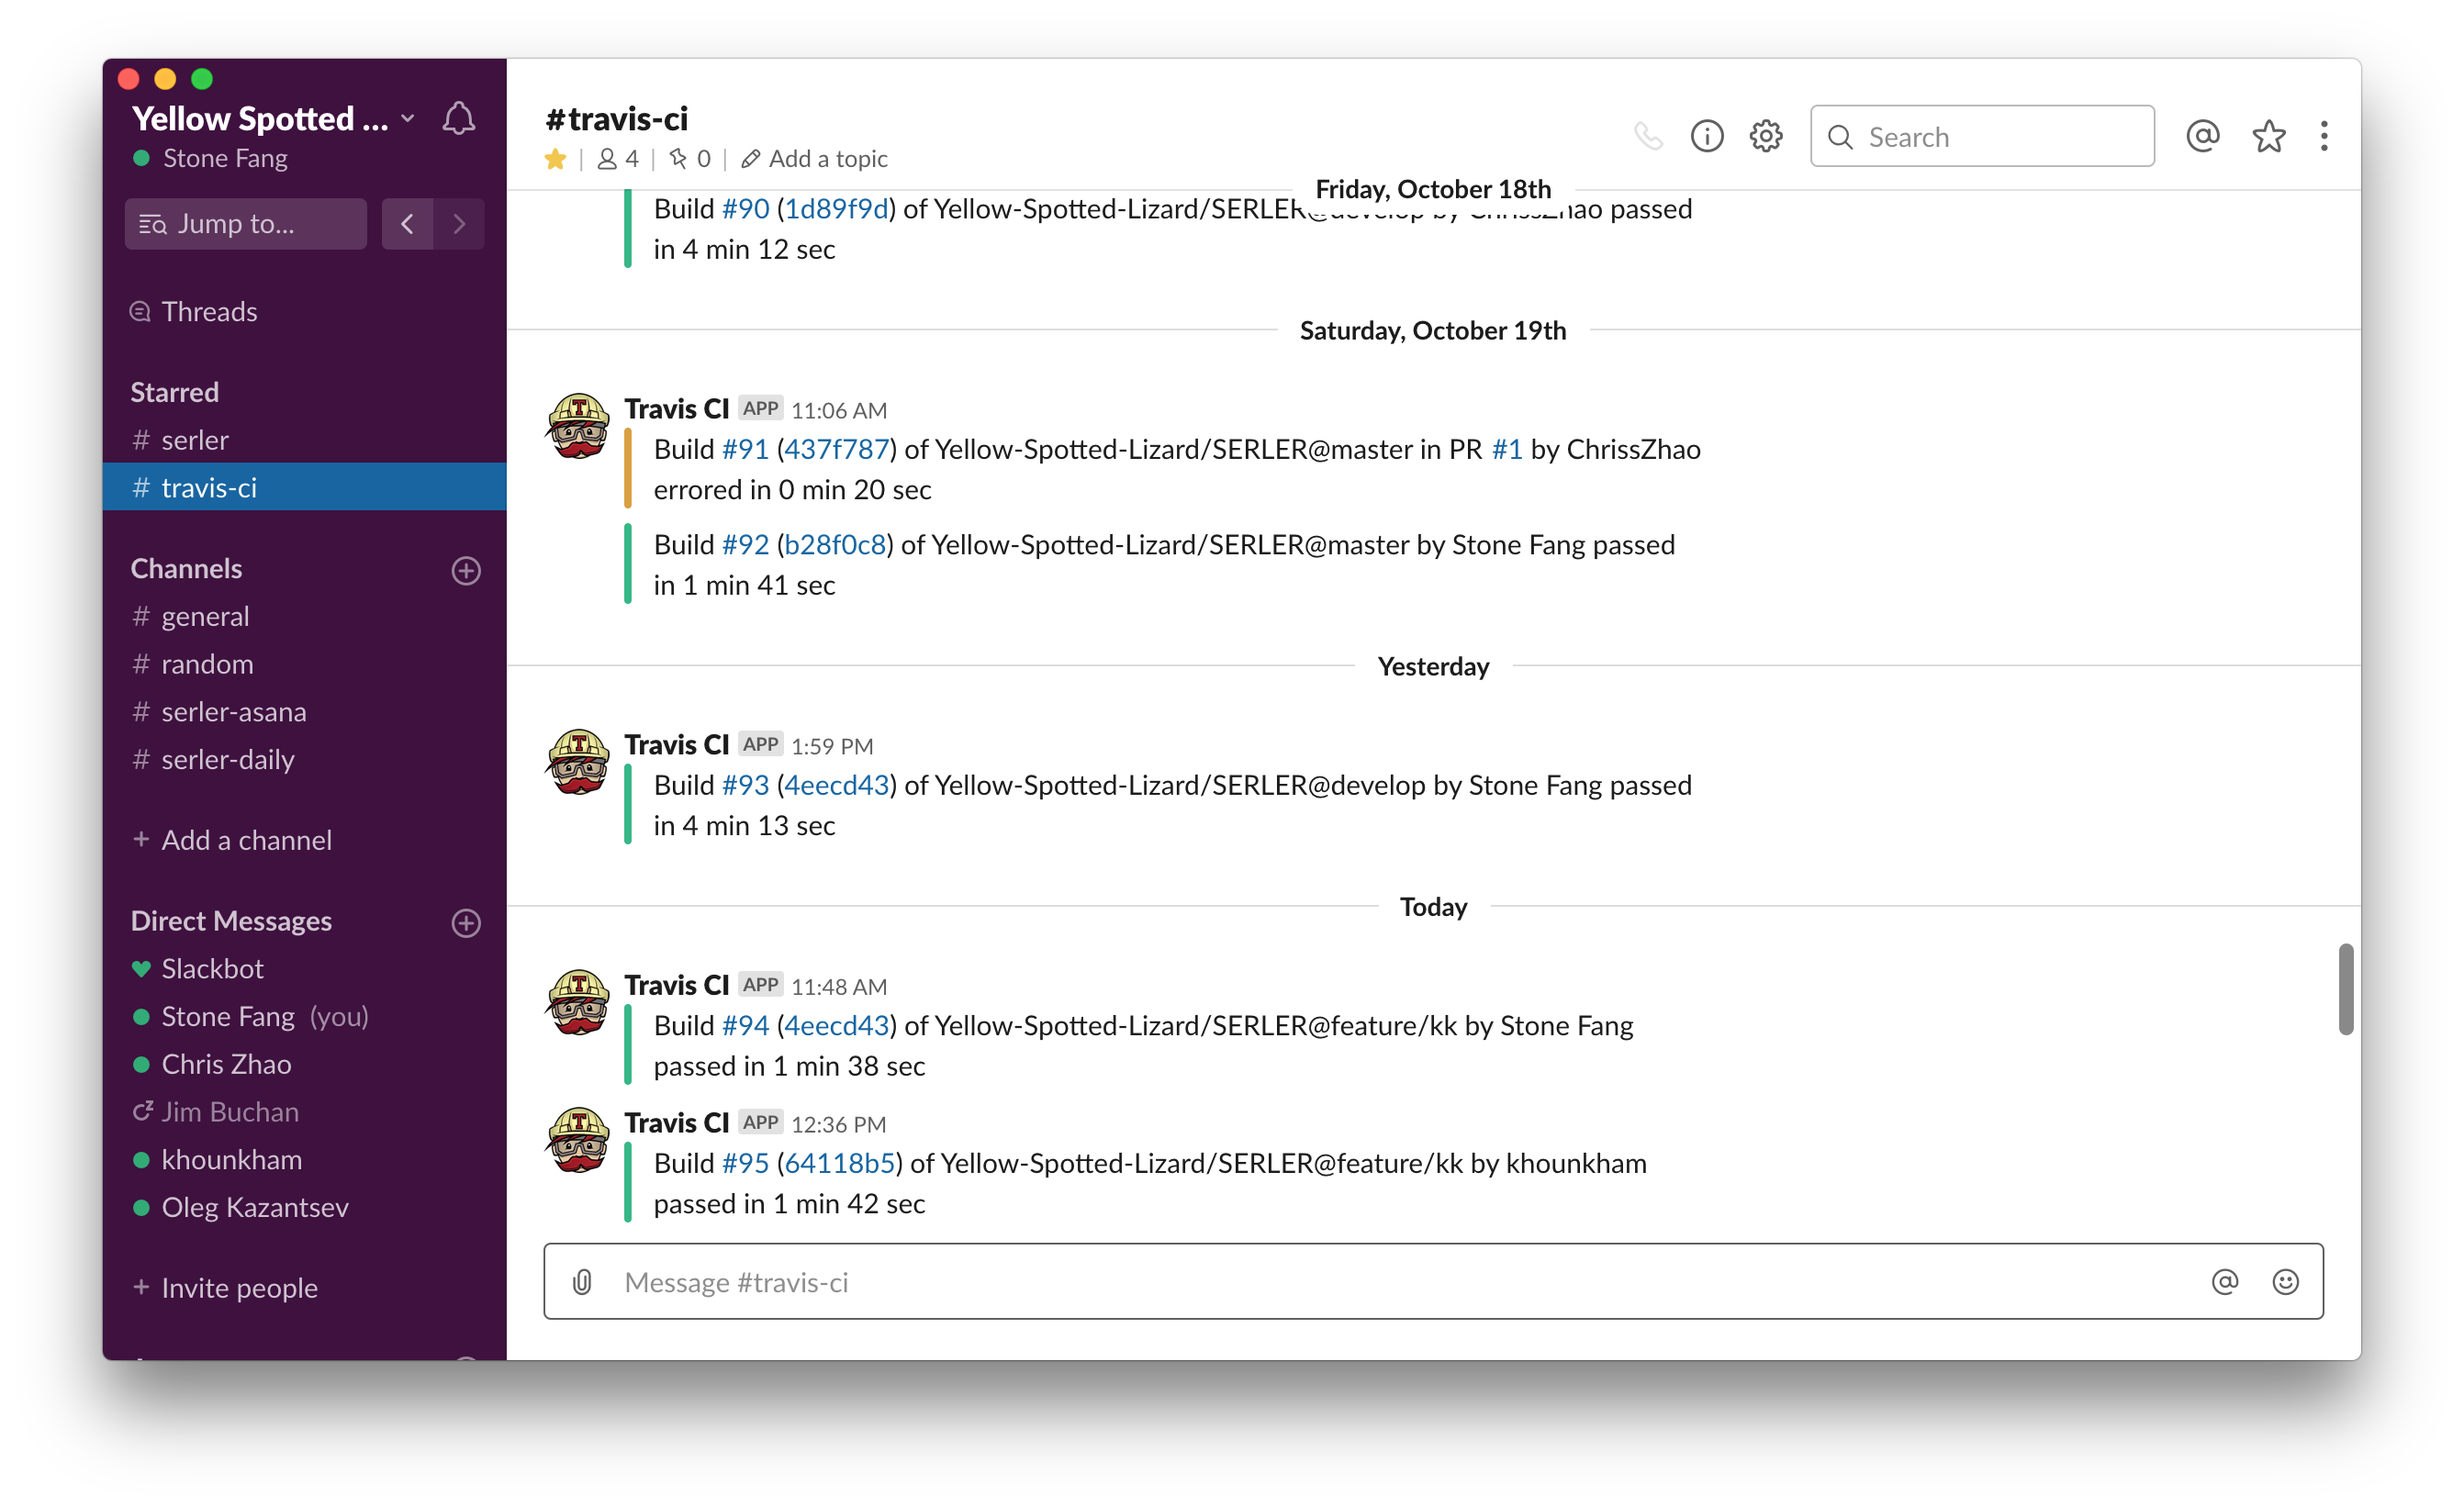
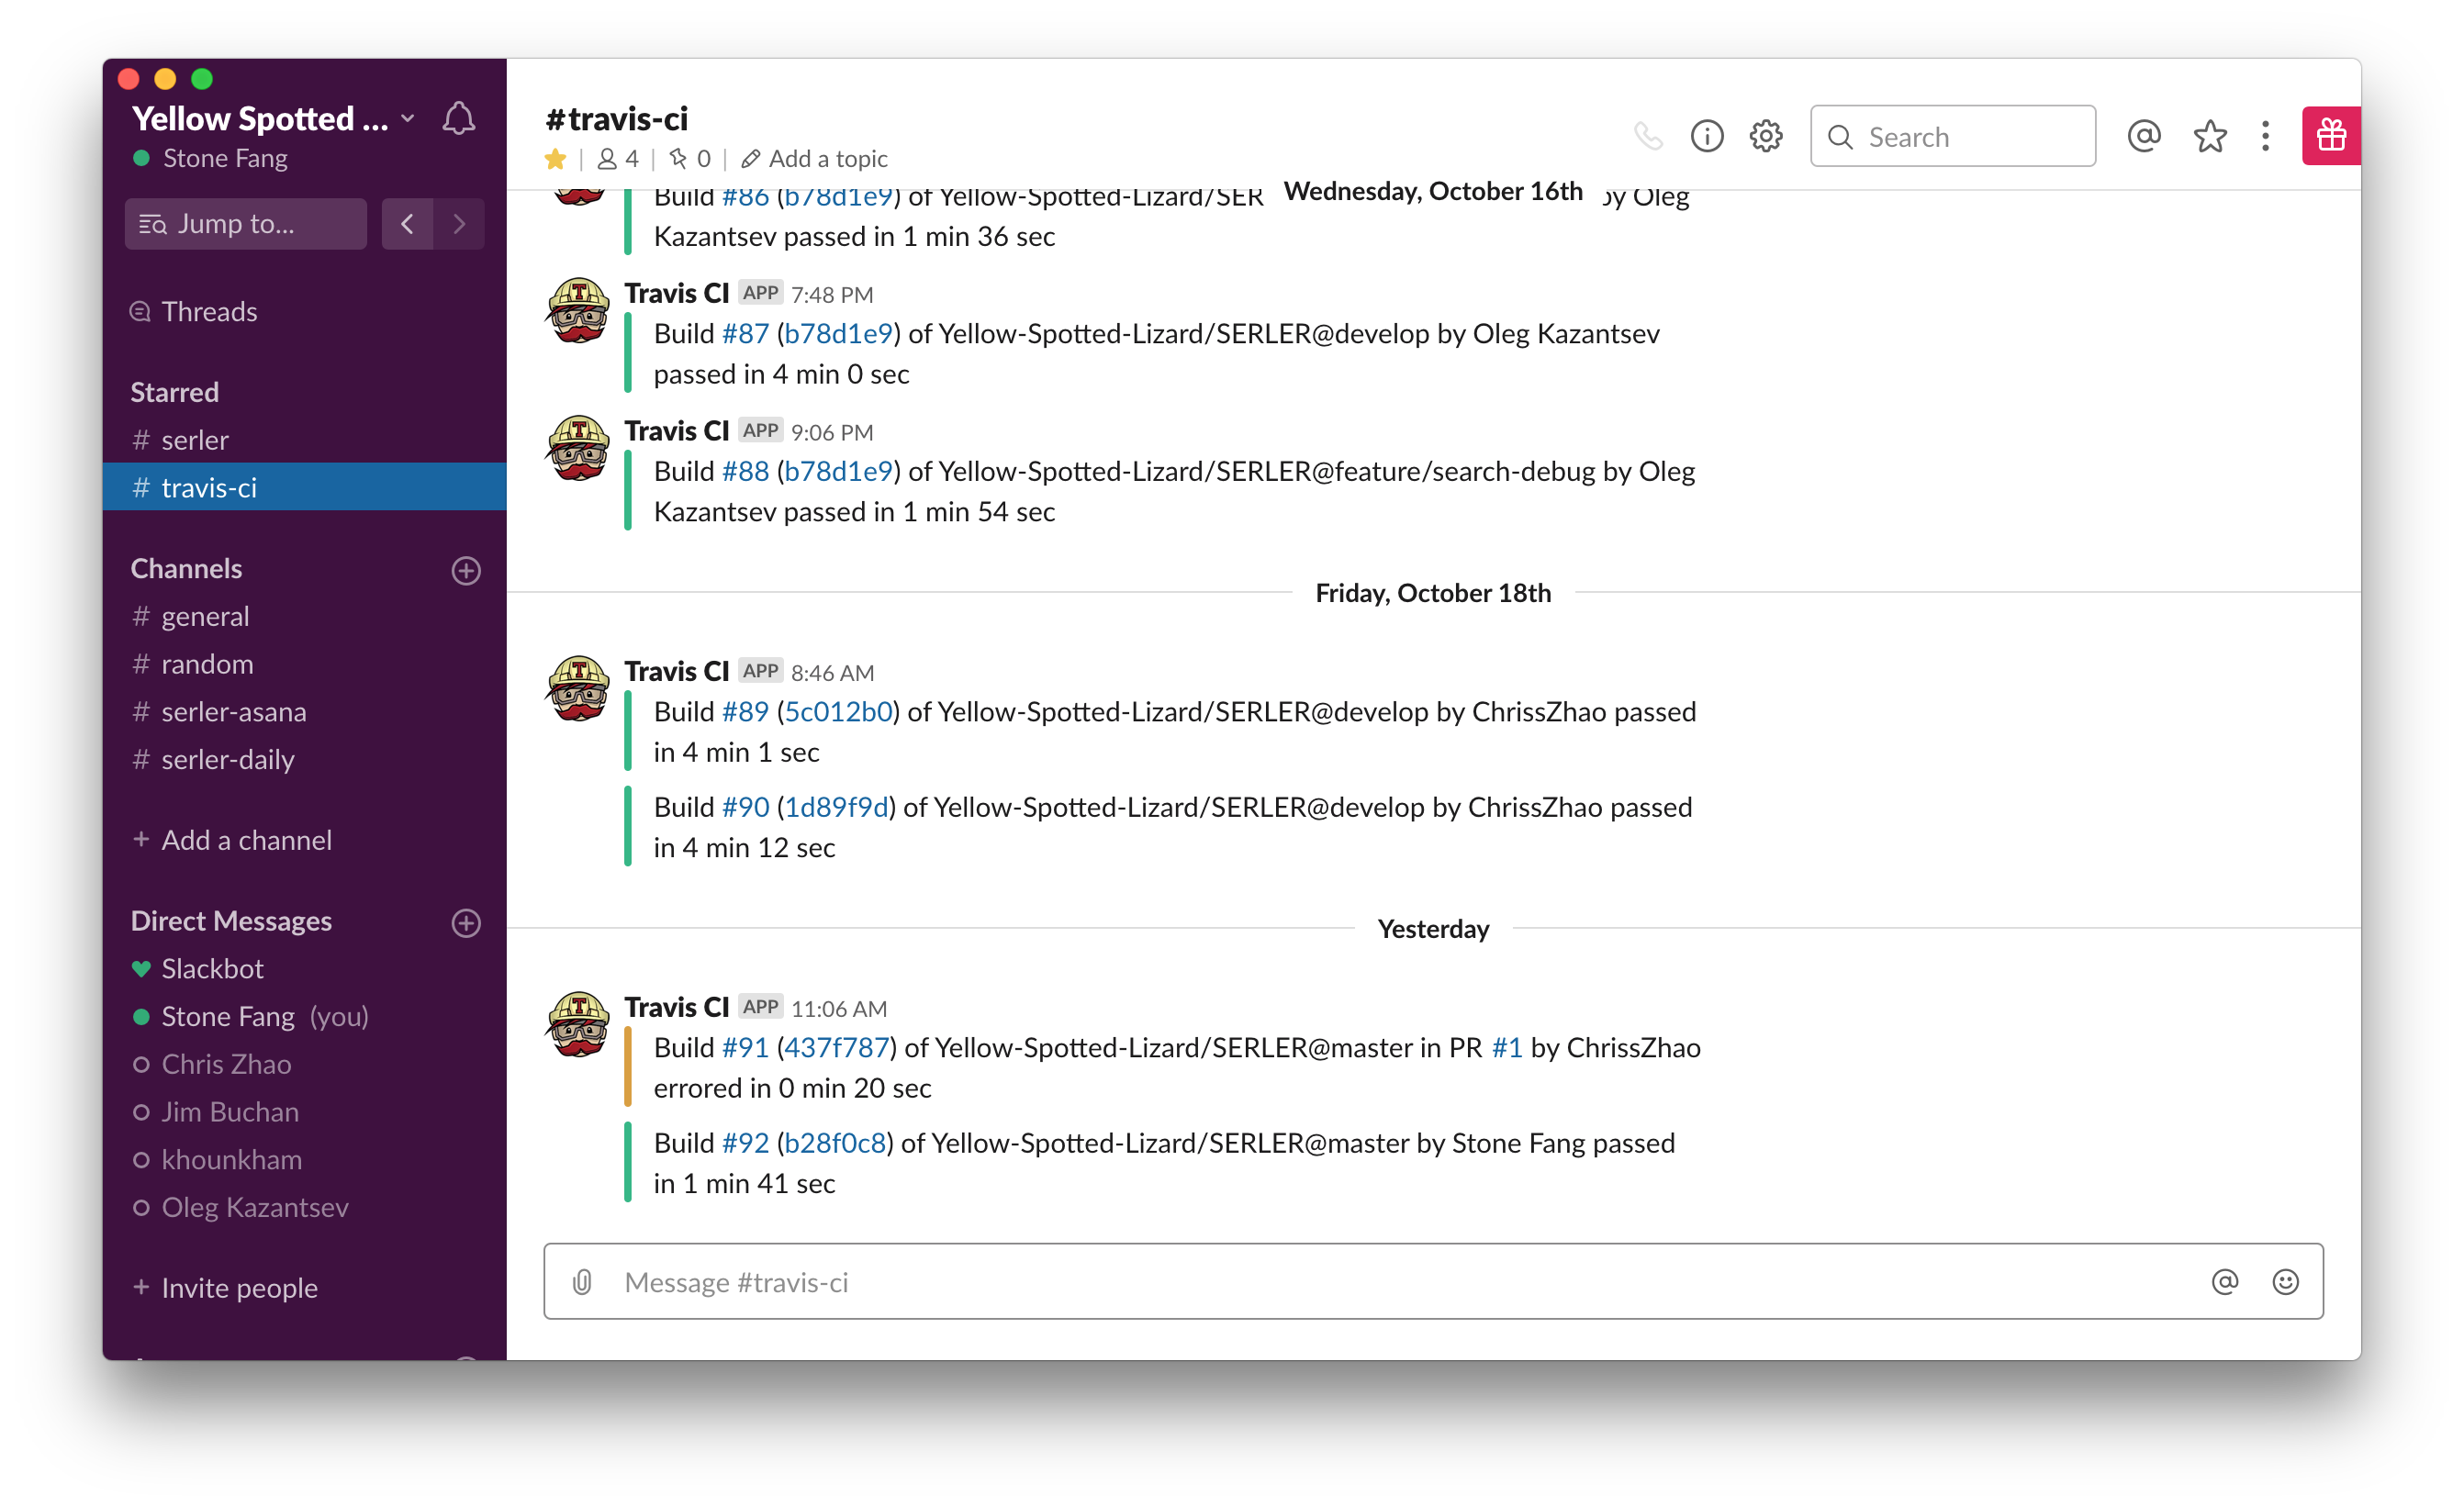
develop: yellow-spotted-lizard-serlerThe next section is the configuration on notification to Slack. We use Slack as our daily communication tool so it would be convenient if we can get notified once a TravisCI has finished either successfully or not. In this part, we made TravisCI always send notification on both success and failure to a certain Slack channel (so the TravisCI notifications won't be mixed with other messages, which is more readable). Here is a snapshot of our Slack channel for TravisCI:
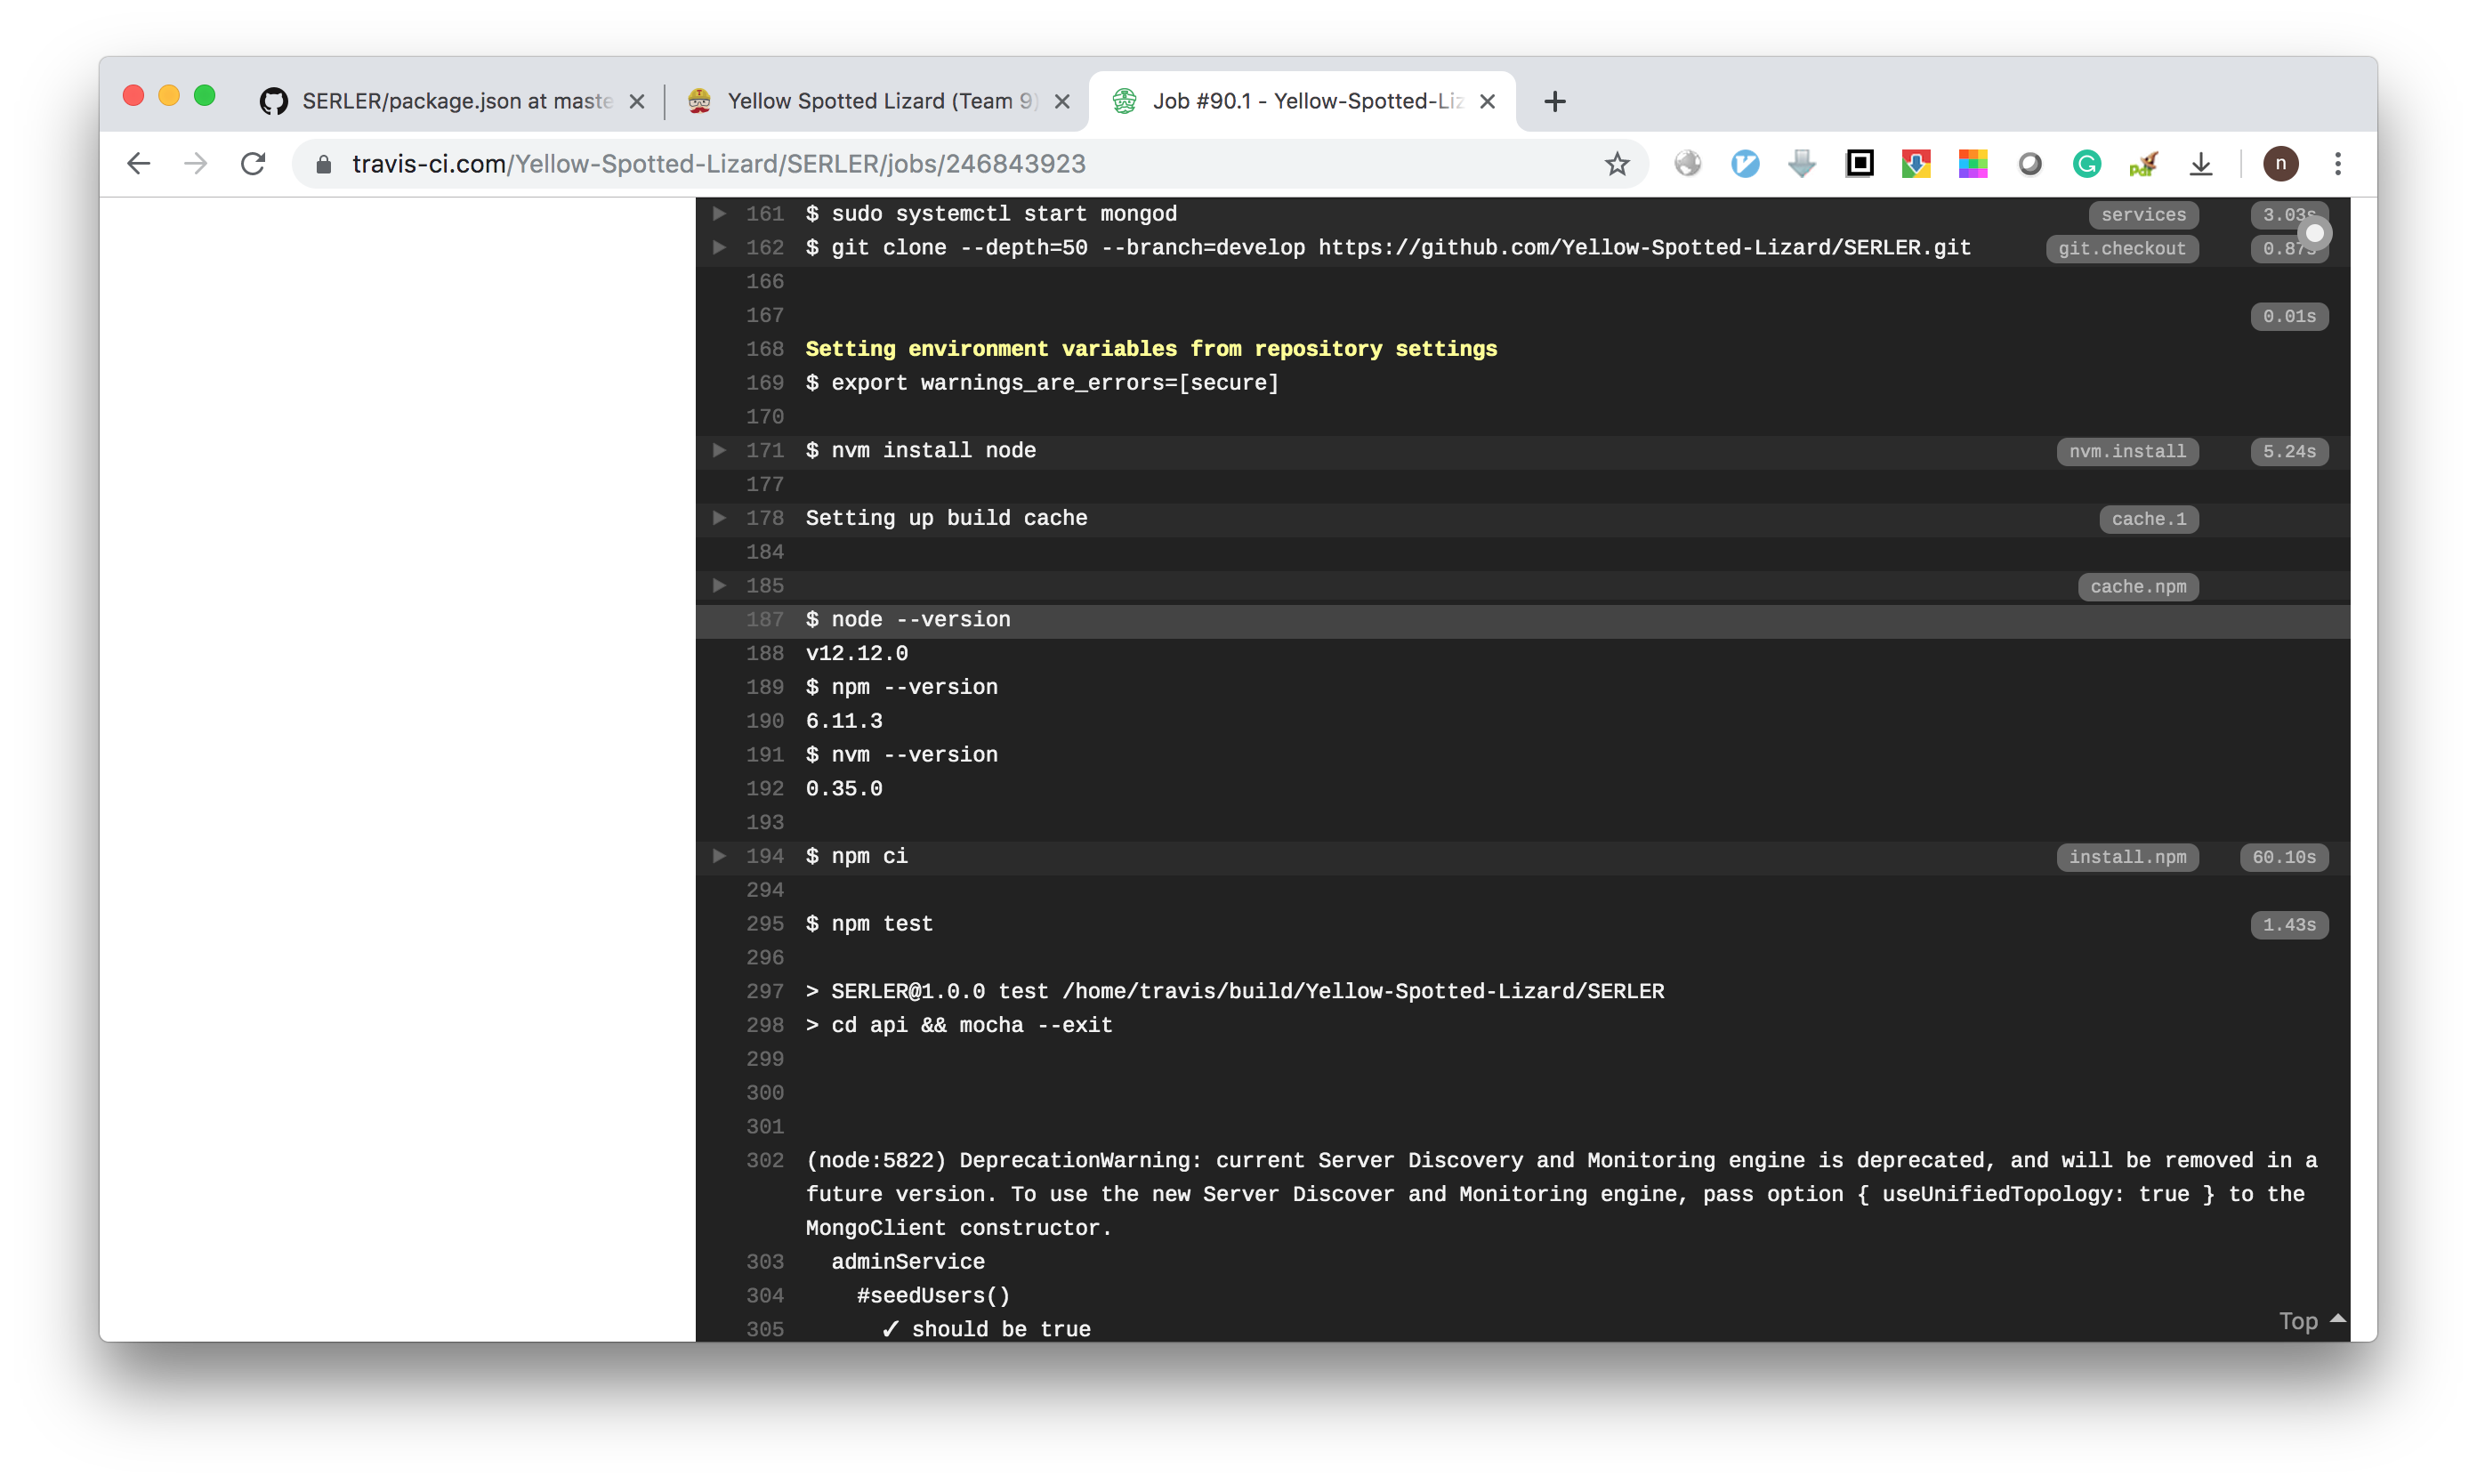
Here is screenshots of logs from a typical TravisCI job. First it setup environments, and then run npm ci command. In this phase, it first install all dependencies by npm install command, and then it run a postinstall because we add this hook in our "package.json" file to build React project into a static file for deployment environment. Then a npm test command will be executed to run all test cases.
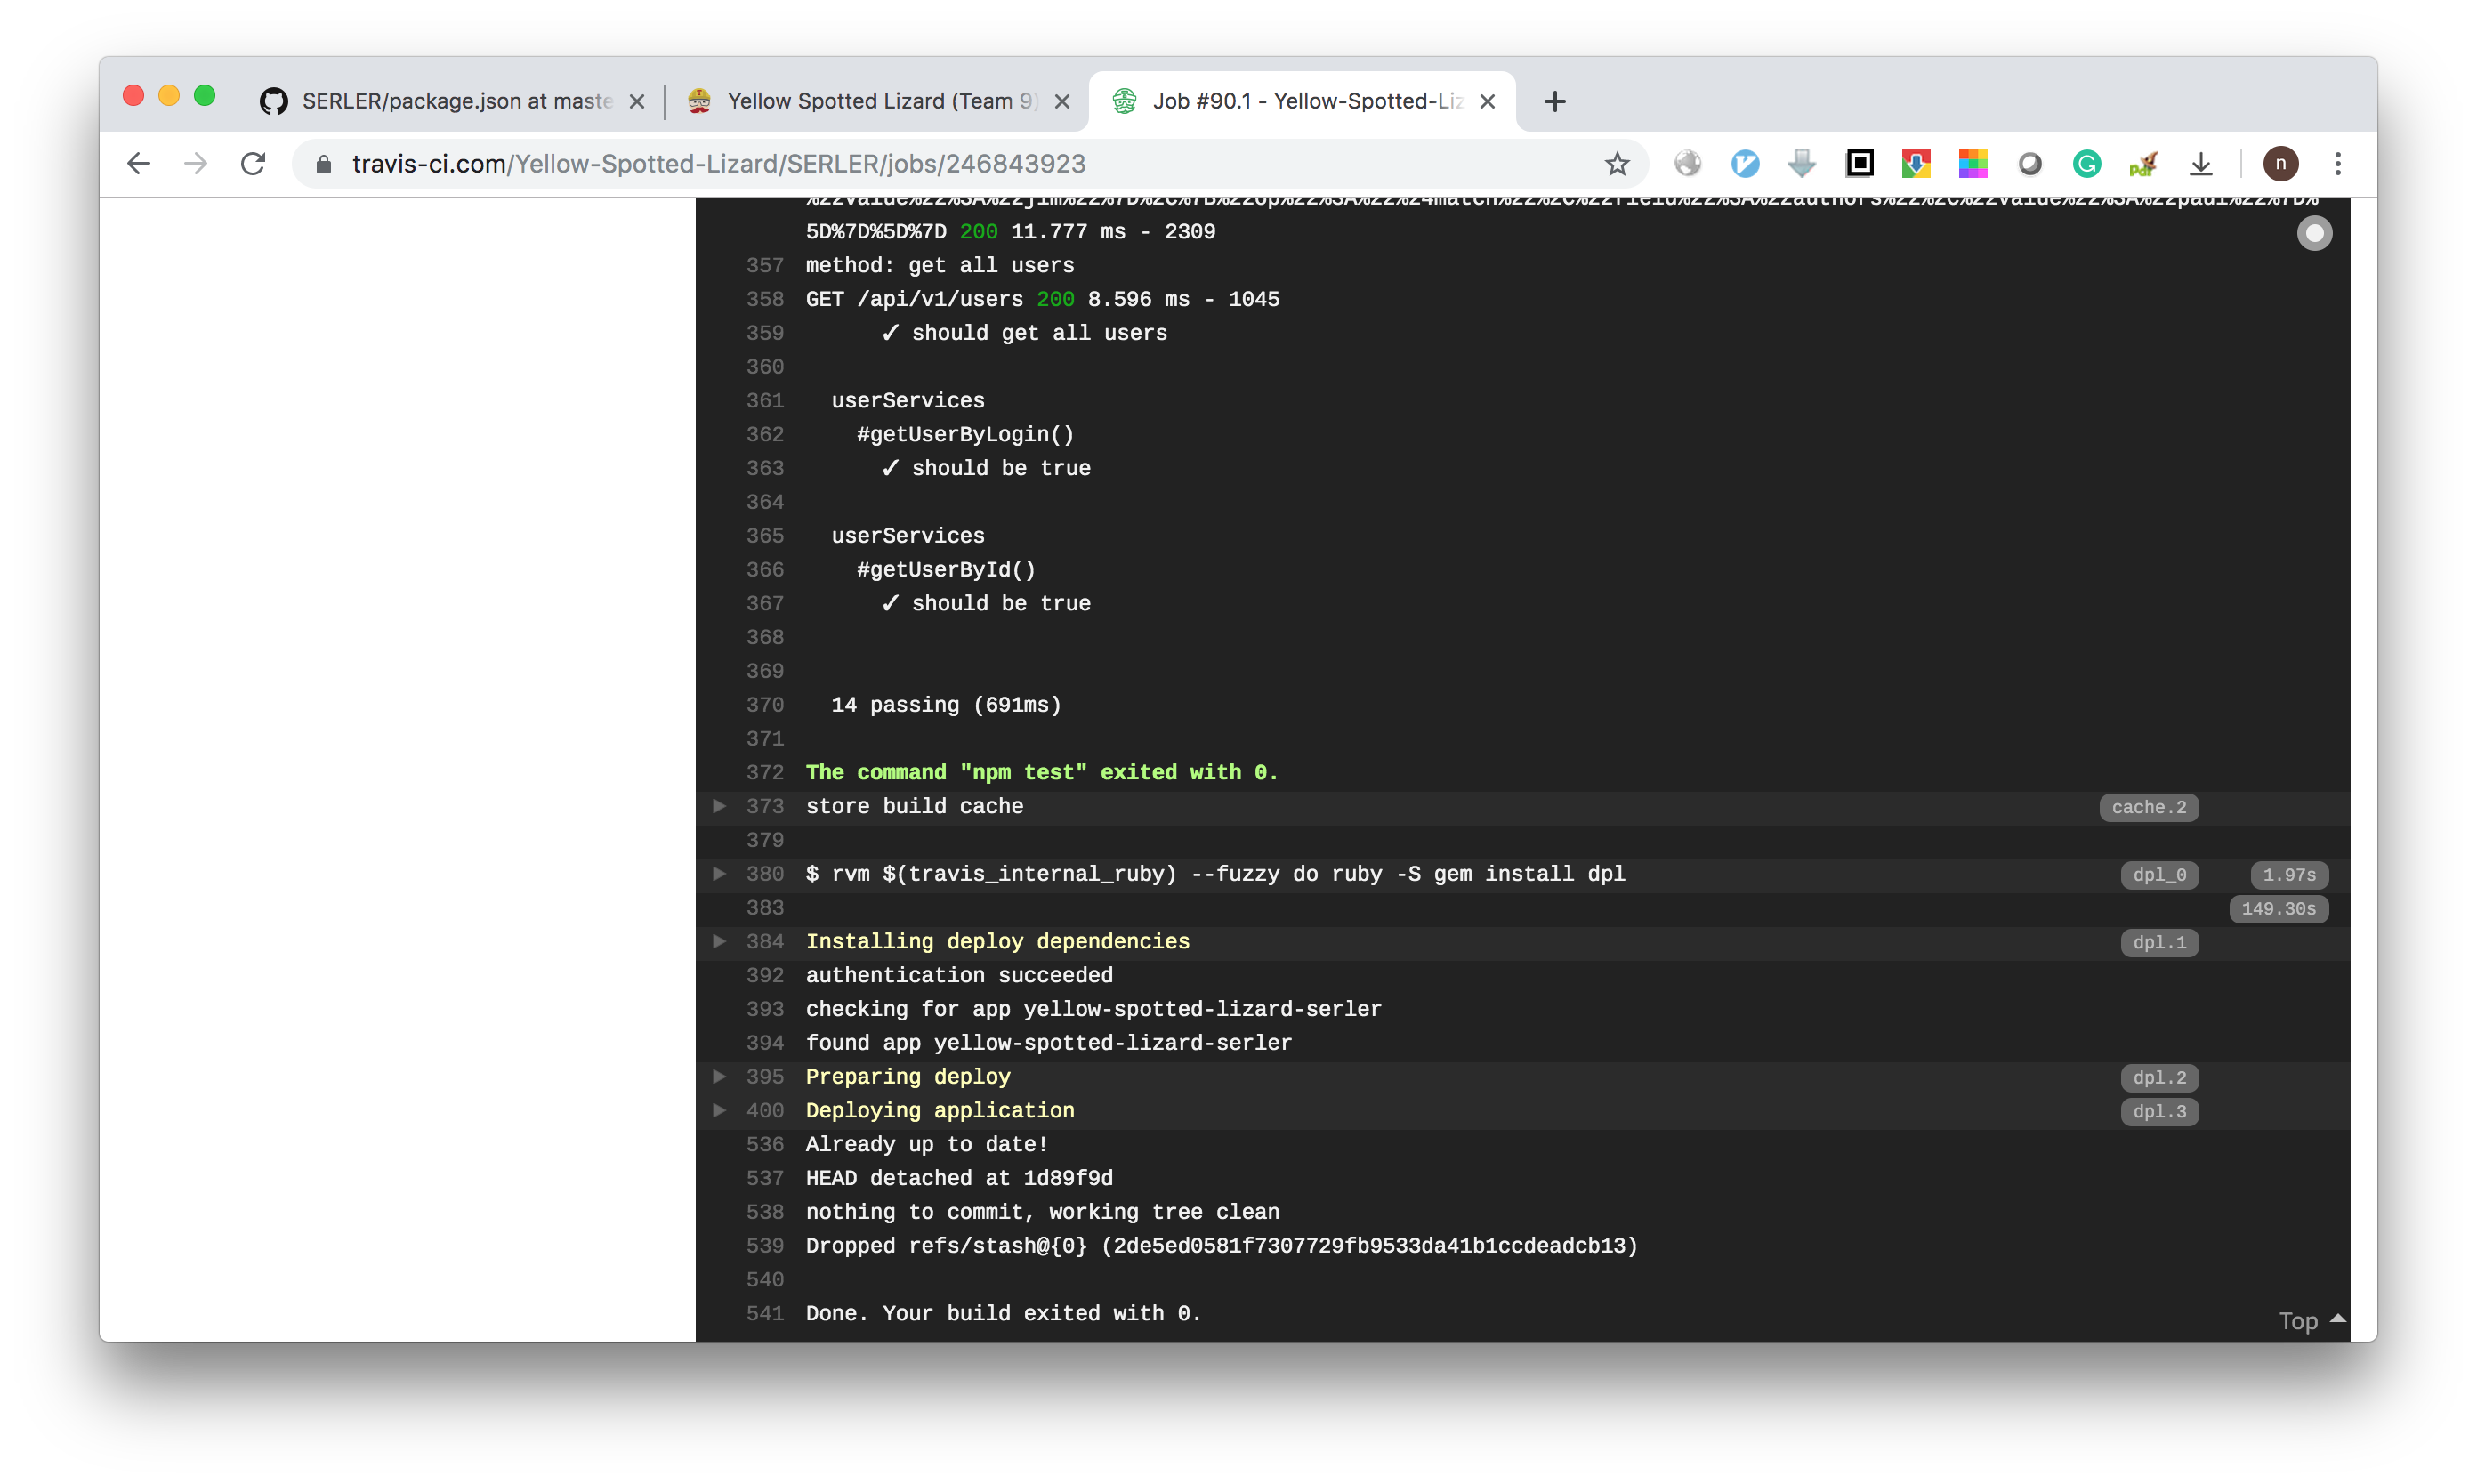
After all test cases pass, it will run deployment to heroku:
We use Mocha, Chai with chai-http & chai-things to test the back-end APIs. Chai-http is a library for test web apps, and chai-things is a library for more convenient and readable assertion.
To use Mocha/Chai for testing first we need to install them in our back-end project with commands
npm install --save-dev mocha chai chai-http chai-thingsHere we use --save-dev for dependencies only at development stage instead of running stage, because testing tools are not required at runtime. The result is shown in our "package.json" file:
  {
    "devDependencies": {
      "chai": "^4.2.0",
      "chai-http": "^4.3.0",
      "mocha": "^6.2.1"
    }
  }
We also add a script to run test:
  {
    "scripts": {
      "test": "mocha --exit"
    }
}Then add test cases to our project. All test cases are here: https://github.com/Yellow-Spotted-Lizard/SERLER/tree/develop/api/test. The following snapshot is a piece of code of typical test case with Mocha/Chai:
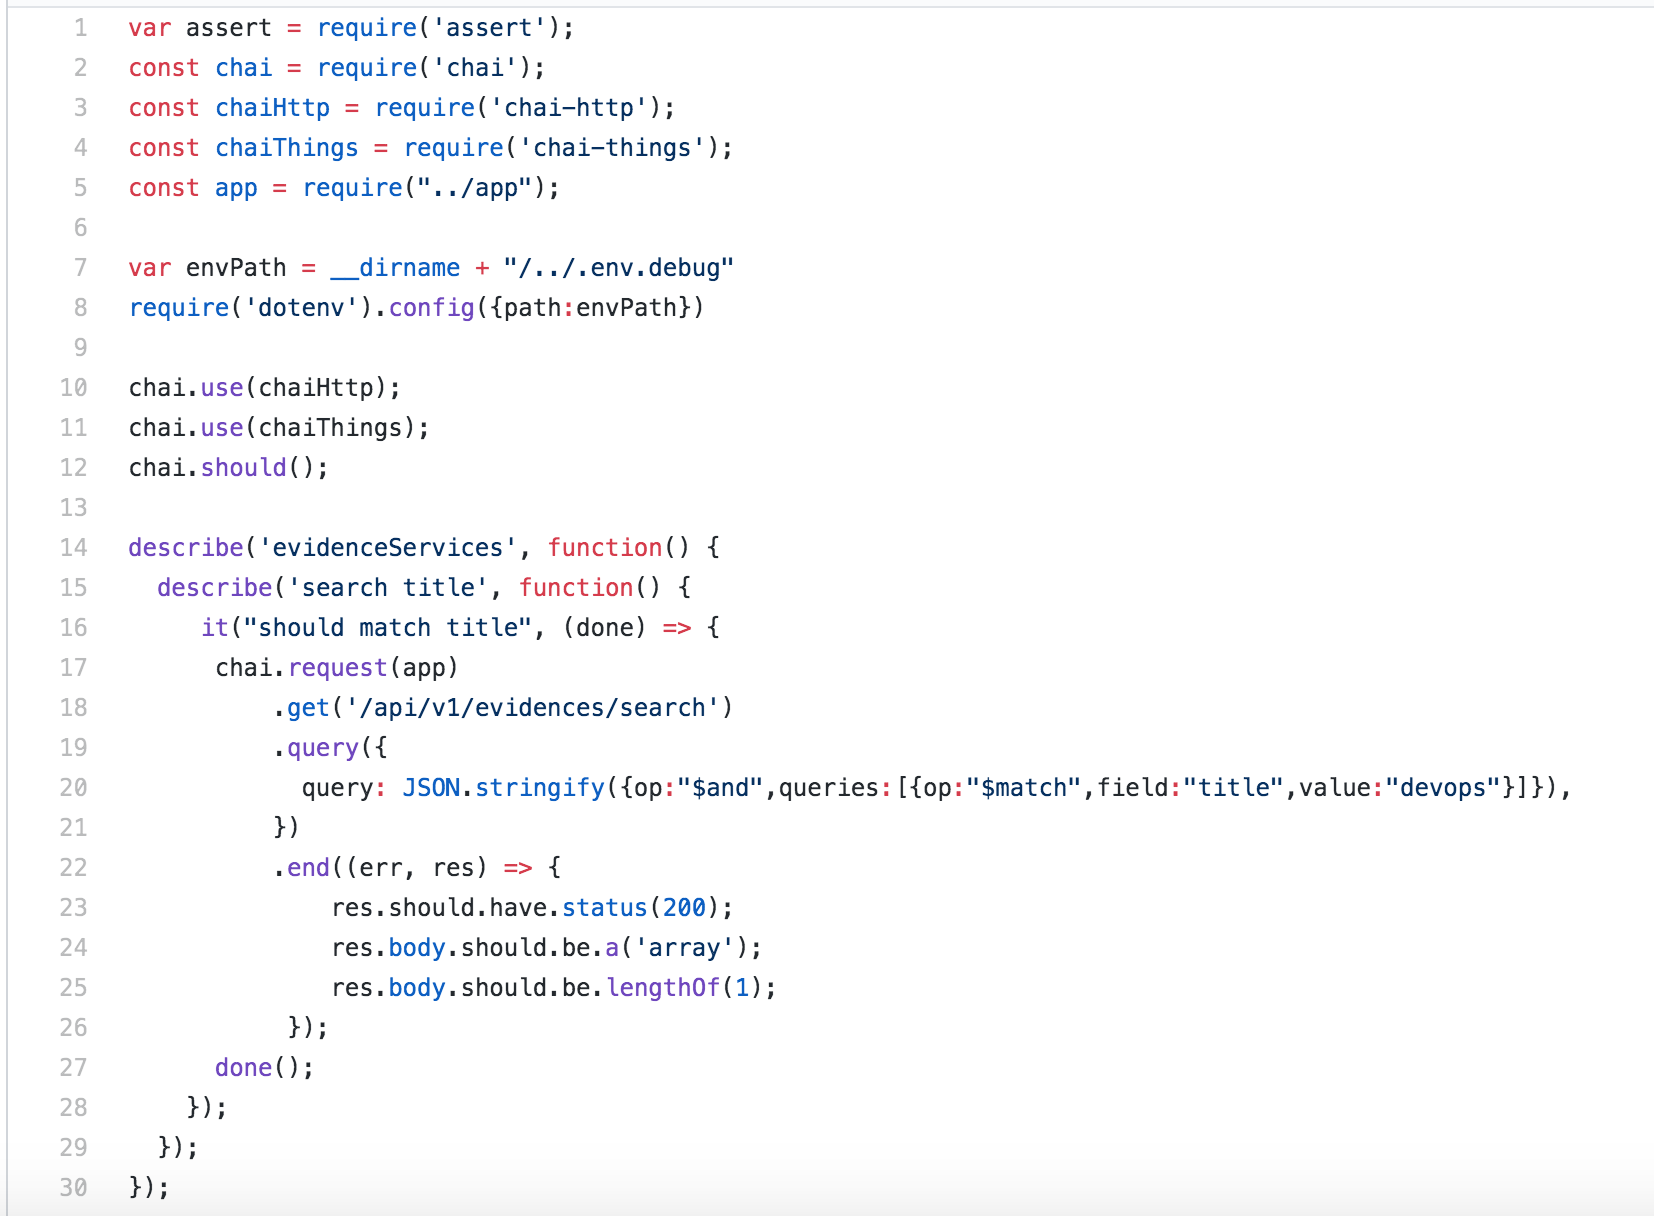
In this case, we first import required libraries, and then do several setups like tell Chai to use chai-http and chai-things. Then the test cases is started by the it() function of Mocha, and it's a good idea to group test cases by the describe() feature. With describe() and it(), we can also specify which test cases will be executed when running Mocha by
mocha --grep <pattern>
Then only the test suites or test cases match that <pattern> will run.
With chai-http, we can directly test the express app imported from our 'app.js' file and send HTTP request to it. In this case, we asserted that the HTTP response should be an array with a length of 1.
With chai-things, we can do assertions on elements in an array of objects. For example, our API will return search results as a JSON array of objects:
[
  {
    // a document
    "title": "...",
    "authors": [],
  },
  {
    //... more documents
  }
]
Then we can assert on the title property of one element by res.body.should.be.to.include.something.that.has.property('title', '...').
We tried to introduce Cucumber and Selenium into our project for UI test. We are using selenium-cucumber-js to test UI. Selenium is a browser automation tool that simulates user interaction on front-end UI. Default selenium use chrome as its browser engine but also can be configured for other engines. However it has not been finished due to lack of time. The framework has been installed but the test case has not been implemented.
Library selenium-cucumber-js can be configured by a json file named 'selenium-cucumber-js.json', here is our file content:
{
    "steps": "./features/step-definitions",
    "pageObjects": "./features/page-objects",
    "sharedObjects": "./features/shared-objects",
    "reports": "./features/reports",
    "timeout": 50000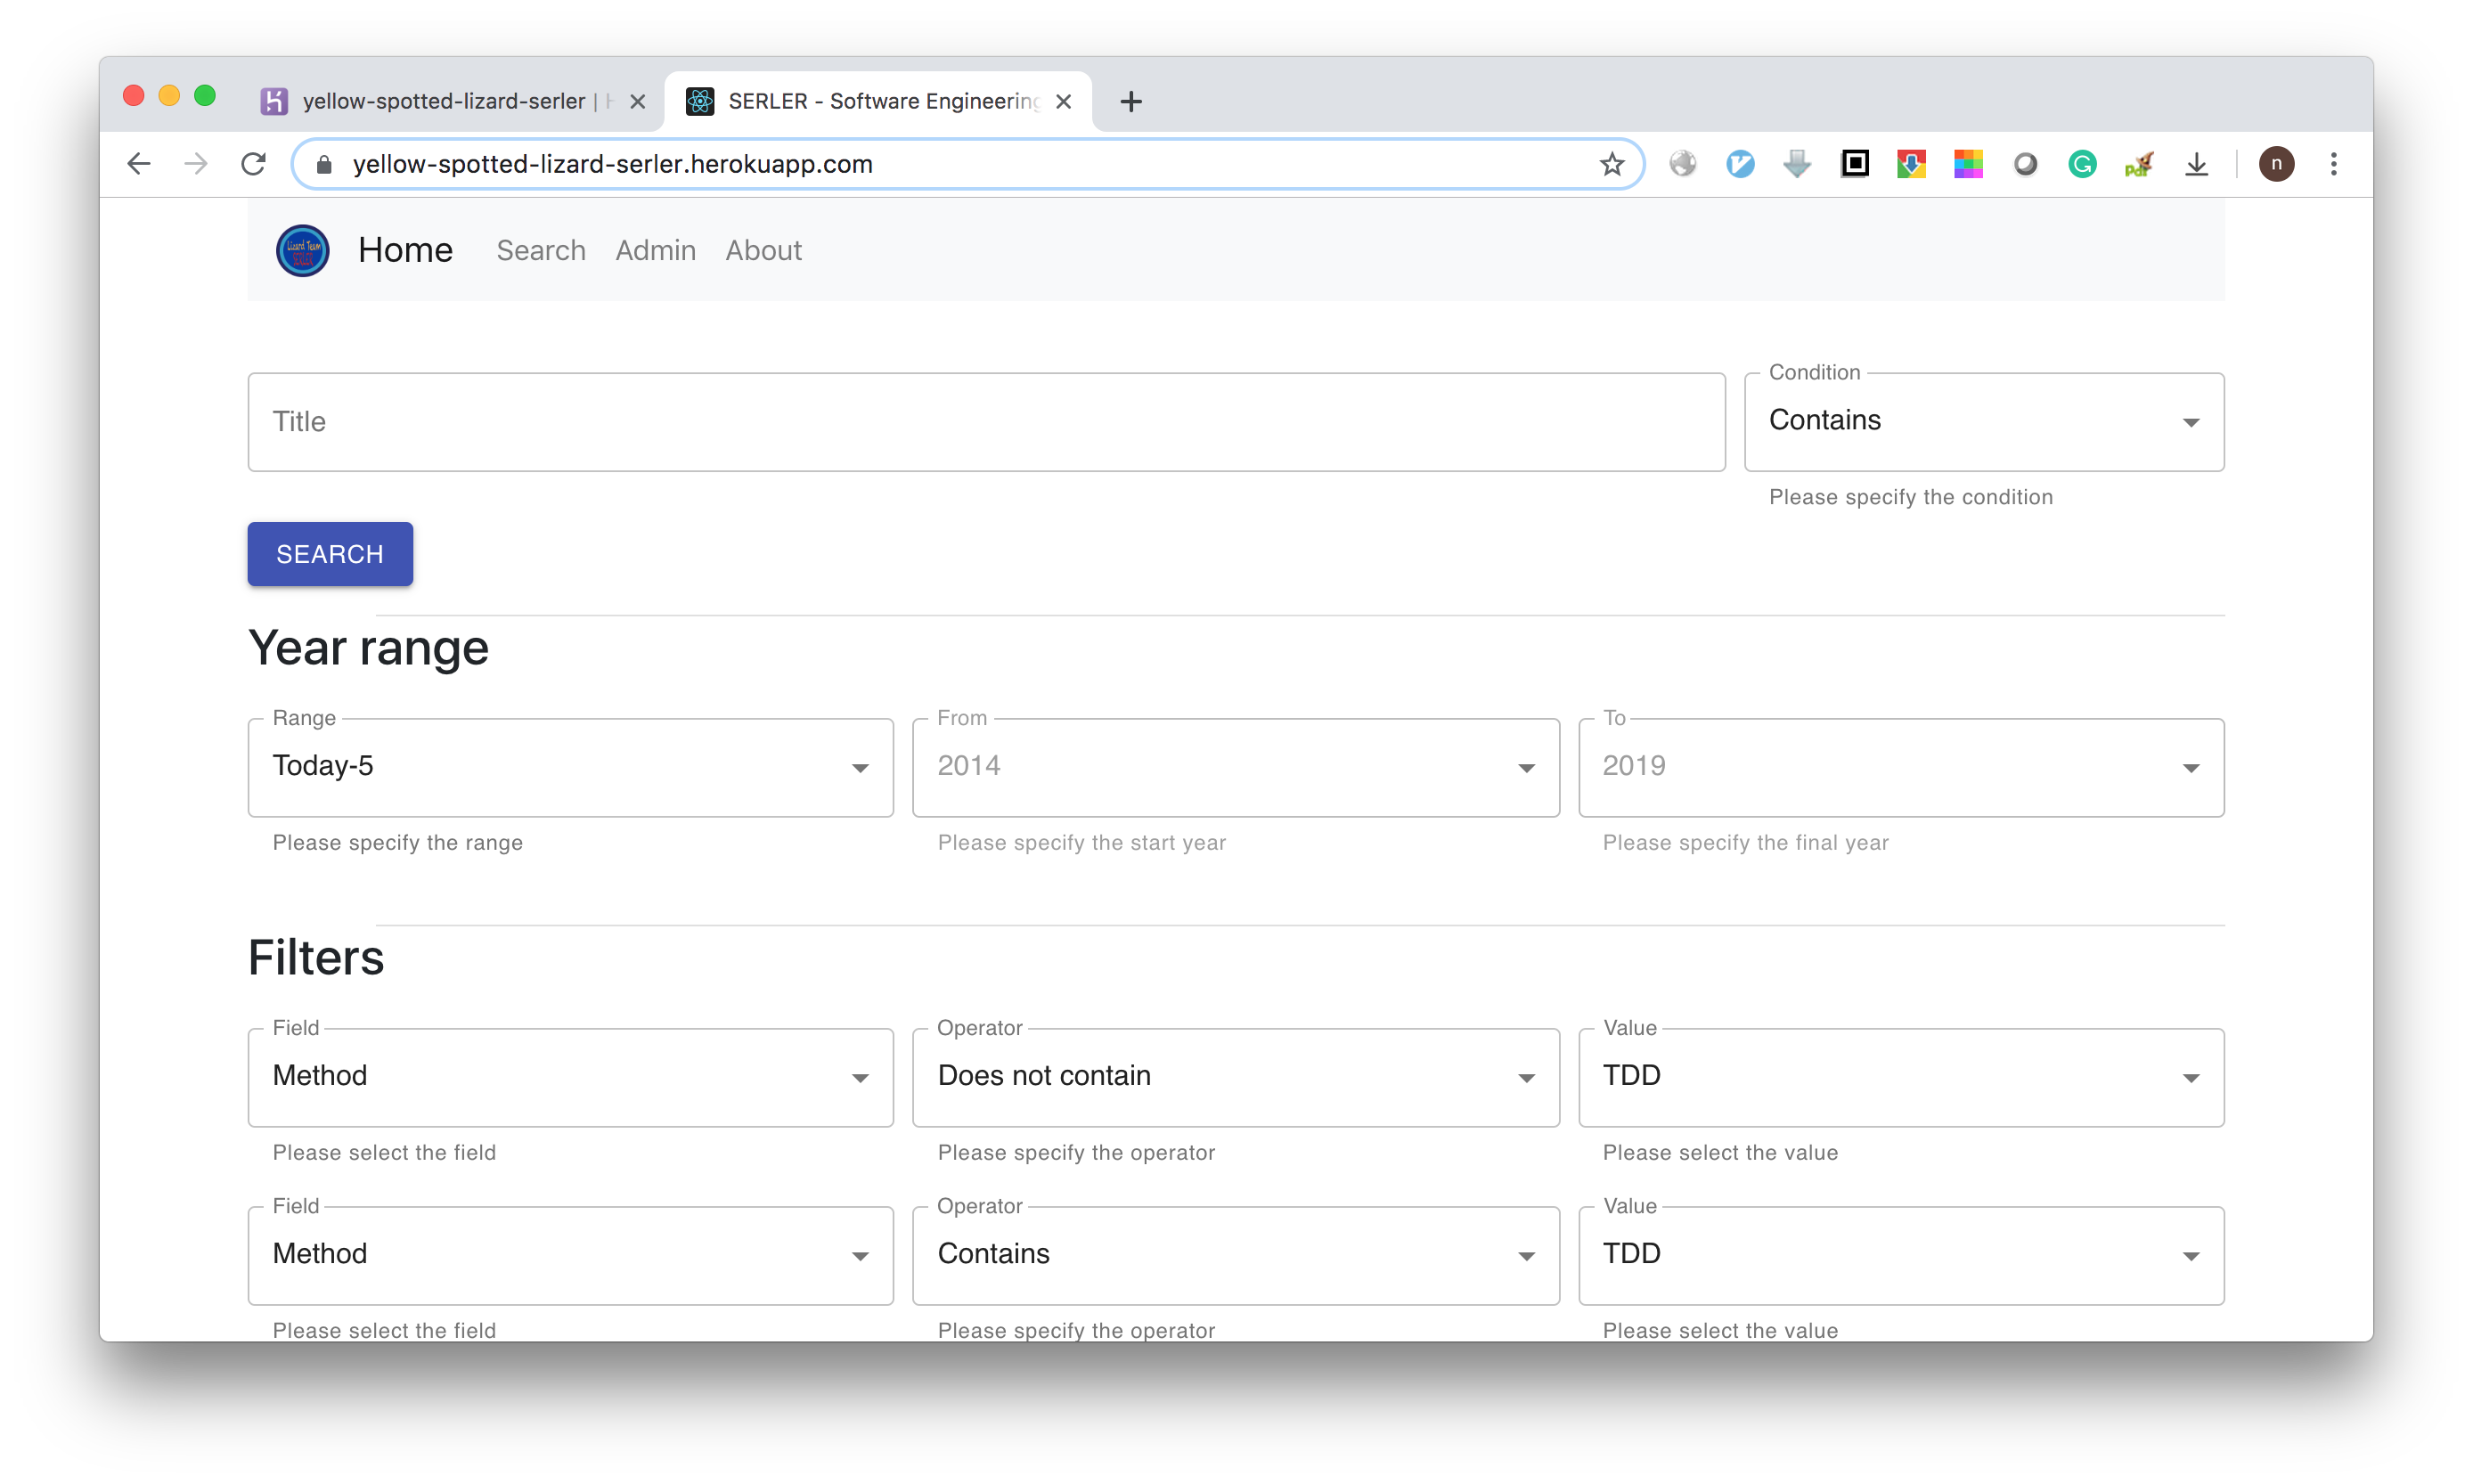
}We use heroku as the application hosting platform. The app address is https://yellow-spotted-lizard-serler.herokuapp.com.
Screenshots of the settings and application:

We setup Heroku app in two ways: manual deployment and automatic deployment from TravisCI.
To setup Heroku application, first need to install Heroku CLI tool following official guild, then run heroku login for authentication so that the subsequent operations can be permitted.
Then create a new Heroku app, "yellow-spotted-lizard-serler" in our case, with heroku create yellow-spotted-lizard-serler. This command will create a remote Git repository on Heroku, as can be seen by git remote -v:

Then we can deploy our code simply with git push command. In addition, we want to push our codes in develop branch instead of master, but the remote repository on Heroku is using master branch, so we need to push local develop branch to remote master branch by
git push heroku develop:masterWe also setup automatic deployment from TravisCI so that we don't need to deploy the code manually after each change. To achieve this, first to create a token for Heroku's app by heroku auth:token. Then we add configuration in .travis.yml for auto deployment:
deploy:
  provider: heroku
  api_key: 9439cfbd-fa1f-450e-b67e-ac3fcd9c252a
  on: develop
  app:
    develop: yellow-spotted-lizard-serler
This will deploy "develop" branch to heroku on each push. We also configured to get notification from TravisCI in Slack so we will know when the deployment is ready.
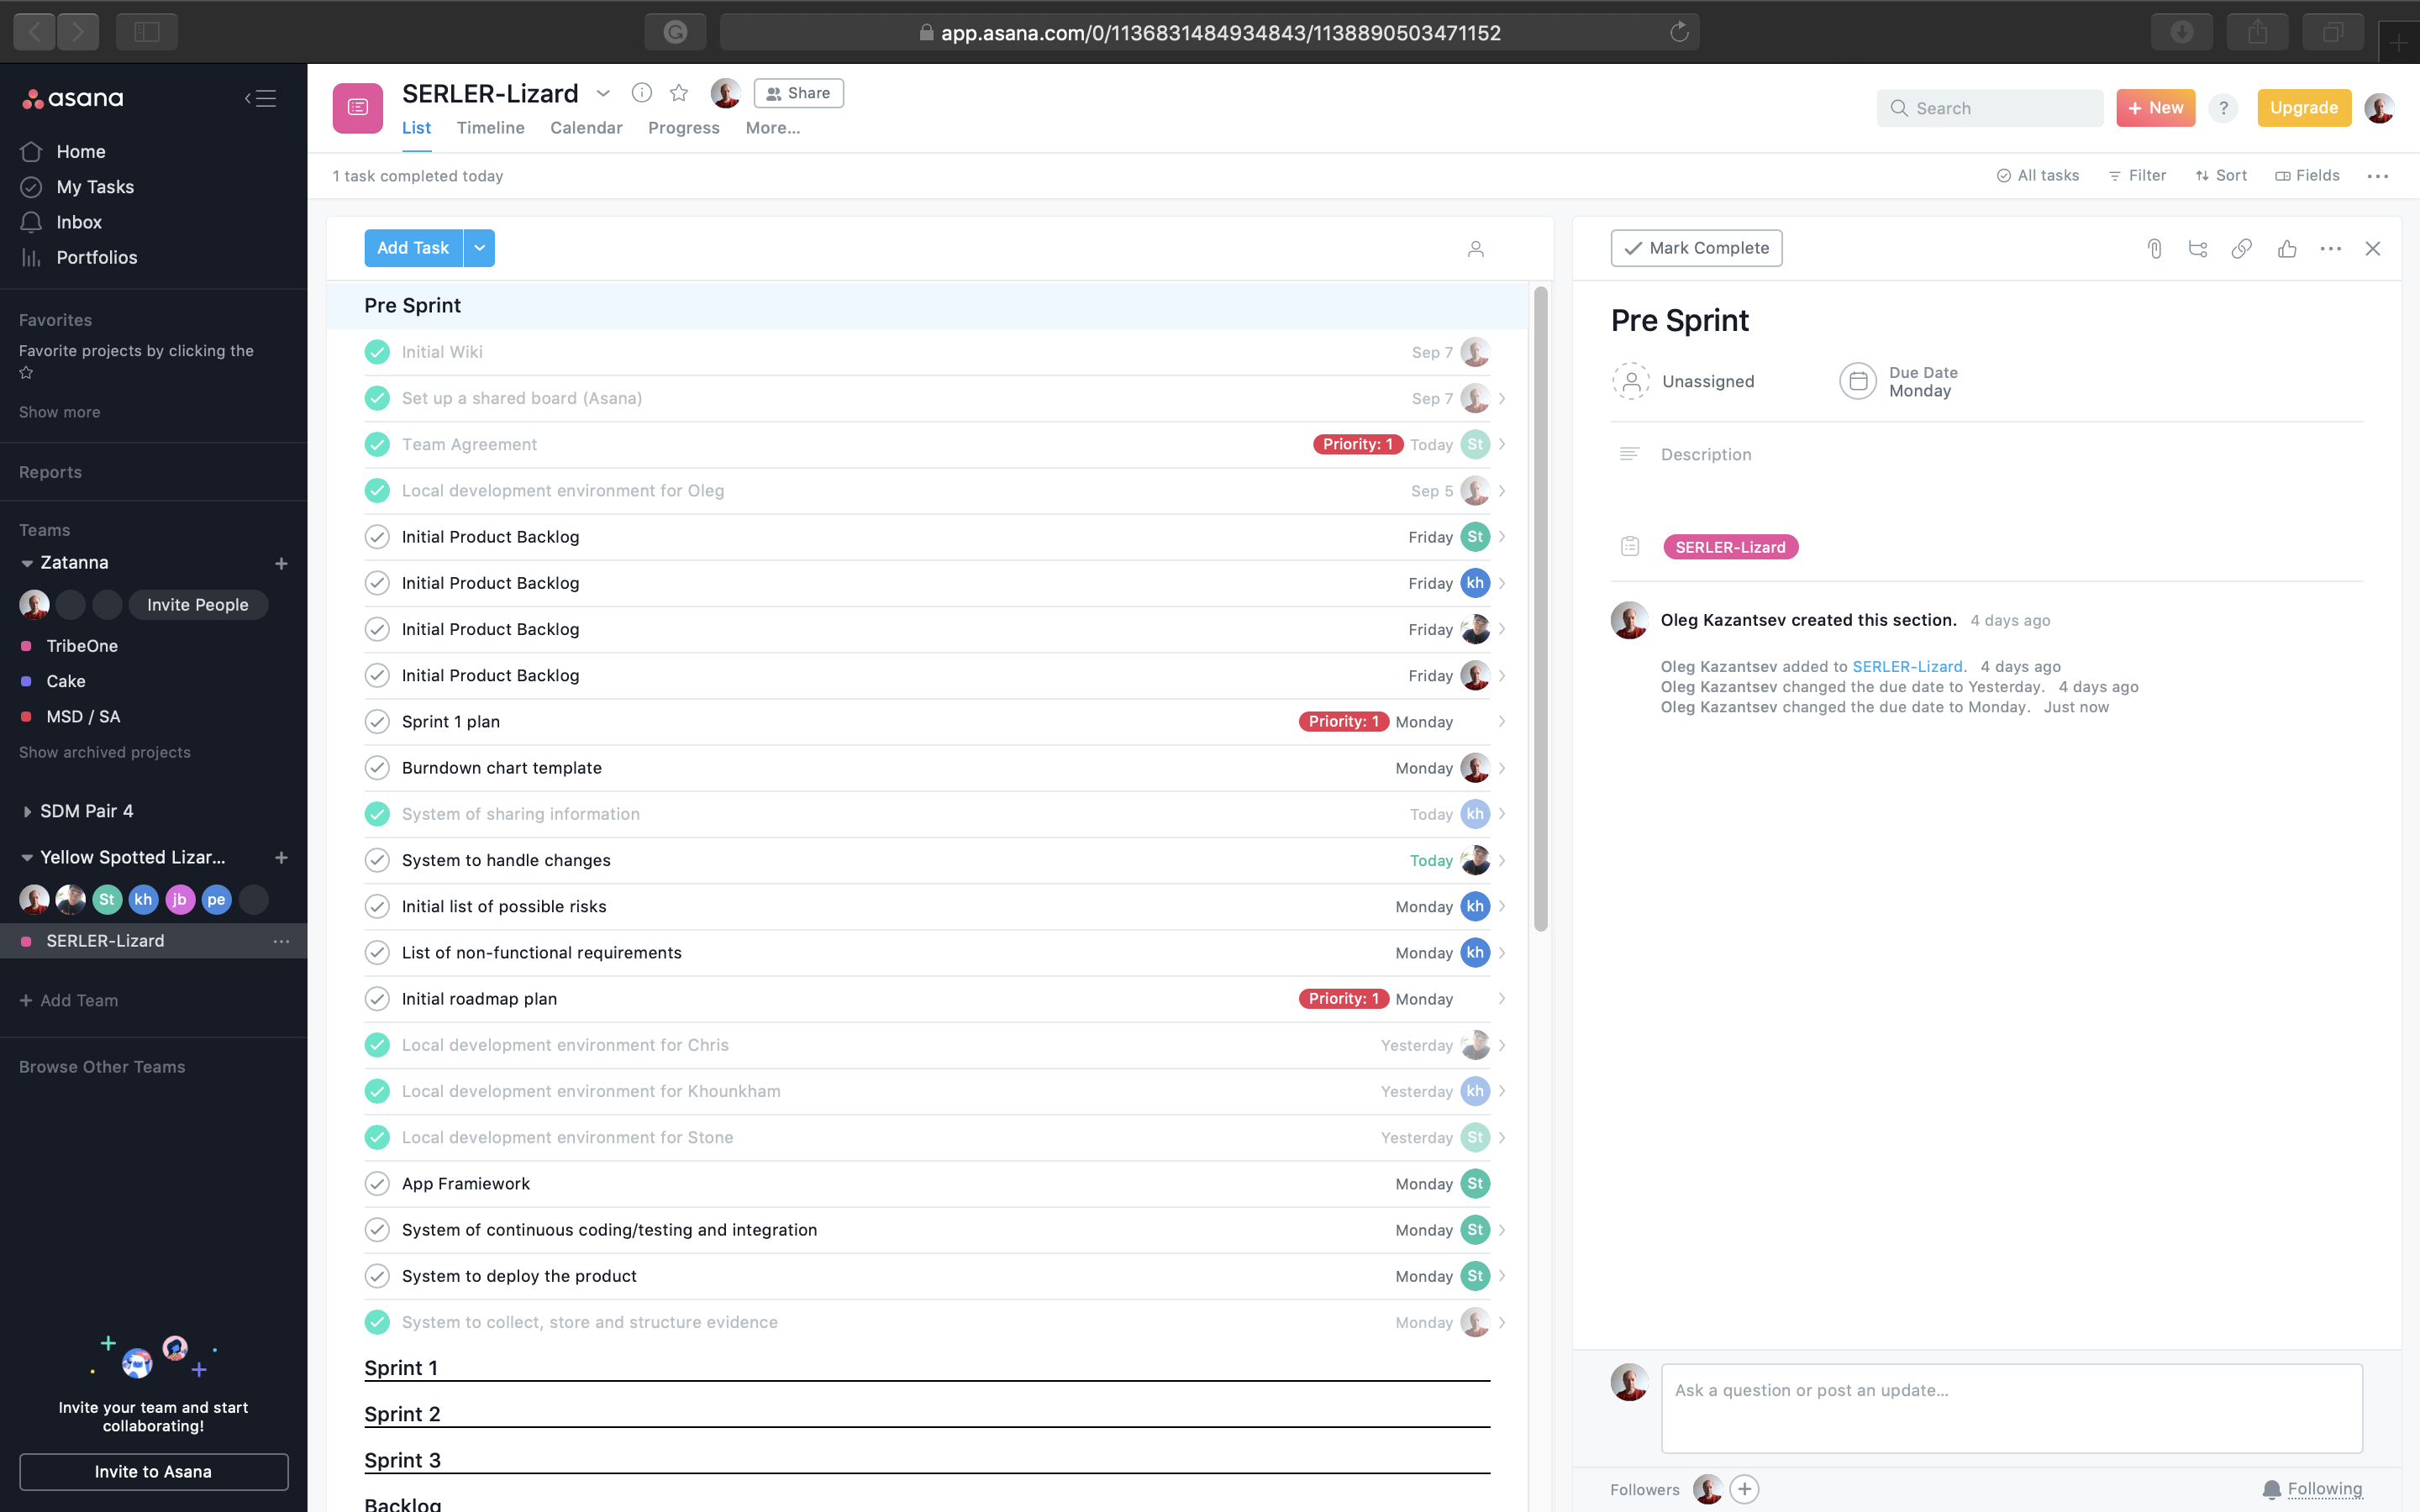
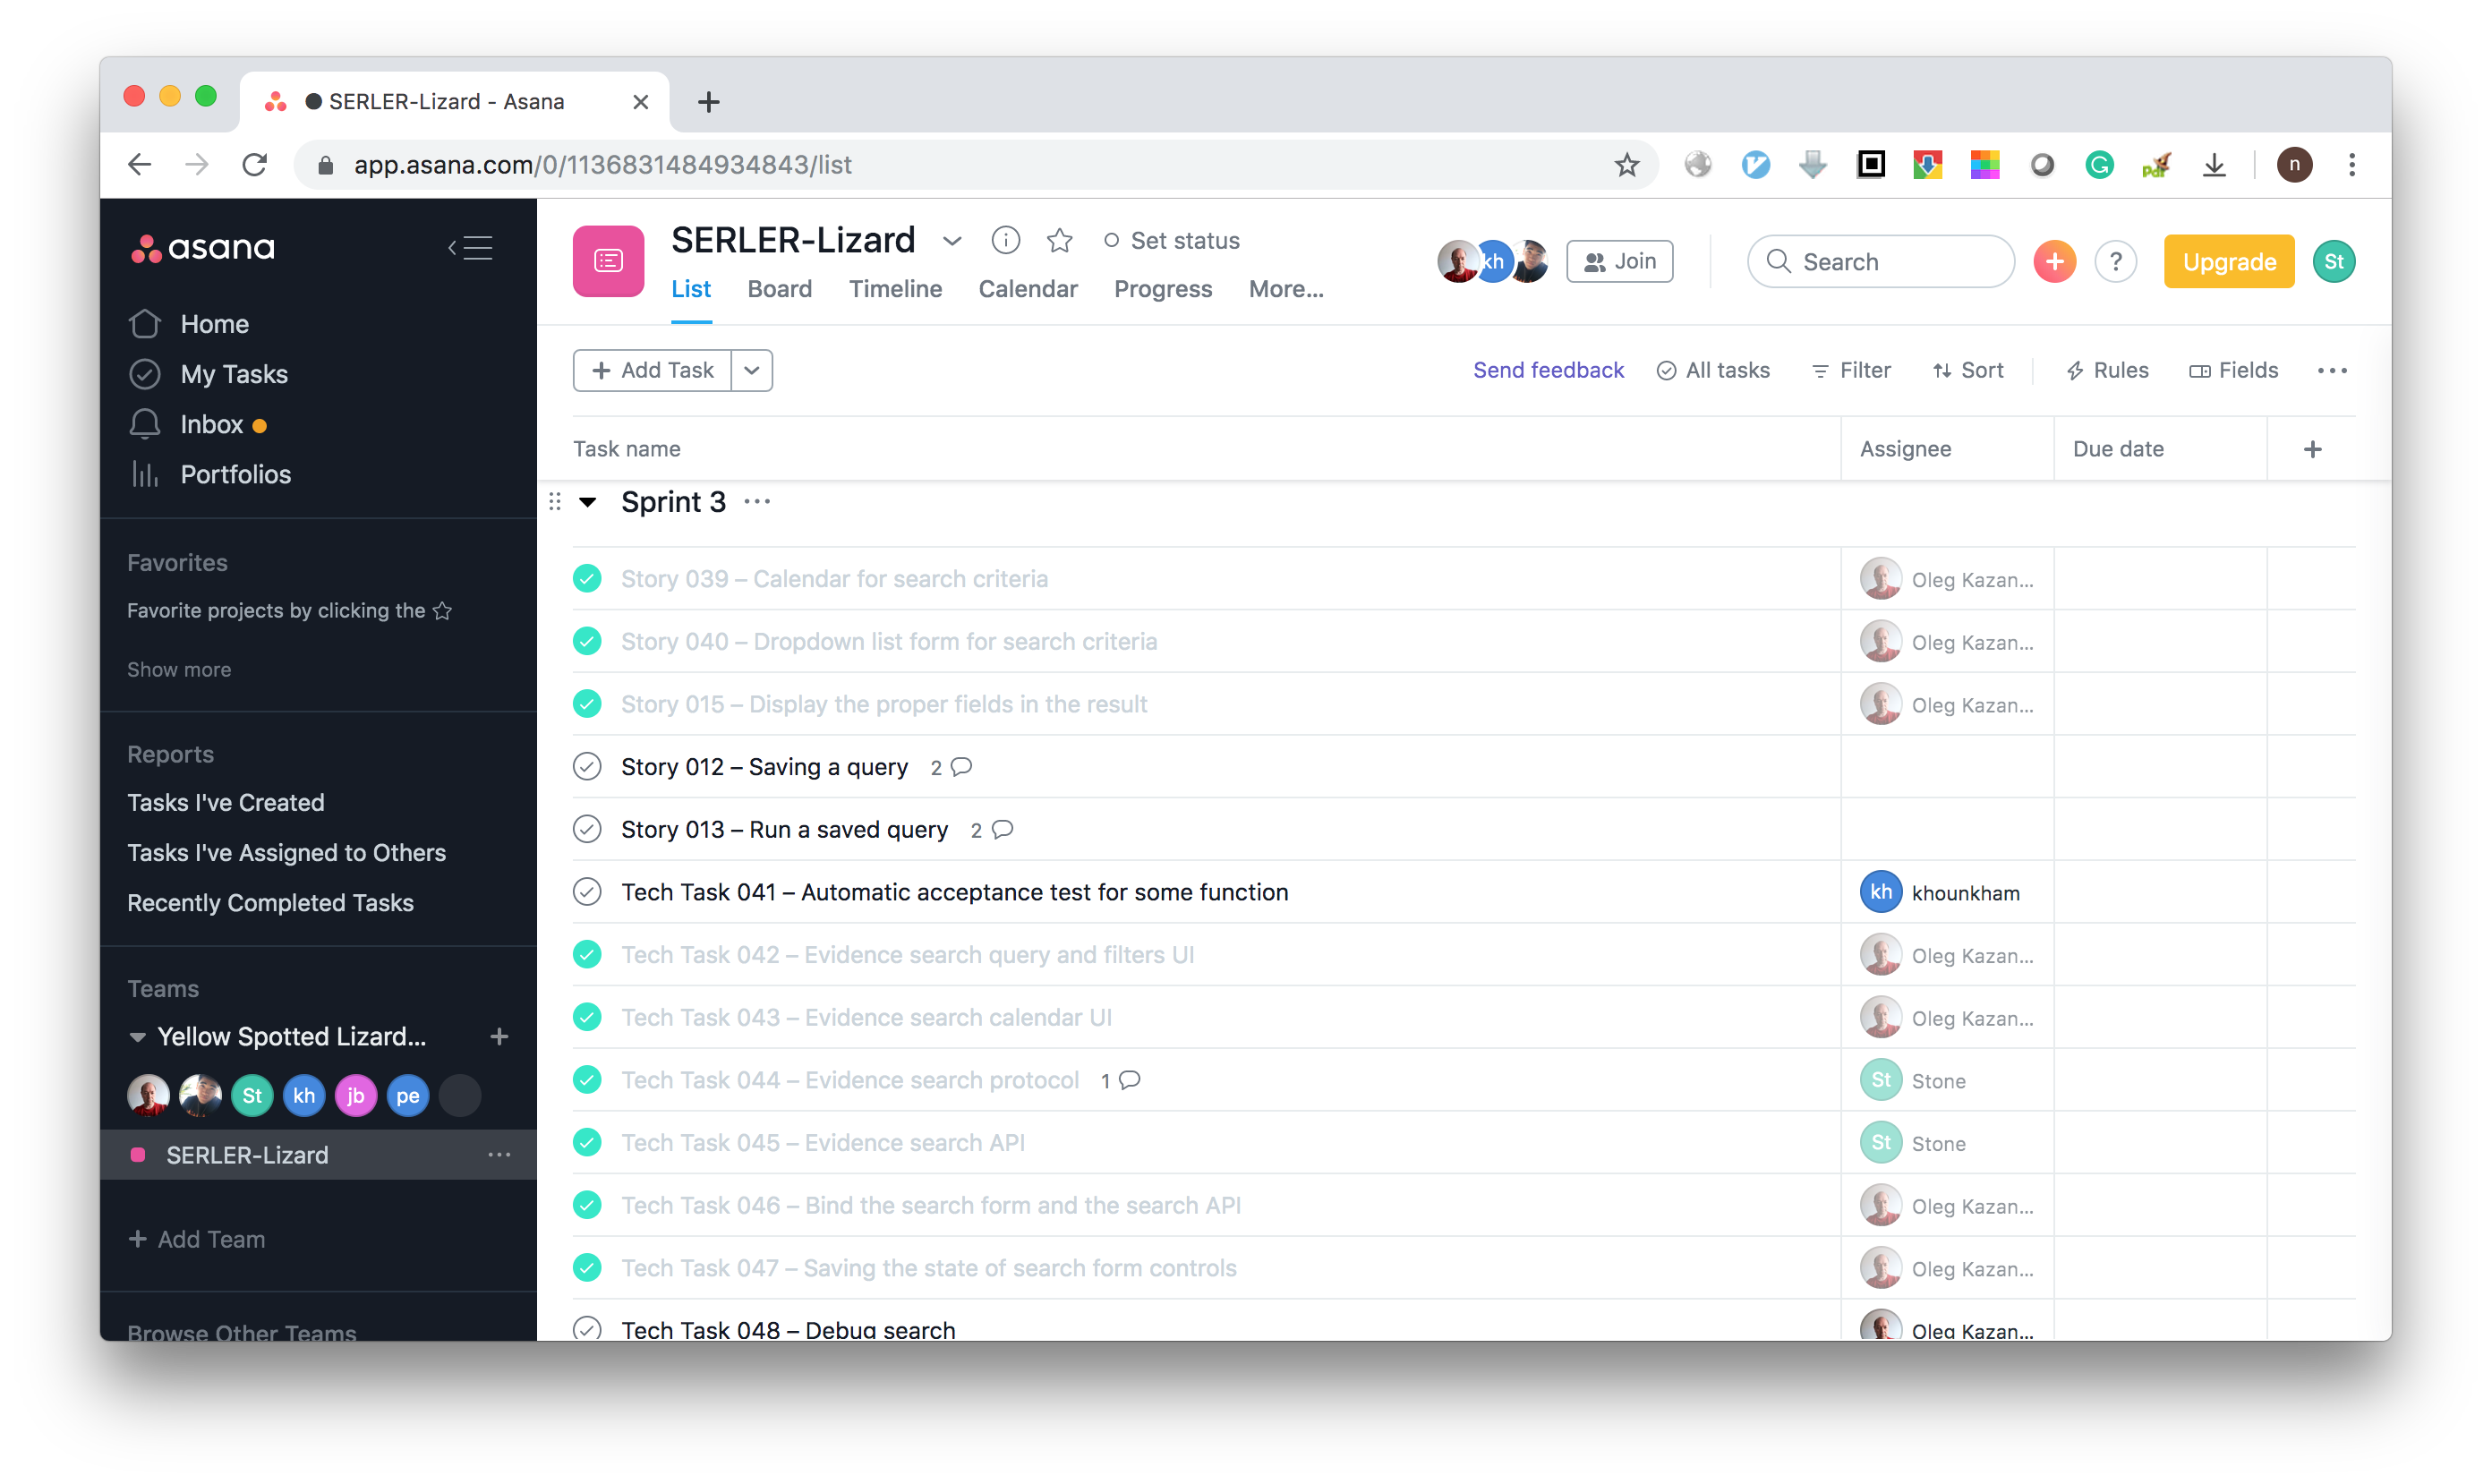
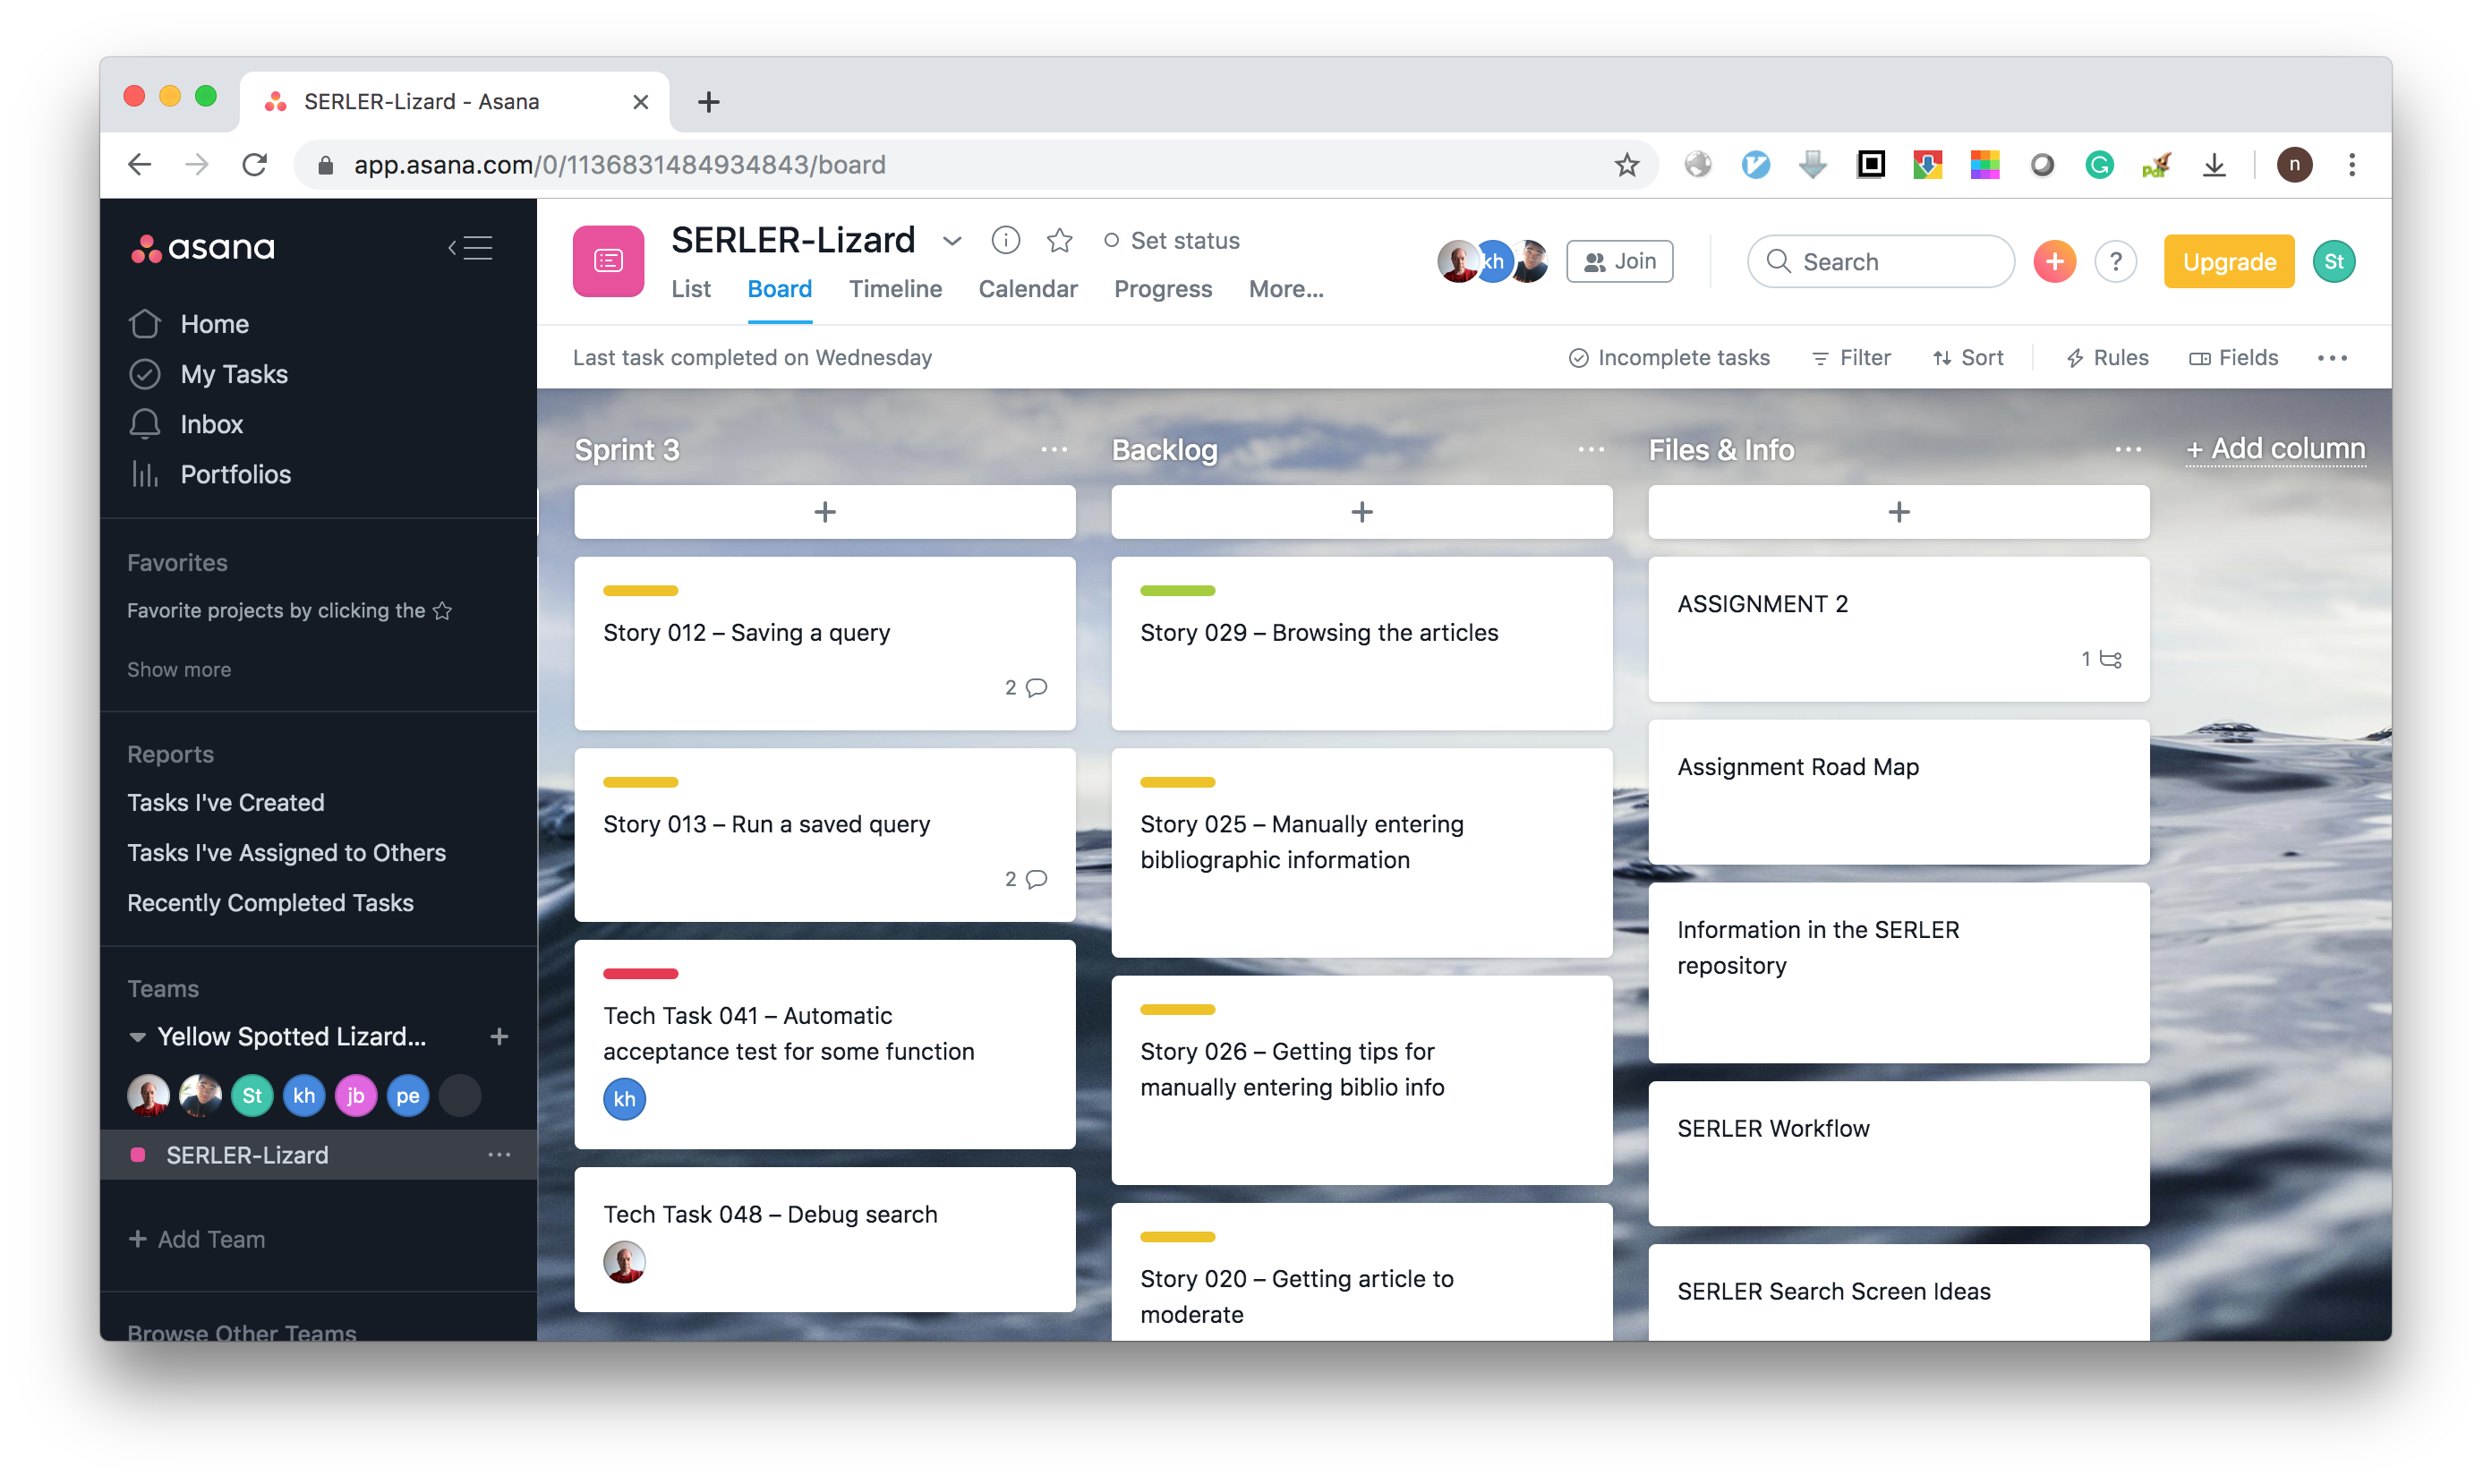
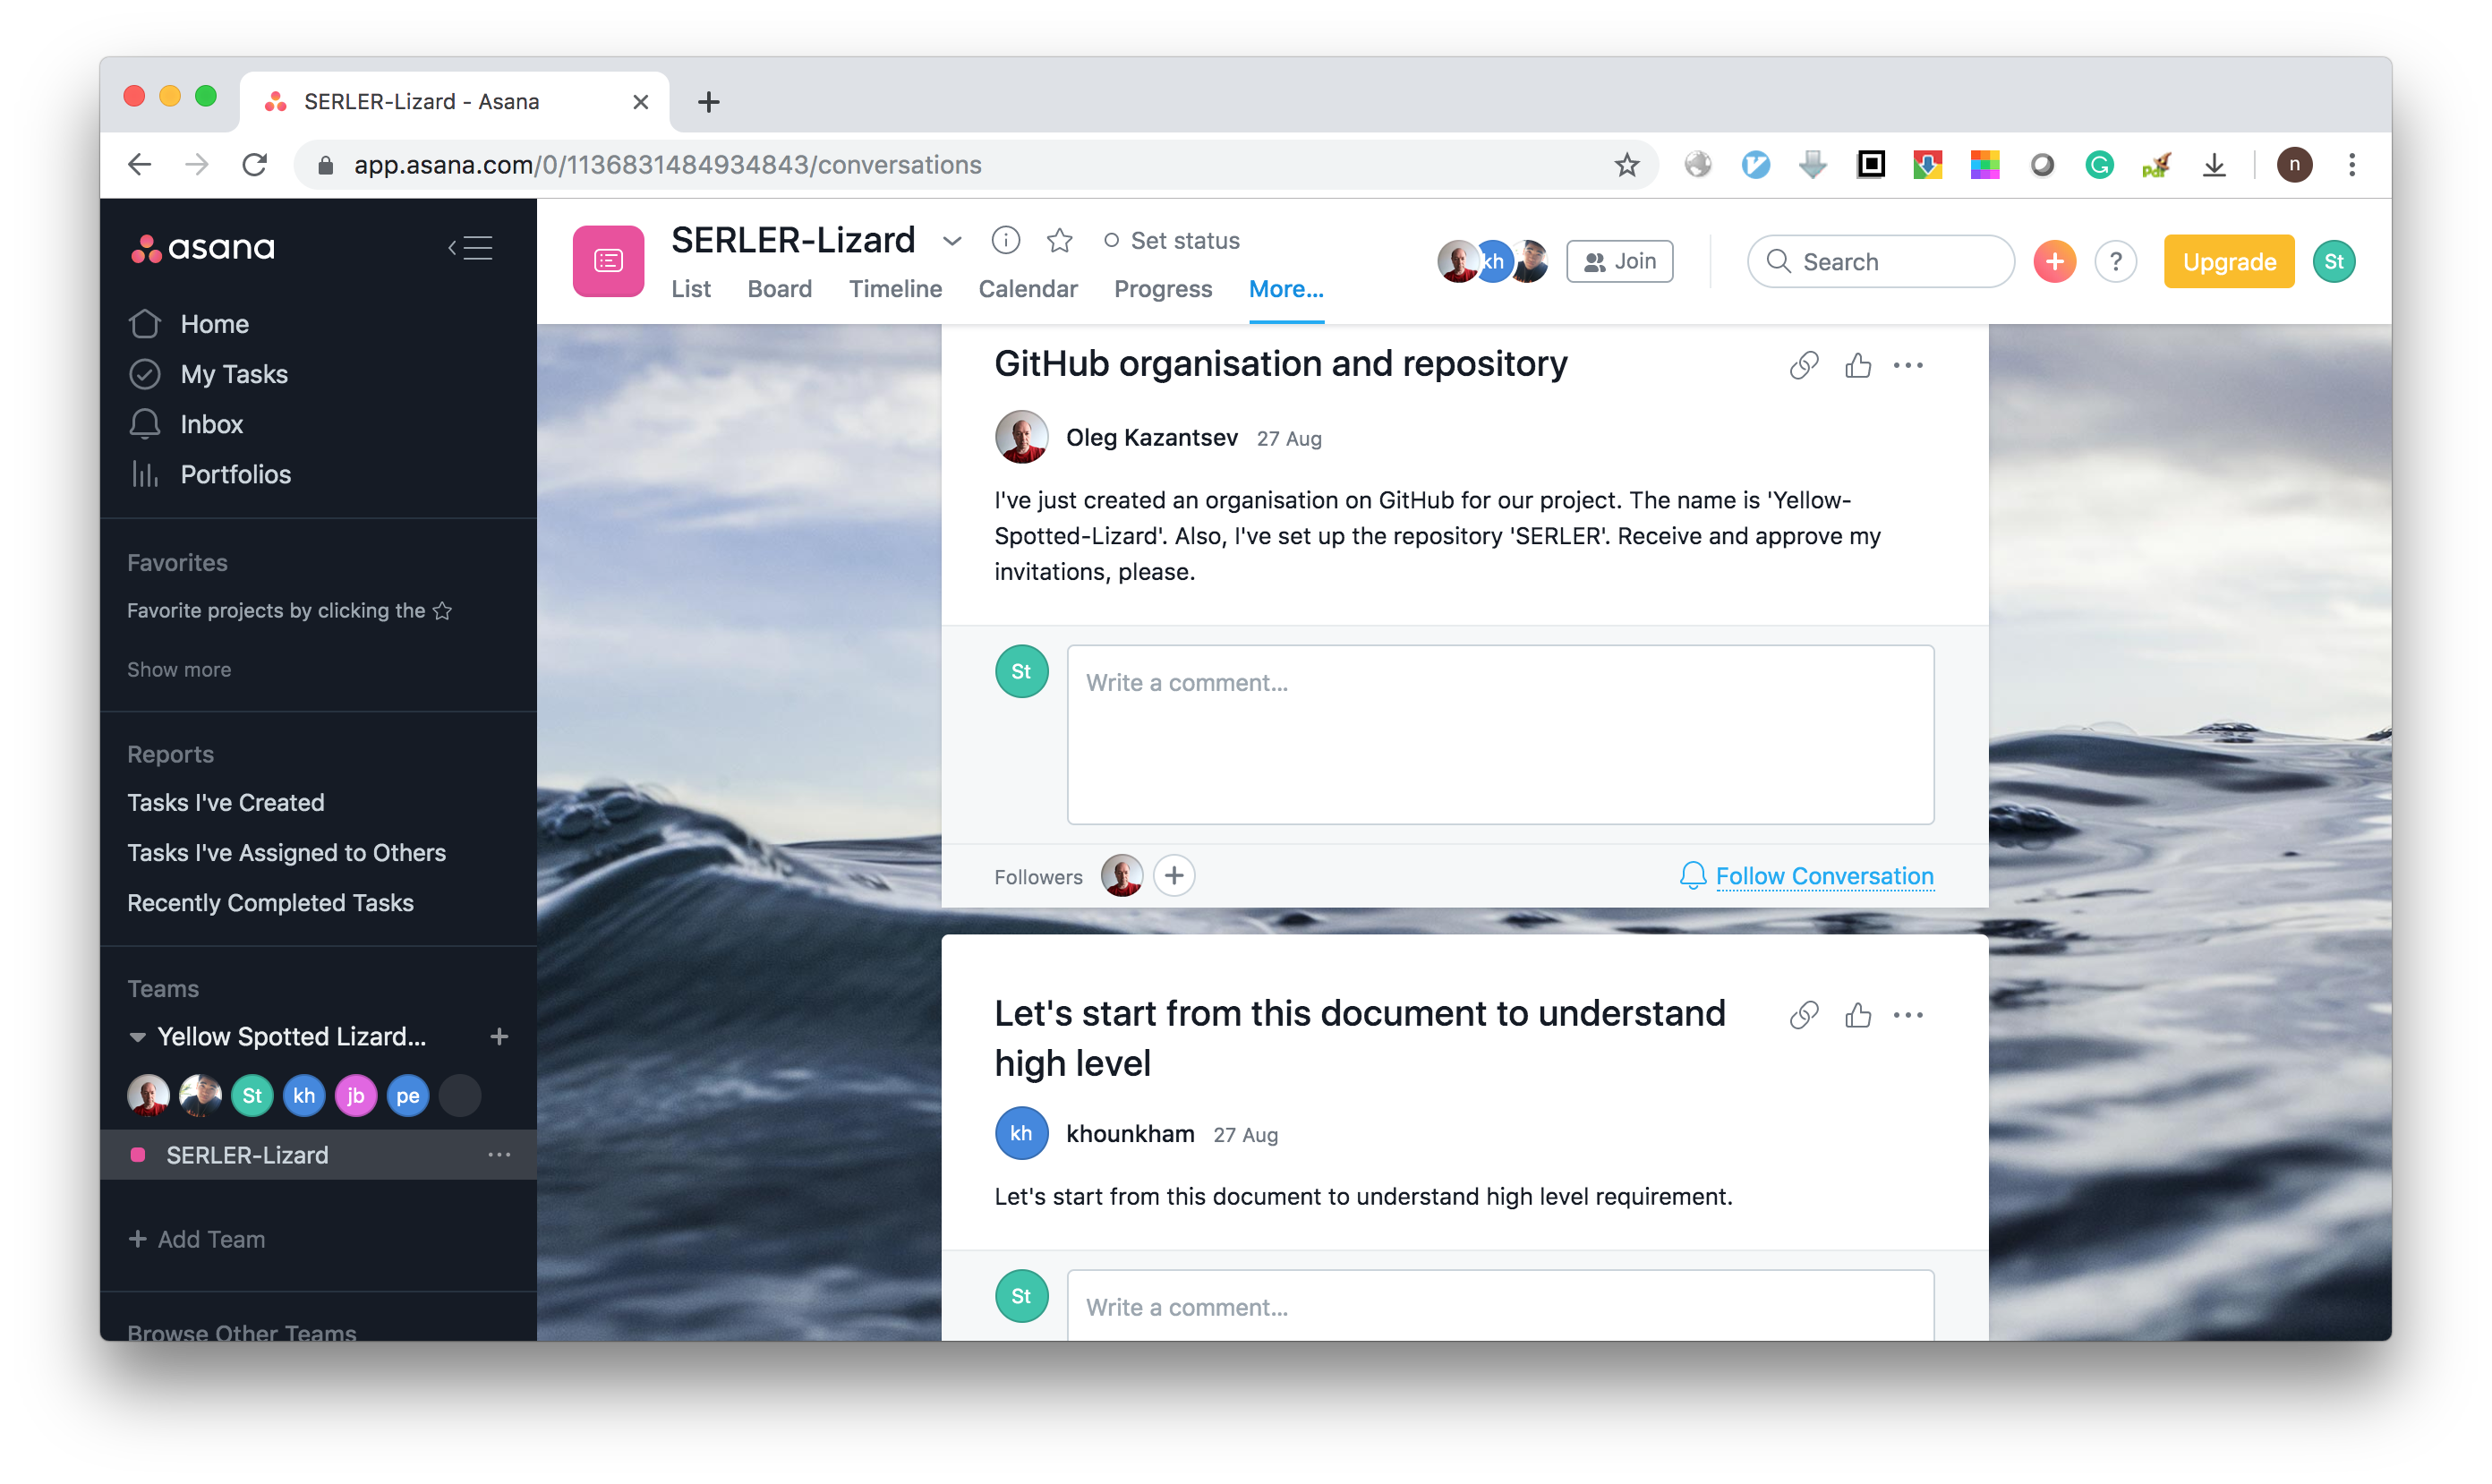
We use Asana to manage user stories and track our tasks. Also we use Asana's conversation feature for general discussions. Here are some screenshots from Asana story list, board view, and conversations.
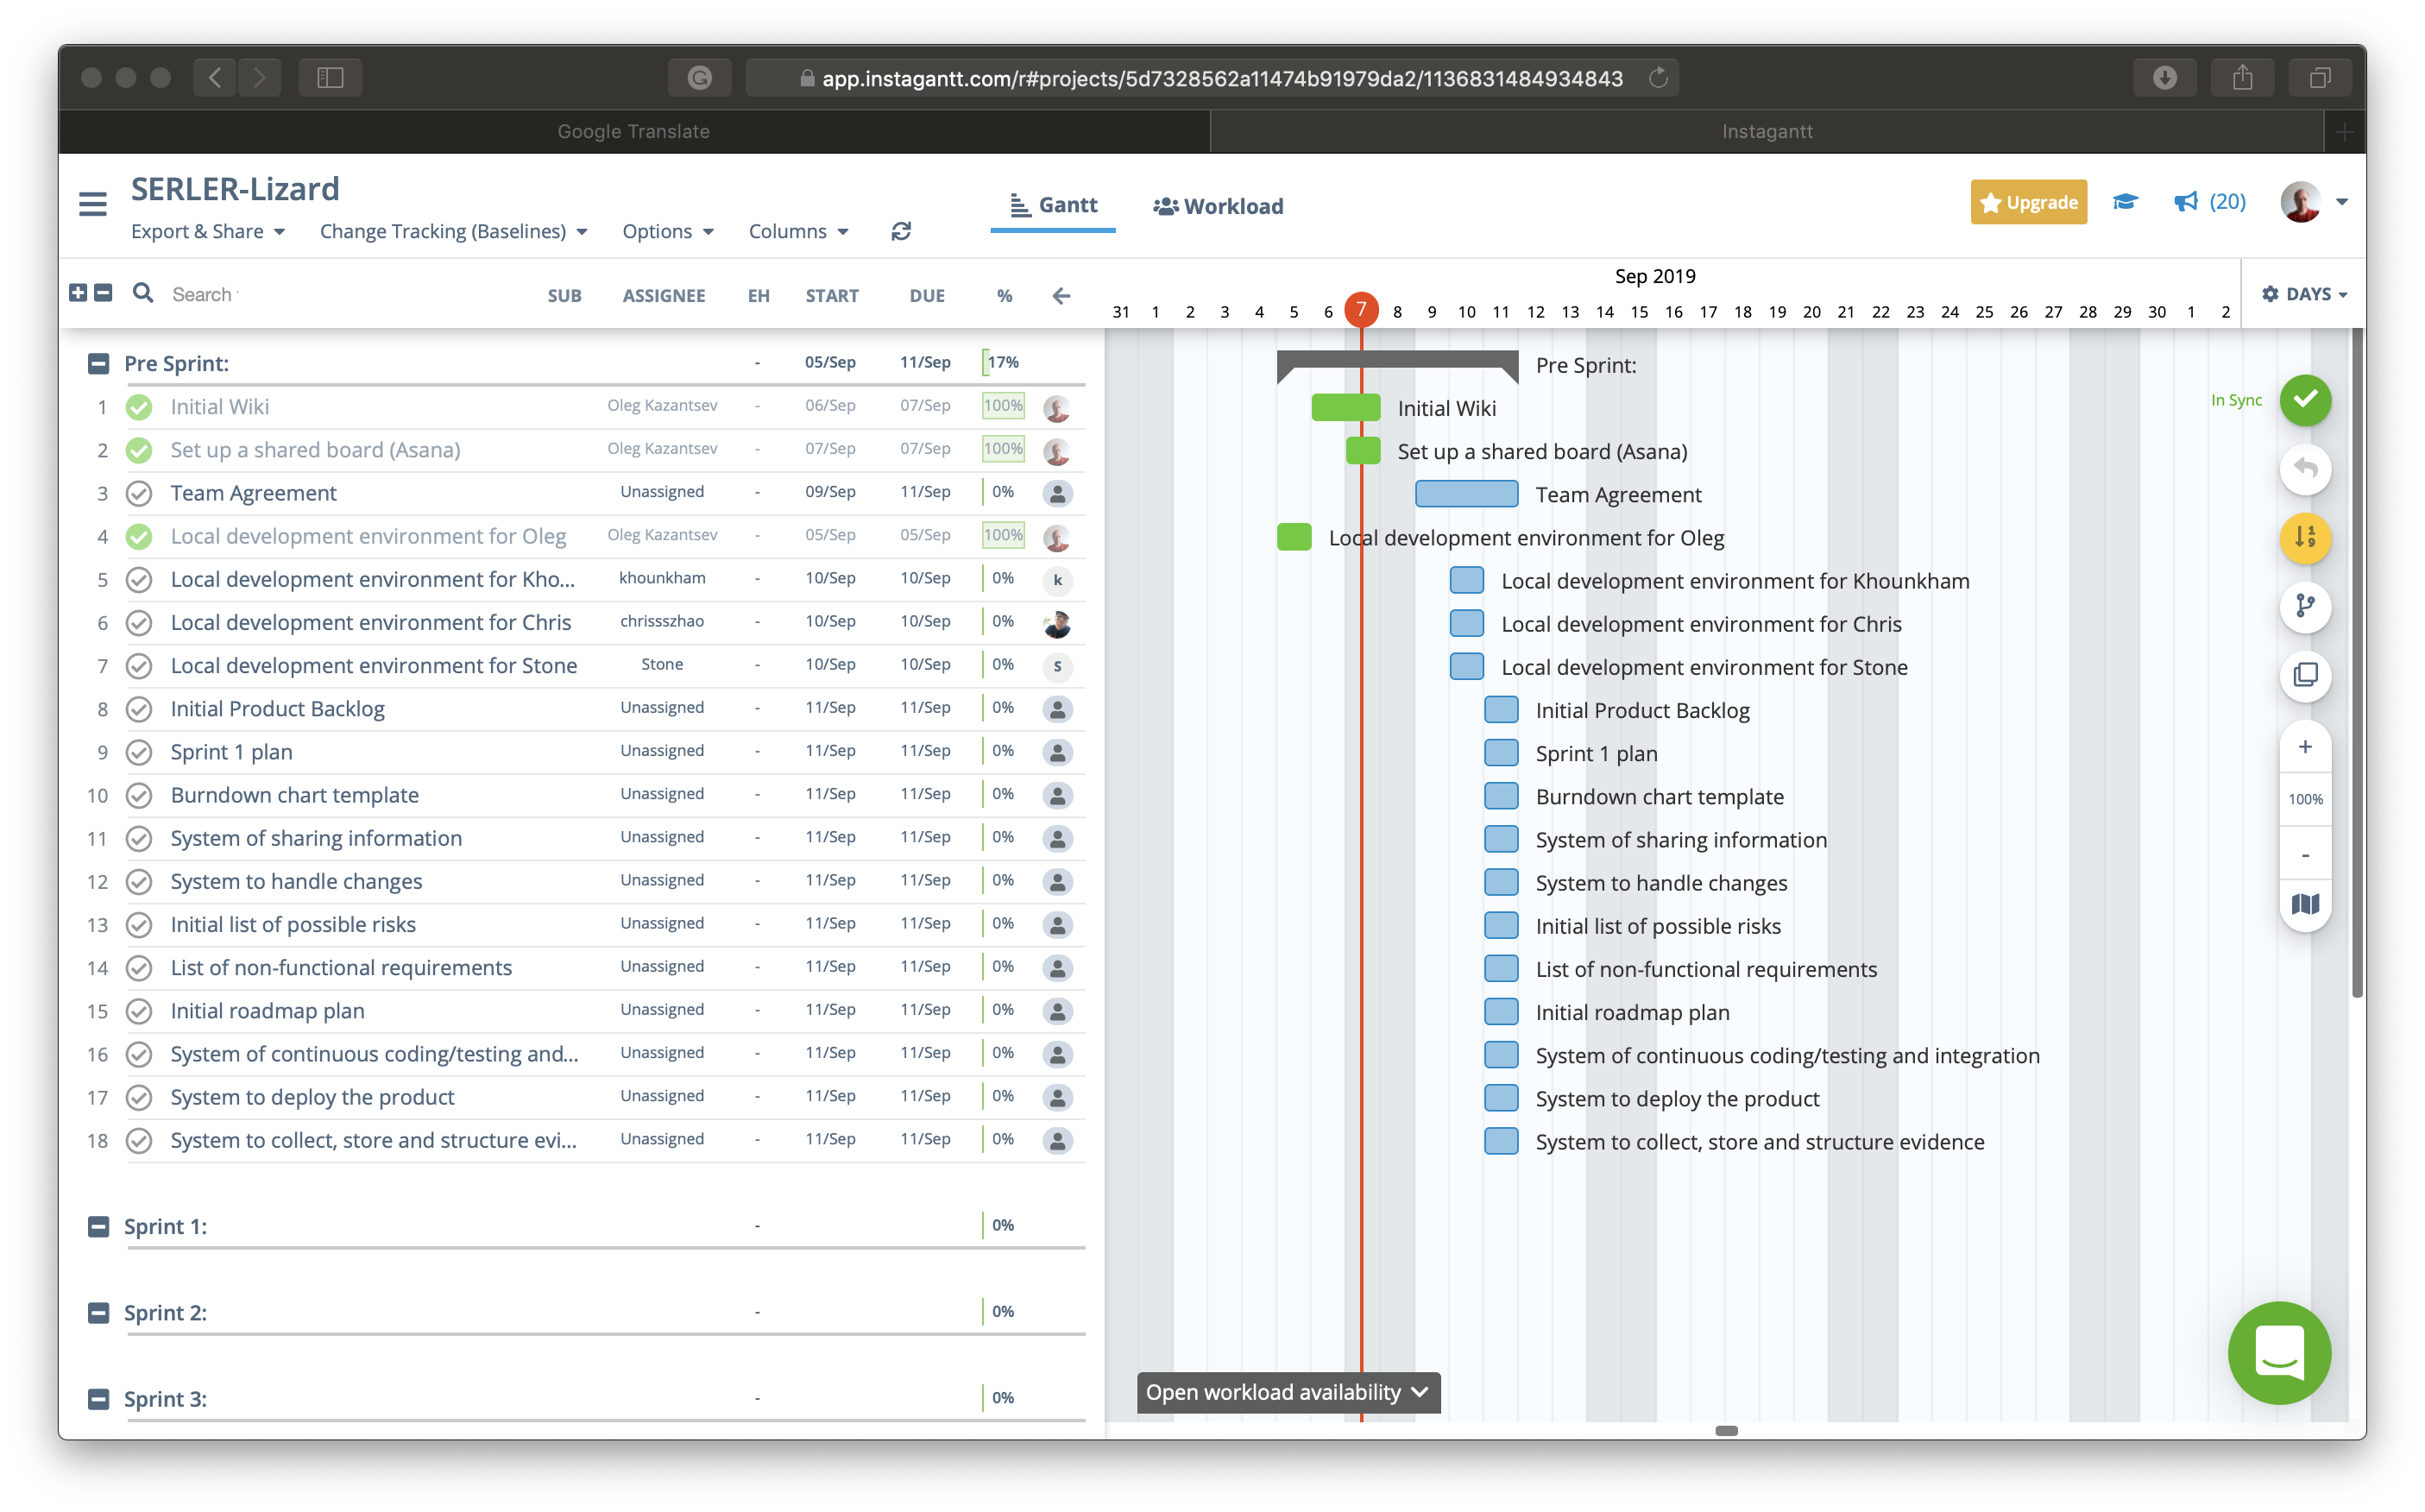
We also use Instagantt to plot charts of our user stories:
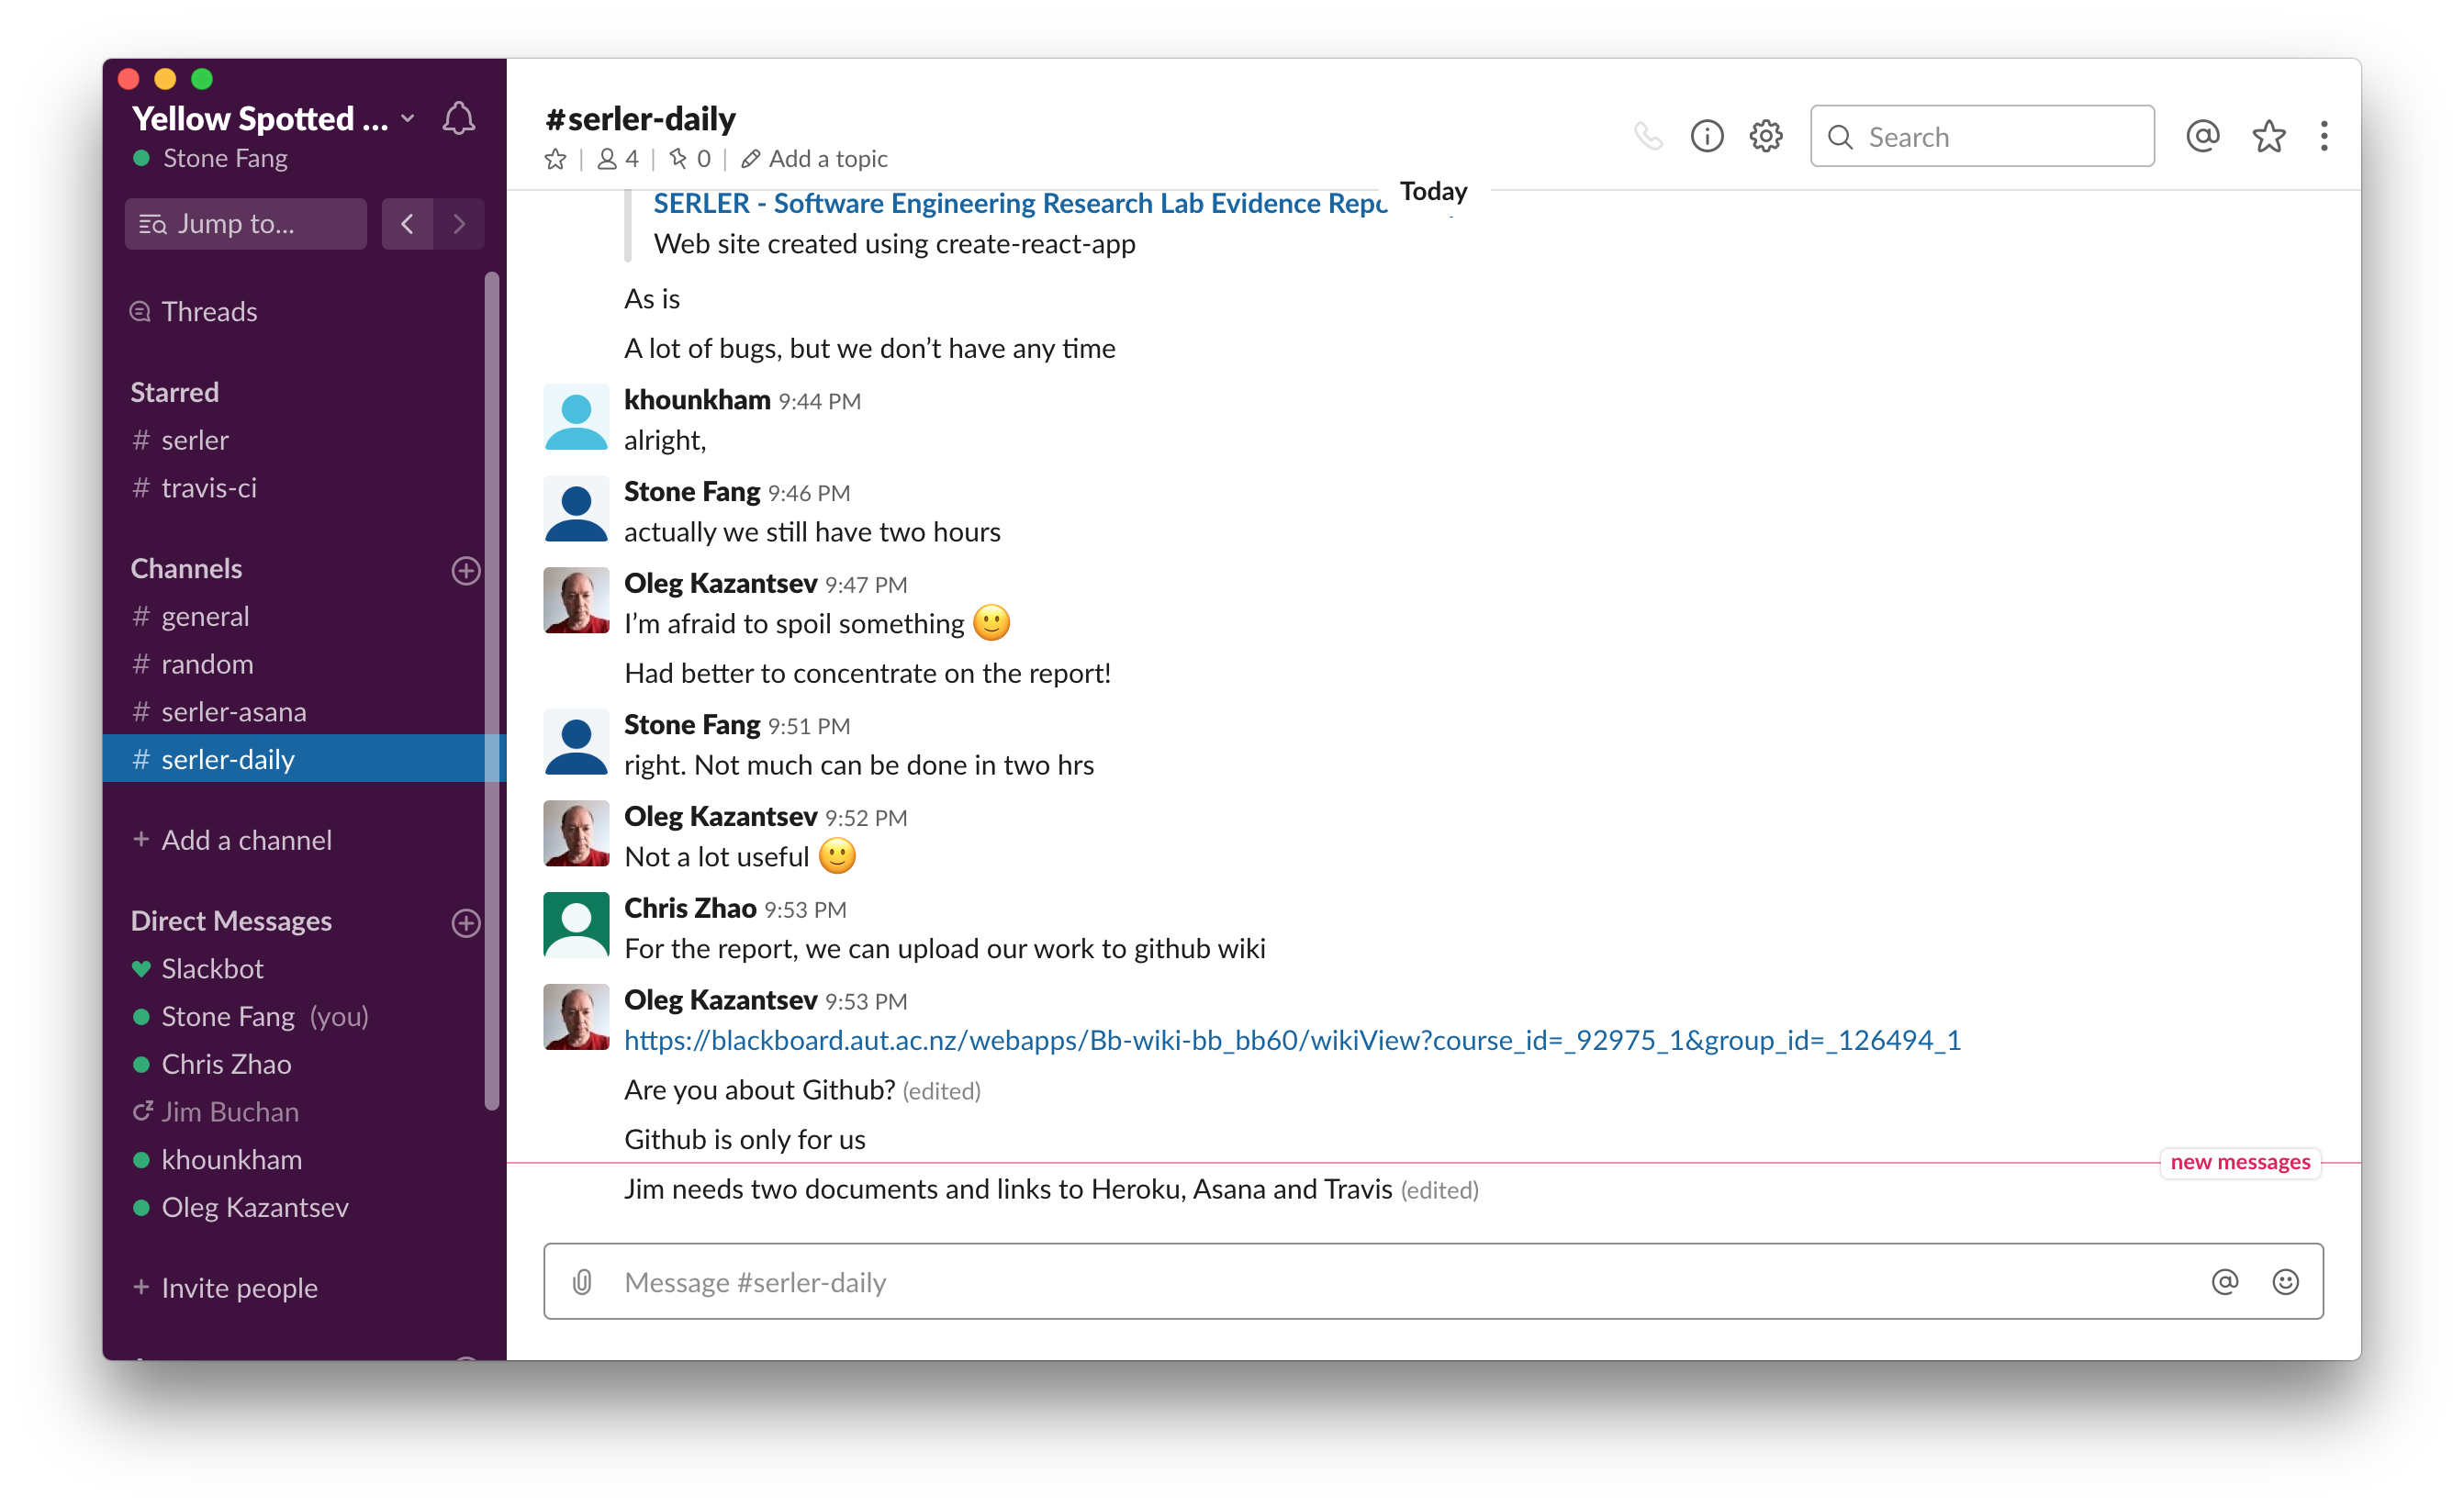
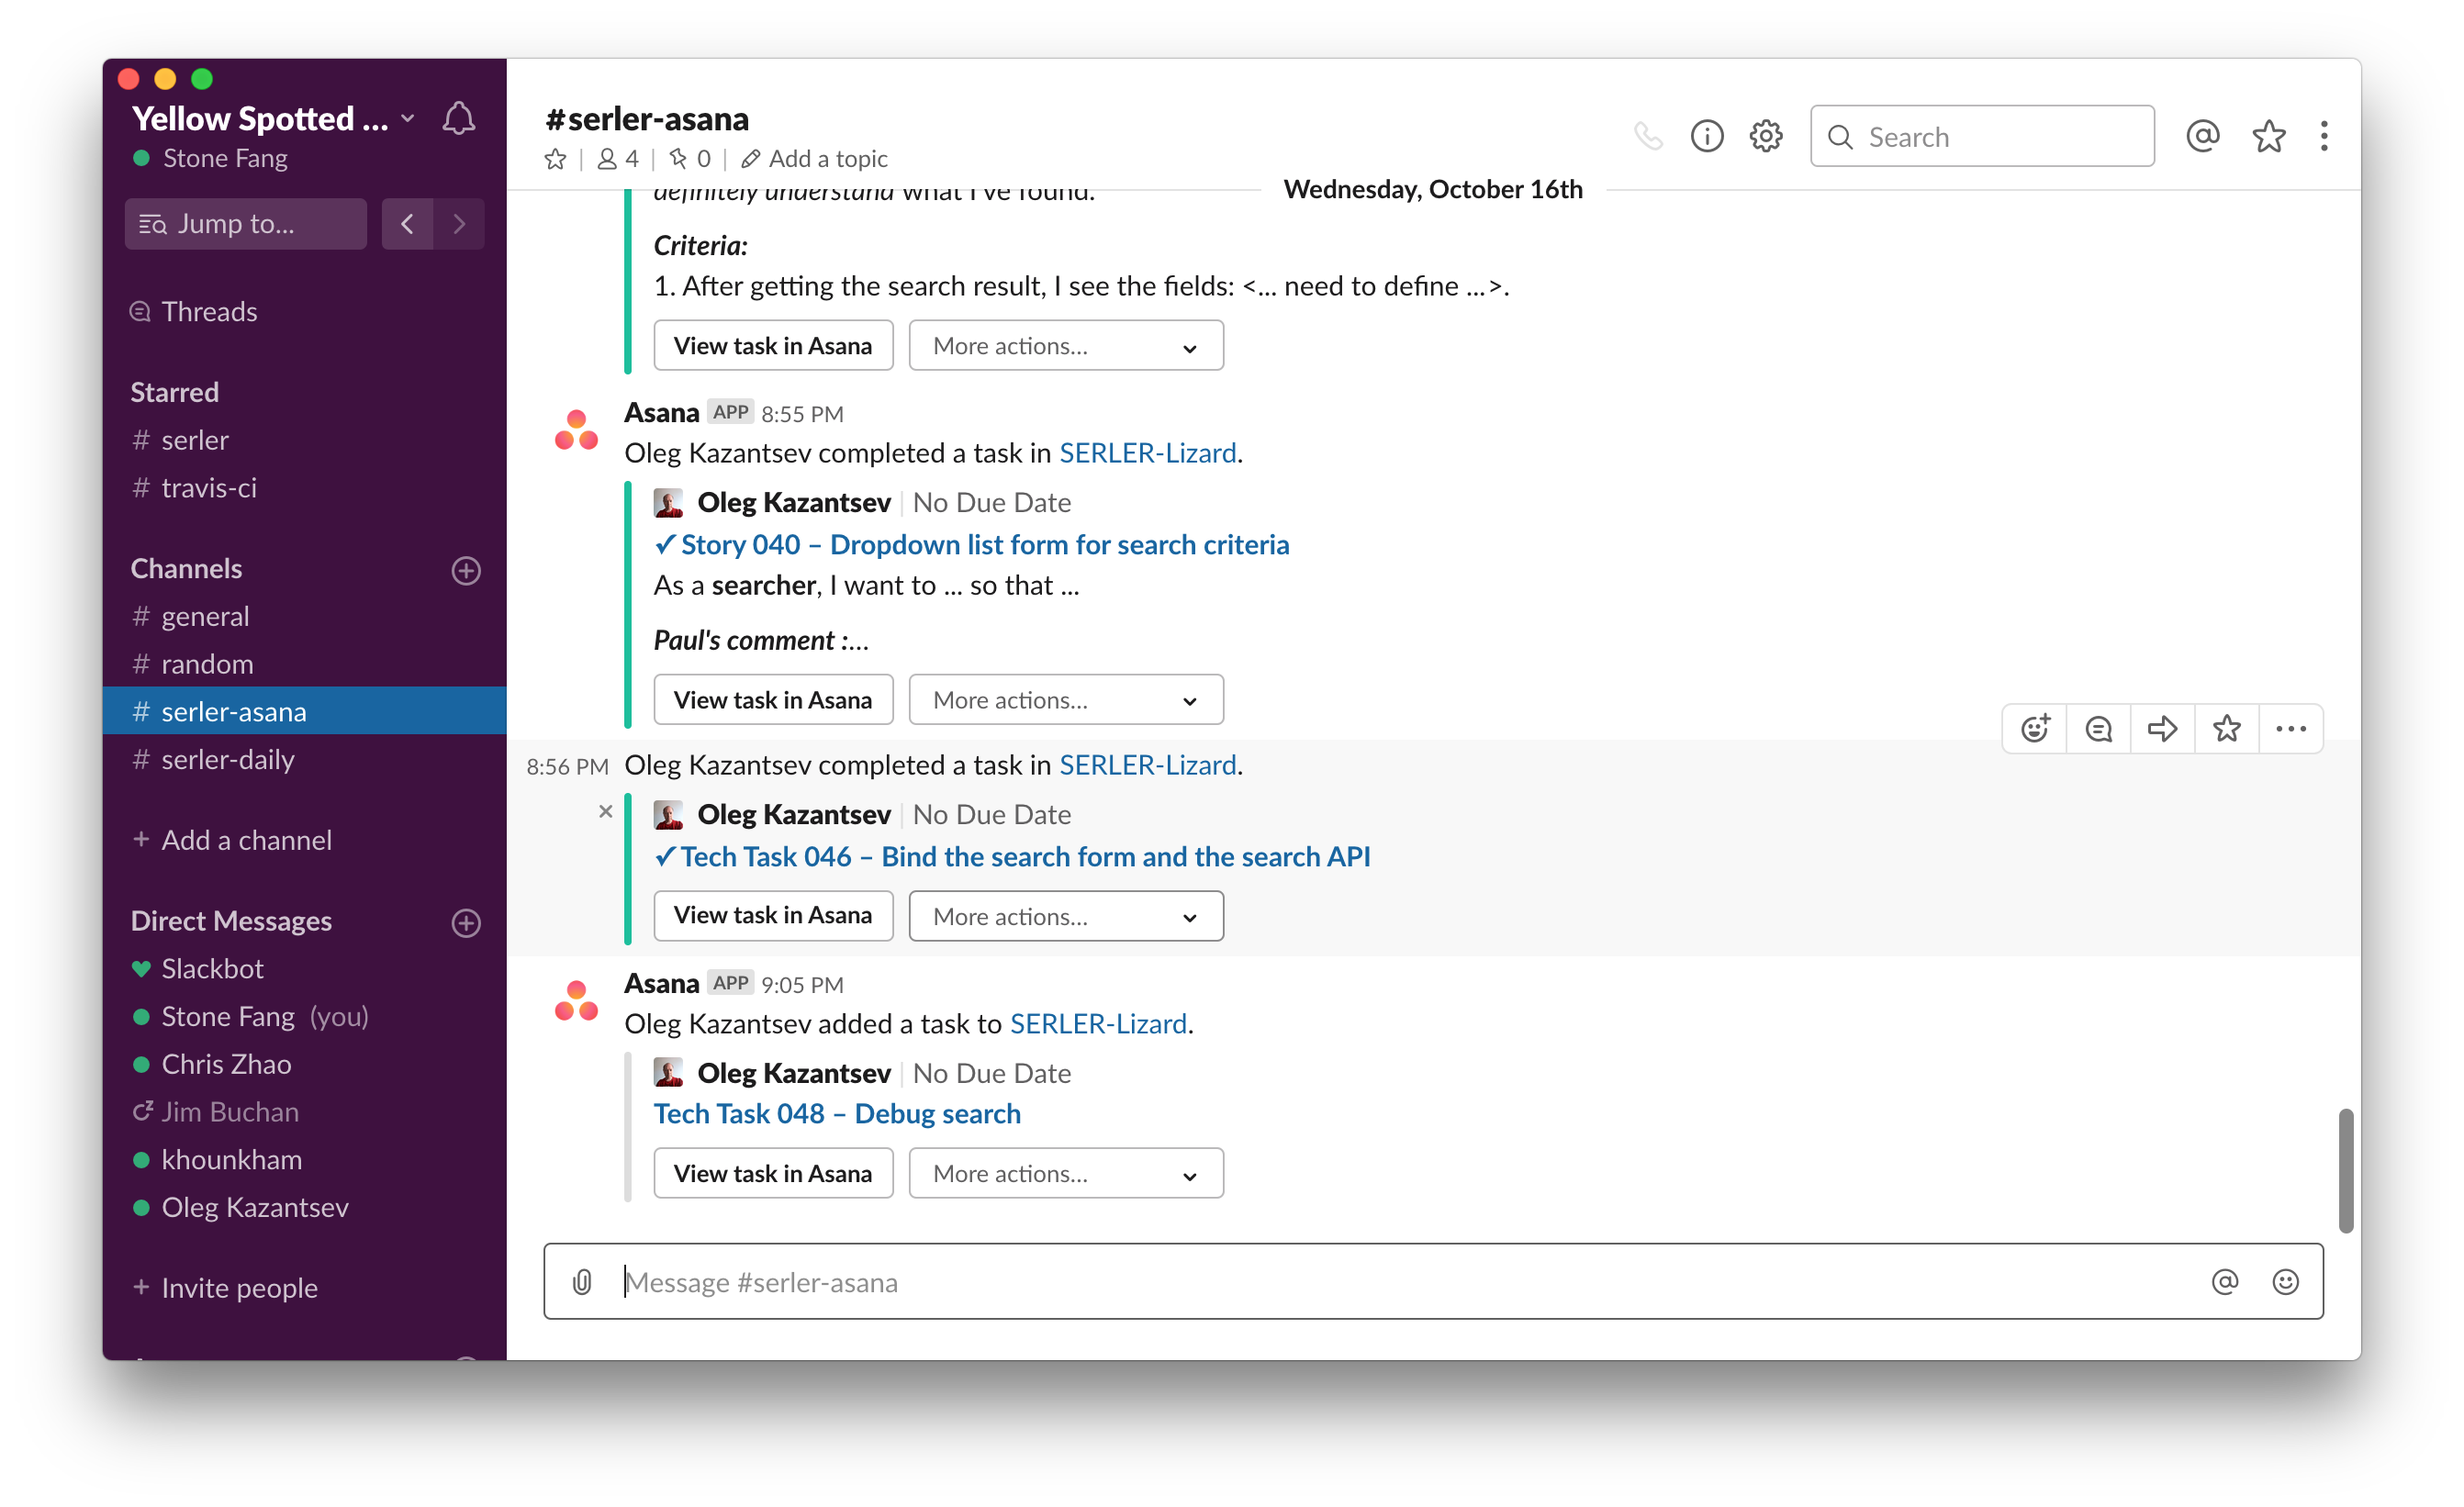
We use Slack as a daily communication tool. We setup some channels for different use. At first we have the '#serler' channel for daily discussion, however the conversations are mixed with notifications from Asana, so later we created the '#serler-daily' for daily communication and '#serler-asana' to receive notifications from Asana. Also we have the '#travis-ci' channel to receive notifications from TravisCI on the completion of each job.
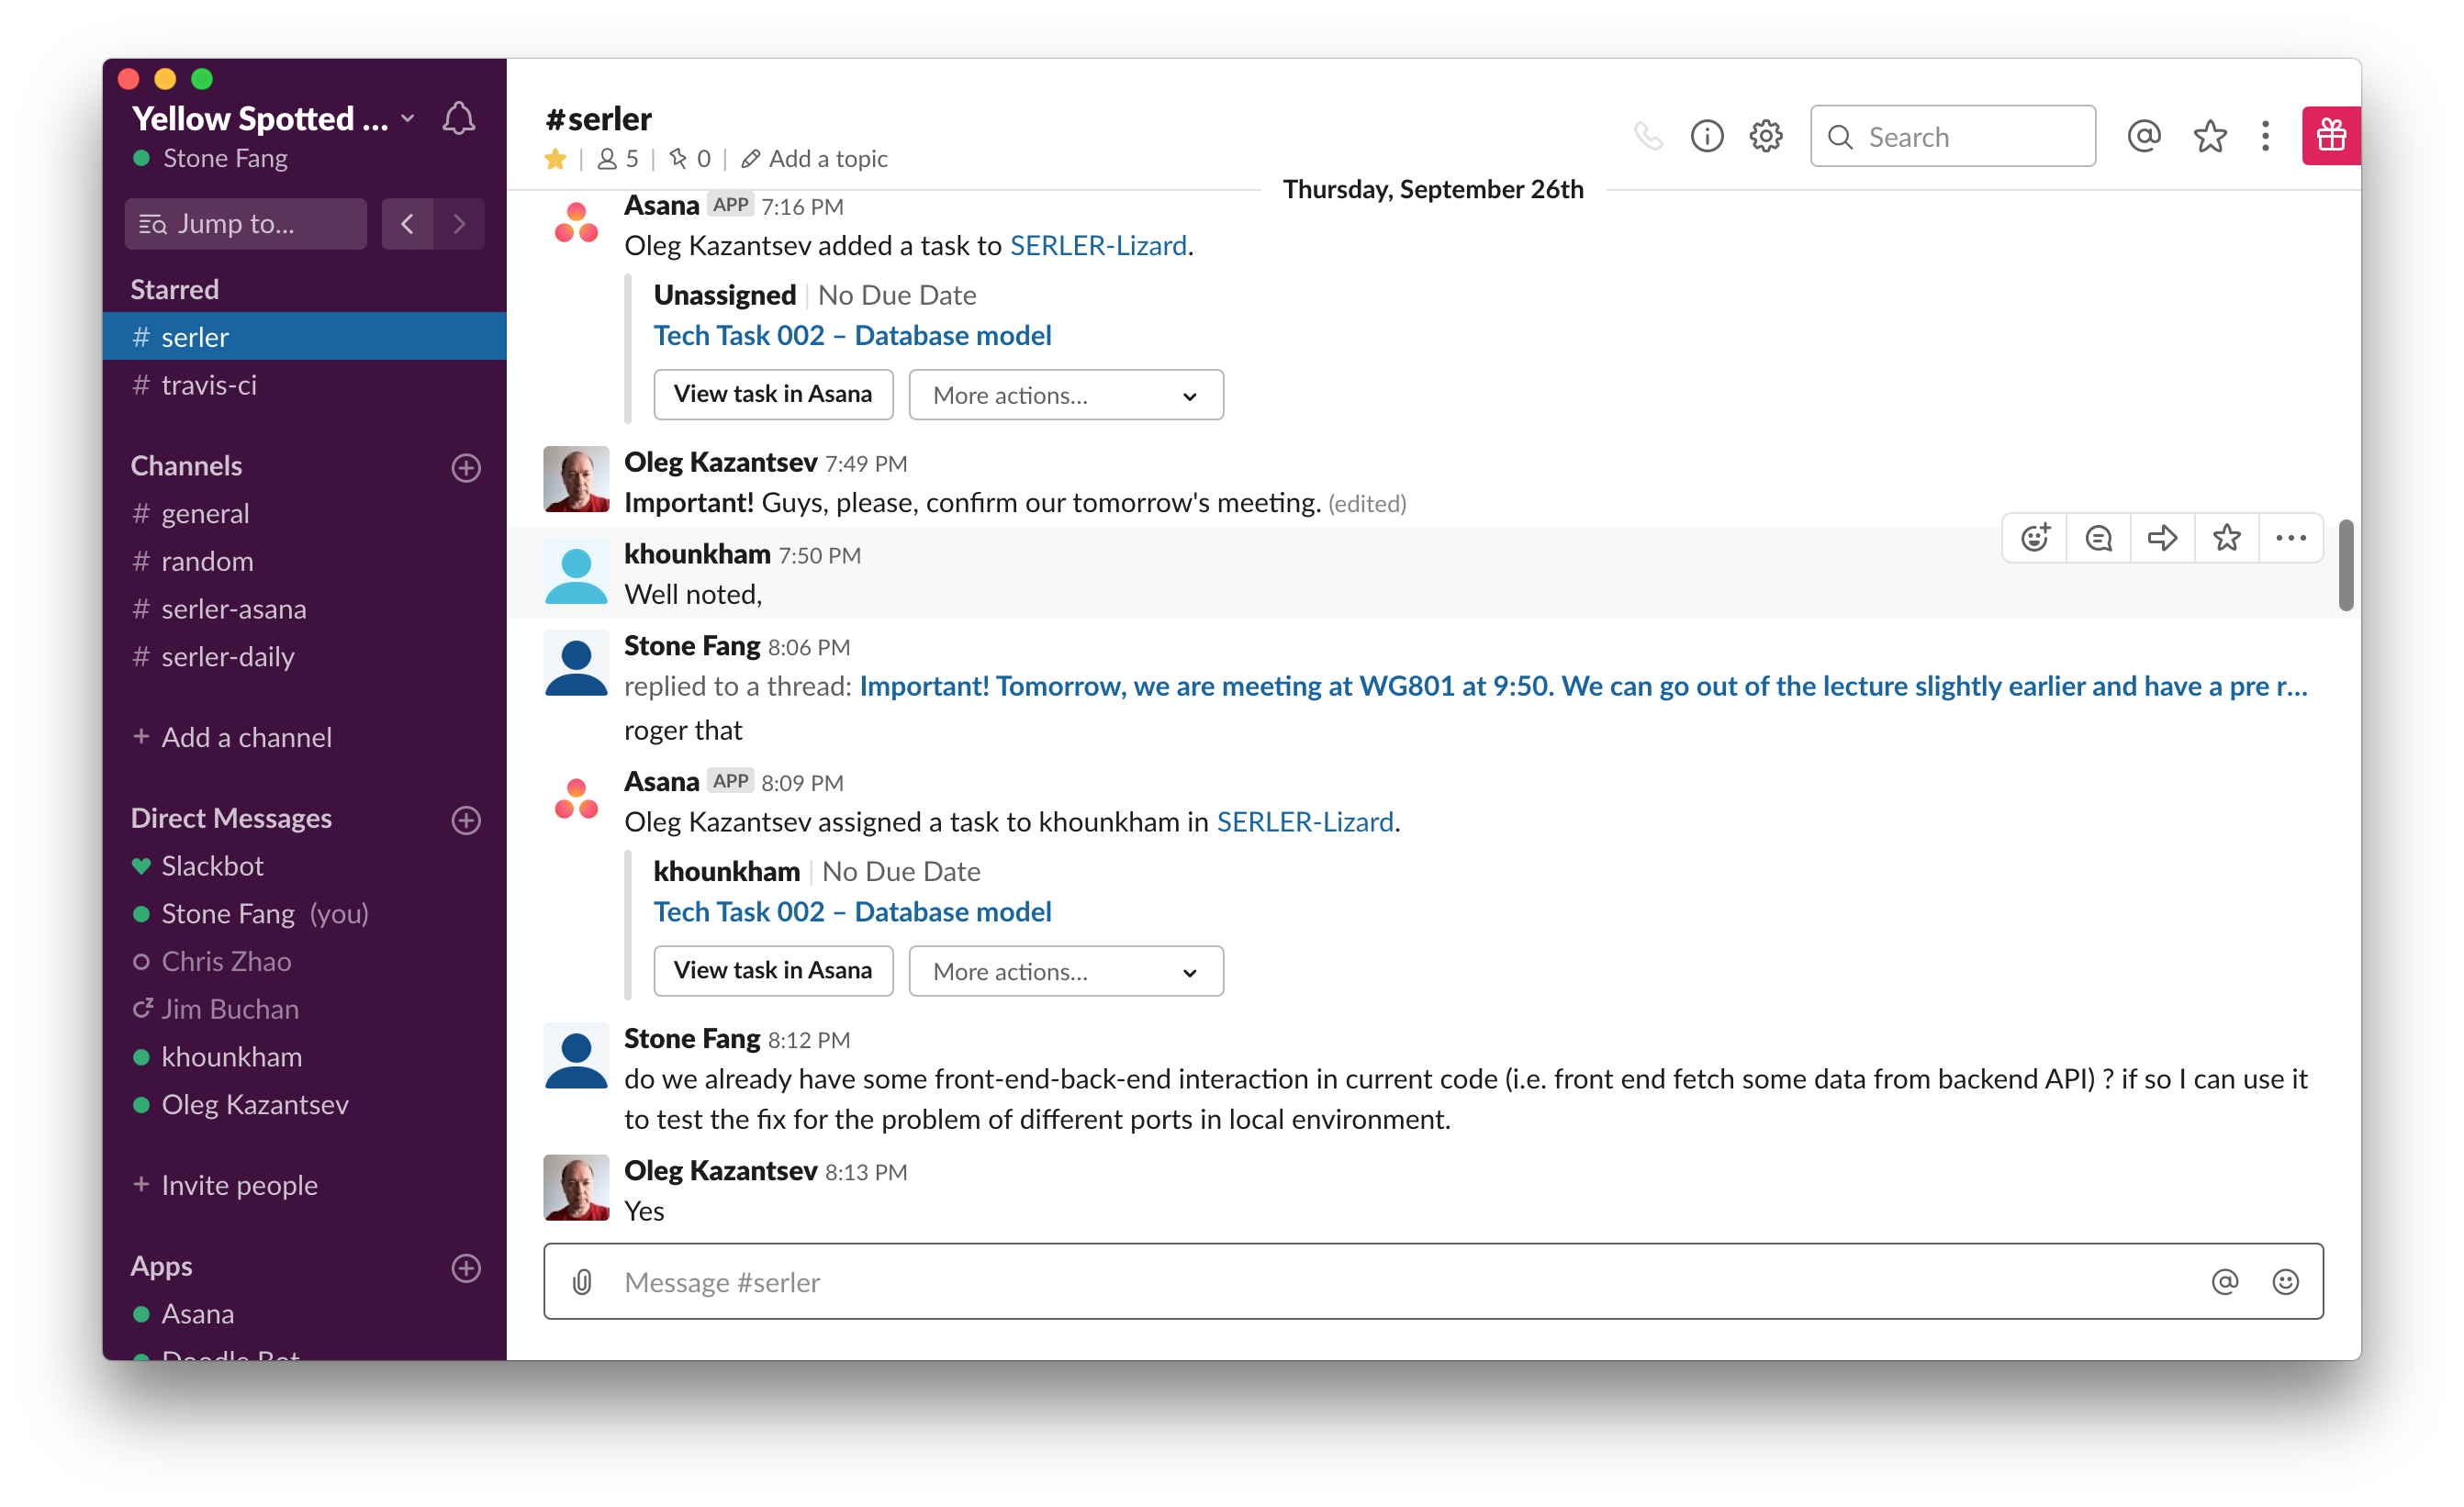
We have Asana integrated with Slack on creation or changes on Asana's stories. With this we can also operate Asana stories in Slack.
We have TravisCI integrated with Slack so that we can get notified on each TravisCI job completed. We can click the links to the build job number and git version number to jump to job details and code changes, respectively. Screenshot: