Getting Started: IntelliJ Setup - Yash-777/mongo-java-driver GitHub Wiki
Open source doesn’t just mean free to download and use, it also means it’s possible for anyone to contribute code. But it’s down to us, the maintainers of the project, to make this process simple and clear to those who want to help.
With this in mind, I’ve prepared a guide to getting IntelliJ set up for coding on the Java Driver - in particular, the new 3.0 code. This guide is for IntelliJ 13, as it has much better integration with Gradle, and should import the project correctly given our Gradle settings. This may still work as a guide for earlier versions of IntelliJ, but your mileage may vary.
These instructions are for the Mac (sorry) but should work on Linux too. On Windows, you might have to use your imagination and reverse some slashes and so forth for the first part, the command-line stuff.
Get the code
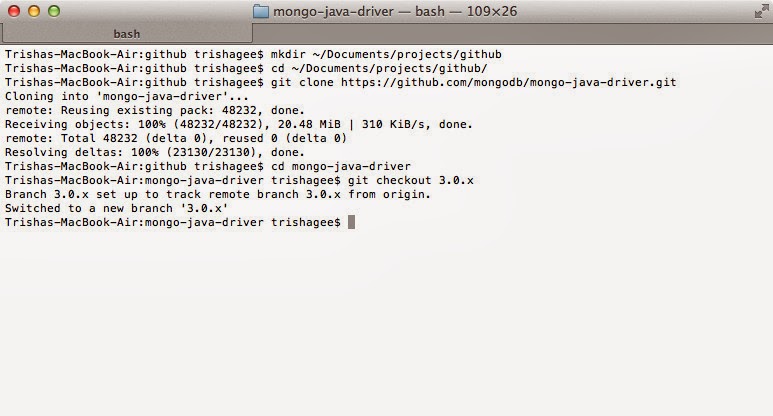
Create (or navigate to) the location you want the code to live in
$ mkdir ~/Documents/projects/github
$ cd ~/Documents/projects/github/
Download the Java Driver code
$ git clone https://github.com/mongodb/mongo-java-driver.git
Navigate into the project and switch to the 3.0.x branch
$ cd mongo-java-driver
$ git checkout 3.0.x
Import into IntelliJ
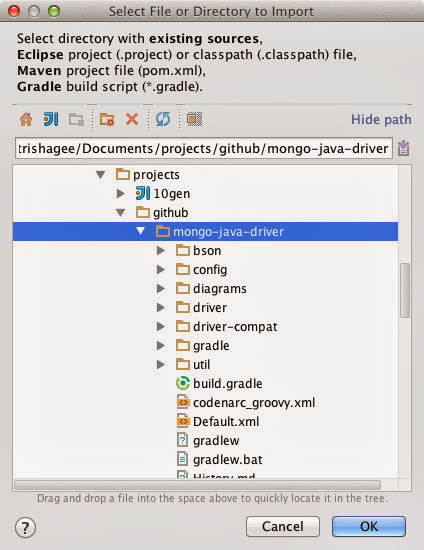
Open IntelliJ, and select File -> Import Project

Navigate to the location you put the code in, select the mongo-java-driver directory and click OK
Select “Import project from external model” and “Gradle”

Select “Use default gradle wrapper (recommended)”. The other settings should be automatically correct. Then press “Finish”

After a bit of thinking, IntelliJ might ask you if you want to open the new project in your current window, or a new one - pick whichever you want, I usually open in a new window.
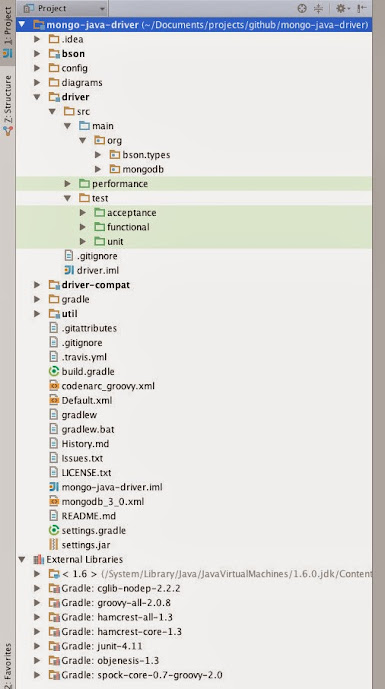
When the project finally opens, if you expand out some of the folders in the project explorer, you should see four different projects (the folders in bold), each with a number of source folders, and you should have a number of external libraries configured via gradle too.
Final Settings
Sadly the import process via gradle is not (yet) perfect, so you may find yourself having to fix a number of minor issues.
Go to the Project Structure dialog, either by clicking on the project structure button at the top of the screen, or by going to File -> Project Structure

While you’re in the “project” general settings, under “Project SDK” make sure a 1.7 version of Java is selected. While the driver will work on Java 6 and above, to work on the code and to build the driver you must use at least Java 7. Because the driver needs to compile down to Java 6, you should keep the Project Language Level set to “6.0 - @Override in Interfaces”

You might see, at the bottom of the dialog, a red-ish bar declaring there are some errors in the project.
Click on the “3 errors found” link, to expand out what those errors are

At the top right of each error, is a “Fix” button. Click this for each of the errors, and accept the suggested fix

Click “OK” on the Project Settings dialog to make sure all your changes are applied.
Building the project
You can compile the project using Build -> Rebuild Project, but we’re going to use the new Gradle integration in IntelliJ 13 to make sure everything is all wired together correctly. Of course, you can use gradle from the command line, from inside your mongodb-java-driver folder, but now you can do everything inside your IDE as well.
The Gradle tool window should be available, since we imported the project via Gradle. You can open it either using the “Gradle” button on the right hand side, if you have “Tool Buttons” enabled in your IDE, or you can open it via View -> Tool Windows -> Gradle.
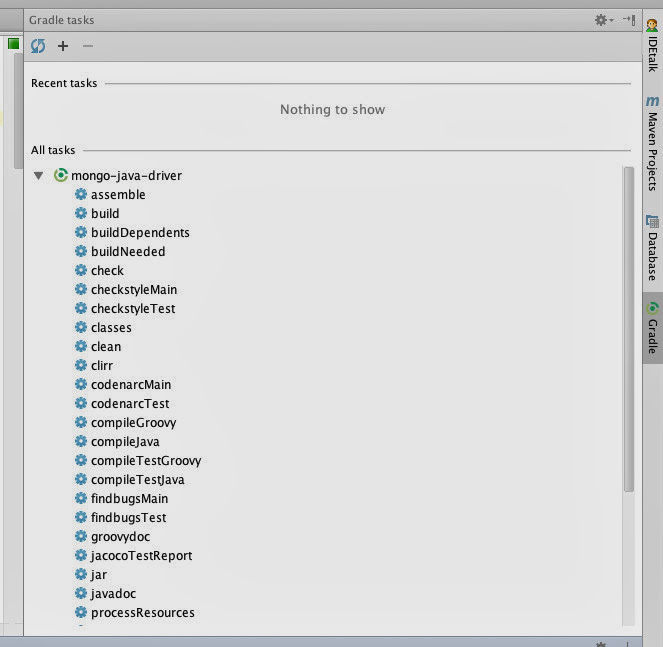
Double click on “compileTestJava” - this task will compile all the Java driver code, and the Java & Groovy tests. We’re not going to run tests right now as the tests require a running MongoDB instance on localhost:27017. The output of the running task will appear in the “Run” window, which in my IDE is at the bottom of the screen.

The build might take some time, as gradle may need to download a number of dependencies. Subsequent runs, however, should take a lot less time.
When you have a running version of the server on localhost:27017, the task you should be running is “check” - this compiles the code, ensures it meets our coding standards, and runs all the tests. This is the command that will be run by travis if you submit a pull request.
Optional Steps
There are a few other things that you can set up in IntelliJ to make life a lot easier. These are not mandatory steps, but will mean that you’re developing in the same way as all the other contributors.
License
We have a consistent license notice on all the files. To set this up in IntelliJ, go to Preferences, either by clicking on the button, or navigating via the menu (on the Mac, this is in IntelliJ IDEA -> Preferences).

Select Copyright -> Copyright Profiles, and click on the “+” symbol at the top of the screen.

Give your new profile a name (e.g. “MongoDB”). Copy the contents of mongodb-java-driver/config/LICENSE into the “Copyright text” box, and press “Apply”

You’ve saved the new profile, but you haven’t applied it yet. So select the “Copyright” heading from the list on the left hand side, and select your newly created “MongoDB” copyright from the dropdown at the top of the screen.
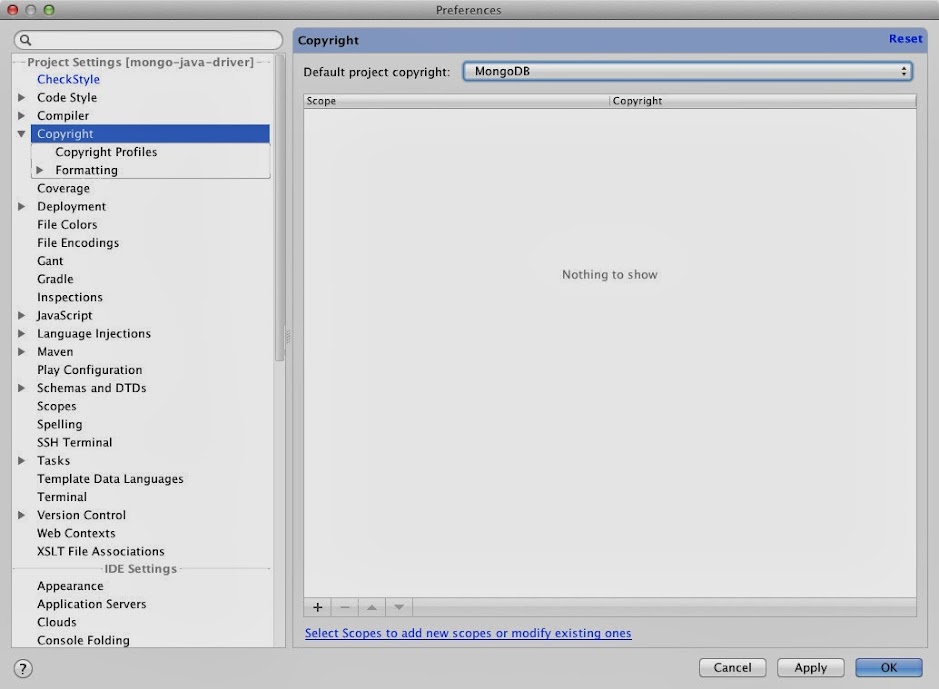
Press “OK”.
Checkstyle
We follow strict code style guidelines on the driver so that the code is consistent across the whole codebase. The build will fail if the guidelines have not been followed. Therefore, life is easier if the checkstyle plugin is installed and set up correctly
Open the Preferences dialog, and select “Plugins”

Click “Browse Repositories…” and type “checkstyle” into the search box on the top right. Right click on Checkstyle-IDEA (this should be the plugin with the most downloads) and click “Download and Install”

Press OK to close both dialogs, and restart IntelliJ when prompted.
When IntelliJ is back, open the Preferences dialog again, and select “Checkstyle” from the list. Click on the “+” button at the bottom of the “Configuration file” area

Enter a description, for example “MongoDB Standards”, and select “Use a local CheckStyle file” and choose mongo-java-driver/config/checkstyle.xml.

Click “Next” and then “Finish”
Select this new configuration file, and the options “Scan test classes” and “Treat CheckStyle errors as warnings”.

Press OK. Now you should get yellow warnings to the right of your code if any of the code doesn’t match our coding standards, so they can be fixed well before breaking the build.
Finished!
And there you have it! The MongoDB Java Driver project is downloaded on your computer and imported into a working IntelliJ project. Now you’re ready to start poking into the code.