IntelliJ IDEA ‐ User Guide - Yash-777/MyWorld GitHub Wiki
C:\Softwares\IDE\ideaIC-2025.2.3.win\bin
idea64.exe

Open Or Import Project
Slect folder - Maven project
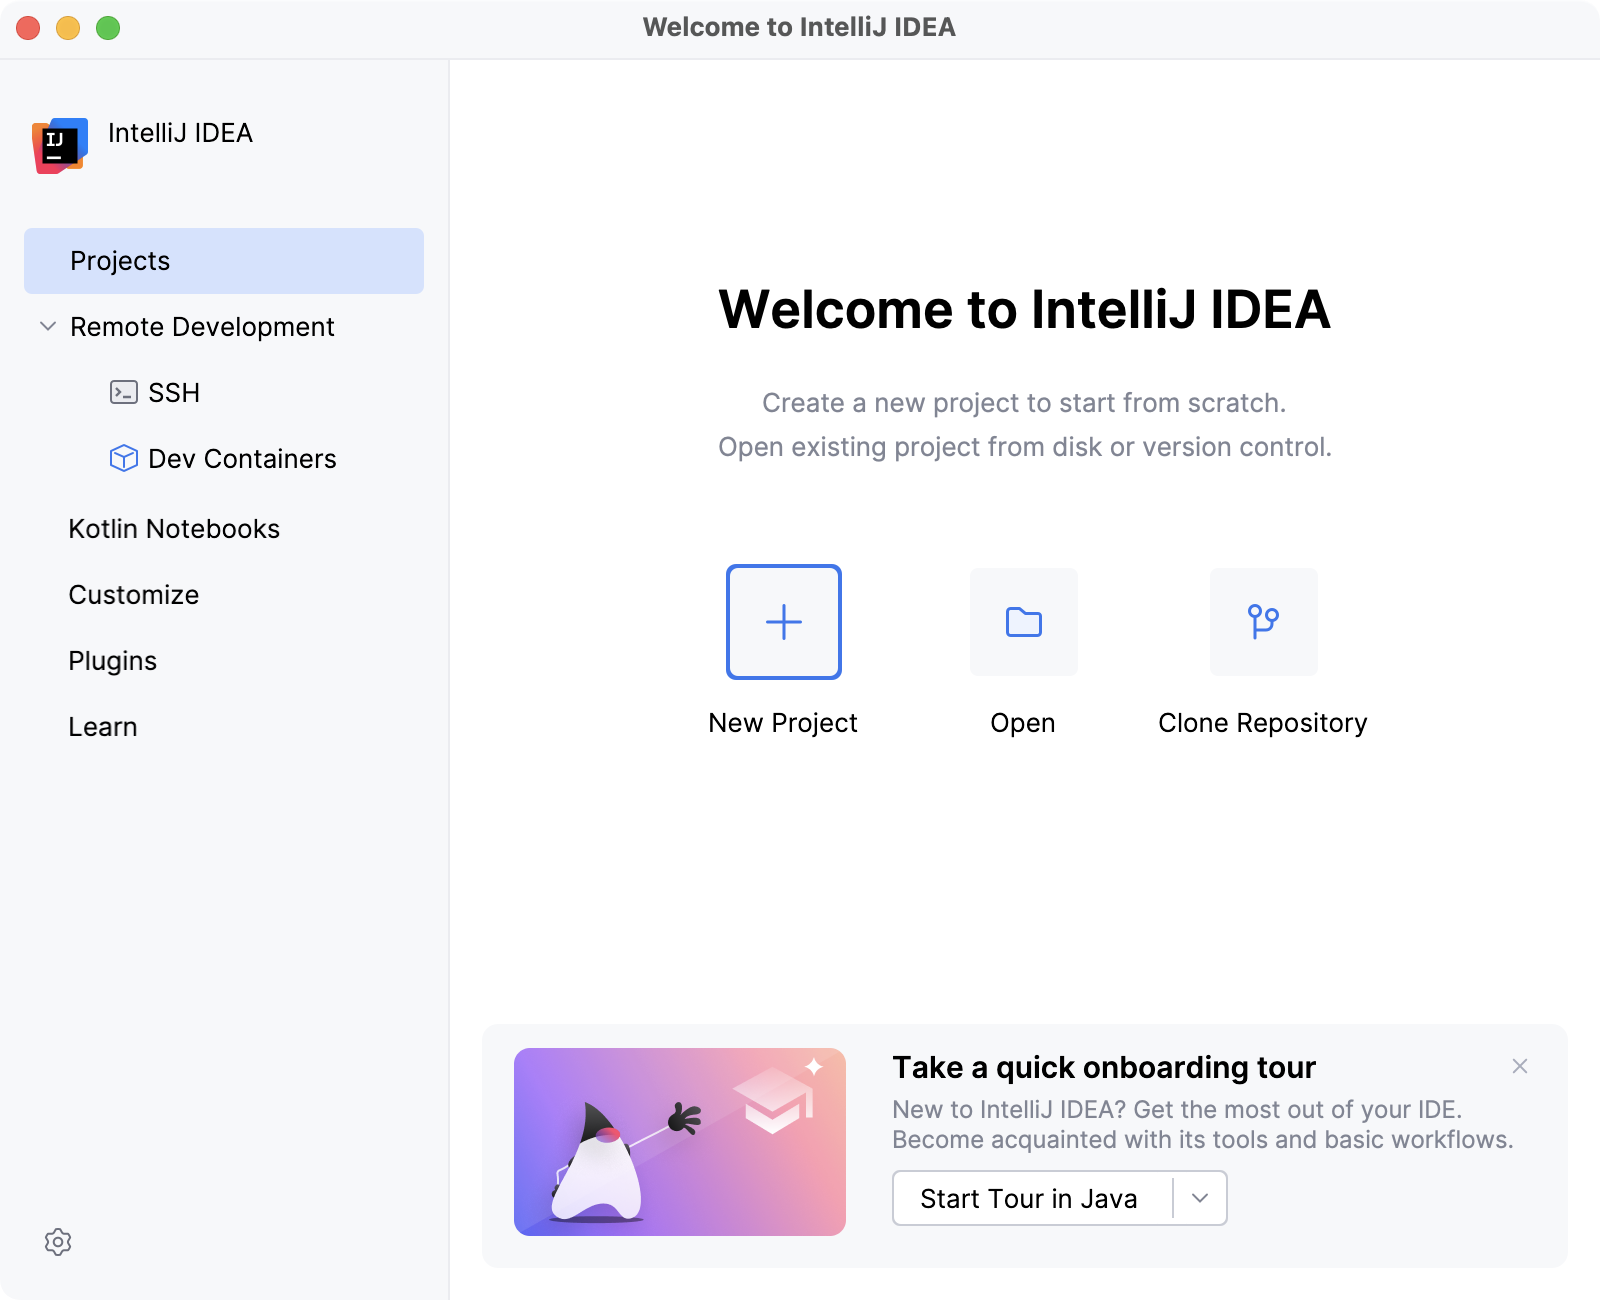
IntelliJ IDEA Community EditionThe IDE for Java and Kotlin enthusiasts
If you’re looking for IntelliJ IDEA in a way that doesn’t require a formal installer (like a .exe or .dmg), but instead can be extracted from a ZIP or tar.gz and run directly, that is actually possible — and it’s the normal way JetBrains distributes it for Linux and also optionally for Windows/macOS.
Here’s how you can get it:
✅ Official portable-style download from JetBrains
- Go to the official IntelliJ IDEA download page: https://www.jetbrains.com/idea/download/
- For Windows OS: Click on "Windows" → download the
.zipversion (instead of the.exeinstaller). - Extract the archive to a folder of your choice (e.g.,
D:\tools\idea). - Go into the
extracted folder → bin → run:idea64.exe(on Windows)
⚠ Important notes:
- This isn’t fully “portable” because IntelliJ stores some settings, caches, and plugins under your home directory (e.g.,
C:\Users\YourName\.IntelliJIdea2025.1). - It still runs without installation —
you don’t need admin rights if you can extract the archive.
Switching from Eclipse to IntelliJ IDEA, especially if you've been using Eclipse for a long time, requires understanding some fundamental differences between the two IDEs, including their user interfaces, compilation methods, shortcuts, project configuration and other aspects.
Import an Eclipse project to IntelliJ IDEA
| Welcome screen | Tool windows | No 'save' button | Save actions |
|---|---|---|---|
You can import either an Eclipse workspace or a single Eclipse project. To do this, click Open on the Welcome Screen or select File/Open in the main menu. |
Just like in Eclipse, in IntelliJ IDEA you also have tool windows. You can find a full list of all available tool windows at View/Tool Windows. Selecting a tool window will open it. Tool windows are also accessible from the tool window buttons on the tool window bars. |
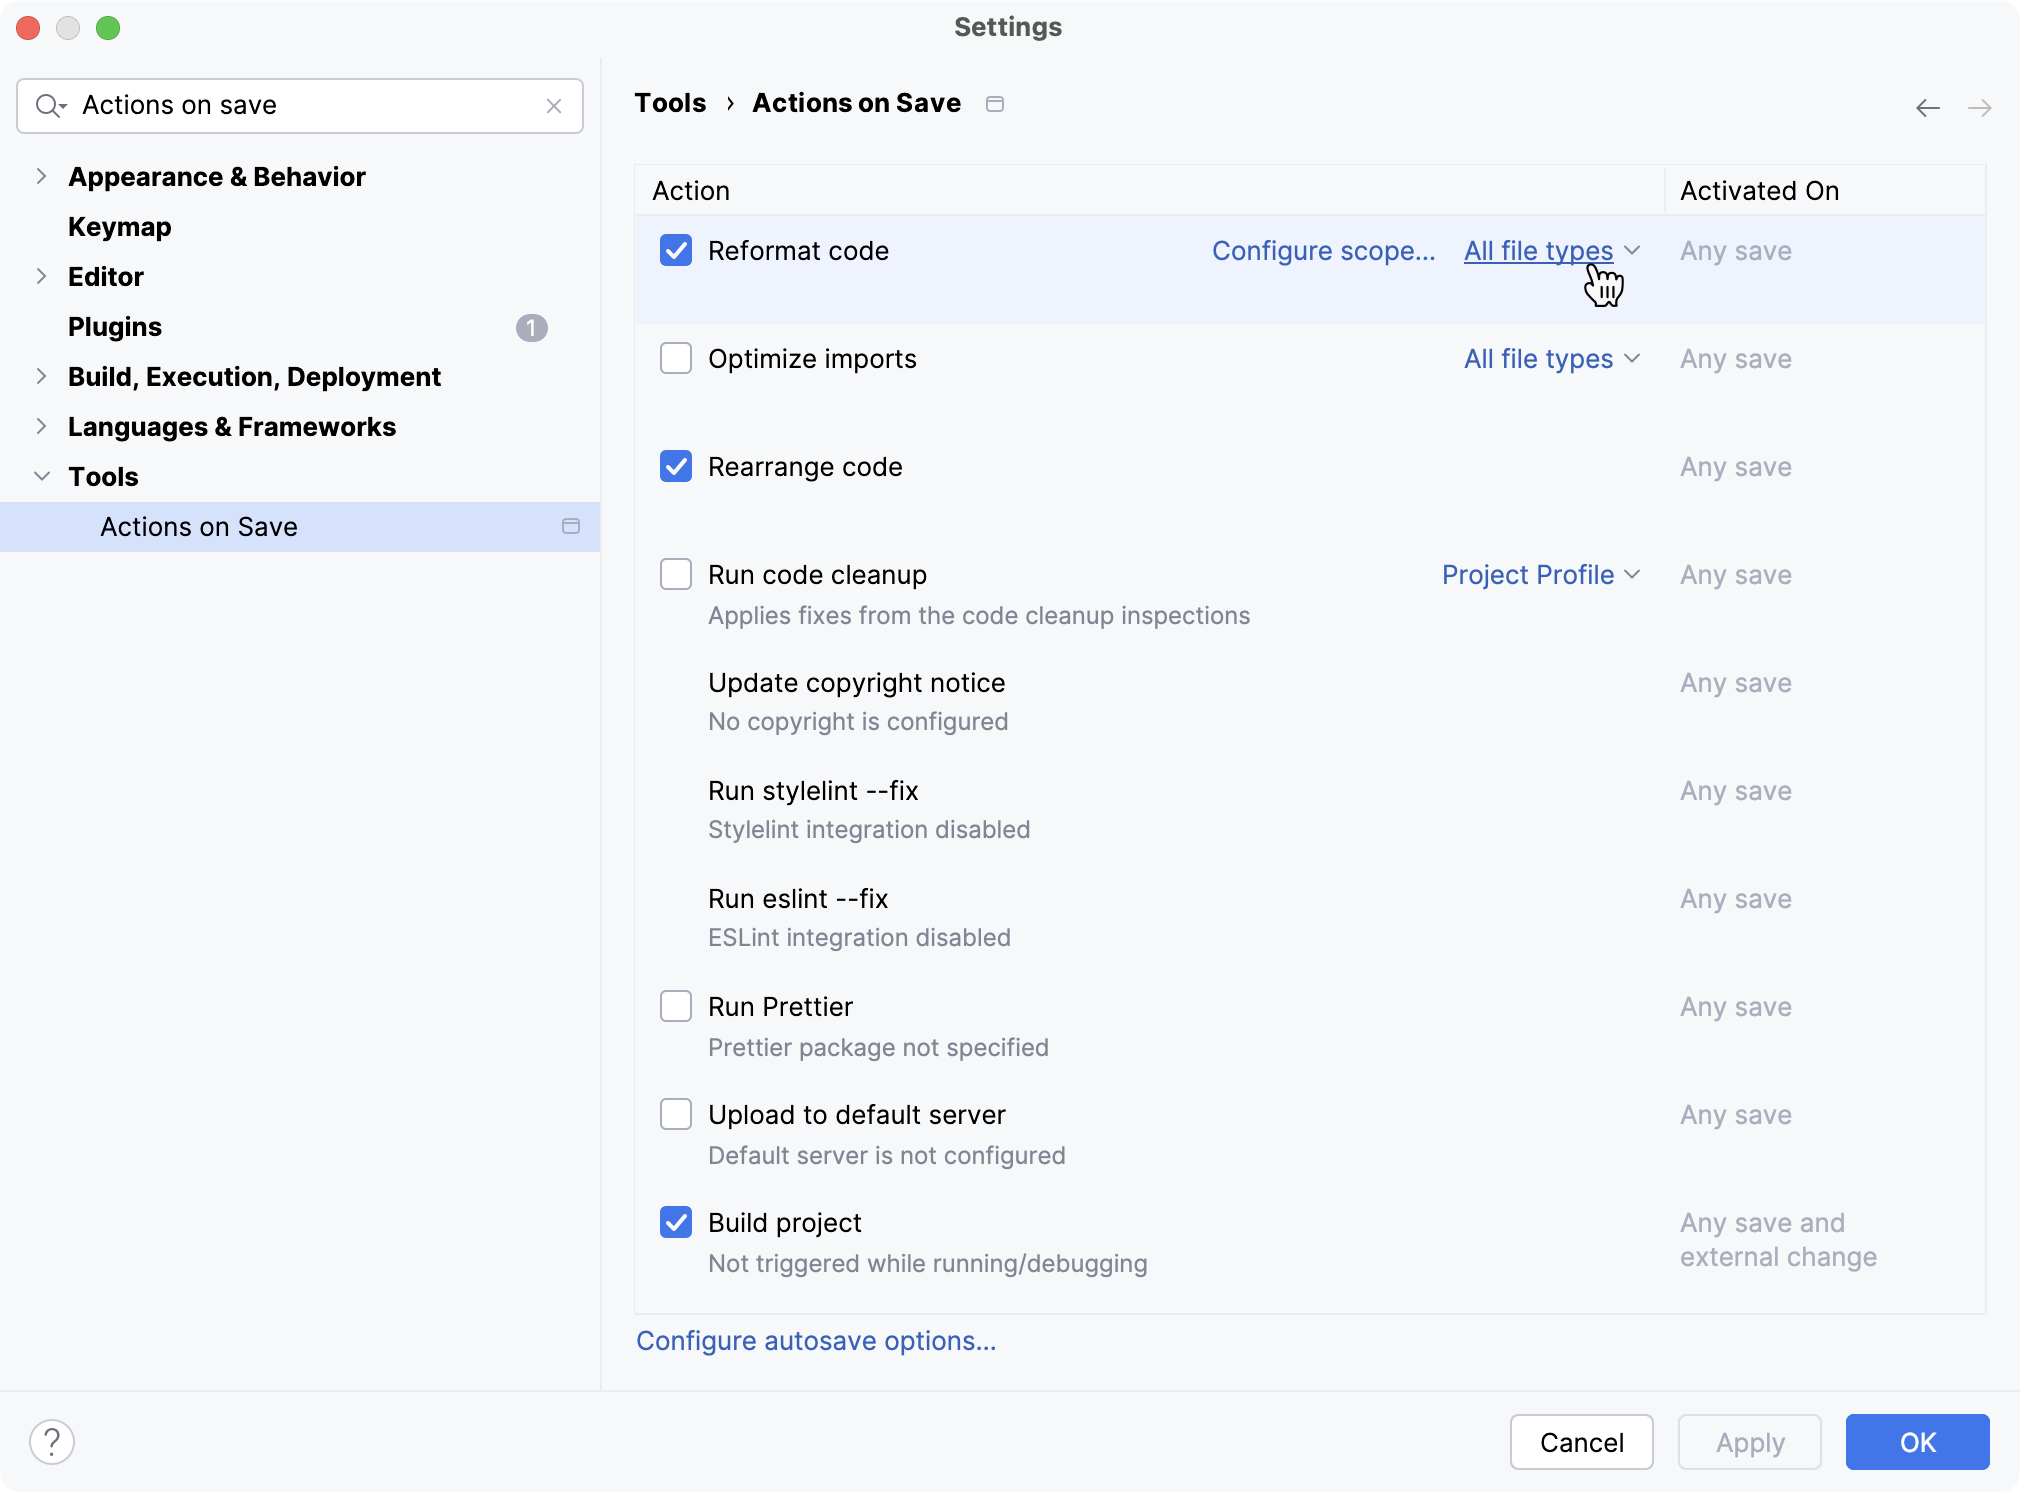
IntelliJ IDEA has no Save button. Since in IntelliJ IDEA you can undo refactorings and revert changes from Local History, it makes no sense to ask you to save your changes every time. | If you are an experienced Eclipse user, you are familiar with save actions: the actions triggered automatically on save, such as reformatting code, organizing imports, and so on. IntelliJ IDEA also features save actions that you can find and enable in Settings - Tools - Actions on Save. |
 |
 |
 |
 |
| Eclipse Shortcut | IntelliJ IDEA Shortcut | Usage | Description |
|---|---|---|---|
| Ctrl + L | Ctrl + G | Go to Line | Jump to a specific line number |
| Ctrl + D | Ctrl + Y | Delete Line | Delete the current line |
| Ctrl + Alt + Down Arrow | Ctrl + D | Duplicate Line | Duplicate the current line or selection |
| Alt + Down Arrow | Shift + Alt + Down | Move Line Down | Move line/selection down |
| (Extra) | Ctrl + / | Line Comment | Toggle line comment |
| (Extra) | Ctrl + Shift + F | Reformat Code | Format code according to style |
| (Extra) | Ctrl + Shift + Up/Down | Move Statement Up/Down | Move entire code block up/down |
Refactorings
The following table maps the shortcuts for the most common refactorings in Eclipse with those in IntelliJ IDEA:
| Eclipse Shortcut | IntelliJ IDEA Shortcut | Usage | Description |
|---|---|---|---|
| Alt + Shift + L | Ctrl + Alt + V | Extract Local Variable | Extract expression to local variable |
| Alt + Shift + R | Shift + F6 | Rename | Rename symbol and all references |
Navigation
The table below roughly maps the navigation actions available in Eclipse with those in IntelliJ IDEA:
| Eclipse Shortcut | IntelliJ IDEA Shortcut | Usage | Description |
|---|---|---|---|
| Ctrl + Shift + T | Ctrl + N | Open type Go to Class |
Open any Java class by name |
| Ctrl + Shift + R | Ctrl + Shift + N | Open resource Go to File |
Open any file by name (non-Java too) |
| (Extra) | Ctrl + Shift + Alt + N | Go to Symbol | Open any symbol (class, method, field) |
| (Extra) | Ctrl + B or Ctrl + Click | Go to Declaration | Jump to declaration of symbol |
| (Extra) | Ctrl + E | Recent Files | Quickly switch between recent files |
| Ctrl + O | Ctrl + F12 | Quick outline File Structure |
Show all methods/fields in current file |
Later, when you get used to these navigation options and need more, refer to Top 5 Navigation Keyboard Shortcuts in IntelliJ IDEA Shortcuts.
Undo
Sometimes, refactorings may affect a lot of files in a project. IntelliJ IDEA not only takes care of applying changes safely, but also lets you revert them. To undo the last refactoring, switch the focus to the Project tool window and press Ctrl + Z.
In Settings → Keymap, you can choose to use the Eclipse keymap which closely mimics Eclipse shortcuts, in case you don't want to learn new shortcuts:

You may be used to typing main in the editor and then calling code completion to have it transformed into a main method definition. However, IntelliJ IDEA templates are a little different:
| Template | Eclipse | IntelliJ IDEA |
|---|---|---|
| Define a main method | main |
psvm |
| Iterate over an array | for | itar |
| Iterate over a collection | for | itco |
| Iterate over a list | for | itli |
| Iterate over an iterable using foreach syntax | foreach | iter |
| Print to System.out | sysout | sout |
| Print to System.err | syserr | serr |
| Define a static field | static_final | psf |
Code completion (Eg: main +
Ctrl+Space)
| Eclipse | IntelliJ IDEA |
|---|---|
| Action | Shortcut |
| Code completion | Ctrl+Space |
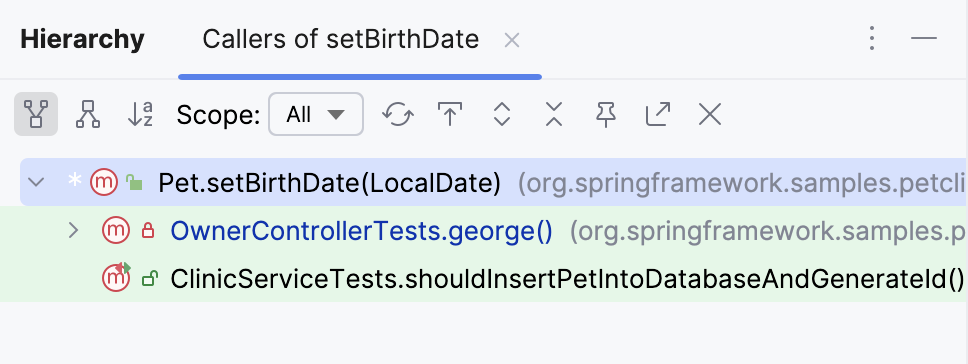
Call hierarchy - In Eclipse & IntelliJ IDEA, you access it by pressing Ctrl+Alt+H shortcut. |
Code formatting |
|---|---|
Both IntelliJ IDEA and Eclipse provide features that allow you to examine the hierarchy and explore the structure of source files. For example, the Call Hierarchy feature shows you all the callers and callees of the selected method. |
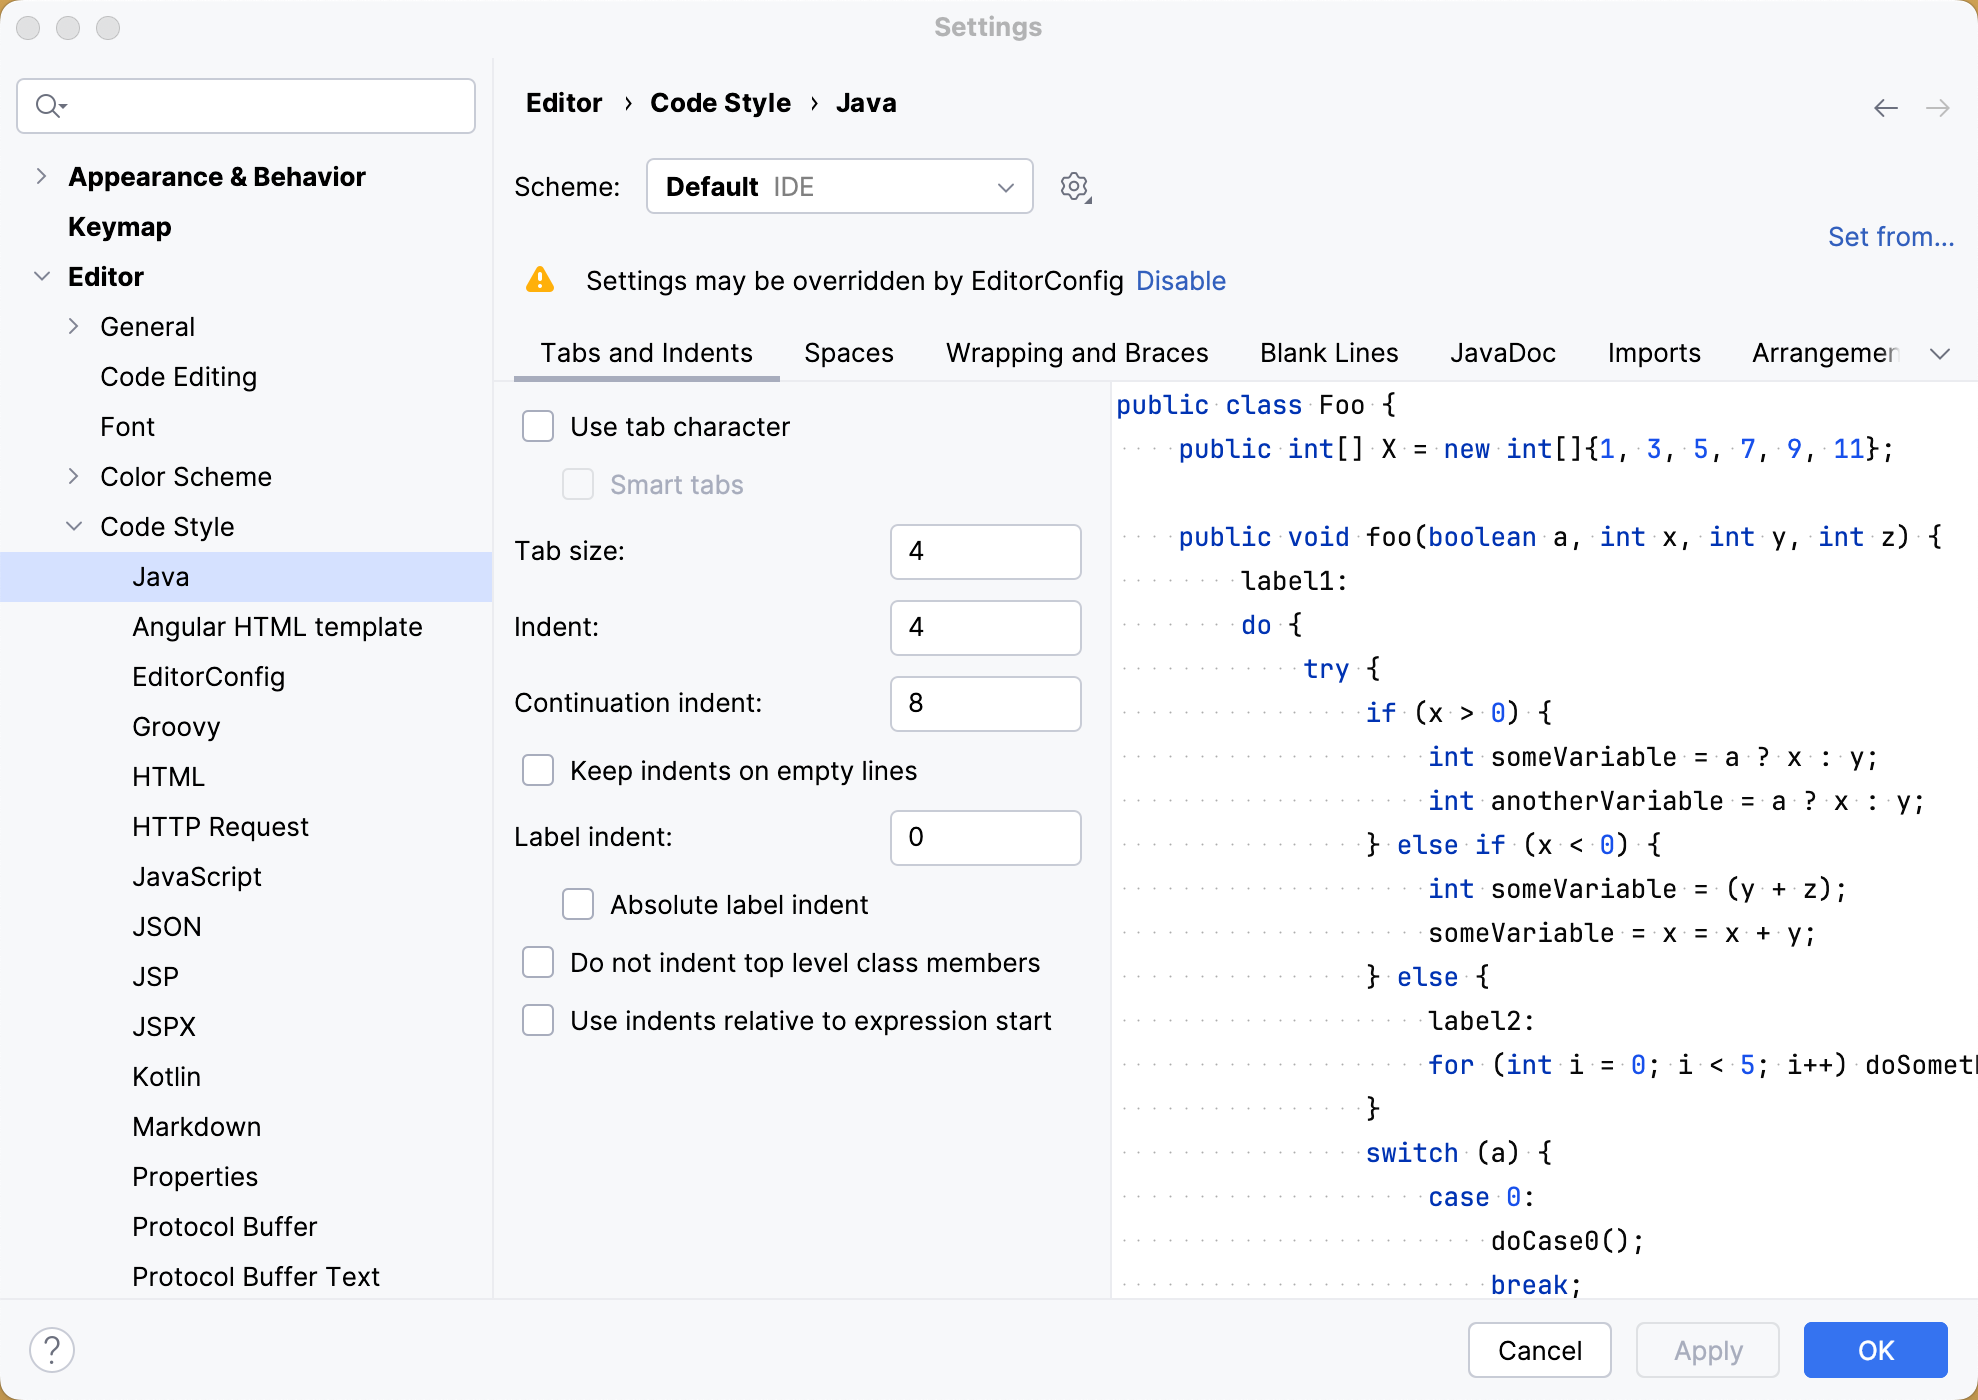
IntelliJ IDEA code formatting rules (available via Settings → Editor → Code Style) are similar to those in Eclipse, with some minor differences. You may want to take note of the fact that the Use tab character option is disabled by default, the Indent size may be different, etc. |
 |
 |
IntelliJ IDEA also maintains a list of files and folders that are completely excluded from any kind of processing. Out of the box, this list includes temporary files, service files related to version control systems, and so on:
*.pyc;*.pyo;*.rbc;*.yarb;*~;.DS_Store;.git;.hg;.svn;CVS;__pycache__;_svn;vssver.scc;vssver2.scc;
Hiding Eclipse-specific files (
.classpath, .project, .settings) from Project View in IntelliJ IDEA.
| Modify the list of ignored files and folders | Description |
|---|---|
|
 |
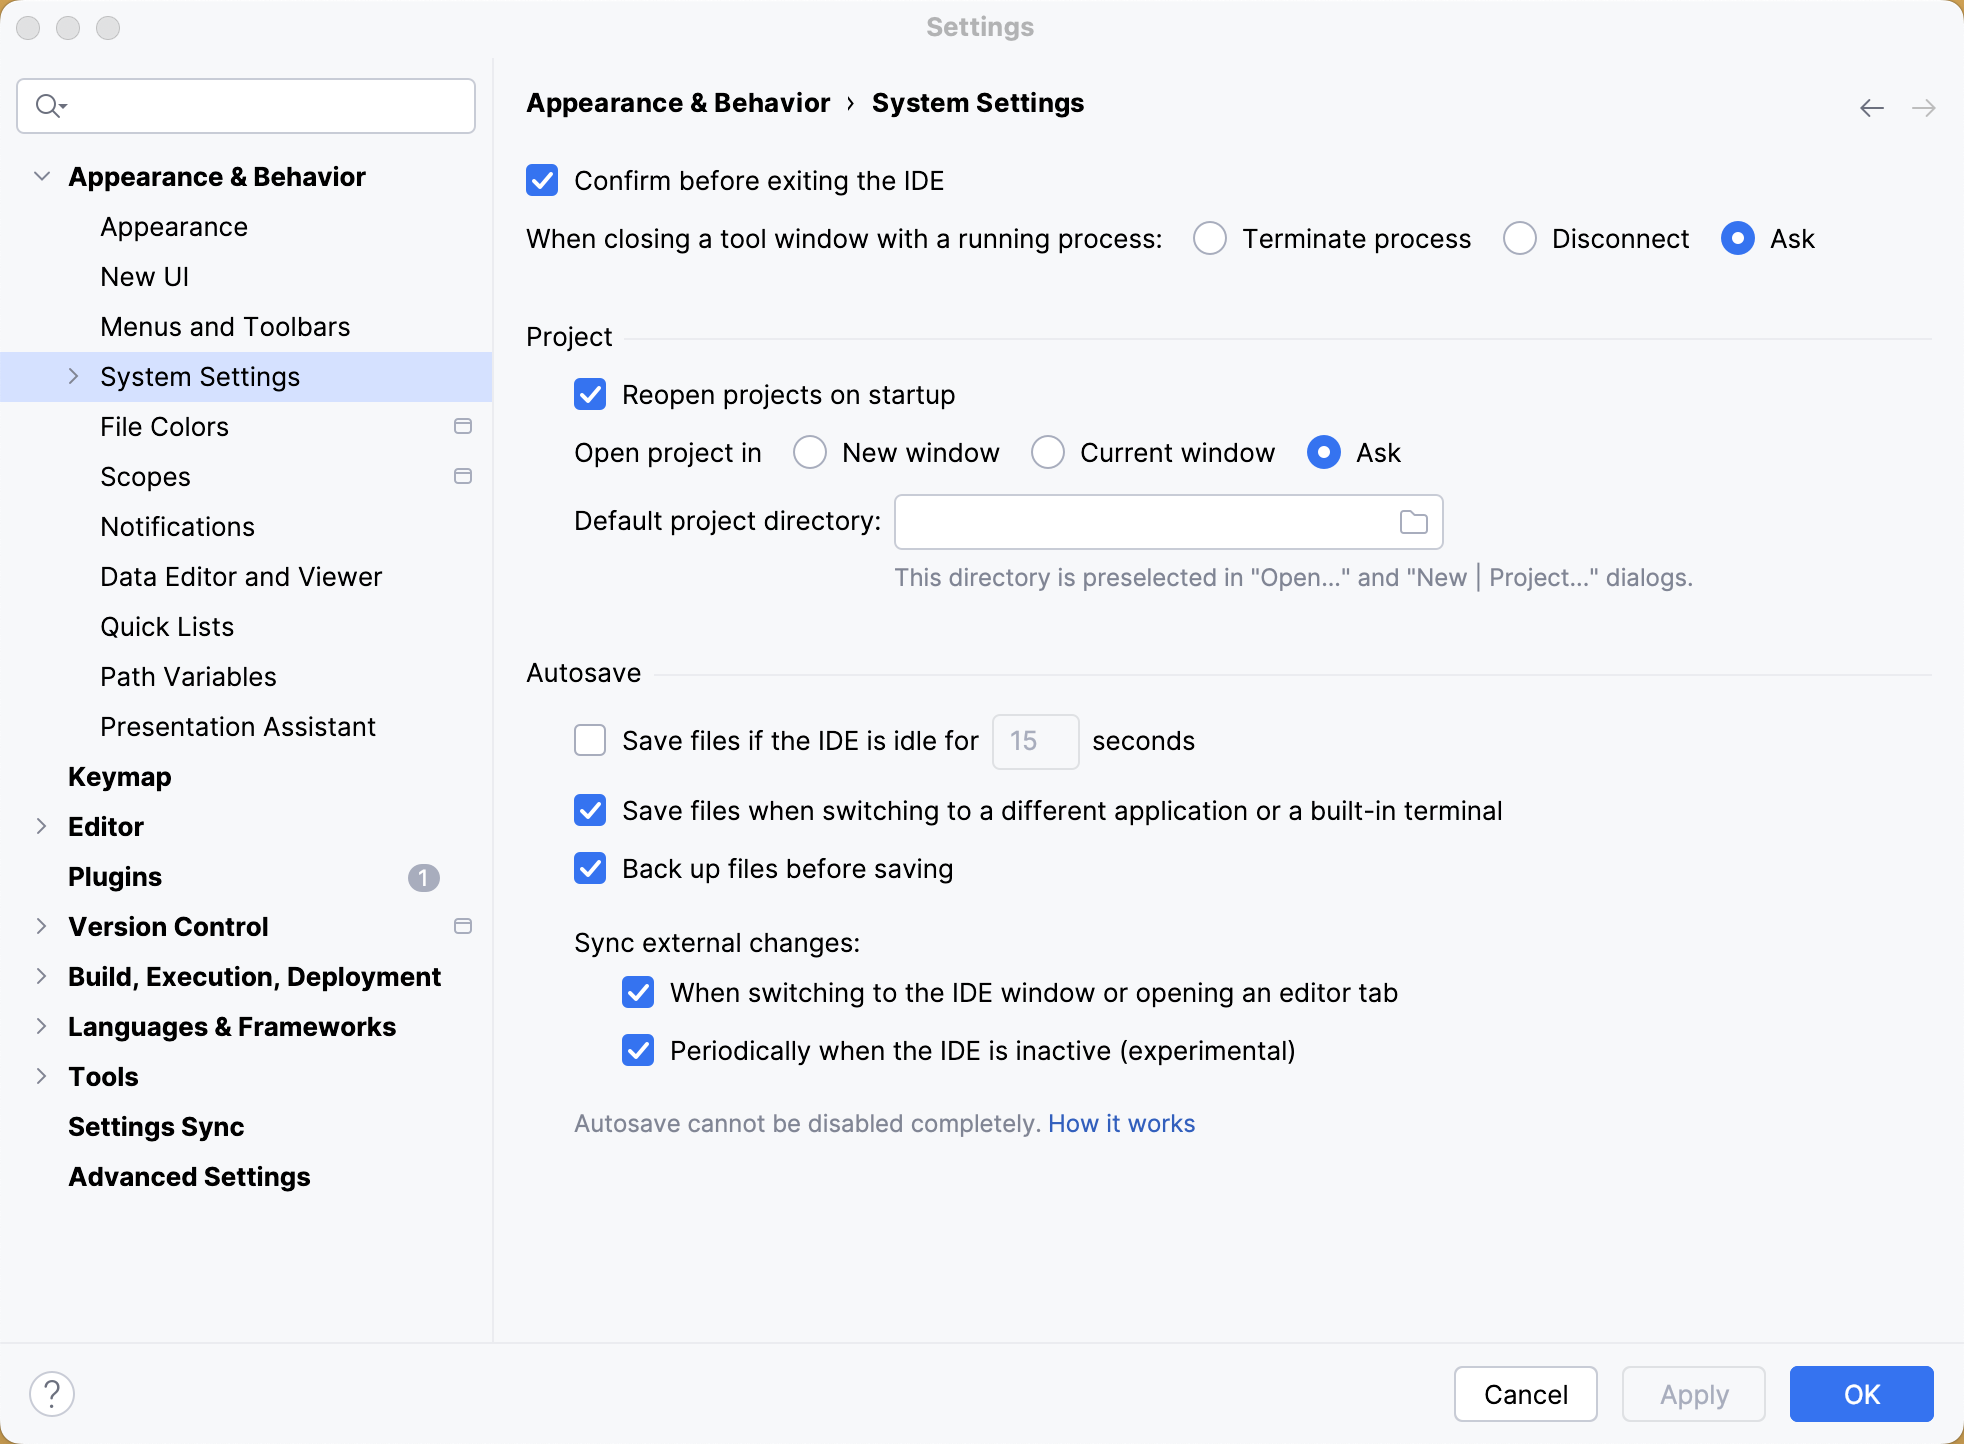
System Settings - Reopen projects on startup
To make IntelliJ IDEA open with your previous project setup automatically, you can configure it to reopen the last project on startup.
- Navigate to
File → Settings → Appearance & Behavior → System Settings. - Find the option: ✅ "Reopen last project on startup"
- Make sure it is checked.
- Click Apply and OK.
| Item | Description |
|---|---|
| Reopen projects on startup | Open all projects that were open when you closed IntelliJ IDEA last time. |
| Build tools | Run goals/tasks |
|---|---|
| IntelliJ IDEA doesn't provide visual forms for editing Maven and Gradle configuration files. Once you've imported or created your Maven or Gradle project, you can edit its pom.xml or build.gradle files directly in the editor. Later, you can synchronize the project model with the changed files on demand, or automatically import changes to the new build files. Any changes to the underlying build configuration will eventually need to be synced with the project model in IntelliJ IDEA. For operations specific to Maven or Gradle, IntelliJ IDEA provides the Maven Project tool window and the Gradle tool window. Apart from your project structure, these tool windows provide a list of goals or tasks plus a toolbar with the relevant actions. |
Use the Maven or Gradle tool window to run any project goal or task. When you do, IntelliJ IDEA creates the corresponding run configuration, which you can reuse later to run the goal or task quickly. It's worth mentioning that any goal or task can be attached to a run configuration. This may be useful when your goal or task generates specific files needed by the application. |
 |
 |
| For manual synchronization, use the corresponding action on the Maven or Gradle tool window toolbar | Both the Maven and Gradle tool windows provide the Run Task action. It runs a Maven or Gradle command similarly to how you'd run it using the console. |