Guide to deploy Wyliodrin to Cisco IR829 - Wyliodrin/cisco829 GitHub Wiki
Guide to deploy Wyliodrin to Cisco IR829
Cisco Router Basics
Cisco Routers are special devices whose main job is to get traffic from one of their interface, process it, and based on what commands were given to the device previously, to drop the traffic or route it through another interface.
Cisco Routers use a special operating system (Examples of operating systems : Microsoft Windows, Linux, Mac OS, Android) called IOS. This operating system specializes in dealing with huge amounts of data and parallel processing for each interface.
Every Cisco Router with IOS has an internal console/terminal akin to Linux. In order to access it we have to connect to the router through one of its many ports:
- Serial
- Fast Ethernet
- Gigabit Ethernet
- 3G
- 4G
- Console
When a router is bought brand new, none of its interfaces are configured with IP addresses, so we are unable to use SSH or Telnet to gain access to the internal terminal.
Our only option is to use the Console port which doesn't require any address to work (the Console port is always available for connection in case we misconfigure the router).
The console port jack varies from router to router. It can be any of:
- RJ-45
- Mini USB type B
- DB-25
- DB-9
IOX is an extension of the IOS which allows the router to run two separate operating systems at the same time: Cisco's IOS and a flavor of Linux called Yocto Linux.
Linux is split between two partitions:
- / - root filesystem ~400MB
- /software - partition unaffected by IOX or IOS reflash ~800MB
Cisco Terminal Basics
Cisco terminal runs in one of four modes which are presented in the following table:
| Terminal Mode | Access Method | Prompt | Exit Method | Linux Console Similarity |
|---|---|---|---|---|
| User EXEC | Enter into terminal | Router> |
Use logout command | Normal user |
| Privileged EXEC | From user EXEC mode, use the enable command | Router# |
Use disable command | Root user |
| Global configuration | From privileged EXEC mode, use the configure terminal command | Router(config)# |
Use end command | Root user who makes system changes |
| Localized configuration | From global configuration mode, use specific commands | Router(config-if)# Router(config-subif)# etc. |
Use exit command to return to global configurationUse end command to return to privileged EXEC mode | Root user who makes specific system changes |
There are 2 keys that help us find a command faster: *? (Question Mark) *TAB
Pressing ? shows current commands that can be executed by completing the current line and at the same time, the arguments we can pass to run that command.
Pressing TAB completes the current line with the only command/argument accepted (it works just like the TAB in Linux).
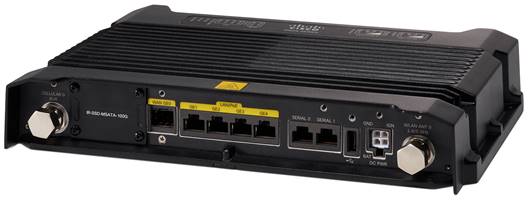
Connecting to the Cisco IR829GW Router
Requirements:
- Computer running Linux
- USB male-male cable (one end A - classic, the other mini B)
- Cisco IR829GW Router
######1. Connect the USB cable from the console port of the router to the computer.
######2. Open a Linux terminal window on the computer.
######3. To connect through console line to the Cisco Router we use the command
sudo screen /dev/ttyUSB1 9600
(The router boots slowly, so it will take a while from plugging it in to actually giving it commands.)
######4.We will reach a prompt IR800> which means that we successfully connected to the IOS console in user EXEC mode.
Starting Telnet on Cisco IR829GW Router
Requirements:
- Connection to IOS terminal through console cable
- 2 Ethernet RJ-45 cable
- DHCP server or home router with DHCP capabilities
######1. Connect one ethernet cable between the computer and the Cisco router (interface GE4).
######2. Connect the other ethernet cable between the DHCP capable device and the Cisco router (interface GE1).
######3. Give the following commands on the IOS terminal:
| Command | Purpose |
|---|---|
IR800> enable |
Get to privileged EXEC mode |
IR800# configure terminal |
Get to global configuration mode |
IR800(config)# interface vlan 100 |
Enter configuration mode for VLAN 100 |
IR800(config-if)# ip address dhcp |
Force the VLAN to take IP addresses from the DHCP capable device |
IR800(config-if)# ip nat outside |
Mark the interface as outgoing for our Linux |
IR800(config-if)# no shutdown |
Make sure the VLAN interface is up |
IR800(config-if)# exit |
Exit to global configuration mode |
IR800(config)# vlan 100 |
Make sure the VLAN is created |
IR800(config-vlan)# exit |
Exit to global configuration mode |
IR800(config)# interface giga1 |
Enter configuration mode for GigabitEthernet 1 |
IR800(config-if)# switchport mode access |
Force port in access mode (one VLAN through it) |
IR800(config-if)# switchport access vlan 100 |
When in access mode, the port will belong to VLAN 100 |
IR800(config-if)# no shutdown |
Make sure the interface is up |
IR800(config-if)# exit |
Exit to global configuration mode |
IR800(config)# interface giga4 |
Enter configuration mode for GigabitEthernet 4 |
IR800(config-if)# switchport mode access |
Force port in access mode (one VLAN through it) |
IR800(config-if)# switchport access vlan 100 |
When in access mode, the port will belong to VLAN 100 |
IR800(config-if)# no shutdown |
Make sure the interface is up |
IR800(config-if)# exit |
Exit to global configuration mode |
IR800(config)# line vty 0 4 |
Enter configuration mode for virtual lines 0 to 4 |
IR800(config-line)# transport input telnet |
Put Telnet as the protocol for connecting to these lines |
IR800(config-line)# password wyliodrin |
Telnet password |
IR800(config-line)# exit |
Exit to global configuration mode |
IR800(config)# enable secret wyliodrinPriv |
Password to access privileged EXEC mode |
IR800(config)# end |
Return to privileged EXEC mode |
IR800# show ip interface brief vlan100 |
Get the address assigned by DHCP |
Note: The address may not be immediately assigned, it usually takes around 30 seconds to one minute for the whole process to stabilize.
######4. On the computer enter in a terminal and write
telnet x.x.x.x              #where x.x.x.x is the IP on seen on the output of the last command
Password: wyliodrin         #telnet password, will not be visible when written

IR800> enable
Password: wyliodrinPriv     #privileged EXEC password, again not visible
IR800#
######5. We now successfully connected through Telnet to our router.
Connect to Yocto Linux's terminal
Requirements:
- Console connection to the Cisco Router
The Cisco Router has a special invisible port GigabitEthernet5 which is used solely for connection with Yocto Linux's ethernet interface.
######1. Give the following commands on the IOS terminal:
| Command | Purpose |
|---|---|
IR800> enable |
Get to privileged EXEC mode |
IR800# configure terminal |
Get to global configuration mode |
IR800(config)# interface giga5 |
Enter configuration mode for GigabitEthernet 5 |
IR800(config-if)# ip address 10.0.0.1 255.255.255.0 |
Put IP address on this interface |
IR800(config-if)# ipv6 enable |
Open IPv6 communication on this interface |
IR800(config-if)# ipv6 address auto |
Autoconfiguration of IPv6 address |
IR800(config-if)# no shutdown |
Make sure the interface is up |
IR800(config-if)# ip nat inside |
Mark the interface as incoming for our Linux |
IR800(config-if)# exit |
Exit to global configuration mode |
IR800(config)# ip dhcp pool LINUXPOOL |
Enter configuration mode for DHCP pool with name LINUXPOOL |
IR800(dhcp-config)# network 10.0.0.0 255.255.255.0 |
Network range for DHCP |
IR800(dhcp-config)# default-router 10.0.0.1 |
Address of the interface that routes the trafic |
IR800(dhcp-config)# dns 8.8.8.8 |
Take the Google's DNS address |
IR800(dhcp-config)# exit |
Exit to global configuration mode |
IR800(config)# ip nat inside source static 10.0.0.2 192.168.3.131 |
Enter configuration mode for Linux's line |
IR800(config)# line 1/4 |
Enter configuration mode for Linux's line |
IR800(config-line)# transport input all |
Permit connection through any method possible |
IR800(config-line)# end |
Return to privileged EXEC mode |
IR800# show iox host list detail |
Info about Linux's state |
Note: It may take a while for Linux to initialize, so if the last command does not give the expected output, repeat it several times.
When the command prints out OS: RUNNING then (ONLY THEN) activate SSH by using the following command:
| Command | Purpose |
|---|---|
IR800# iox host exec enablessh IR800 |
Activate SSH in Guest |
######2. We will connect to the Linux using a feature of the Cisco Router: Telneting to the interface GigabitEthernet 5 address on the port 2070 will open a terminal on Yocto Linux.
IR800# telnet 10.0.0.1 2070
######3. Input root as the username (there is no password set up).
######4. We successfully reached a Linux terminal prompt.
root@IR800-GOS-1:~#
######5. Add a password to be able to connect through SSH from another device using passwd command:
root@IR800-GOS-1:~# paswd
Changing password for root.
Enter new UNIX password:    #here type wyliodrin (it will be invisibile as you type)
Retype new UNIX password:   #wyliodrin again here