Setup Mode - WizBangCrash/esp-homekit-devices GitHub Wiki
When browsing to a device in setup mode you will be presented with a web page similar to the following:
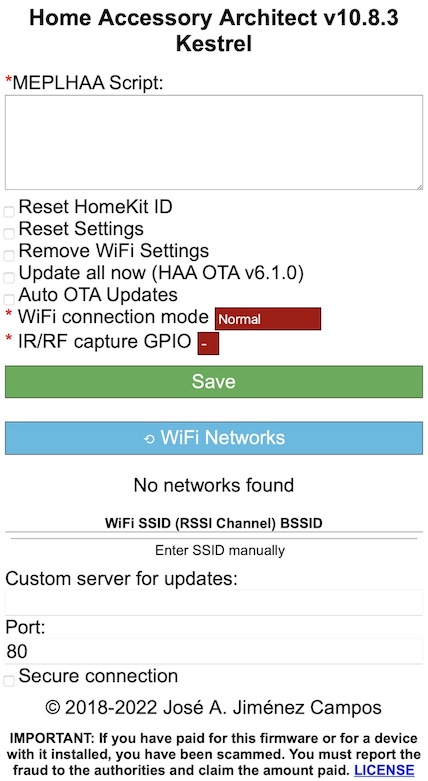
NOTE: "⟲ WiFi Networks" will search for & show a list of networks discoverable by your device
This mode is used to configure the device and you can perform the following:
- Reset HomeKit ID
- Remove WiFi Settings
- Update all now
- Auto OTA Updates
- Change WiFi Network
- Input / Edit JSON configuration string
- Custom server for updates
NOTE: If an invalid JSON string or no JSON string is detected during boot, the device will enter setup mode automatically.
Entering Setup Mode
To enter setup mode, you must quickly toggle any action switch/button 8 times (physical or from Home App). You can secure this method by declaring a time after device boot to perform it.
Additionally, you can declare a physical method to enter setup mode.
If the device's configured WiFi network is unavailable when entering setup mode
it will switch to AP mode and you will need to connect directly to it via the
generated SSID e.g. HAA-XXXXXX (where XXXXXX are the last six characters of
its Ethernet MAC address).
Emergency Setup Mode: If a device has its power cut or freezes within 3 seconds of boot, next time it boots it will go directly to setup mode.
Device Connection
If a device has been through initial configuration and is already configured for
a WiFi network then once it has entered setup mode it can be accessed using a
web browser by connecting to its IP address or HAA auto-configured hostname
e.g. http://192.168.1.45 or http://HAA-123BC7 (Note: some routers may
require you to use the .local domain http://HAA-123CB7.local or if you have
set your local domain then use this instead).
The Update all now & Auto OTA Updates options are only valid if you installed the initial firmware using the OTA method.
Change WiFi Network
The setup mode page presents a list of WiFi networks within range of the device.
The list can be refreshed by clicking the ⟲ WiFi Networks button. If you want
to change the network the device currently connects to on boot then select one
of the available networks and enter the network password when requested.
The WiFi connection mode button can be toggled between Normal and
Force BSSID. Choosing Normal will cause the device to connect to any network
with the selected SSID. Choosing Force BSSID will force the device to
connect to the WiFi network with the specified BSSID only i.e. if you have
range extenders in your house all with the same SSID you can use the
Force BSSID option to ensure the device only connects to a specific range
extender.
If your SSID is hidden then you can enter its details manually by clicking on the
Enter SSID manually button. You will then be prompted to enter an SSID and a
password. Make sure you enter both correctly.
Reconnecting to WiFi Network
If the WiFi network becomes unreachable, the device will continually retry its connection until it becomes available again.
Inputting Configuration
Device configuration is set by inputting a JSON configuration string into the
Setup Mode page. See the section on Configuration for details
on how to create the configuration string. Ideally you will have used something
like the haa-configurator tool being
developed by Maximilian Beck to create your configuration string and then
copy / paste into the JSON Config field.
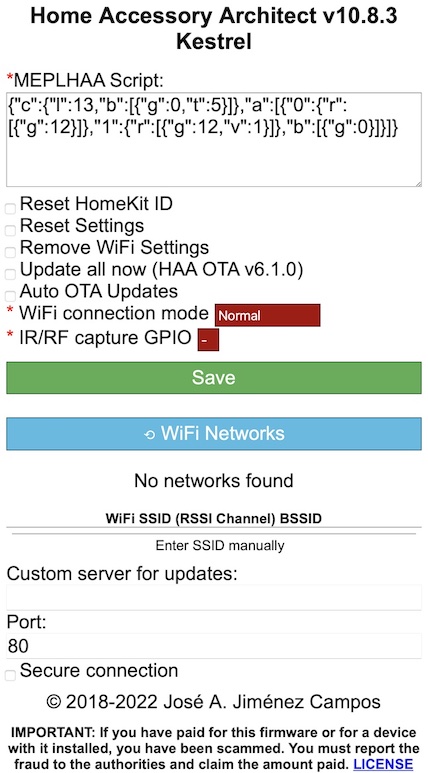
The above image shows Setup Mode with a configuration string entered and ready
for Save to be pressed.
Reset HomeKit ID
When you make edits to your JSON configuration that involve changes to the accessory type or number of used accessories you will have to remove & re-add your device from HomeKit and the Home App.
Setting this option will reset the HomeKit ID used by the device when you press
Save.
When making changes to a device that requires the HomeKit ID to be reset follow this procedure:
- Enter Setup Mode on the device
- Remove your device from the Home App
- Select
Reset HomeKit ID - Select
Save - Pair the device with your Home App again
Remove WiFi Settings
You can remove any currently saved WiFi settings by enabling the
Remove WiFi Settings option and then clicking Save.
The device will remove any previously stored SSID and password then reboot.
As no WiFi settings will be available on reboot the device will immediately
enter Setup Mode.
Update all now
A manual request for an OTA update can be performed by enabling the OTA Update
option and then clicking Save.
The device will then check the configured OTA repository for an updated firmware,
download it if available and then restart.
Auto OTA Updates
Enabling the Auto OTA Updates option causes the firmware to search for an OTA
update from the configured OTA repository every time the setup mode is selected and
the setup webpage has not been loaded in a browser within 90 seconds.
NOTE: The search is only performed if the original firmware was installed using the OTA procedure.
Custom server for updates
By default a device flashed with the OTA version of HAA will retrieve its firmware updates from the RavenSystem/haa GitHub account.
Since HAA OTA v3.0.0 the option has been available for the device to retrieve its firmware files from a web server of your choice (local or remote) instead of using the GitHub server.
In order to use your own web server the Custom server for updates and Port
fields need to be filled in with details of the URL to retrieve the files from.
You also have the option of selecting a secure connection.
When using either the Update all now & Auto OTA Updates the device will attempt to retrieve its firmware updates from the custom server if specified or GitHub if these fields are left blank.
Firmware can also be downgraded by placing an older copy of the files on your web server.
NOTE: Since HHABoot v3.0.0 the firmware files must be signed and verified with a hardcoded public key.
Saving Changes
Clicking Save will save any changes you have made while in setup mode,
apply them and reboot the device to use them.