Beginner Guide - WittleWolfie/OwlcatModdingWiki GitHub Wiki
Modding Kingmaker and Wrath uses .dll libraries written in the C# programming language.
If you are unfamiliar with programming or C# take a look at some tutorials: Recommended and Official Microsoft.
As an alternative to UMM for Wrath you can also use Owlcat's Wrath Modification Template. This allows you to accomplish some changes by editing text files, but most mods still require programming. This page assumes you are using UMM though the information may also be applicable to the template.
Modding Workflow:
- Inspect the game code with a decompiler such as dotPeak, ILSpy or dnSpy
- Create a C# library that modifies the game code with your desired changes
- Unity Mod Manager (UMM) loads your library
- Harmony can modify the game code behavior directly
Note Any 2.* version of Harmony works. If you already have UMM installed you can use the Harmony DLL it comes with. Otherwise you can download it directly.
Internally game mechanics are represented using blueprints. Understanding how they work is key to modifying mechanics such as classes, spells, dialogues, items, and more. Note that the section on blueprints is written for Wrath, but the general structure applies to Kingmaker as well.

For Kingmaker:
- Blueprint Dump
- Data Viewer allows searching blueprints in game
For Wrath:
- BubblePrints is recommended for out-of-game viewing. It provides fast and easy searching of blueprints and is regularly updated with new functionality.
- Data Viewer is recommended for in-game viewing. This is particularly useful when validating your mod.
- Blueprints are provided in the
blueprints.zipfile in the game directory - A blueprint dump is pinned in
#mod-dev-technicalon Discord
This covers the setup for modding with minimal dependencies but doesn't explain much about making changes in the game.
If you're okay using a modding library, skip the rest of this tutorial and go through Getting Started with BlueprintCore.
That tutorial uses template based project setup and step-by-step instructions for creating complex feats. You will learn more about how the game works and how to approach modding. However, the tutorial requires the use of the BPCore library so if you do not want to rely on it then you should continue with this tutorial.
- Download and install Microsoft Visual Studio Community with C# - This tutorial uses 2019 so if you are not confident to translate the tutorial instructions to a newer version, please stick with 2019 - Download it here
- Create a new project using the Class Library template
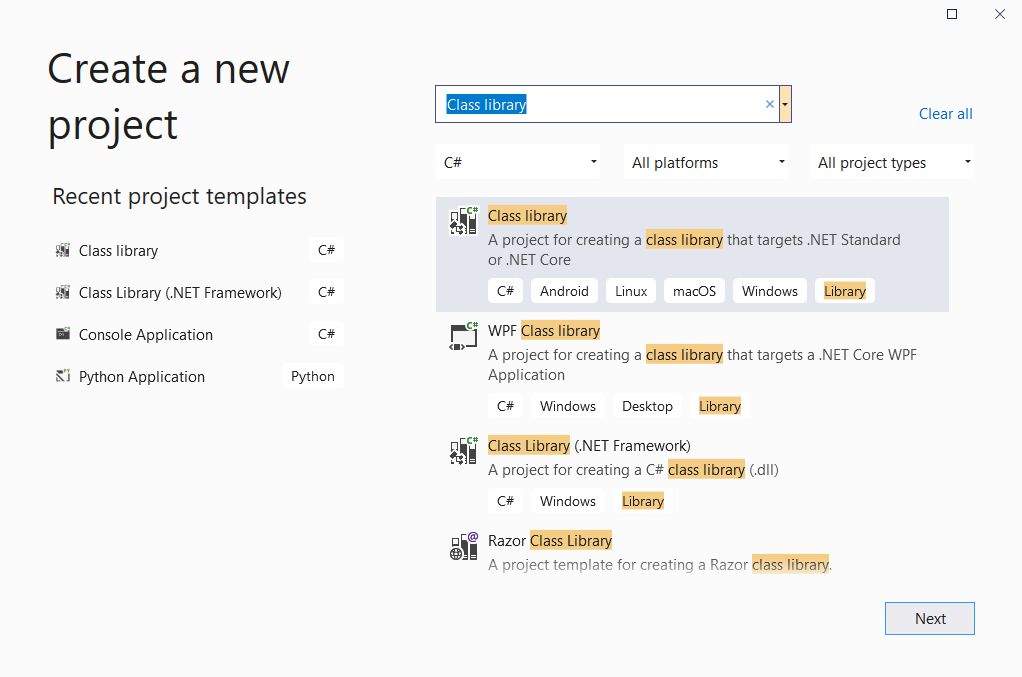
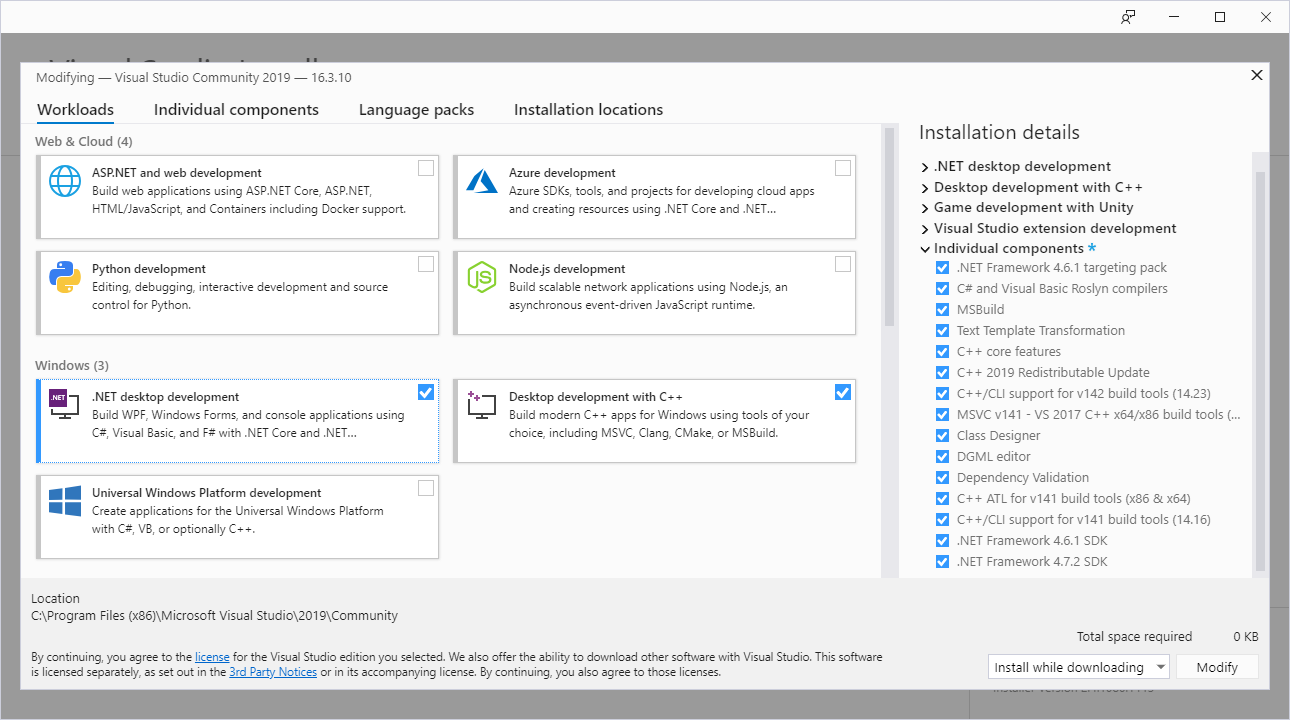
- If Class Library isn't available make sure the .NET tools are installed:
- Select
Get Tools and Features...in the tools menu - Install the .NET tools
- Select
- You can use Class Library (.NET Framework) but it uses older deprecated syntax. If you use the Wrath Modification Template the automatically generated project uses the old style syntax. You can use it as is or create a new project to replace the generated project.
- If Class Library isn't available make sure the .NET tools are installed:
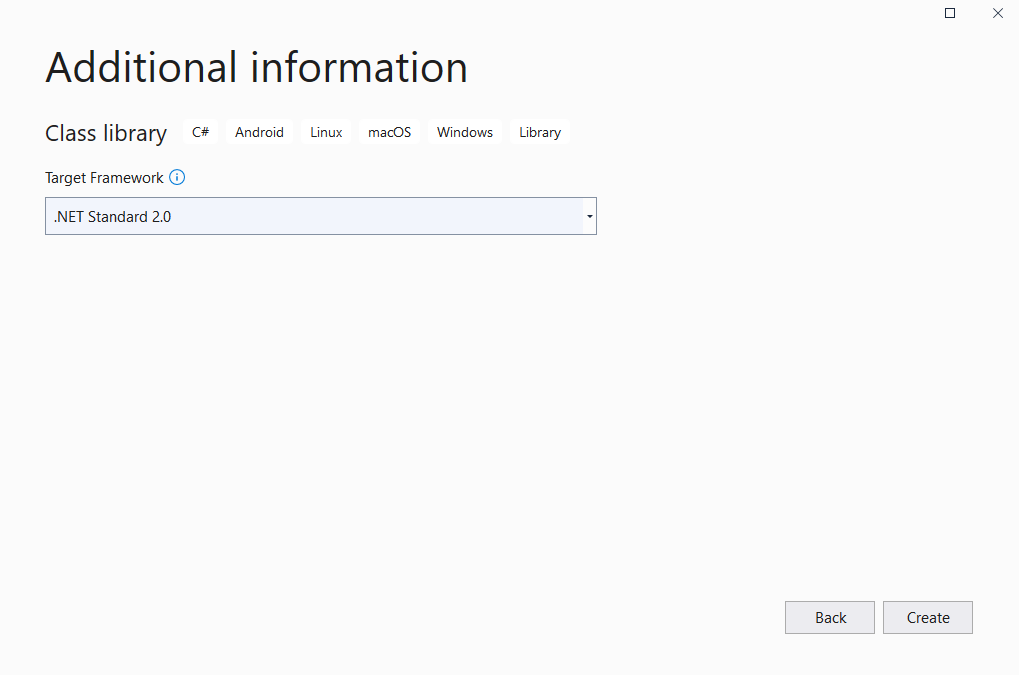
- The .NET Framework version required will not show as an option so just select the default for now.
- Your project should now look like this.
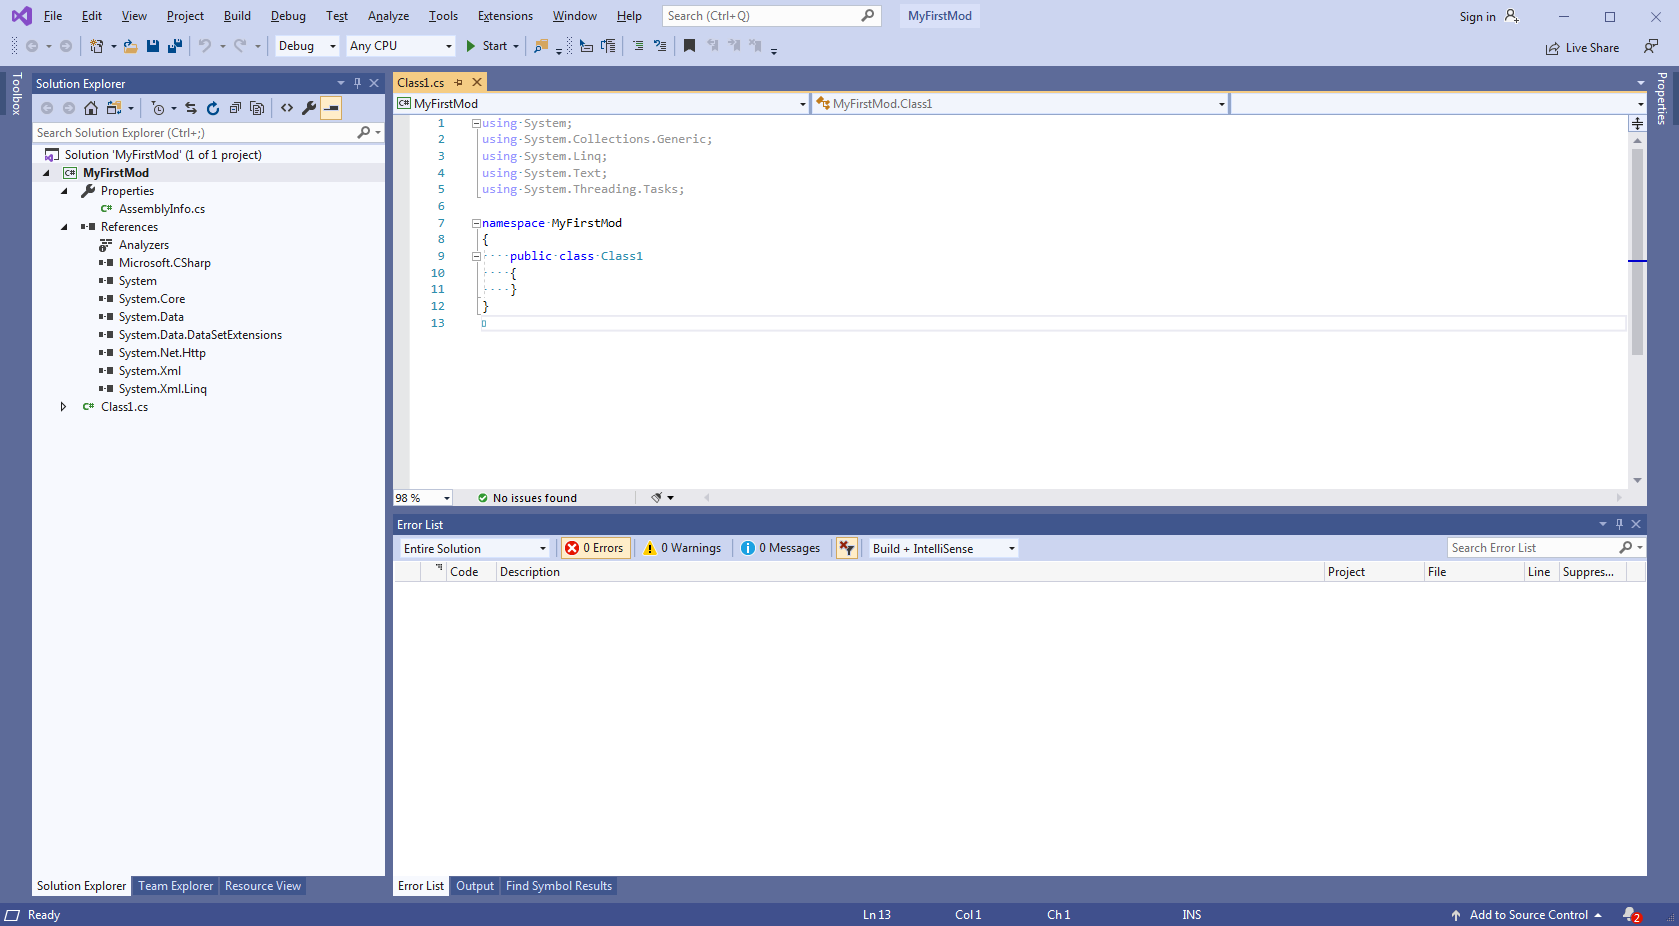
- Double click on MyFirstMod to edit the project file
- Replace
with
<TargetFramework>netstandard2.0</TargetFramework>
<LangVersion>latest</LangVersion>
<!-- Set to net46 for Kingmaker -->
<TargetFramework>net472</TargetFramework>
- This configures the .NET Framework version correctly and enables the latest C# language features
- Replace
- Rename Class1.cs to Main.cs
- Right click the project in the solution explorer, select properties, navigate to the build pane. By default, the project is in the debug configuration. Set the debug output path to
bin\Debug\MyFirstMod\, then change the active configuration to release and then set the release output path tobin\Release\MyFirstMod\.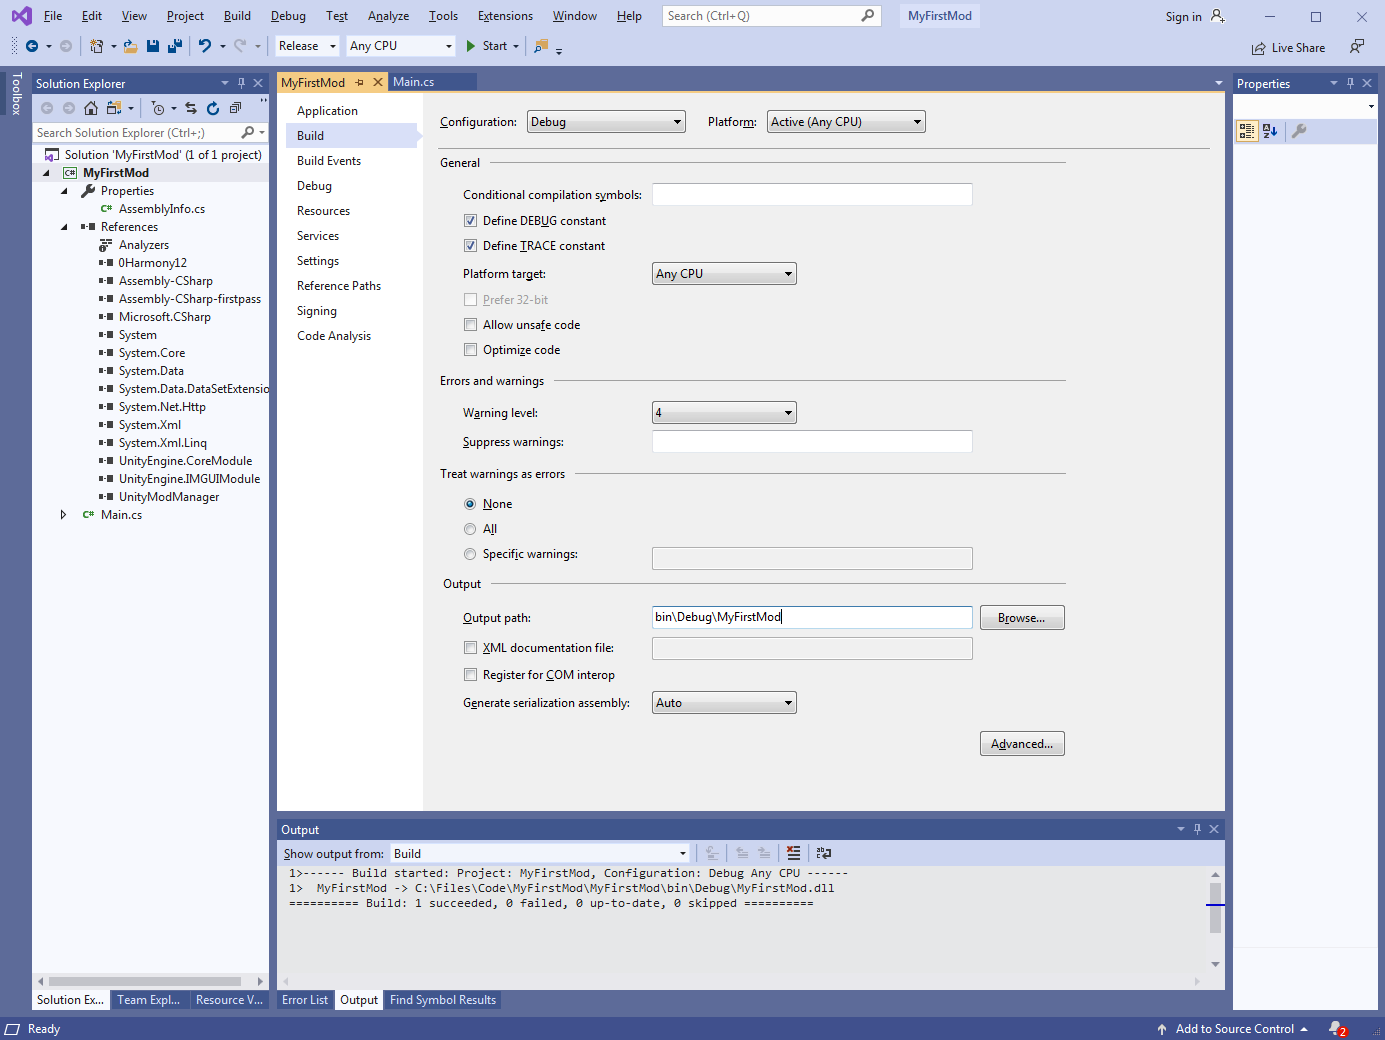
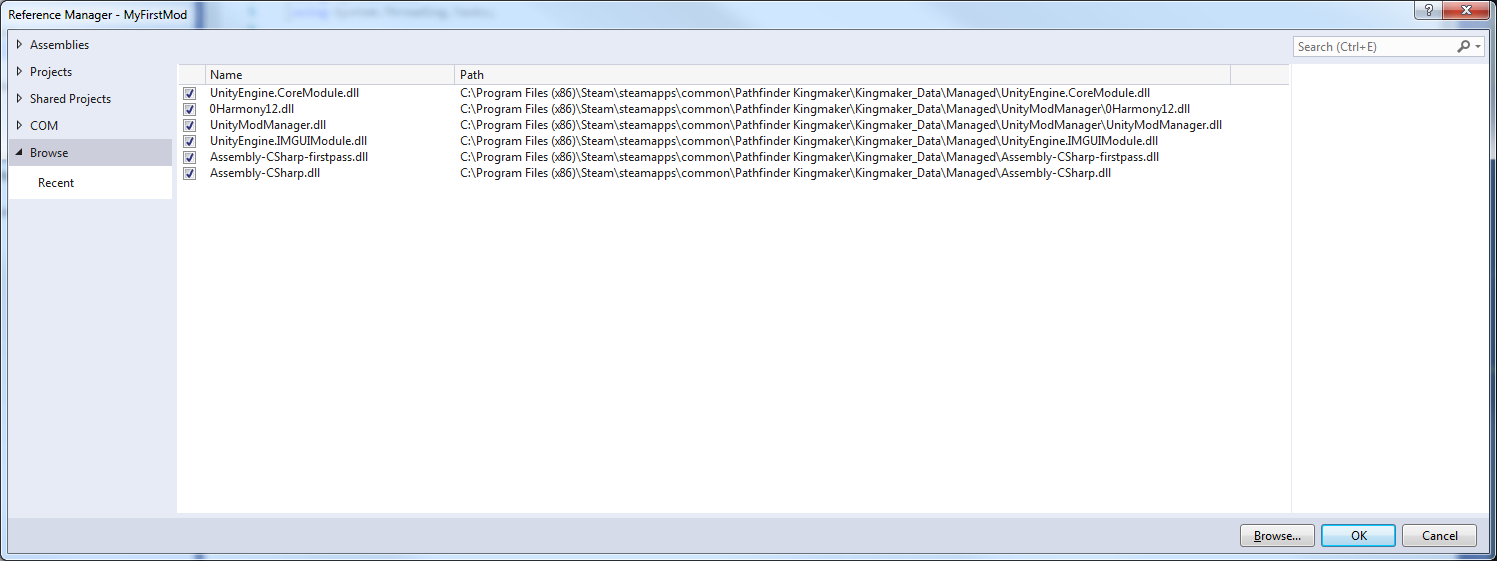
- Right click Dependencies and select add References. Then select browse, navigate to the game folder and add the displayed references.
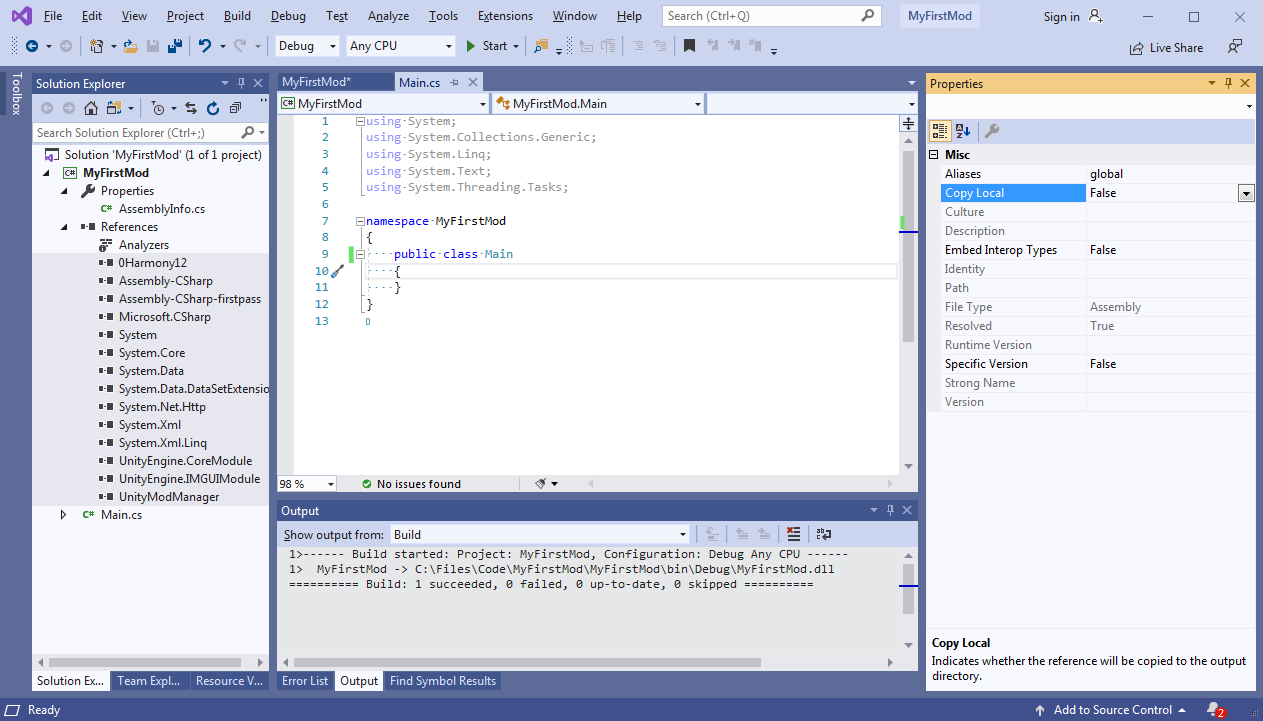
- The project should now look like this. Select all the project references, right click properties, and set Copy Local to False.
- We now set the contents of Main.cs with our code to initialize the mod after Unity Mod Manager loads it.
using UnityEngine;
using UnityModManagerNet;
using UnityEngine.UI;
using HarmonyLib;

namespace MyFirstMod
{
    static class Main
    {
        public static bool Enabled;

        static bool Load(UnityModManager.ModEntry modEntry)
        {
            modEntry.OnToggle = OnToggle;
            return true;
        }

        static bool OnToggle(UnityModManager.ModEntry modEntry, bool value)
        {
            Enabled = value;
            return true;
        }
    }
}- We then create our information file, which lets Unity Mod Manager know how to load and manage our mod. Right click the project, select
Addand thenNew Itemand create a text file namedInfo.json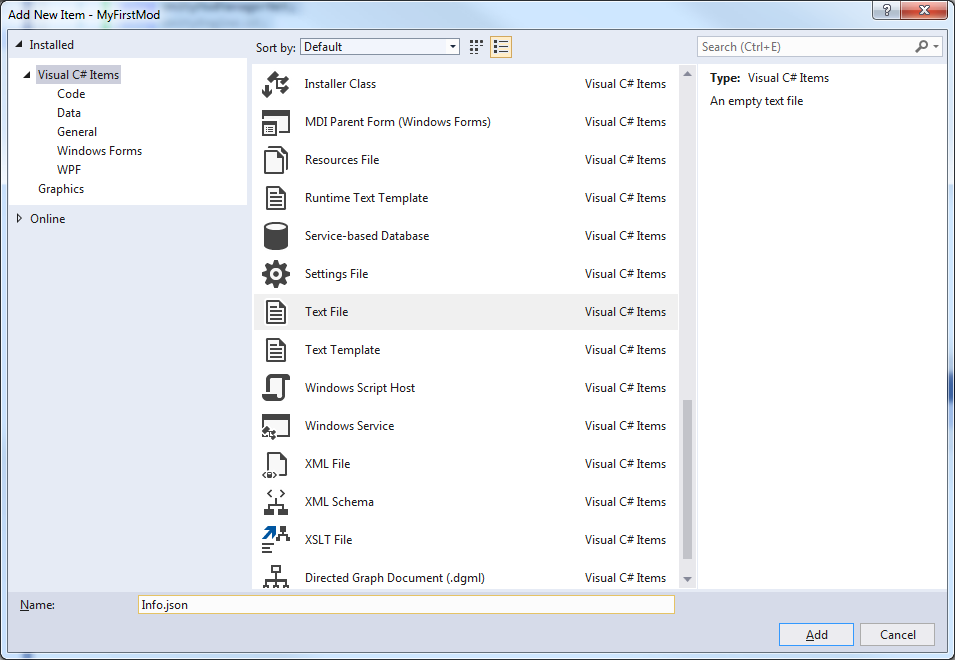
Set the contents to
{
  "Id": "MyFirstMod",
  "DisplayName": "My First Mod",
  "Author": "username",
  "Version": "1.0.0",
  "ManagerVersion": "0.21.3",
  "Requirements": [],
  "AssemblyName": "MyFirstMod.dll",
  "EntryMethod": "MyFirstMod.Main.Load"
}
and then right click the file, select properties, and then enable Copy if newer 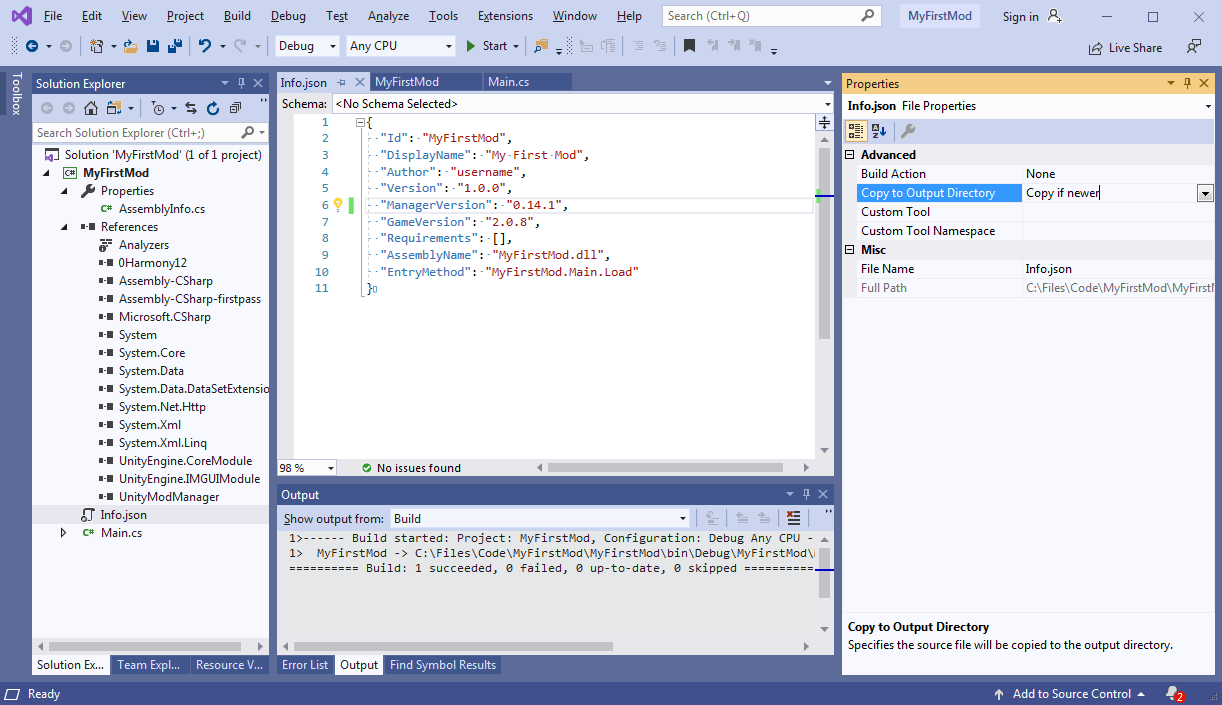
-
Build with mod with
ctrl+bor selectBuild MyFirstModunder the build menu. This will create a .dll file in your project's bin directory.MyFirstMod\bin\Debug\MyFirstMod.dllwhen build in debug configuration andMyFirstMod\bin\Release\MyFirstMod.dllwhen built in release configuration. -
Copy the files (MyFirstMod.dll and Info.json) to
C:\Program Files (x86)\Steam\steamapps\common\Pathfinder Kingmaker\Mods\MyFirstModto install. -
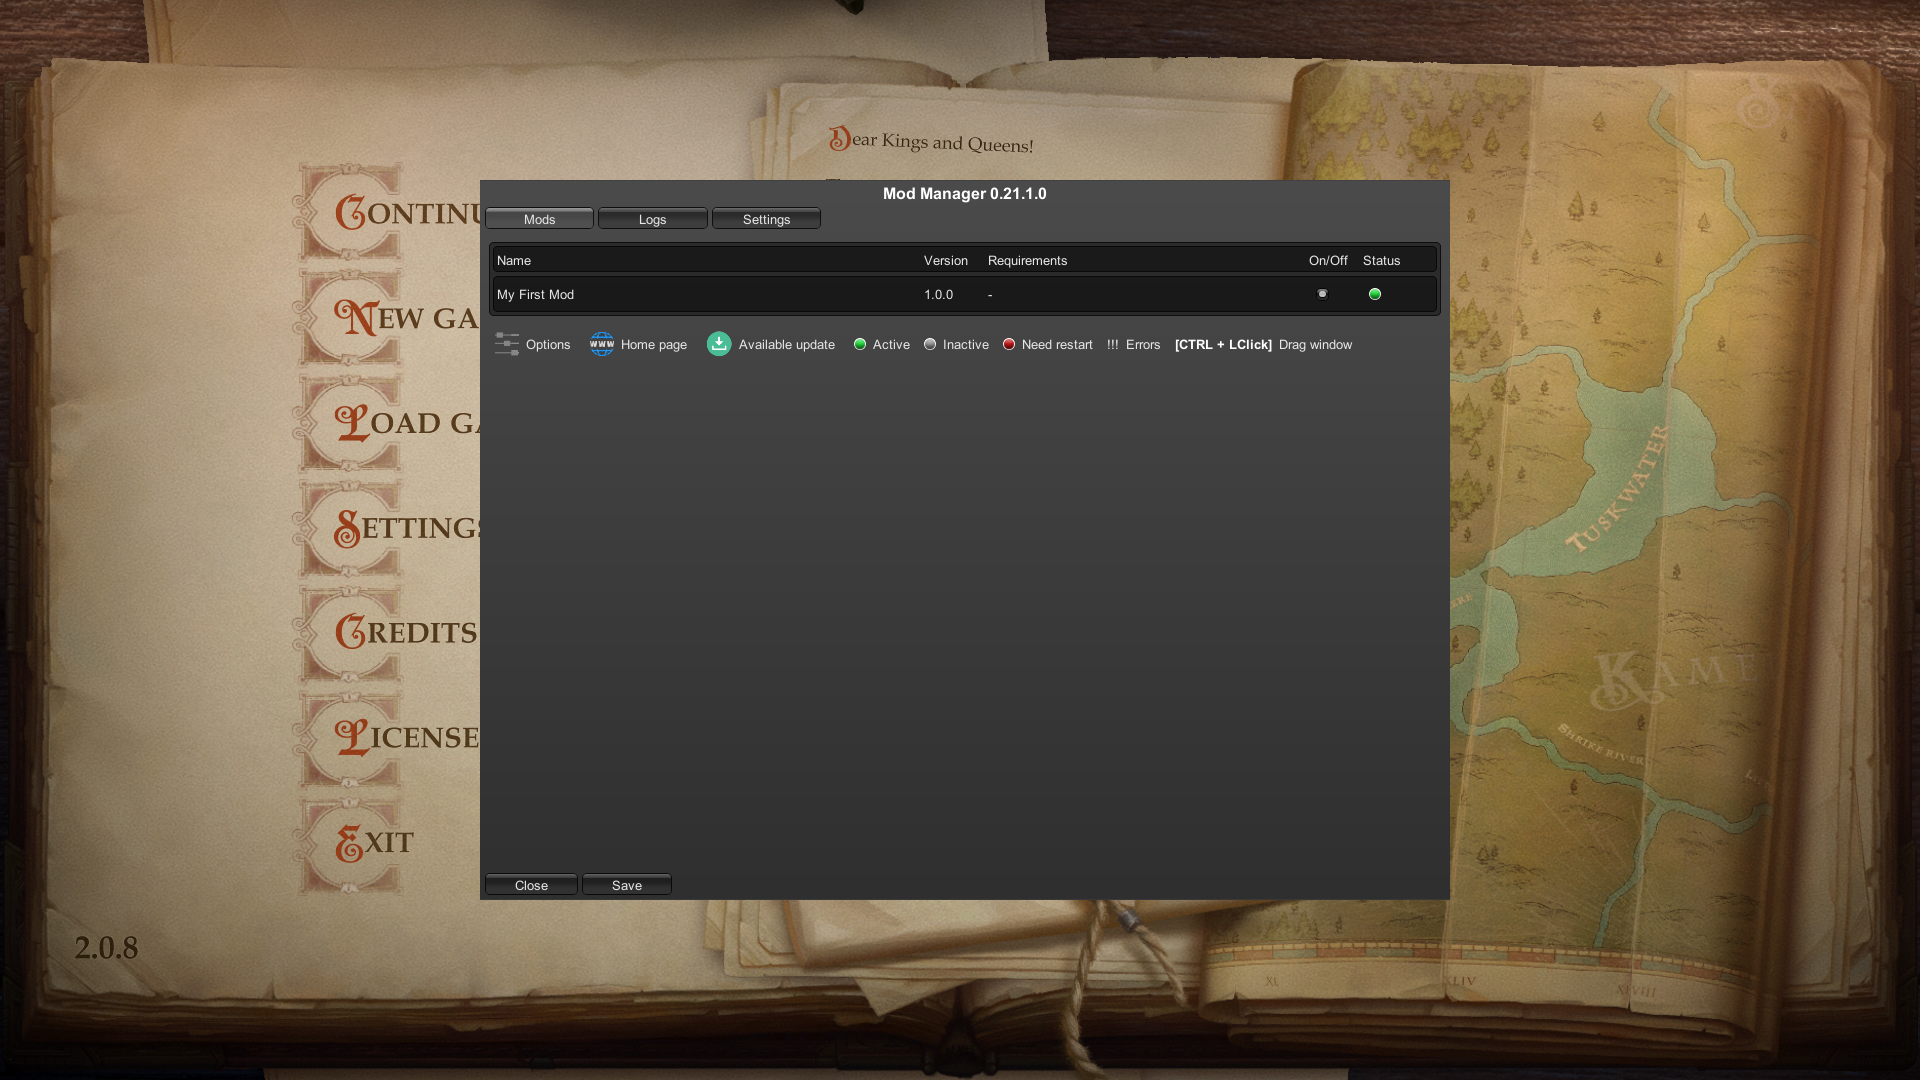
The mod should now show up in the Unity Mod Manager screen at start up.
-
Create a new class called
Settings.csusing UnityModManagerNet; namespace MyFirstMod { public class Settings : UnityModManager.ModSettings { public float MyFloatOption = 2f; public bool MyBoolOption = true; public string MyTextOption = "Hello"; public override void Save(UnityModManager.ModEntry modEntry) { Save(this, modEntry); } } }
-
Add a new
OnGuimethod to draw your settingsusing UnityEngine; using UnityModManagerNet; using UnityEngine.UI; using HarmonyLib; namespace MyFirstMod { static class Main { public static Settings Settings; public static bool Enabled; static bool Load(UnityModManager.ModEntry modEntry) { Settings = Settings.Load<Settings>(modEntry); modEntry.OnToggle = OnToggle; modEntry.OnGUI = OnGUI; modEntry.OnSaveGUI = OnSaveGUI; return true; } static bool OnToggle(UnityModManager.ModEntry modEntry, bool value) { Enabled = value; return true; } static void OnGUI(UnityModManager.ModEntry modEntry) { GUILayout.BeginHorizontal(); GUILayout.Label("MyFloatOption", GUILayout.ExpandWidth(false)); GUILayout.Space(10); Settings.MyFloatOption = GUILayout.HorizontalSlider(Settings.MyFloatOption, 1f, 10f, GUILayout.Width(300f)); GUILayout.Label($" {Settings.MyFloatOption:p0}", GUILayout.ExpandWidth(false)); GUILayout.EndHorizontal(); GUILayout.BeginHorizontal(); GUILayout.Label("MyBoolOption", GUILayout.ExpandWidth(false)); GUILayout.Space(10); Settings.MyBoolOption = GUILayout.Toggle(Settings.MyBoolOption, $" {Settings.MyBoolOption}", GUILayout.ExpandWidth(false)); GUILayout.EndHorizontal(); GUILayout.BeginHorizontal(); GUILayout.Label("MyTextOption", GUILayout.ExpandWidth(false)); GUILayout.Space(10); Settings.MyTextOption = GUILayout.TextField(Settings.MyTextOption, GUILayout.Width(300f)); GUILayout.EndHorizontal(); } static void OnSaveGUI(UnityModManager.ModEntry modEntry) { Settings.Save(modEntry); } } }
Harmony patches allow us to change the behavior of methods. As an example, we will patch the game to change the cost of mercenaries. In order to patch a method, we need to know how it is defined, so we start by opening the game assembly (C:\Program Files (x86)\Steam\steamapps\common\Pathfinder Kingmaker\Kingmaker_Data\Managed\Assembly-CSharp.dll) in DnSpy. We then need to find out where the behavior we wish to modify is defined, so a good way of doing that is opening the search menu (ctrl+shift+k) and trying keywords that seem relevant. In this case CustomCompanion Cost brings up the method we wish to change. 
Now we can create a patch to change the behavior. There are three kinds of patches, Prefix patches that run before the original method, Postfix patches that run after the original method, and Transpiler patches which modify the the method's IL (intermediate language, a kind of high level assembly) directly. Postfix patches can choose to prevent the original method, and other patches from running, so they may cause compatibility issues with other mods if they prevent their patches from running.
In this case, we will use a postfix patch to set half the cost of the gold.
The simplest way of using harmony is to call the PatchAll method, which scans the mod for any harmony patches, and applies them.
using UnityModManagerNet;
using HarmonyLib;
namespace MyFirstMod
{
    static class Main
    {
        public static bool Enabled;

        static bool Load(UnityModManager.ModEntry modEntry)
        {
            modEntry.OnToggle = OnToggle;
            var harmony = new Harmony(modEntry.Info.Id);
            harmony.PatchAll(Assembly.GetExecutingAssembly());
            return true;
        }
        static bool OnToggle(UnityModManager.ModEntry modEntry, bool value)
        {
            Enabled = value;
            return true;
        }
    }
}
For the patch itself, patches can be located in any file in the mod.
using Kingmaker;
using HarmonyLib;

namespace MyFirstMod
{
    //HarmonyPatch attribute allows PatchAll to find the patch
    [HarmonyPatch(typeof(Player), "GetCustomCompanionCost")]
    static class Player_GetCustomCompanionCost_Patch
    {
        //Postfix must be spelt correctly to be applied
        static void Postfix(ref int __result)
        {
            if(!Main.Enabled) return;
            // Harmony parameters are determined by name, __result
            // is the current cost of the mercenary. Because it is a
            // ref parameter, we can modify it's value
            __result = __result / 2;
        }
    }
}
Blueprints are the main way that mechanical data is stored. They are containers that contain data for features such as character classes, races, items, abilities, dialogs, NPCs, AI and many more. As an example of modifying blueprints, we will enable Goblins as a playable race.
The first step is to find out where playable races are stored. One way is to search the json blueprints for references to a race until we find something promising. 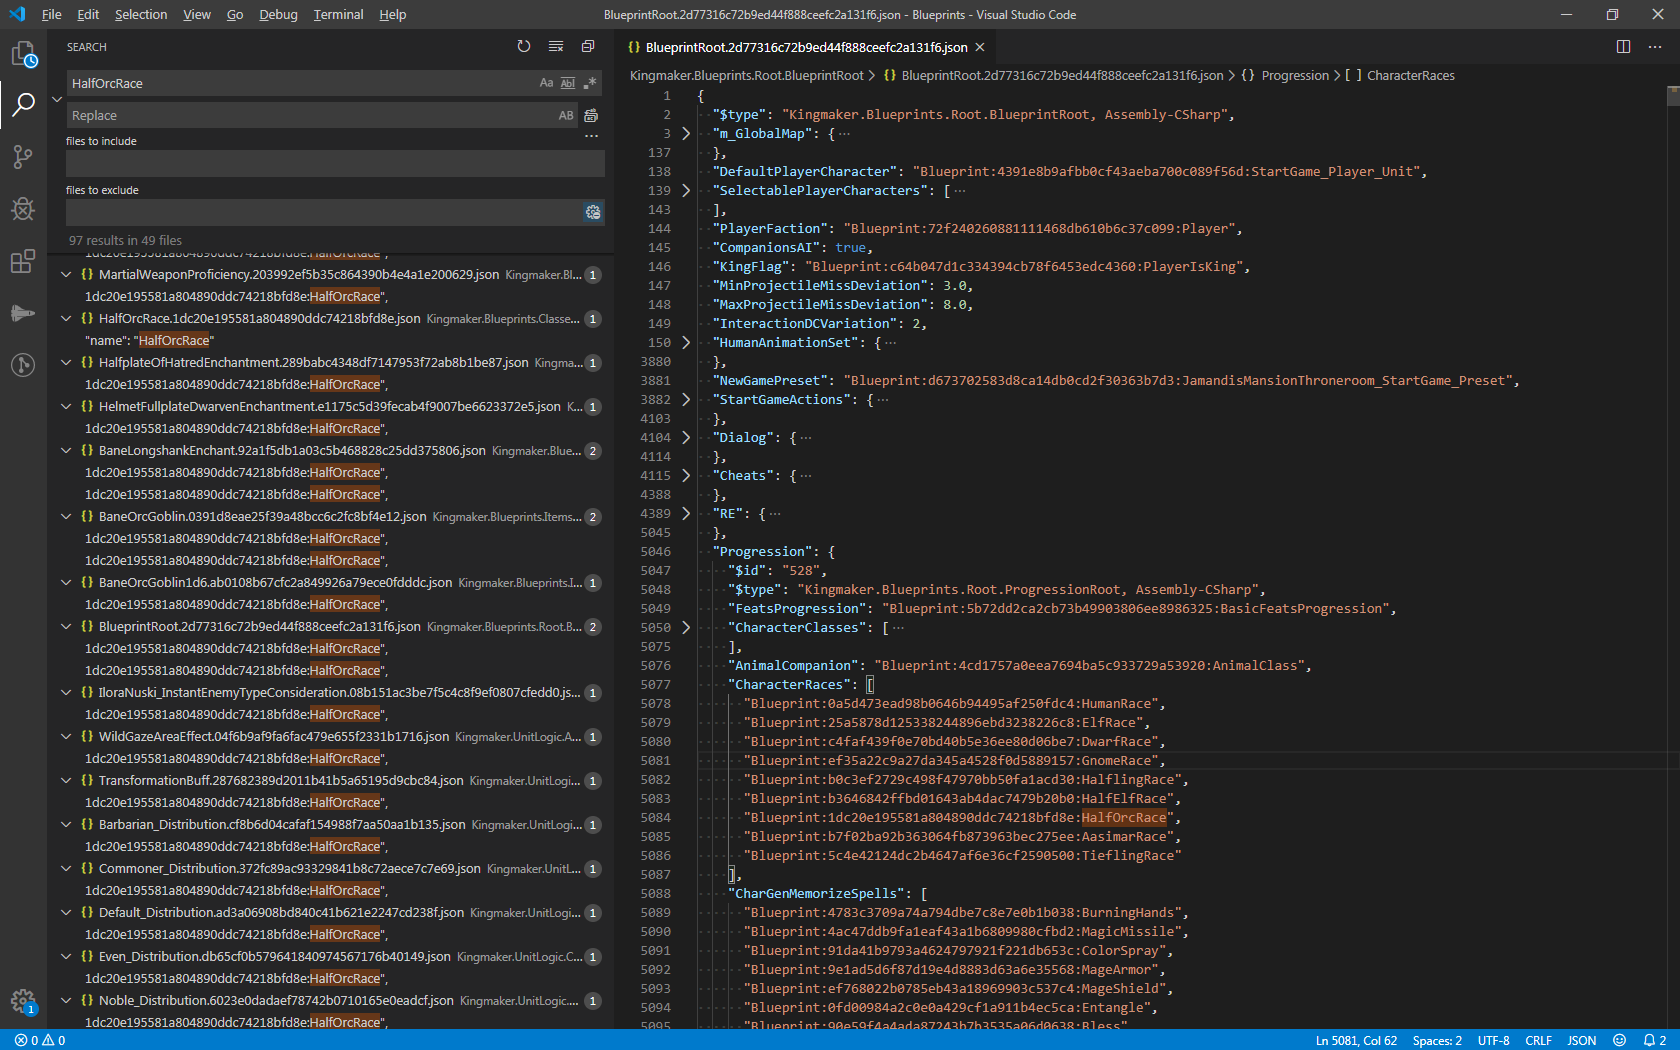
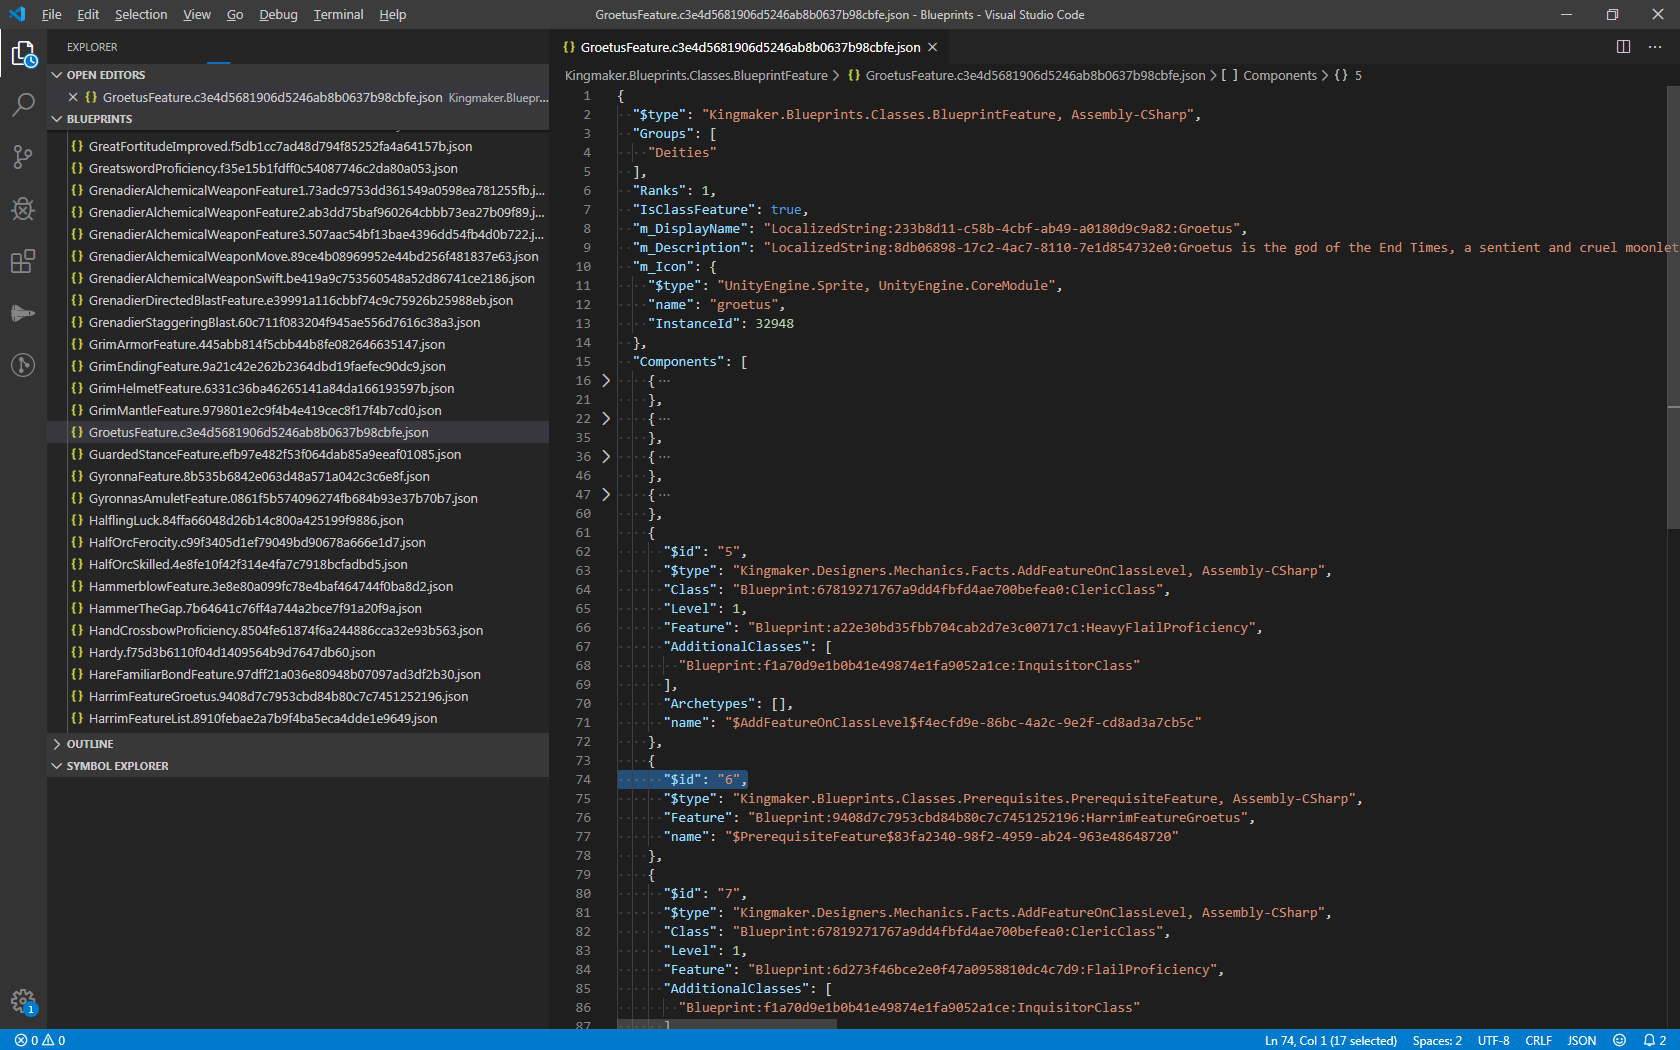
As an example of modifying blueprints, we will allow Groetus to be selected as a deity for divine casters other then Harrim. The first step is to find the Groetus blueprint in the json blueprint dump. Any reasonable text editor will do, but we'll use vscode for the example. vscode can search filenames with ctrl+p and file contents with ctrl+shift+f. Search Groetus should bring up the file GroetusFeature.c3e4d5681906d5246ab8b0637b98cbfe.json.
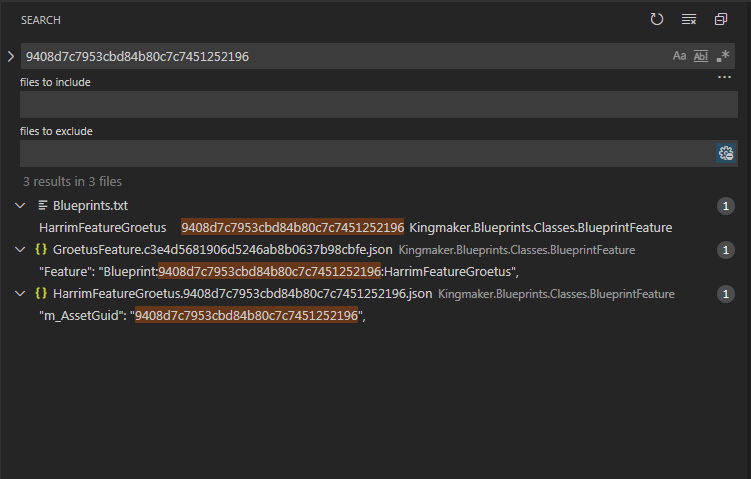
After inspecting the GroetusFeature blueprint, we can see the reason why Groetus is not selectable by other characters is because the blueprint has a PrerequisiteFeature requirement that the character have the HarrimFeatureGroetus blueprint. If we search the file contents for 9408d7c7953cbd84b80c7c7451252196 (the HarrimFeatureGroetus assetGuid) we can see that it isn't referenced by any other blueprints except for the Groeutus blueprint
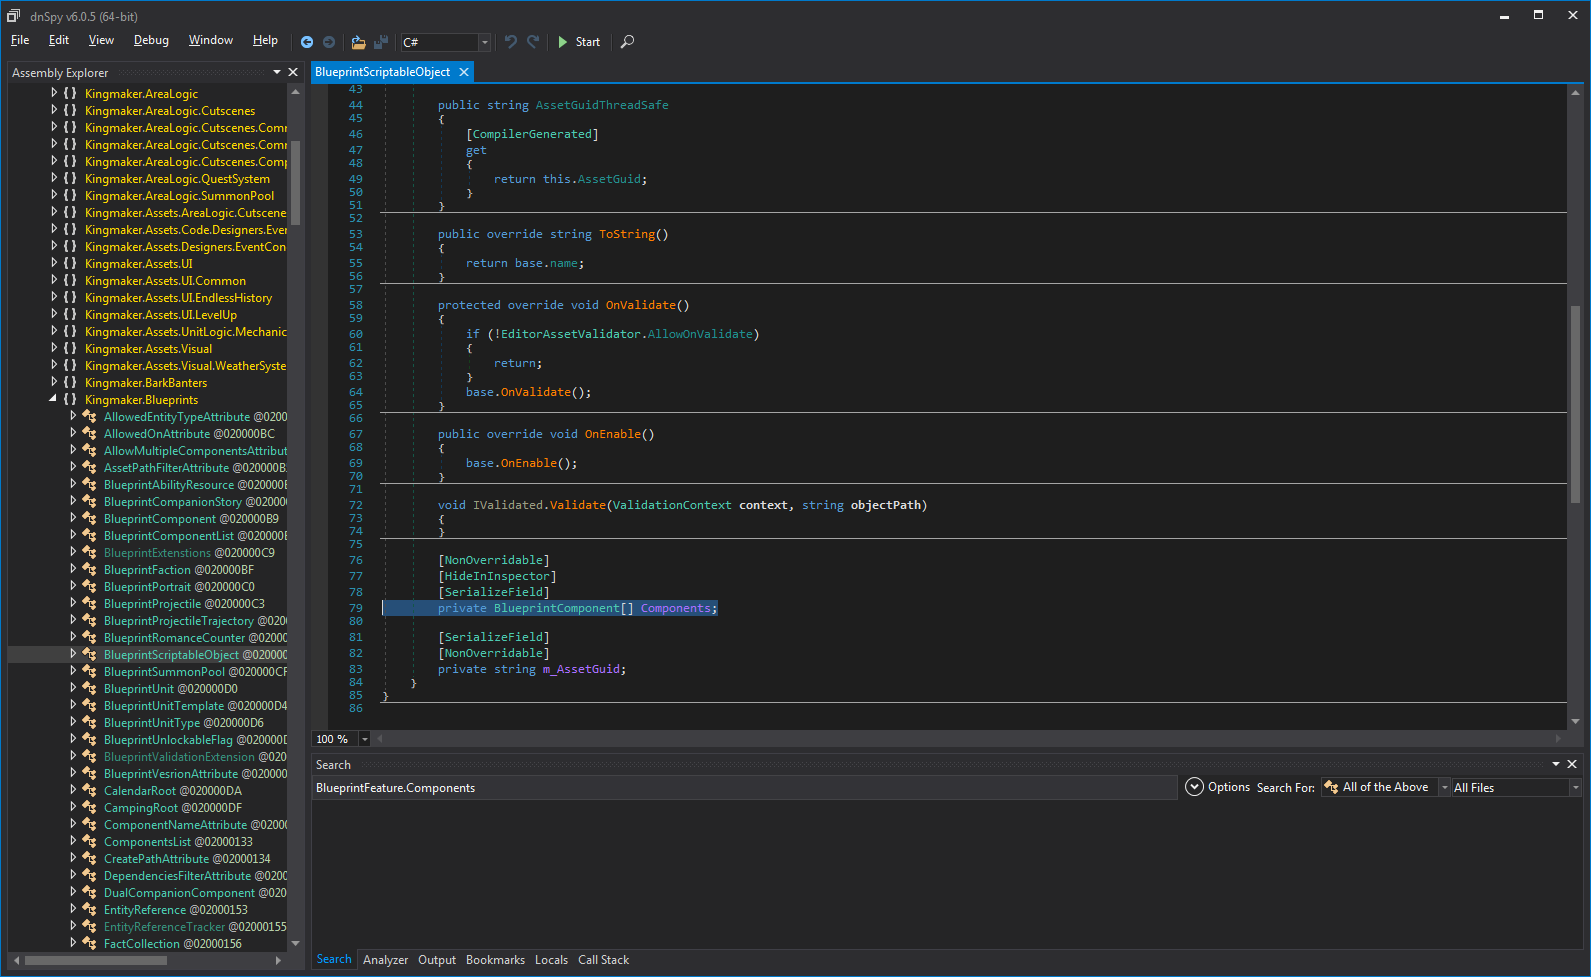
We need to modify the GroetusFeature's Components list to remove the prerequisite. As GroetusFeature is a kind of BlueprintFeature, If we take a look at BlueprintFeature in DnSpy we can see that it does not contain a field named Components. We can click on the parent class BlueprintFeatureBase, and after doing that a few times, we finally find out that Components is a field of theBlueprintScriptableObject class.
Now that we know what we need to do, we can start modifying the blueprints
using UnityModManagerNet;
using Kingmaker.Blueprints;
using Kingmaker.Blueprints.Classes;
using System.Linq;
using Kingmaker.Blueprints.Classes.Prerequisites;
using HarmonyLib;

namespace MyFirstMod
{
    static class Main
    {
        public static bool Enabled;

        static bool Load(UnityModManager.ModEntry modEntry)
        {
            var harmony = new Harmony(modEntry.Info.Id);
            harmony.PatchAll(Assembly.GetExecutingAssembly());
            return true;
        }

        static bool OnToggle(UnityModManager.ModEntry modEntry, bool value)
        {
            Enabled = value;
            return true;
        }

        /// <summary>
        /// We cannot modify blueprints until after the game has loaded them, we patch
        /// LibraryScriptableObject.LoadDictionary to be able to make our modifications as
        /// soon as the blueprints have loaded.
        /// </summary>
        [HarmonyPatch(typeof(LibraryScriptableObject), "LoadDictionary")]
        static class LibraryScriptableObject_LoadDictionary_Patch
        {
            static bool loaded = false;
            static void Postfix()
            {
                if (loaded) return;
                loaded = true;

                var groetusFeature = ResourcesLibrary.TryGetBlueprint<BlueprintFeature>("c3e4d5681906d5246ab8b0637b98cbfe");
                groetusFeature.ComponentsArray = groetusFeature.ComponentsArray
                    .Where(c => !(c is PrerequisiteFeature))
                    .ToArray();
            }
        }
    }
}In Wrath LibraryScriptableObject no longer exists. Instead the main entry point is BlueprintsCache#Init():
/// <summary>
/// We cannot modify blueprints until after the game has loaded them. We patch BlueprintsCache.Init
/// to initialize our modifications as soon as the game blueprints have loaded.
/// </summary>
[HarmonyPatch(typeof(BlueprintsCache))]
static class BlueprintsCache_Patches
{
    static bool loaded = false;

    [HarmonyPatch(nameof(BlueprintsCache.Init)), HarmonyPostfix]
    static void Postfix()
    {
        if (loaded) return;
        loaded = true;

        var groetusFeature = ResourcesLibrary.TryGetBlueprint<BlueprintFeature>("c3e4d5681906d5246ab8b0637b98cbfe");
        groetusFeature.ComponentsArray = groetusFeature.ComponentsArray
            .Where(c => !(c is PrerequisiteFeature))
            .ToArray();
    }
}