Batch Uploading from a CSV - UVicLibrary/Vault GitHub Wiki
Cheatsheet (Jump to)
- Download the Template - Dashboard > Cdm Migrator (dropdown) > Csv Batch Uploader > template > [Save as a .csv file]
- Filling out the CSV
- Notes for Developers
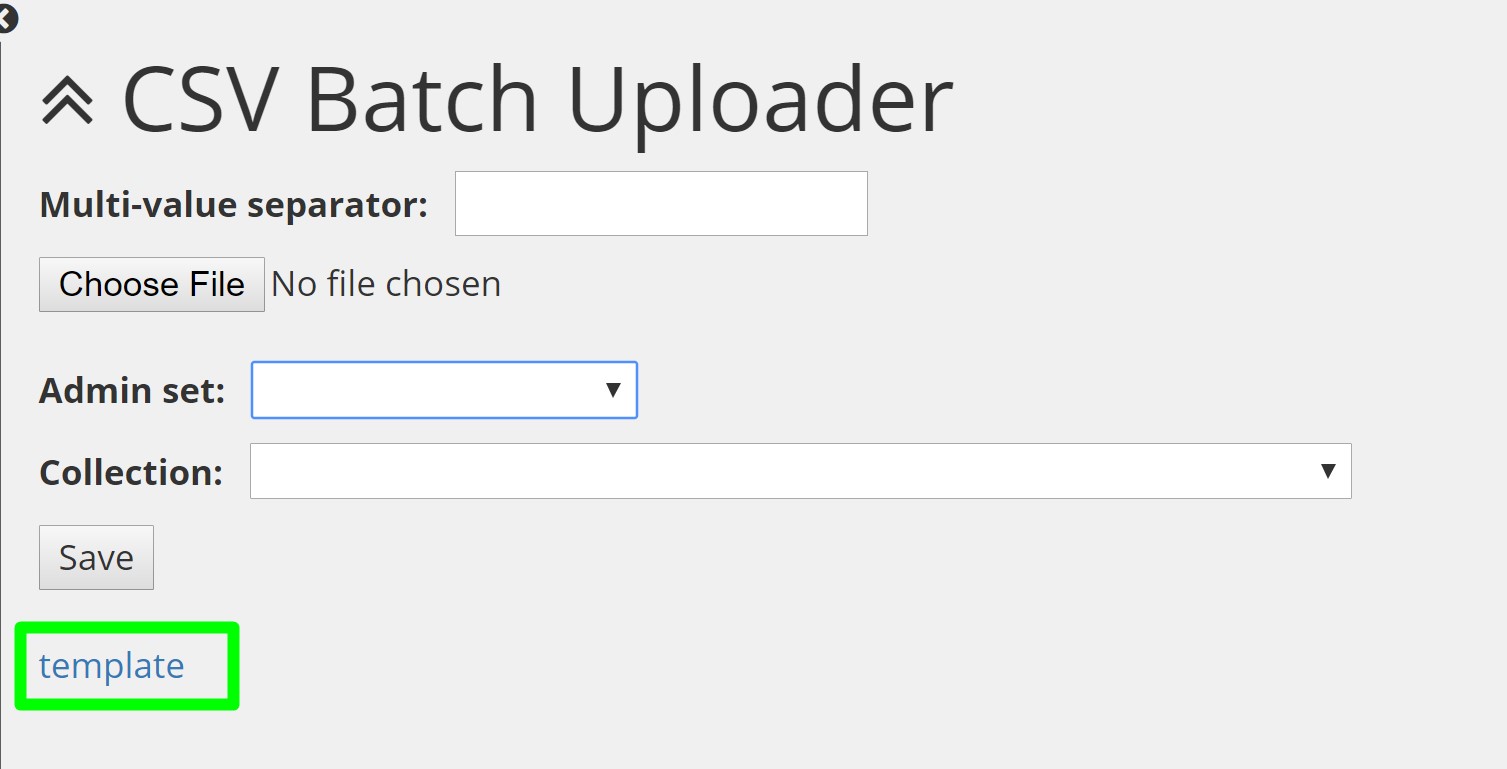
Download the Template
Go to the dashboard and click on/expand the Cdm Migrator dropdown, then click Csv Batch Uploader. On this page, click the template link under the Save button.
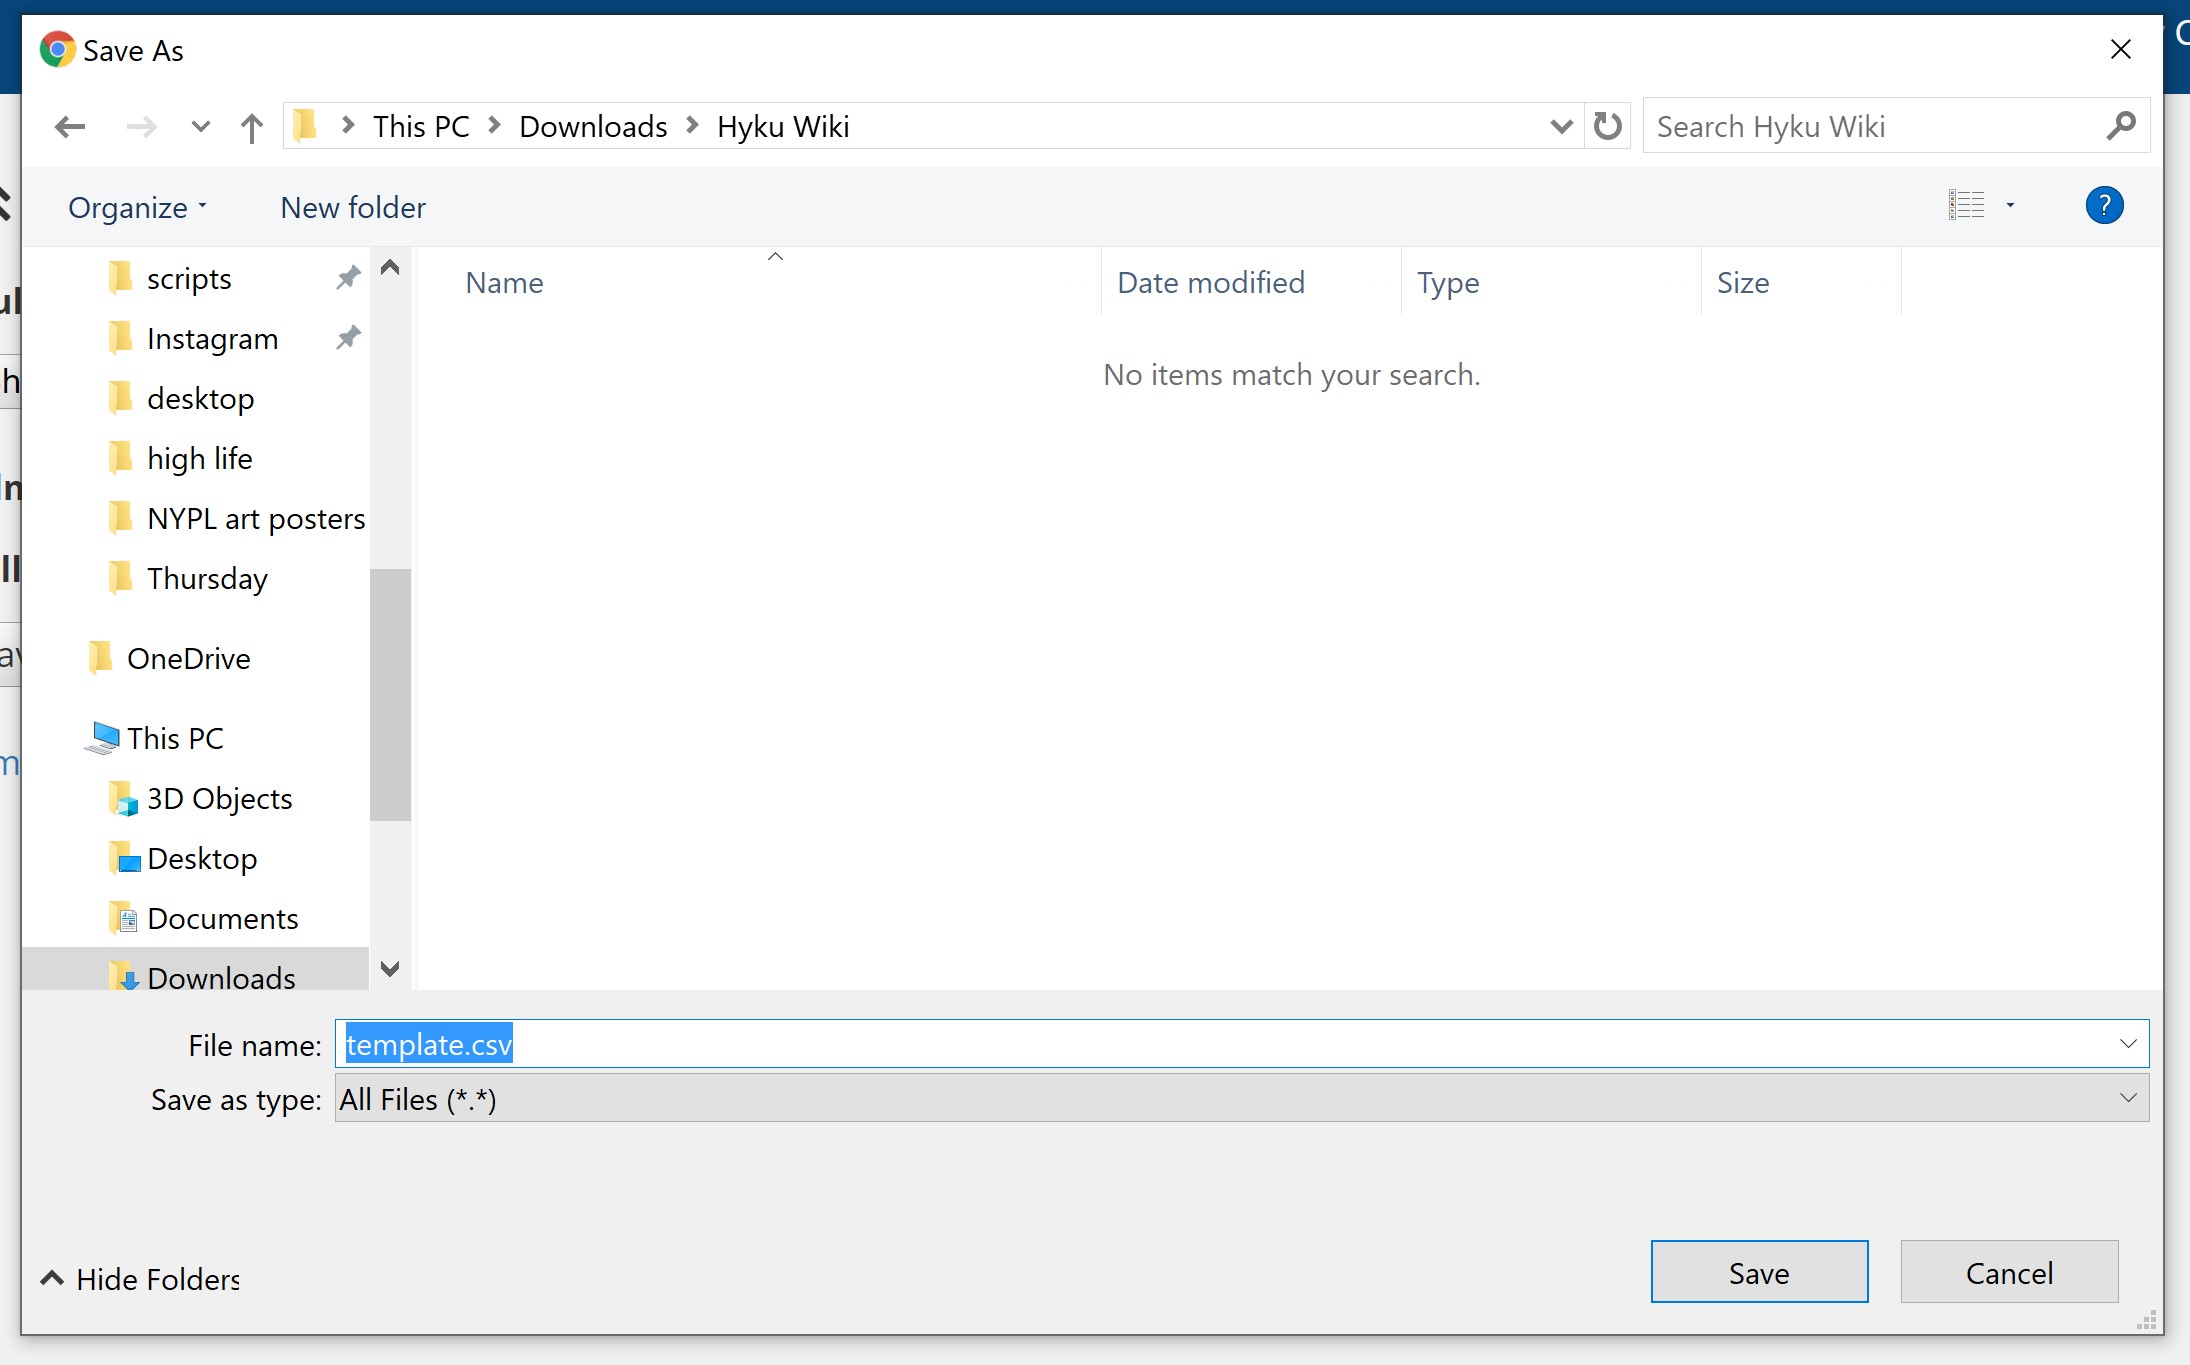
A dialog box will pop up with options for downloading the file. Change the folder/location and the name to whatever you want. Remember to add .csv to the end of your file name (e.g. template.csv). The Save as Type box below the file name should say All Files (.). CSV stands for "comma-separated values." You can open a CSV file in Microsoft Excel or other spreadsheet software.
Filling out the CSV
Vault is very particular about the format of its CSV. To ensure everything uploads the way you expect, follow the guidelines below.
The URL Column
Assuming all your files/objects are on Q Drive (a UVic Libraries' networked drive and repository), the URL field should contain the file path to the file/object on the Q: Drive. If you don't have access to the Q Drive, or someone will be copying your files to the Q Drive for you, please refer to "Items Not on Q Drive" instructions below.
Items Already on Q Drive
We've linked a folder on the Vault server to the Q Drive and Vault actually pulls items from the former to upload them. (This is because Vault expects all items for uploading to be stored locally on the computer.) Consequently, we need to point Vault to this new folder on the server instead of the actual Q Drive.
On Windows (PC)
- Find the file in your usual folder dialog box.
- Click on the address bar (highlighted in green below) and copy/paste it into the URL column of your CSV. Repeat the 1st two steps until every item has a file path associated with it.
- Press
Cntrl + hto bring up the find-and-replace feature. Replace every backslash\with a forward slash/.
On a Mac
- Find the file in your usual folder dialog box.
- Right-click or context-click the file then hold the alt key for additional options.
- Click "Copy [file name] as pathname" and paste it into the URL column of your CSV.
For both systems...
- Press
Cntrl + h(PC) orCmd + h(Mac) to bring up the find and replace feature. Replace every instance ofQ:\tofile:///usr/local/rails/vault/tmp/uploads/local_files/. - Delete the URL column and rename column B's heading to "url" (Note that url should be all lowercase).
Items Not on Q Drive
To prepare your files to be moved onto the Q Drive, they should all be contained in one folder. Within that folder, you can organize your items into subfolders if you like.
If you don't have subfolders, then simply fill in the URL column with the full name of each file. If you do have subfolders, then you will fill that column with the path to each file, including subfolders along the way. For example, say I have a nested folder structure like so:
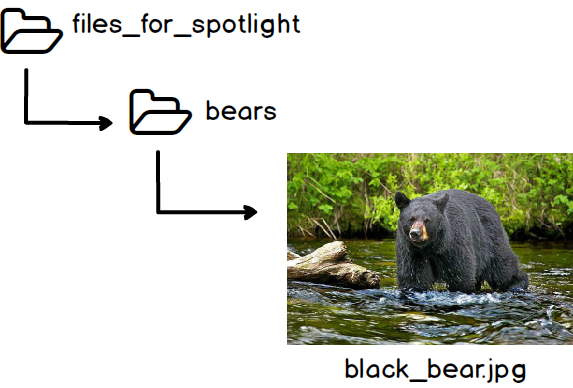
In the URL column for this file, I would type in the file path as bears/black_bear.jpg. (Note the forward slash as opposed to backslash.)
Imagine if I was an ant living in the top-level folder. How would you tell me to find black_bear.jpg? You would say something like "go into the bears folder and get the file named black_bear.jpg." This is what we're telling Vault to do.
General Conventions
Notes for Developers
Batch-uploading items to Vault sets off a chain reaction of Active Record Jobs. To see enqueued jobs, go to vault.library.uvic.ca/sidekiq and click Busy. If a job has failed, click Retries and you'll see the error message that prevented the upload.
If an upload has failed, edit the CSV and try the upload again. In addition to restarting the server with sudo systemctl restart httpd, you'll also have to restart sidekiq with sudo sidekiqctl stop and then sudo sidekiqctl start. This will restart the job queue.