Creating a VS project for your plugin - TiberiumFusion/TTPlugins GitHub Wiki
← Back to the Developing with Visual Studio overview article.
This section demonstrates how to set up a Visual Studio solution & project in order to compile your plugin. The steps below are shown with Visual Studio 2017; however, the process is extremely general and can be adapted to any IDE that is capable of compiling .NET Framework binaries.
If you do not have Visual Studio, you can download† one of Visual Studio's Community editions from the Visual Studio website. There are also various getting started materials on the Visual Studio website that are helpful for beginners.
- VS 2017 is generally superior on all accounts and is highly recommended for this scenario. This wiki uses VS 2017 for all demonstrations.
- Previous modern versions, including VS 2015, 2013, 2012, and 2010, will also suffice.
- If using VS 2019, first install this addon in order to fix the New Project dialog.
- VS 2022 and worse are never recommended.
† NOTE: Recent changes from Microsoft have hidden the best versions of Visual Studio Community behind a pay wall. The creation of a Microsoft account, enrollment in the "Dev Essentials" program, and sale of your identity to Microsoft, pursuant to Microsoft's T&Cs, is required to surmount the pay wall before Microsoft will provide you with their download links to VS 2019 and older. If you consider the value of your identity to be greater than a download link, consider obtaining the download links from a free source.
◆ Open the New Project wizard (File -> New -> Project) and pick the Class Library (.NET Framework) template. Enter a name & location for your plugin project, and choose a CLR 4 release of the .NET Framework to target. It is highly recommended to target .NET 4.5.2, which is the version that TTPlugins is compiled against and is either present or superseded on most users' PCs. Click OK to create the solution and project.
◆ In the Solution Explorer, right click on the project References and add a reference to TTPlugins.dll. You can reference the version that's included in the Terraria Tweaker 2 install files, or you can download TTPlugins.dll and its XML code documentation file from the Releases page (recommended).
◆ IMPORTANT:
Depending on what types your plugin needs to be aware of, you will probably also need to add references to Terraria.exe itself and maybe some XNA assemblies. You can find Terraria.exe in your Terraria install folder, naturally. You can dig out the XNA assemblies from your computer's GAC, or you can install the XNA 4.0 Refresh SDK (recommended) and find the reference assemblies at C:\Program Files (x86)\Microsoft XNA\XNA Game Studio\v4.0\References\Windows\x86.
◆ Open the project properties and enter an assembly name and namespace for your project. If you are importing a plugin that you created in Terraria Tweaker 2, use the same name and namespace that's inside your plugin source code file(s).
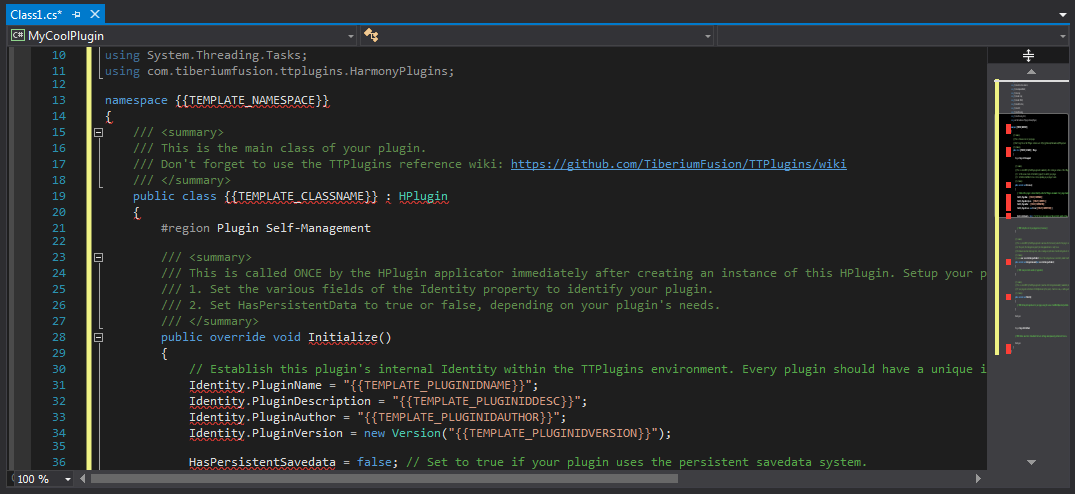
◆ Download the plugin class template from this repository. Open the default Class1.cs file and replace its contents with the contents of the PluginTemplate.cs. If you are importing a plugin that you already created in Terraria Tweaker 2, simply copy and paste the contents of your old plugin file instead of the contents of the template.
◆ If you are using the template, fill out all of the {{TEMPLATE}} sections. Each section corresponds to a field in Terraria Tweaker 2's new plugin wizard. The {{TEMPLATE_NAMESPACE}} section should match the namespace you entered in the project Properties.
◆ Rename the Class1.cs file to match the name of your plugin class.
◆ You can now build the solution or project and Visual Studio will compile your plugin.
◆ In the project's output folder, you will find your compiled plugin assembly, as well as TTPlugins and a bunch of XNA dependencies. You can ignore the XNA dependencies.
◆ You can now copy your new plugin DLL file (and PDB if you are debugging) to your Plugins folder, then open Terraria Tweaker 2, edit a Tweak List, and enable your plugin.
Read the Embedding assets in your plugin article to learn how to add images, sound, and other assets to your plugin as embedded resources.


