Using the JumpCloud PowerShell Module - TheJumpCloud/support GitHub Wiki
| REFERENCES |
|---|
| Installing the JumpCloud PowerShell Module |
| JumpCloud PowerShell module YouTube channel |
| Using the PowerShell module with large data sets |
| How to use the associations functions |
Navigate to copy and paste-able PowerShell examples and usage explanations using the below links.
- JumpCloud PowerShell Module Command Basics
-
Managing JumpCloud Users
- Querying User Information
- Querying User Associations
- Exporting User Information To CSV
- Gathering User Password Expiration Information
- Report On Users Password Set Date
- Enabling 2FA For The User Portal
- Password Changes And Unlocks
- Updating JumpCloud User Passwords in bulk using a CSV file
- Adding and Modifying Custom Attributes
- Adding Custom Attributes in Bulk
- Releasing Users From AD Bridge
- Send Activation or Password Reset Emails
- Updating The Email Address Domain For All JumpCloud Users
- List All Users That Are Not Bound To A System
- List All Users That Are Not Bound To A User Group
- Report On LDAP Binding and Samba Service Users
- Modify the LDAP Binding Attribute on Users In Bulk
- Removing Inactive (Pending) JumpCloud Users
- Implementing a Rolling Password Expiration Policy
- Managing JumpCloud User Groups
-
Managing JumpCloud Systems
- Querying System Information
- Querying System Associations
- Exporting System Information to CSV
- Exporting Systems Created in the Last 30 Days to CSV
- Updating system displayName to match system hostName
- Enabling systems for MFA login
- Reporting on and Removing Duplicate Systems
- Reporting on systems lastContact within X days
- Remove systems after X days of inactivity
- List All Systems That Are Not Bound To A User
- List All Systems That Are Not Bound To A System Group
- Reporting on JumpCloud Agent Version
- Enabling systemInsights on systems
- Return SystemFDEKeys for all JumpCloud managed encrypted systems
- Export all SystemFDEKeys for JumpCloud managed encrypted systems to CSV
- Reporting on the JumpCloud Service Account on macOS
-
Managing JumpCloud System Users
- Querying System User Information
- Export all JumpCloud system user information to CSV
- Export All User And System Associations To CSV with JumpCloud Username
- Adding System Users
- Removing System Users
- Adding JumpCloud User System Bindings In Bulk Using a CSV File
- Removing JumpCloud User System Bindings In Bulk Using a CSV File
- Managing the System User Permissions Between JumpCloud System Groups and JumpCloud User Groups
-
Managing JumpCloud System Groups
- Creating System Groups
- Querying System Groups
- Adding Systems To Groups
- Removing System From Groups
- Creating JumpCloud User or System Groups in Bulk from a CSV file
- Modifying JumpCloud Systems In Bulk Using a CSV File
- Enabling MFA for all members of a JumpCloud user group
- Enable MFA for a Group of Systems
-
Commands and Command Results
- Importing JumpCloud Commands
- Invoking JumpCloud Commands
- Querying JumpCloud Command Results
- Querying the Output of JumpCloud Command Results
- Exporting JumpCloud Command Results to CSV
- Exporting the output of specific JumpCloud Command Results to CSV
- Removing JumpCloud Command Results
- Querying Commands for Run-As Users
-
System Insights Examples
- Determine Existing Users on a Device
- Search for a Specific User Across Devices
- Output Existing Users on All Devices Omitting System Accounts
- Output Existing Users on All Devices Omitting System Accounts To CSV
- Query all of the Installed Applications for a Specific Device
- Query all of the Installed Applications for all Devices and Output to CSV
-
Directory Insights Events Examples
- Get all events from the last 30 days
- Get events during a time range and limit results
- Get events between a range using UTC time
- Get events between a range using Get-Date
- Get Admin Login Attempt Events
- Get Admin Logins by User
- Get events of either of two users
- Get User Delete Events
- Get User Create Events
- Get changes to the organization
- Get Group Delete Events
- Get Group Create Events
- Get SSO Auth
- Get SSO Auth by user
- Get User Events by Username
- Policies Examples
- RADIUS Servers
-
Associations Examples
- Copying all JumpCloud Associations From One User to Another and Excluding Direct System Associations
- Copying all JumpCloud Associations From One User to Another, Excluding Direct System Associations and Removing Existing Associations
- Copying User Group Associations From One User to Another
- Copying Resource Associations from One User Group to Another and Excluding Members of the User Group
- Copying Resource Associations from One System Group to Another and Excluding System Group Members
- Advanced Usage
PowerShell commands are all created with a 'verb-noun' syntax. The verb defines the action and the noun defines the object or objects that the action will apply to. It is best practice for all commands to be written with a singular noun though many commands return multiple objects.
Each set of JumpCloud user commands contain four general functions.
'New/Add' commands create new objects like JumpCloud users of JumpCloud user groups.
Commands that start with 'New/Add' have mandatory values that must be specified for the commands to run. If a New/Add command is called without the mandatory parameters filled out then the shell will prompt for the values before executing the command.
Example:
New-JCUser

cmdlet New-JCUser at command pipeline position 1
Supply values for the following parameters:
firstname: Cool
lastname: Dude
username: cool.dude
email: cool.dude@sup.com
In the above example the mandatory parameters for the command New-JCUser were not populated and the shell prompted for each mandatory parameter before executing the command.
New-JCUser -firstname Cool -lastname Dude -username cool.dude -email cool.dude@sup.com
In this example each of the mandatory fields for the New-JCUser command are populated.
In addition to mandatory fields there are also optional fields that can be used when using New/Add commands. To find all available optional parameters navigate to the help documentation for the command.
You can navigate to the help documentation for a JumpCloud command from directly within the shell.
PowerShell has a built in help system that can be access by typing 'Help' and then command you wish to learn about.
Example:
Help New-JCUser
To exit out of the help system and return back to the shell press Q
You can also access online help directly from the shell by adding the '-online' flag to the help command.
Example:
Help New-JCUser -Online
This example will open the associated online support doc in the default web browser for the New-JCUser command located within the JumpCloud support GitHub wiki.
Once inside the help documentation for a command navigate to the 'PARAMETERS' section to locate all of the mandatory and optional parameters for a command. In the definition of each parameter there will be a 'Required' field that will show if the parameter is mandatory or optional.
Example:
-email
The email address for the user. This must be a unique value.

Type: String
Parameter Sets: (All)
Aliases:

Required: True
Position: Named
Default value: None
Accept pipeline input: True (ByPropertyName)
Accept wildcard characters: False

-enable_user_portal_multifactor
A boolean $true/$false value for enabling MFA at the user portal

Type: Boolean
Parameter Sets: (All)
Aliases:

Required: False
Position: Named
Default value: None
Accept pipeline input: True (ByPropertyName)
Accept wildcard characters: False
The above examples shows two parameters for the 'New-JCUser' command. The parameter 'email' is required which can be seen as 'Required: True'. The parameter 'enable_user_portal_multifactor' is optional which can be seen as 'Required: False'.
Get commands return information describing a specific JumpCloud object or group of objects.
By default running a Get command will return all of the JumpCloud objects associated with the command.
Get-JCUser
The above example will return all the information describing all JumpCloud users.
Get commands can also lookup single objects. To find the syntax for using a Get command leverage the built in help within the Shell to locate the command syntax.
 Help Get-JCUser

NAME
    Get-JCUser

SYNOPSIS
    Returns all JumpCloud Users within a JumpCloud tenant or a single JumpCloud User using the -ByID Parameter.


SYNTAX
    Get-JCUser [-ByID] -UserID <String> [<CommonParameters>]

    Get-JCUser [-Username] <String> [<CommonParameters>]


DESCRIPTION
    The Get-JCUser function returns all information describing a JumpCloud user. By default it will return all Users.
The above example shows how to local the syntax for a command using the Help command. Under the 'SYNTAX' header the help command reveals that Get-JCUser can be called using the '-Username' or '-ByID' and '-UserID' parameters.
 Get-JCUser -Username cool.dude

email                          : cool.dude@sup.com
username                       : cool.dude
allow_public_key               : True
ssh_keys                       : {}
sudo                           : False
enable_managed_uid             : False
unix_uid                       : 7823
unix_guid                      : 7827
activated                      : False
password_expired               : False
account_locked                 : False
passwordless_sudo              : False
externally_managed             : False
firstname                      : Cool
lastname                       : Dude
ldap_binding_user              : False
enable_user_portal_multifactor : False
totp_enabled                   : False
attributes                     : {}
created                        : 1/10/18 6:41:33 PM
samba_service_user             : False
_id                            : 5a565e5d275828e303a71139
This example uses the Get-JCUser command to lookup a specific user by specifying the '-Username'. Note that 'Username' is a case specific field.
Set commands update existing objects within JumpCloud. Set commands can be used to modify all the parameters of JumpCloud objects that are not immutable. To locate the parameters that can be modified for a given Set command lookup the commands available parameters. Reference how to locate parameters on a JumpCloud command as described in the New/ADD commands section above.
Set commands can modify more then one parameter on an object.
Example:
 Set-JCUser -Username cool.dude -firstname Coolest -lastname Dudet

id                             : 5a565e5d275828e303a71139
organization                   : 59df9ce8c00b4cf463187062
email                          : cool.dude@sup.com
username                       : cool.dude
allow_public_key               : True
ssh_keys                       : {}
enable_user_portal_multifactor : False
sudo                           : False
passwordless_sudo              : False
activated                      : False
password_expired               : False
account_locked                 : False
enable_managed_uid             : False
unix_uid                       : 7823
unix_guid                      : 7827
externally_managed             : False
firstname                      : Coolest
lastname                       : Dudet
ldap_binding_user              : False
addresses                      : {}
phoneNumbers                   : {}
relationships                  : {}
badLoginAttempts               : 0
totp_enabled                   : False
attributes                     : {}
created                        : 1/10/18 6:41:33 PM
samba_service_user             : False
_id                            : 5a565e5d275828e303a71139
This example updates the user cool.dude and changes the users firstname from 'cool' to 'coolest' and the users lastname from 'dude' to 'dudet'
Remove commands remove objects or associations between objects. Remove commands by default will show a warning prompt with the associated action when called.
 Remove-JCUser cool.dude
WARNING: Are you sure you wish to delete user: cool.dude ?
Confirm
Continue with this operation?
[Y] Yes [A] Yes to All [H] Halt Command [S] Suspend [?] Help (default is "Yes"):
To skip the default warning when running a Remove command use the '-force' parameter
 Remove-JCUser cool.dude -force

Username  Results
--------  -------
cool.dude Deleted
Be very careful when using the '-force' parameter there is no undo button
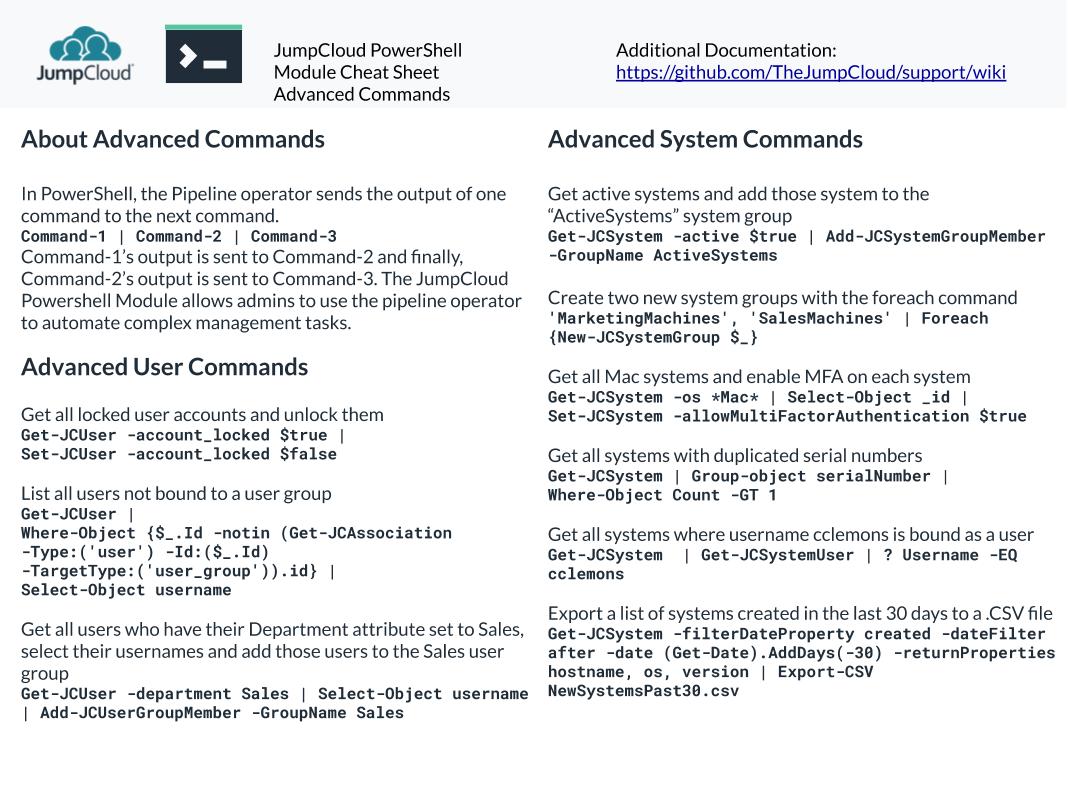
Looking for a reference guide? The JumpCloud PowerShell Module Cheat Sheet is provided to help JumpCloud administrators quickly grasp the value and the syntax required to use the JumpCloud PowerShell Module.
After familiarizing oneself with adding and modifying users and groups through the PowerShell Module, advanced commands can be strung together to automate complex tasks. The second page of the JumpCloud PowerShell Module Cheat Sheet provides example commands using the pipeline operator.

In addition to the JumpCloud PowerShell Module Cheat Sheet, the JumpCloud PowerShell Module Cheat Sheet - System Insights is also provided to help JumpCloud administrators quickly come up to speed on querying their organization's System Insights data directly from the JumpCloud PowerShell Module.
This Cheat Sheet covers just some of the tables that are available in System Insights. For more information on what other tables are available through System Insights, check out What Kind of Data Does System Insights Collect. For some more example System Insights commands using the JumpCloud PowerShell Module, see System Insights Examples.

Directory Insights data offers reporting functionality for actions admin and users make on a daily basis. For more information on what other tables are available through System Insights, check out the JumpCloud API reference. For example Directory Insights commands using the JumpCloud PowerShell Module, see Directory Insights Examples.

Download the PDF JumpCloud PowerShell Module Cheat Sheet.
Download the PDF JumpCloud PowerShell Module Cheat Sheet - System Insights.
Download the PDF JumpCloud PowerShell Module Cheat Sheet - Directory Insights.
Get-JCUser
Returns all JumpCloud user information
Get-JCUser | measure
Counts the number of JumpCloud users in an an organization
Get-JCUser bobby.boy
Only returns the information on user bobby.boy
Get-JCUser | Get-Member
Displays all properties of a JumpCloud user object
Get-JCUser -returnProperties username, email
Uses the pipeline and the parameter '-returnProperties' to return the username and email for all JumpCloud users in an organization
Get-JCUser -activated $false -returnProperties username, createdUsing the boolean parameter '-activated' with the search filter $false this search returns all inactive users and their usernames and the date they were created.
Get-JCUser -filterDateProperty created -dateFilter after -date (Get-Date).AddDays(-30) -returnProperties username, createdUses the parameter '-filterDateProperty' which creates the two dynamic parameters '-dateFilter' and '-date' to return users that were created in the last 30 days and only returns their username and created date using the '-returnProperties' parameter.
Get-JCAssociation -Type user -username roy.bittan -IncludeNames -IncludeVisualPath
Displays all JumpCloud associations for user with username roy.bittan. The -IncludeNames and -IncludeVisualPath switch parameters are used to display additional information.
Get-JCAssociation -Type user -username roy.bittan -IncludeNames -IncludeVisualPath | Select-Object -Property "targetType","targetName", "visualPathByName", "associationType"Displays all JumpCloud associations for user with username roy.bittan and only displays the "targetType","targetName", "visualPathByName", "associationType" fields.
Get-JCAssociation -Type user -username roy.bittan -TargetType system -IncludeNamesDisplays only the system associations for user with username roy.bittan using by specifying system for the -TargetType parameter.
Get-JCAssociation -Type user -username roy.bittan -TargetType user_group -IncludeNamesDisplays only the user_group associations for user with username roy.bittan using by specifying user_group for the -TargetType parameter.
Get-JCAssociation -Type user -username roy.bittan -IncludeNames -IncludeVisualPath -DirectUses the -Direct parameter to only display the Direct associations for user with username roy.bittan.
Get-JCAssociation -Type user -username roy.bittan -IncludeNames -IncludeVisualPath -IndirectUses the -Indirect parameter to only display the Indirect associations for user with username roy.bittan.
Get-JCBackup -Users
Backs up JumpCloud user information to CSV. A CSV backup file containing all user information will be created within the current working directory when this command is run.
Get-JCUser -filterDateProperty created -dateFilter after -date (Get-Date).AddDays(-7) -returnProperties username, created, email | Export-Csv NewUsers.csv
Uses the parameter '-filterDateProperty' which creates the two dynamic parameters '-dateFilter' and '-date' to return users that were created in the last 7 days and exports their 'username', 'created date', and 'email' to the CSV 'NewUsers.csv'.
[int]$UTCOffset = '-6' # Update with your locations timezone offset to UTC. 8 = Singapore Standard Time, -5 = EST, - 8 = PST, -6 = MDT

Get-JCUser -returnProperties username, password_expiration_date, password_expired | Select-Object username, @{name = "password_expiration_date"; expression = { ($_.password_expiration_date).addHours($UTCOffset)}},  @{name ="day of week";expression = {(($_.password_expiration_date).addHours($UTCOffset)).DayOfWeek}}, password_expired | Sort-Object password_expiration_date
Uses the pipeline and a calculated field to display both the password expiration date and the day of week of the expiration sorted by the password expiration date. It is no fun when the CEO's password expires on a Saturday.
Get-JCUser -password_expired $false -returnProperties username, password_expiration_date, password_expired | Select-Object username, @{name = "password_expiration_date"; expression = { ($_.password_expiration_date).addHours($UTCOffset)}}, @{name ="day of week";expression = {(($_.password_expiration_date).addHours($UTCOffset)).DayOfWeek}} | Sort-Object password_expiration_date| Where-Object {$_.'day of week' -EQ 'Sunday'-or $_.'day of week' -eq 'Saturday'}
Uses the pipeline and a calculated field to display only users whose passwords will expire on a weekend. It is no fun when the CFO's password expires on a Sunday.
[int]$UTCOffset = '-6' # Update with your locations timezone offset to UTC. 8 = Singapore Standard Time, -5 = EST, - 8 = PST, -6 = MDT
[DateTime]$Date = "05/20/2019" # Modify this value to specify the date

Get-JCUser -password_expired $false -filterDateProperty password_expiration_date -dateFilter before -date $Date -returnProperties username, email, password_expiration_date | Select-Object username, email, @{name = "password_expiration_date"; expression = { ($_.password_expiration_date).addHours($UTCOffset)}}, @{name ="day of week";expression = {(($_.password_expiration_date).addHours($UTCOffset)).DayOfWeek}}
Uses the pipeline and a calculated field to display only users whose passwords will expire before the date specified for in the $Date variable.
[int]$UTCOffset = '-6' # Update with your locations timezone offset to UTC. 8 = Singapore Standard Time, -5 = EST, - 8 = PST, -6 = MDT
[int]$NumberOfDays = "5" # Modify this variable to widen or narrow down the scope of the search
[DateTime]$Date = (Get-Date).AddDays($NumberOfDays)
Get-JCUser -password_expired $false -filterDateProperty password_expiration_date -dateFilter before -date $Date -returnProperties username, email, password_expiration_date | Select-Object username, email, @{name = "password_expiration_date"; expression = { ($_.password_expiration_date).addHours($UTCOffset) } }, @{name = "day of week"; expression = { (($_.password_expiration_date).addHours($UTCOffset)).DayOfWeek } }
Uses the pipeline and a calculated field to display only users whose passwords will expire in the number of days specified for the $NumberOfDays variable. In this example 5 days is the threshold. Modify this variable to widen or narrow down the scope of the search.
[int]$UTCOffset = '-6' # Update with your locations timezone offset to UTC. 8 = Singapore Standard Time, -5 = EST, - 8 = PST, -6 = MDT
$GroupName = "Exec" # Update with the name of the JumpCloud user group to query.

Get-JCUserGroupMember -GroupName $GroupName  |% { Get-JCUser -userid $_.UserID | Select-Object username, @{name = "password_expiration_date"; expression = { ($_.password_expiration_date).addHours($UTCOffset)}},  @{name ="day of week";expression = {(($_.password_expiration_date).addHours($UTCOffset)).DayOfWeek}}, password_expired | Sort-Object password_expiration_date}
Queries all the password expiration dates for users in the user group specified for the value of the variable $GroupName and calculates the date of the week their password will expire.
The below examples are only applicable for orgs that have a default password expiration date set and enforced. To enable this login to the JumpCloud admin console and navigate to the "Settings" and "Security" tab. Under the header "Password Aging" on the "Settings/Security" tab check the box and enter a value in the field for "Password expires after ' ' days" and then save the settings page.
By setting a value for this field each JumpCloud user object will have a new field "password_expiration_date".
Until this value is set this field will not be present on user objects over the JumpCloud API.
You can always "disable" the password expiration policy after using the below workflow to report on JumpCloud user password set dates if you do not wish to enforce the expiration policy for your users.
The default behavior for the "password_expiration_date" field when password aging is enable for existing active users is to populate this field with the current date and time added to the password expiration day value specified. All active users with Existing passwords will have the same "password_expiration_date" based on this value once the setting is enabled.
By default all JumpCloud console dates are set in UTC.
Get-JCUser -returnProperties password_expiration_date, username | Select-Object username, password_expiration_date, @{name = "password_set_date"; expression = {(Get-Date($_.password_expiration_date)).AddDays(-90)}} | Sort-Object password_set_date -DescendingThis example will display all users usernames, password_expiration_date and the calculated property password_set_date which in this example shows a calculation based on 90 days. Update "AddDays(-90)" based on what is configured for your orgs password expiration policy. If 45 days were the value instead of 90 this would need to be updated to AddDays(-45).
Get-JCUser -returnProperties password_expiration_date, username | Select-Object username, password_expiration_date, @{name = "password_set_date"; expression = {((Get-Date($_.password_expiration_date)).AddDays(-90)).AddHours(-6)}} | Sort-Object password_set_date -DescendingThis example will display all users usernames, password_expiration_date and the calculated property password_set_date which in this example shows a calculation based on 90 days and UTC offset of 6 hours. Update "AddDays(-90)" based on what is configured for your orgs password expiration policy. If 45 days were the value instead of 90 this would need to be updated to AddDays(-45). This example also takes in account for the time zone. By default all JumpCloud times are in UTC. This example uses "AddHours(-6)" to set the UTC offset. Modify this value based on your time zone relative to UTC.
Get-JCUser -returnProperties password_expiration_date, username | Select-Object username, password_expiration_date, @{name = "password_set_date"; expression = {((Get-Date($_.password_expiration_date)).AddDays(-90)).AddHours(-6)}} | Sort-Object password_set_date -Descending | Export-Csv "JCUserPasswordInfo_$(Get-Date -Format MM-dd-yyyy).csv"This example will export all users usernames, password_expiration_date and the calcuated property password_set_date which in this example shows a calculation based on 90 days and UTC offset of 6 hours to the CSV file "JCUserPasswordInfo_$(Get-Date -Format MM-dd-yyyy).csv". Update "AddDays(-90)" based on what is configured for your orgs password expiration policy. If 45 days were the value instead of 90 this would need to be updated to AddDays(-45). This example also takes in account for the time zone. By default all JumpCloud times are in UTC. This example uses "AddHours(-6)" to set the UTC offset. Modify this value based on your time zone relative to UTC.
Get-JCUser -enable_user_portal_multifactor $false -returnProperties username, enable_user_portal_multifactor, created
Uses the pipeline to filter for all JumpCloud users who do not have MFA enabled for the users portal.
Get-JCUser -enable_user_portal_multifactor $false | Set-JCUser -enable_user_portal_multifactor $True
Uses the pipeline to filter for all JumpCloud users who do not have MFA enabled and then enables MFA for these users.
Get-JCUser -enable_user_portal_multifactor $true -totp_enabled $false -returnProperties username, enable_user_portal_multifactor, totp_enabled
After setting 'enable_user_portal_multifactor' to $true for a user, the user will be sent an email invite with a link to configure their TOTP token. After setting up the MFA token and completing a successful user portal login with this token the parameter 'totp_enabled' will display $true. This command shows all user accounts with 'enable_user_portal_multifactor' enabled who have not logged into the user portal to complete MFA configuration as 'totp_enabled' is false for their accounts.
Get-JCUser -enable_user_portal_multifactor $true -totp_enabled $true -returnProperties username, enable_user_portal_multifactor, totp_enabled
This command shows all users who have completed the MFA configuration for the user portal.
Get-JCUserGroupMember -GroupName Sales | Set-JCUser -enable_user_portal_multifactor $true
This command will enable user portal MFA for all users within the JumpCloud User Group 'Sales'.
Set-JCUser bobby.boy -password Password1!
Resets the password for user account 'bobby.boy'
Set-JCUser bobby.boy -account_locked $false
Unlocks user bobby.boys account.
Set-JCUser bobby.boy -account_locked $true
Locks user bobby.boy's account. Note this would not lock the user out from their email if the user bobby.boy's account was bound to the G-Suite or Office 365 directory within JumpCloud.
Get-JCUser -account_locked $true | Set-JCUser -account_locked $false
Unlocks all JumpCloud user accounts that are in a locked state by first filtering for locked accounts and then unlocking each account.
Get-JCUser -password_expired $true | Set-JCUser -password (New-RandomPassword)
If the password for a JumpCloud user account expires and the user account is bound to either Office365 or G-Suite using the JumpCloud directory sync then this account will be suspended within the associated directory. Because the account is suspended even if the end user has configured a recovery method like an alternate email or cell phone they will not be able to recover their email account because it is in a suspended state. This example is a proof of concept for how to solve for this by reenabling the linked email account by simply setting a random password for the account. The user could then regain access to their account through their recovery method and then reset their JumpCloud user account.
The command 'New-RandomPassword' can be found within the module RandomUser
Step 1: Create the CSV file
Create a CSV file with a two column headings Username and Password
Then fill out the columns with an entry for each user to update. Note usernames are case sensitive
Pro tip user the following command to export all JumpCloud usernames to CSV.
Get-JCUser -returnProperties username | Export-CSV JumpCloudUsers.csv
Example contents for a CSV file named passwordupdate.csv:
username,Password
jcuser.one,Oneoneone1!
jcuser.two,Twotwotwo2!
jcuser.three,Threethreethree3!
Step 2: Import the CSV
Example using the above file passwordupdate.csv to update three JumpCloud users passwords:
Be sure you provide the full file path to the CSV file or are within the directory of the file in your terminal when you attempt to run the below commands.
Import-CSV ./passwordupdate.csv | % {Set-JCUser -username $_.username -password $_.password}This example takes the above file passwordupdate.csv as input for the command Set-JCUser and updates each users password in the CSV file.
Set-JCUser -username bobby.boy -NumberOfCustomAttributes 2 -Attribute1_name Department -Attribute1_value Dev -Attribute2_name Location -Attribute2_value Boulder
When adding or modifying Custom attributes you must first specify the number of attributes you wish to interact with by setting the '-NumberOfCustomAttributes' parameter. If this parameter is not set then the '-Attribute#name' and '-Attribute#value' parameters will not display as these are dynamic parameters that require a value to be set for the '-NumberOfCustomAttributes' parameter.
For each custom attribute specified there are two parameters that populate, the 'Attribute#_name' and the 'Attribute#_value'. In the example above '-NumberOfCustomAttributes' is set to '2' so a total of four additional parameters must be populated. If this number was set to '1' there would only be two parameters to populate and if it was set to '3' there would be a total of six.
If an attribute exists on the user being modified with a matching Attribute_name then the value for this attribute will be updated. If an attribute does not exist for the 'Attribute_name' then a new attribute will be added for the user.
Custom attributes can be added to existing users in bulk using a .CSV file.
In this example we will first export existing users to a .CSV file. Then update this .CSV file with the attributes we want to set on our users and finally import this .CSV file.
Note that during the import process an API call will be made for each user so the time it will take will vary depending on the number of users being updated.
It takes ~ 1 minute for every 100 user modifications.
Get-JCUser -returnProperties username | Export-CSV JCUsers.csv
This exports all JumpCloud user usernames to a .CSV file.
Example output:
"username","_id"
"Cat.Dog","59f88d88c714906566697323"
"Brew.Tanya","5a01d805fd267ba07f6b6a60"
"Bro.Hondo","5a01d80669ea1a637ea6a856"
Update this CSV file by adding a column for the attribute value you wish to add to the users. Remove any users from this .CSV that you do not wish to modify.
Example updated CSV file:
"username","value"
"Cat.Dog","Sales"
"Brew.Tanya","Sales"
"Bro.Hondo","Marketing"
In this example I've added a column named 'Value' and populated this for each user. If I wanted to add an additional custom attribute to my users I would add an additional column named 'value2'. If I wanted to specify the custom attribute name I would add in an additional column named 'name' and populate this for each user.
Next I'll import this information using 'ForEach-Object' and 'Import-CSV'
Import-CSV 'JCUsers.csv' | ForEach-Object {Set-JCUser $_.username -NumberOfCustomAttributes 1 -Attribute1_name Department -Attribute1_value $_.value}
This command will take the information from the .CSV 'JCUsers.csv' and for each user in the CSV add a custom attribute with the attribute_name 'Department' and the value for what is specified for the user within the .CSV. If the CSV column header was 'value1' instead of 'value' I would update '-Attribute1_value $.value' to '-Attribute1_value $.value1'. Refer to the example for 'Adding and Modifying Custom Attributes' above if you wish to modify more than one attribute.
Set-JCUser -Username bobby.boy -externally_managed $false
Releases user 'bobby.boy' from AD Bridge so user account can be fully managed by JumpCloud.
Get-JCUserGroupMember -GroupName Dev | Set-JCUser -externally_managed $false
Releases all users in the JumpCloud user group 'Dev' from AD Bridge so their user accounts can be fully managed by JumpCloud.
Get-JCUser | Set-JCUser -externally_managed $false
Releases all JumpCloud users from AD Bridge so their user accounts can be fully managed by JumpCloud.
Send-JCPasswordReset -username jcuser.oneSends an activation or reset email to JumpCloud user with username 'jcuser.one'
Get-JCUserGroupMember -GroupName NewUsers | Send-JCPasswordResetSends an activation or reset email to all members of the JumpCloud user group 'NewUsers'.
Get-JCUser -activated $false | Send-JCPasswordResetSends an activation email to all JumpCloud users who are in an inactive state. Users that are inactive have not yet set their JumpCloud user passwords.
Get-JCUser -activated $false -filterDateProperty created -dateFilter after -date (Get-Date).AddDays(-7) -returnProperties username | Send-JCPasswordResetSends an activation email to all JumpCloud users who are in an inactive state and were created in the last seven days. Users that are inactive have not yet set their JumpCloud user passwords.
Get-JCUser | Select-Object _id, @{ Name = 'email'; Expression = { ($_.email).replace('olddomain.com','newdomain.com') }} | foreach {Set-JCUser -ByID -UserID $_._id -email $_.email}Prior to running this command users primary email addresses should be updated on the opposite of the directory sync, Office 365, G Suite, or both, prior to running the above update command.
Keep the directory sync active and do not deactivate associated directory syncs when making changes to users on the opposite of the directory sync.
This example updates the domain on the email addresses associated with every user in the JumpCloud tenant using Parameter Binding, the pipeline, and a calculated property. The 'olddomain.com' would represent the current domain and the 'newdomain.com' would be the new domain.
To customize this command to only take action on specific users apply this filter on Get-JCuser
$Users = Get-JCUser
$Users |
    Where-Object {$_.Id -notin (Get-JCAssociation -Type:('user') -Id:($_.Id) -TargetType:('system')).id} |
    Select-Object username
This command will list all users that are not bound to a system.
$Users = Get-JCUser
$Users |
    Where-Object {$_.Id -notin (Get-JCAssociation -Type:('user') -Id:($_.Id) -TargetType:('user_group')).id} |
    Select-Object username
This command will list all users that are not bound to a user group.
Get-JCUser -ldap_binding_user $true -returnProperties username,email,ldap_binding_user,samba_service_user | Export-CSV JC_LDAP_Bind_Users.csvThis command uses the JumpCloud search endpoint to search for all users who are enabled as LDAP bind users and exports these users username, email, ldap_binding_user status, and samba_service_user status to the CSV file JC_LDAP_Bind_Users.csv. Removing | Export-CSV JC_LDAP_Bind_Users.csv
Example output:
"username","email","ldap_binding_user","samba_service_user","_id"
"hflax","[email protected]","True","False","5c64460e7cbc75270f5a635c"
"mscott","[email protected]","True","False","5c644628edac52561b2355a7"
"ldap.binding","[email protected]","True","True","5c64467125630f5955eb929f"
Three users in this environment are configured as LDAP binding users.
Get-JCUser -ldap_binding_user $true -returnProperties username, ldap_binding_user | Where-Object username -NE "ldap.binding" | % {Set-JCUser -UserID $_._id -ldap_binding_user $false}This command searches for all users who are enabled as an LDAP Bind User. It then uses the Where-Object command to filter out the user with username ldap.binding and then disables the LDAP Bind User flag for all other users by setting this value to False using the Set-JCUser command.
Modify ldap.binding" with usernames from JumpCloud users from your environment to use this example.
Get-JCUser -ldap_binding_user $true -returnProperties username, ldap_binding_user | Where-Object username -NotIn @("samba.bind","jira.bind","ldap.binding") | % {Set-JCUser -UserID $_._id -ldap_binding_user $false}This command searches for all users who are enabled as an LDAP Bind User. It then uses the Where-Object command to filter out three users to not modify using -NotIn @("samba.bind","jira.bind","ldap.binding") and then disables the LDAP Bind User flag for all users by setting this value to False using the Set-JCUser command.
Modify @("samba.bind","jira.bind","ldap.binding") with usernames from JumpCloud users from your environment to use this example.
You cannot disable the ldap_binding_user flag for a user configured as a Samba Service User
User accounts that have not configured a password are considered inactive. Without a password there is no way for an account to access any resources.
Inactive accounts can be identified in the JumpCloud admin console with a orange circle in the status column.
To search for inactive account using the PowerShell module use the -activated parameter.
Example:
Get-JCUser -activated $false -returnProperties username, activatedThis example will return all accounts that are in an inactive state.
To remove inactive accounts pipe this command into the Remove-JCUser command
Example:
Get-JCUser -activated $false -returnProperties username, activated| Remove-JCUserThe -force parameter can be used with Remove-JCUser to remove users without a confirmation prompt.
When enabling password expiration for a JumpCloud organization the default behavior sets the password expiration date to the same date and time for all users of a JumpCloud organization.
To limit the number of accounts that are set to expire on a given date and time, admins can follow the below steps to create a phased, rolling, password expiration policy for their organization.
This can be done by enabling the user setting “Password Never Expires” for all users in an organization before enabling password expiration for an organization and then disabling this setting for batches of users at a time.
For organizations that already have password expiration in place the steps can also be implemented but doing so will update all users existing password expiration dates.
Only once the setting “Password Never Expires” is disabled per user will the global password expiration setting apply to the users account.
Admins can use this method to implement a rolling password expiration policy and take control of the number of accounts that are set to expire at a given time.
Get-JCUser -password_expired $false -returnProperties username | % {Set-JCUSer -UserID $_._id -password_never_expires $true}This example will set the field password_never_expires to True for all JumpCloud users in an organization. Note that this field can only be set to True for users whose passwords are not expired.
Turn on a password expiration policy under "Org Settings" > "User Accounts" > "Custom Password Settings" within the JumpCloud admin console. [Follow this link for additional information] (Enable a password expiration policy in the JumpCloud admin console.)
Only once the parameter “Password Never Expires” is set to False for a user will the user’s account be set to expire at the current time plus the number of days configured for password expiration.
See examples below for how to modify this parameter on JumpCloud users
Get-JCUserGroupMember -GroupName Phase1 | % {Set-JCUser -UserID $_.UserID -password_never_expires $false}This example sets “Password Never Expires” to false for all JumpCloud users in the JumpCloud user group Phase1. Admins can group users into user groups and use these user groups to disable “Password Never Expires” and implement a rolling password expiration policy.
Get-JCUser -description Phase2 -returnProperties username | % {Set-JCUser -UserID $_._id -password_never_expires $false}This example sets “Password Never Expires” to false for all JumpCloud users with the description of Phase2. Admins can use a user attribute like the description field to implement a rolling password expiration policy.
Username
mscott
kmalone
dschrute
Example of a CSV containing a single column "Username". This CSV is named "JCUsernames.csv"
Import-Csv ./JCUsernames.csv | % {Set-JCUser -Username $_.username -password_never_expires $false}This example sets the “Password Never Expires” to false for all JumpCloud users in the CSV "JCUsernames.csv" using the users usernames. Note that the username field is case sensitive.
New-JCUserGroup 'BoulderOffice'
Creates a new JumpCloud user group 'BoulderOffice'
 $NewGroups = 'Marketing', 'Sales', 'Tech', 'Admin'
 $NewGroups | Foreach {New-JCUserGroup $_}

Name      id                       Result
----      --                       ------
Marketing 5a57e508232e113e3b8a24d8 Created
Sales     5a57e50845886d7276f79bad Created
Tech      5a57e50845886d7276f79bae Created
Admin     5a57e509c9118062fb6a0217 Created
Creates four JumpCloud user groups by first creating an array of the new groups and then using 'Foreach' to create a group for each object in the array.
Get-JCUserGroupMember Developers
Returns the JumpCloud users who are members of the group 'Developers'
Get-JCGroup -type User
Returns all JumpCloud users groups
Get-JCGroup -type User | Get-JCUserGroupMember
Returns all JumpCloud user group members
Get-JCGroup -type User | Get-JCUsergroupmember | Group-Object GroupName
Returns all JumpCloud user group members grouped by 'GroupName' using the 'Group-Object' command
Get-JCGroup -type User | ? name -Like *Sales* | Get-JCUserGroupMember | Export-CSV SalesGroupMembers.csv
Exports all JumpCloud users within JumpCloud user groups that contain the word 'Sales' to the file 'SalesGroupMembers.csv' using the 'Export-CSV' command
Get-JCGroup -type User | Get-JCUserGroupMember | ? Username -eq bobby.boy
Returns all the JumpCloud groups that the user 'bobby.boy' is a member of
Get-JCAssociation -Type user_group -Name Developers -IncludeNamesDisplays all JumpCloud associations for the user_group named Developers. The -IncludeNames parameter is used to display the targetNames.
Get-JCAssociation -Type user_group -Name Developers -IncludeNames | Select-Object "target*"Displays only the target fields (targetID, targetType, and targetName) for all JumpCloud associations for the user_group named Developers. The -IncludeNames parameter is used to display the targetNames.
Get-JCAssociation -Type user_group -Name Developers -TargetType application -IncludeNames | Select-Object "target*"Displays only the applications and target fields (targetID, targetType, and targetName) for the user_group named Developers. The -IncludeNames parameter is used to display the targetNames.
The -TargetType parameter can be used to only return targets of the following types: application, g_suite, ldap_server, office_365, radius_server, system_group,user
Add-JCUserGroupMember -GroupName Developers -Username bobby.boy
Adds the user 'bobby.boy' to the user group 'Developers'
Get-JCGroup -type User | Get-JCUserGroupMember | ? Username -eq johnny.boy | Add-JCUserGroupMember -Username bobby.boy
Adds the user 'bobby.boy' to all the same groups that user 'johnny.boy' is a member of
Get-JCUserGroupMember -GroupName Developers | Add-JCUserGroupMember -GroupName DevOpsTeam
Adds all JumpCloud users who are members of the group 'Developers' to the user group 'DevOpsTeam'
Get-JCUser | ? attributes -Like '*name=Department; value=Sales;*' | Add-JCUserGroupMember -GroupName Sales
Adds all JumpCloud users that have the custom attribute 'Department' set with a value of 'Sales' to the group 'Sales'
Get-JCUser | Sort-Object created | select -First 10 | Add-JCUserGroupMember -GroupName FirstTen
Adds the oldest 10 JumpCloud user accounts to the JumpCloud group 'FirstTen'
Step 1: Create the CSV
The commands Add-JCUserGroupMember and Remove-JCUserGroupMember have two mandatory parameters: GroupName and UserName
The easiest way to modify JumpCloud group membership via a CSV file is to create a CSV with column headings that align with these two mandatory parameters.
Then fill out the columns with an entry for each JumpCloud user group modification.
Example contents for a CSV file named groupimport.csv:
GroupName, Username
All Users, bruce.springsteen
Office 365 Users, bruce.springsteen
Admins, bruce.springsteen
All Users, steven.vanzandt
Office 365 Users, steven.vanzandt
All Users, patti.scialfa
All Users, max.weinberg
Note: The JumpCloud user groups in this CSV must already exist and both GroupNames and Usernames are case sensitive
Step 2: Import the CSV
Example using above file groupimport.csv and the command Add-JCUserGroupMember:
Import-CSV ./groupimport.csv | Add-JCUserGroupMember
This example takes the above file groupimport.csv as input for the command Add-JCUserGroupMember and adds the JumpCloud user bruce.springsteen to three groups, steven.vanzandt to two groups, and patti.scialfa and max.weinberg to a single group.
Example Output:
GroupName       Username          UserID                   Status
---------       --------          ------                   ------
All Users       bruce.springsteen 6a68bob1648a08c604743cf6 Added
Office366 Users bruce.springsteen 6a68bob1648a08c604743cf6 Added
Admins          bruce.springsteen 6a68bob1648a08c604743cf6 Added
All Users       steven.vanzandt   6a68bobbbe6e074a042bc67e Added
Office366 Users steven.vanzandt   6a68bobbbe6e074a042bc67e Added
All Users       patti.scialfa     6a68bobf6166a0cc04b3a19b Added
All Users       max.weinberg      6a68boba4464ea0903d2ba88 {"message":"Already Exists"}
If a user is already a member of the Group the output will display "{"message":"Already Exists"}"
Example using above file groupimport.csv and the command Remove-JCUserGroupMember:
Import-CSV ./groupimport.csv | Remove-JCUserGroupMember
This example takes the above file groupimport.csv as input for the command Remove-JCUserGroupMember and removes the JumpCloud user bruce.springsteen from three groups, steven.vanzandt from two groups, and patti.scialfa and max.weinberg from a single group.
Example Output:
GroupName       Username          UserID                   Status
---------       --------          ------                   ------
All Users       bruce.springsteen 6a68bob1648a08c604743cf6 Removed
Office366 Users bruce.springsteen 6a68bob1648a08c604743cf6 Removed
Admins          bruce.springsteen 6a68bob1648a08c604743cf6 Removed
All Users       steven.vanzandt   6a68bobbbe6e074a042bc67e Removed
Office366 Users steven.vanzandt   6a68bobbbe6e074a042bc67e Removed
All Users       patti.scialfa     6a68bobf6166a0cc04b3a19b Removed
All Users       max.weinberg      6a68boba4464ea0903d2ba88 {"message":"Not Found"}
If a user is not a member of the Group the output will display "{"message":"Not Found"}"
Remove-JCUserGroupMember -GroupName Dev -Username bobby.boy
Removes the user 'bobby.boy' from the group 'Dev'
PS > $RemoveGroup = 'Developers'
PS > Get-JCUserGroupMember $RemoveGroup | ForEach-Object { Get-JCUser -Username $_.Username | ? totp_enabled  -EQ $False | Remove-JCUserGroupMember -GroupName $RemoveGroup }
First the variable '$RemoveGroup' is set to 'Developers'. Next each member of the group 'Developers' is queried to see if MFA has been configured. If MFA has not been enabled the users are removed from the 'Developers' group.
PS > $RemoveGroup = 'Sales'
PS > Get-JCUserGroupMember $RemoveGroup | ForEach-Object { Get-JCUser -Username $_.Username | ? account_locked -EQ $True | Remove-JCUserGroupMember -GroupName $RemoveGroup }
First the variable '$RemoveGroup' is set to 'Sales'. Next each member of the group 'Sales' is queried to see if the user account is locked. If the user account is locked the user is removed from the 'Sales' group.
Get-JCBackup -UserGroups
Backs up JumpCloud user group membership to CSV. A CSV backup file containing all user group information will be created within the current working directory when this command is run.
Get-JCGroup -Type User -Name TheBand | Get-JCUserGroupMember | Export-Csv TheBandMembers.csv
This command will export a single JumpCloud group membership to a CSV file. In this example, the JumpCloud User Group named 'The Band' is exported to the CSV file 'TheBandMembers.csv'.
Get-JCBackup -SystemGroups
Backs up JumpCloud system group membership to CSV. A CSV backup file containing all system group information will be created within the current working directory when this command is run.
Get-JCGroup -Type System -Name 'Mac Systems' | Get-JCSystemGroupMember | Export-CSV MacSystems.CSV
This command will export a single JumpCloud system group membership to a CSV file. In this example, the JumpCloud System Group named 'Mac Systems' is exported to the CSV file 'MacSystems.CSV'.
Get-JCSystem
Returns all JumpCLoud system information
Get-JCSystem | measure
Counts the number of JumpCloud systems in an organization
Get-JCSystem -SystemId 5l733u59c244f2yr0oc55ks9
Looks up the system information on system with SystemID '5l733u59c244f2yr0oc55ks9'
Get-JCSystem | Get-Member
Displays all the properties of a JumpCloud system object
Get-JCSystem -returnProperties hostname,displayName
Uses the parameter '-returnProperties' to return the hostname, displayName, and _id for all JumpCloud systems in an organization
Get-JCSystem | Group-Object -Property version, os
Uses the pipeline and the command 'Group-Object' to group JumpCloud systems and provide a breakdown of systems by operating system and os version.
Get-JCSystem -active $true -returnProperties hostname, remoteIPUses the boolean search parameter '-active' to return all active JumpCloud systems and the parameter '-returnProperties' to return only the hostname and remoteIP address.
Get-JCSystem -filterDateProperty created -dateFilter after -date (Get-Date).AddDays(-30) -returnProperties hostname, active
Uses the parameter '-filterDateProperty' which creates the two dynamic parameters '-dateFilter' and '-date' to return the systems that were created in the last 30 days and only returns the hostname and active properties using the '-returnProperties' parameter.
Get-JCAssociation -Type system -Name "Bobs computer" -IncludeNames -IncludeVisualPathDisplays all JumpCloud associations for system with displayName Bobs computer. The -IncludeNames and -IncludeVisualPath switch parameters are used to display additional information.
Get-JCAssociation -Type system -Name "Bobs computer" -IncludeNames -IncludeVisualPath | Select-Object -Property "targetType","targetName", "visualPathByName", "associationType"Displays all JumpCloud associations for system with displayName Bobs computer and only displays the "targetType","targetName", "visualPathByName", "associationType" fields.
Get-JCAssociation -Type system -Name "Bobs computer" -TargetType policy -IncludeNames -IncludeVisualPath | Select-Object -Property "targetType","targetName", "visualPathByName", "associationType"Displays only the policy associations for system with displayName Bobs computer using by specifying policy for the -TargetType parameter.
Get-JCAssociation -Type system -Name "Bobs computer" -TargetType user -IncludeNames -IncludeVisualPath | Select-Object -Property "targetType","targetName", "visualPathByName", "associationType"Displays only the user associations for system with displayName Bobs computer using by specifying user for the -TargetType parameter.
Get-JCAssociation -Type system -Name "Bobs computer" -IncludeNames -DirectUses the -Direct parameter to only display the Direct associations for system with displayName Bobs computer.
Get-JCAssociation -Type system -Name "Bobs computer" -IncludeNames -IndirectUses the -Indirect parameter to only display the Indirect associations for system with displayName Bobs computer.
Get-JCBackup -Systems
Backs up JumpCloud system information to CSV. A CSV backup file containing all system information will be created within the current working directory when this command is run.
Get-JCSystem -filterDateProperty created -dateFilter after -date (Get-Date).AddDays(-30) -returnProperties hostname, os, version | Export-CSV NewSystemsPast30.csv
Uses the parameter '-filterDateProperty' which creates the two dynamic parameters '-dateFilter' and '-date' to return the systems that were created in the last 30 days and returns the hostname, os, and version properties using the '-returnProperties' parameter and then exports this information to the CSV file 'NewSystemsPast30.csv'
Get-JCSystem | % {Set-JCSystem -SystemID $_._id -displayName $_.hostname}
If a systems hostName changes the 'displayName' for the system will not be updated in the JumpCloud UI. The above command will set the JumpCloud displayName to the current system hostname for all systems in a JumpCloud tenant.
Set-JCSystem -SystemID 5l733u59c244f2yr0oc55ks9 -allowMultiFactorAuthentication $true
Enables MFA login for the system with systemID '5l733u59c244f2yr0oc55ks9'
Get-JCSystem -os *Mac* | Select-Object _id | Set-JCSystem -allowMultiFactorAuthentication $true
Gets all JumpCloud Mac systems and enables MFA login for them using the search filter '-os' which takes wildcard input.
Get-JCSystem | Group-object serialNumberThis will display all JumpCloud systems grouped by serialNumber. Any entry with a count greater then 1 contains an duplicate.
Get-JCSystem | Group-object serialNumber | Where-Object Count -GT 1This will only display JumpCloud systems that have duplicate entries.
Get-JCSystem | Group-Object serialNumber | Where-Object Count -gt 1 | foreach {$_.Group | Sort-Object lastContact -Descending | Select-Object hostname,lastContact, active, _id | Format-Table }This example will show the details of all duplicate systems.
Get-JCSystem | Group-Object serialNumber | Where-Object Count -gt 1 | foreach {$_.Group | Sort-Object lastContact -Descending | Select-Object hostname,lastContact, active, _id | Select-Object -First 1}This example will show the systems that have duplicate entries but only reveal the system that has checked in most recently. This would be the system to not remove and preserve when doing duplicate clean ups.
Get-JCSystem | Group-Object serialNumber | Where-Object Count -gt 1 | Foreach {$_.Group | Sort-Object lastContact -Descending | Select-Object hostname,lastContact, active, _id | Select-Object -Skip 1}This example will show all the duplicate systems that should be cleaned up or deleted. The system that has checked in most recently is skipped in this output.
Get-JCSystem | Group-Object serialNumber | Where-Object Count -gt 1 | Foreach {$_.Group | Sort-Object lastContact -Descending | Select-Object hostname,lastContact, active, _id | Select-Object -Skip 1 | Remove-JCSystem -force}BE VERY CAREFUL this command will actually remove all duplicate systems with a duplicate serial number and only leave the most recent system that has checked per the lastContact date. It is reccomened to run the example above this example to see the systems that would be removed prior to running this command.
Get-JCSystem -filterDateProperty lastContact -dateFilter after -date (Get-Date).AddDays(-90) -returnProperties hostname, lastContact, createdThis example will return a list of all systems that have not checked into the JumpCloud console in the last 90 days. Update the parameter .AddDays(-90) to modify the date range.
Get-JCSystem -filterDateProperty lastContact -dateFilter after -date (Get-Date).AddDays(-90) -returnProperties hostname, lastContact, created | Export-Csv JCSystemslastContact.csvThis example will output a csv of all systems that have not checked into the JumpCloud console in the last 90 days named JCSystemslastContact.csv. Update the parameter .AddDays(-90) to modify the date range.
Get-JCSystem -filterDateProperty lastContact -dateFilter before -date (Get-Date).AddDays(-90) | Remove-JCSystemThis example removes all JumpCloud systems that have not contacted JumpCloud in the lsat 90 days. Update the parameter .AddDays(-90) to modify the date range.
BE VERY CAREFUL this command will remove systems from JumpCloud. To automatically remove the systems without a prompt per system the -Force parameter can be used with Remove-JCSystem. Example: Remove-JCSystem -force
$Systems = Get-JCSystem
$Systems |
    Where-Object {$_._Id -notin (Get-JCAssociation -Type:('system') -Id:($_._Id) -TargetType:('user')).id} |
    Select-Object displayname
This command will list all systems that are not bound to a user.
$Systems = Get-JCSystem
$Systems |
    Where-Object {$_._Id -notin (Get-JCAssociation -Type:('system') -Id:($_._Id) -TargetType:('system_group')).id} |
    Select-Object displayname
This command will list all systems that are not bound to a system group.
Get-JCSystem -returnProperties hostname, agentVersion, lastContact | Sort-Object lastContact -Descending | Export-CSV JCSystemAgentReport.csvThis command will create a CSV file which contains all systems in a JumpCloud org and include the systems hostname, agentVersion,lastContact date, and JumpCloud _id.
Get-JCSystem -returnProperties hostname, agentVersion, lastContact | Sort-Object lastContact -Descending | Select-Object *, @{name='agentNumber'; expression={(($_.agentVersion).Substring(2)/1)}} | Where-Object agentNumber -lt 10.65 | Export-CSV JCSystemAgentReport.csvThis command will create a CSV file for all JumpCloud systems running a version of the JumpCloud agent less than version 10.65. This is done by creating a calculated property "agentNumber" and using the Where-object function to filter against this property. The calculated property "agentNumber" strips the first two characters of agentVersion: "0." (example 0.10.63 becomes 10.63) which creates an integer value that can be used with Where-Object and mathematical operators.
Modify this portion of the command: Where-Object agentNumber -lt 10.65 to modify the mathematical filter on the agentNumber field to fit your desired usecase.
Get-JCSystem -returnProperties hostname, agentVersion, lastContact | Sort-Object lastContact -Descending | Select-Object *, @{name='agentNumber'; expression={(($_.agentVersion).Substring(2)/1)}} | Where-Object agentNumber -gt 10.65 | Export-CSV JCSystemAgentReport.csvThis command will create a CSV file for all JumpCloud systems running a version of the JumpCloud agent greater than version 10.65. This is done by creating a calculated property "agentNumber" and using the Where-object function to filter against this property. The calculated property "agentNumber" strips the first two characters of agentVersion "0." (example 0.10.63 becomes 10.63) which creates an integer value that can be used with Where-Object and mathematical operators.
Modify this portion of the command: Where-Object agentNumber -gt 10.65 to modify the mathematical filter on the agentNumber field to fit your desired usecase.
Get-JCSystem | Select systemInsights, hostname, _id | ? systemInsights -Like "*deferred*" | Set-JCSystem -systemInsights $trueThis command will enable systemInsights for all systems that it is not enabled on.
Get-JCSystem | ? fde -Like "*keyPresent=True; active=True*" | Select-object hostname, _id, @{Name='key';Expression={Get-JCSystem -SystemID $_._id -SystemFDEKey | Select-object -expandProperty key}}This command will return the System FDE keys for all systems that have a key present.
Get-JCSystem | ? fde -Like "*keyPresent=True; active=True*" | Select-object hostname, _id, @{Name='key';Expression={Get-JCSystem -SystemID $_._id -SystemFDEKey | Select-object -expandProperty key}} | Export-CSV JCSystemFDEKeys.CSVThis export all the System FDE keys JumpCloud encrypted systems that have a key present to a CSV file named "JCSystemFDEKeys.csv".
The command Get-JCSystem can be used to report on macOS systems and query the presence of the JumpCloud Service account.
The JumpCloud Service account (Record name: _jumpcloudserviceaccount) is required to mangage FileVault and SecureTokens using the JumpCloud agent.
Get-JCSystem -os 'Mac OS X' -hasServiceAccount $false -returnProperties displayName, lastContact, hasServiceAccount | Sort-Object lastContact -Descending
Returns all macOS systems that do not have the JumpCloud service account. Append the following to the above command to export this information to CSV: | Export-Csv JCServiceAccountInfo.csv
Get-JCSystem -os 'Mac OS X' -hasServiceAccount $true -returnProperties displayName, lastContact, hasServiceAccount | Sort-Object lastContact -Descending
Returns all macOS systems that have the JumpCloud service account. Append the following to the above command to export this information to CSV: | Export-Csv JCServiceAccountInfo.csv
Get-JCSystem -os 'Mac OS X' -returnProperties displayName, lastContact, hasServiceAccount | Sort-Object lastContact -Descending
Returns all macOS systems and the JumpCloud service account status. Append the following to the above command to export this information to CSV: | Export-Csv JCServiceAccountInfo.csv
Get-JCSystemUser -SystemID 5l733u59c244f2yr0oc55ks9
Returns the JumpCloud users bound to the JumpCloud system with SystemID '5l733u59c244f2yr0oc55ks9'
Get-JCsystem | Get-JCsystemUser | Select displayName, hostname, systemID, username, administrator, directbind, @{Name= 'BindGroups'; Expression = {$_.BindGroups}} | Export-Csv SystemUsers.csv
Exports all JumpCloud system users to the CSV file SystemUsers.csv using the alias 'Select' for the command Select-Object and a caluclaed field to enumerate the 'BindGroups' field.
Get-JCSystem | Get-JCSystemUser | ? Username -EQ 'shane.tune'
Returns all JumpCloud managed systems that the user 'shane.tune' is bound to by querying all system users using the command 'Get-JCSystem | Get-JCSystemUser' and then filtering these results for only the results that contain an object where the username value equals 'shane.tune'.
Get-JCSystem | ? os -Like *Mac* | Get-JCSystemUser
Returns all JumpCloud system users on JumpCloud Mac systems
Get-JCBackup -SystemUsers
Backs up JumpCloud system user information to CSV. A CSV backup file containing all system user information will be created within the current working directory when this command is run.
Get-JCSystem | ForEach-Object { Get-JCAssociation -Type:('system') -Id:($_._id) -TargetType:('user') -IncludeInfo } | Select-Object -Property:('id' `
, @{Name = 'displayName'; Expression = { $_.info.displayName}}`
, @{Name = 'os'; Expression = { $_.info.os }}`
, @{Name = 'remoteIP'; Expression = { $_.info.remoteIP }} `
, @{Name = 'serialNumber'; Expression = {$_.info.serialNumber}}`
, @{Name = 'userId'; Expression = { $_.targetInfo._id }}`
, @{Name = 'username'; Expression = { $_.targetInfo.username}})`
| Export-Csv UserSystemAssociations.csv
This command will enable systemInsights for all systems that it is not enabled on.
Add-JCSystemUser -Username cclemons -SystemID 5a0795nnie7127f4ev2erb154a -Administrator $true
Adds the JumpCloud user with username 'cclemons' to the JumpCloud system with SystemID '5a0795nnie7127f4ev2erb154a' with administrator permissions.
Get-JCSystemUser -SystemID '5a0795nnie7127f4ev2erb154a' | Add-JCSystemUser -SystemID '6a0795nnie7127f4ev2erb154b' -Administrator $true
Adds all JumpCloud users that are bound to JumpCloud system with SystemID '5a0795nnie7127f4ev2erb154a' to JumpCloud system '6a0795nnie7127f4ev2erb154b' with administrator permissions.
Remove-JCSystemUser -Username cclemons -SystemID 5a0795nnie7127f4ev2erb154a -force
Removes the JumpCloud user with username 'cclemons' from the system with SystemID '5a0795nnie7127f4ev2erb154a'. A warning will not display because the '-force' parameter is used.
Get-JCSystemUser -SystemID 5a0795nnie7127f4ev2erb154a | ? Administrator -EQ $false | Remove-JCSystemUser -force
Removes all JumpCloud users from system with SystemID '5a0795nnie7127f4ev2erb154a' who do not have admin rights on the machine. A warning will not display because the '-force' parameter is used.
Step 1: Create the CSV
The commands Add-JCSystemUser has three parameters, SystemID (The ID of the system to modify), username (The user to add to the system), and Administrator (A True/False value to set the user as admin on the system.).
Create a CSV file that has a columns named username, SystemID, and Administrator.
Then fill out the columns with an entry for each JumpCloud system you wish to modify and input the username of the user to add to the systema and a 'True/False' value to denote if the user should be an administrator on the system.
Example contents for a CSV file named systemusers.csv:
username,SystemID,Administrator
cool.dude,5b2a6a7e318d48746c4d88b6,True
bro.hondo,5b2a78ba4a768f6ba1c3fe77,False
cat.dog,5b2a8b2862cab80d13da15f2,False
cool.dude,5b2a78ba4a768f6ba1c3fe77,True
bro.hondo,5b2a8b2862cab80d13da15f2,False
Step 2: Import the CSV
In PowerShell navigate to the location of the CSV file (using cd "path to csv").
Following the pipe is a for-each command where the values of the parameters are being pulled from the current object being passed into the pipeline using "$_.parameterName'"
The '-Administrator' parameter is expecting a boolen True/False value and a string/boolean conversion is done to satisfy this requirement.
Learn more about the PowerShell pipeline here.
Example using above file systemusers.csv.csv and the command Add-JCSystemUser:
Import-Csv ./systemusers.csv | % {Add-JCSystemUser -Username $_.username -SystemID $_.SystemID -Administrator ([System.Convert]::ToBoolean($_.Administrator))}Removing JumpCloud users from JumpCloud systems with disable the local account Removing permissions does not delete local accounts
Step 1: Create the CSV
The commands Remove-JCSystemUser has two parameters, SystemID (The ID of the system to modify) and username (The user to remove from the system).
Create a CSV file that has a columns named username and SystemID.
Then fill out the columns with an entry for each JumpCloud system you wish to modify and input the username of the user to remove from the system.
Example contents for a CSV file named systemusers.csv:
username,SystemID,
cool.dude,5b2a6a7e318d48746c4d88b6
bro.hondo,5b2a78ba4a768f6ba1c3fe77
cat.dog,5b2a8b2862cab80d13da15f2
cool.dude,5b2a78ba4a768f6ba1c3fe77
bro.hondo,5b2a8b2862cab80d13da15f2
Step 2: Import the CSV
In PowerShell navigate to the location of the CSV file (using cd "path to csv").
Following the pipe is a for-each command where the values of the parameters are being pulled from the current object being passed into the pipeline using "$_.parameterName'"
Learn more about the PowerShell pipeline here.
Example using above file systemusers.csv.csv and the command Remove-JCSystemUser:
Import-CSV ./systemusers.csv | % {Remove-JCSystemUser -Username $_.username -SystemID $_.SystemID -force}By default when associating a JumpCloud system group to a JumpCloud user group all of the JumpCloud users within the JumpCloud user group will be created as standard users and not be granted administrative permissions to the systems within the JumpCloud system group. Only JumpCloud users configured as Global Administrators (Sudo=$true) will be given administrative permissions on these systems.
The below commands can be used to modify the system permissions for JumpCloud users granted permissions to JumpCloud systems via JumpCloud user group associations.
Note these commands are not dynamic and only apply to the JumpCloud users and systems that are members of the groups when the commands are run.
To use these commands in your environment modify the values of $UserGroup and $SystemGroup variables.
$UserGroup = 'SalesUsers'
$SystemGroup = 'SalesMachines'

Get-JCSystemGroupMember -GroupName $SystemGroup | Get-JCSystemUser | Where-Object {$_.BindGroups -like $UserGroup} | Add-JCSystemUser -Administrator $true
In this example the JumpCloud users within the JumpCloud user group 'SalesUsers' are granted administrative permissions on all systems within the JumpCloud system group 'SalesMachines'. The command 'Add-JCSystem' is used to add these users as administrators on these systems.
$UserGroup = 'SalesUsers'
$SystemGroup = 'SalesMachines'

Get-JCSystemGroupMember -GroupName $SystemGroup | Get-JCSystemUser | Where-Object {$_.BindGroups -like $UserGroup} | Set-JCSystemUser -Administrator $false
In this example the JumpCloud users within the JumpCloud user group 'SalesUsers' are set as standard users on all systems within the JumpCloud system group 'SalesMachines'. The command 'Set-JCSystem' is used to modify the system permissions.
New-JCSystemGroup 'BoulderMachines'
Creates a new JumpCloud System Group 'BoulderMachines'
PS > $NewGroups = 'MarketingMachines', 'SalesMachines', 'TechMachines', 'AdminMachines'
PS > $NewGroups | Foreach {New-JCSystemGroup $_}

Name              id                       Result
----              --                       ------
MarketingMachines 5a85f57d232e110d42979986 Created
SalesMachines     5a85f57d1f24757f6e672e89 Created
TechMachines      5a85f57d232e110d4297998a Created
AdminMachines     5a85f57e45886d7d22a3676d Created
Creates four JumpCloud System Groups by first creating an array of the new groups and then using 'Foreach' to create a group for each object in the array.
Get-JCSystemGroupMember TechMachines
Returns the JumpCloud systems that are members of the group 'TechMachines'
Get-JCGroup -type System
Returns all JumpCloud systems groups
Get-JCGroup -type System | Get-JCSystemGroupMember
Returns all JumpCloud systems groups and the systems group members
Get-JCGroup -type System | Get-JCSystemGroupmember | Group-Object GroupName
Returns all JumpCloud System Group members grouped by 'GroupName' using the 'Group-Object' command
Get-JCGroup -type System | ? name -Like *Dev* | Get-JCSystemGroupMember | Export-CSV SalesGroupMembers.csv
Exports all JumpCloud systems within all JumpCloud System Groups that contain the word 'Dev' to the file 'DevSystemGroupMembers.csv' using the 'Export-CSV' command
Get-JCGroup -type System | Get-JCSystemGroupMember | ? SystemID -eq '5l733u59c244f2yr0oc55ks9'
Returns all the JumpCloud groups that the system with SystemID '5l733u59c244f2yr0oc55ks9' is a member of using the pipeline and the alias '?' for the command Where-Object
Add-JCSystemGroupMember -GroupName Developers -SystemID '5l733u59c244f2yr0oc55ks9'
Adds the system with JumpCloud SystemID '5l733u59c244f2yr0oc55ks9' to the System Group 'Developers'
Get-JCGroup -type System | Get-JCSystemGroupMember | ? SystemID -eq '5l733u59c244f2yr0oc55ks9' | Add-JCSystemGroupMember -SystemID '5a316nf14n726iel204u0v54'
Adds the JumpCloud system with system ID '5a316nf14n726iel204u0v54' to all the same system groups that system '5l733u59c244f2yr0oc55ks9' is a member of
Get-JCSystemGroupMember -GroupName Developers | Add-JCSystemGroupMember -GroupName DevOpsTeam
Adds all JumpCloud systems who are members of the System Group 'Developers' to the System Group 'DevOpsTeam'
Get-JCSystem -active $true | Add-JCSystemGroupMember -GroupName ActiveSystems
Adds all JumpCloud systems that are active to the JumpCloud System Group ActiveSystems
Get-JCSystem | Sort-Object created | select -First 10 | Add-JCSystemGroupMember -GroupName FirstTen
Adds the oldest 10 JumpCloud systems to the JumpCloud System Group 'FirstTen'
Remove-JCSystemGroupMember -GroupName Dev -SystemID 5a316nf14n726iel204u0v54
Removes the system with JumpCloud SystemID '5a316nf14n726iel204u0v54' from the group 'Dev'
PS > $RemoveGroup = 'MFA_disabled'
PS > Get-JCSystemGroupMember $RemoveGroup | ForEach-Object { Get-JCSystem -SystemID $_.SystemID | ? allowMultiFactorAuthentication  -EQ $True | Remove-JCSystemGroupMember -GroupName $RemoveGroup }
First the variable '$RemoveGroup' is set to 'MFA_disabled'. Next each system member of the group 'MFA_disabled' is queried to see if MFA has been configured. If MFA has been enabled the system is removed from the 'MFA_disabled' group.
Step 1: Create the CSV
The commands New-JCUserGroup and New-JCSystemGroup both have a single mandatory parameter: GroupName
The easiest way to add JumpCloud user or system groups in bulk group via a CSV file is to create a CSV with a single column headings GroupName which aligns with this mandatory parameters.
Then fill out this columns with an entry for each group group to create.
Example contents for a CSV file named groupimport.csv:
GroupName
Group1
Group2
Group3
Group4
Group5
Step 2: Import the CSV
Example using the above file groupimport.csv to create JumpCloud user groups:
Be sure you provide the full file path to the CSV file or are within the directory of the file in your terminal when you attempt to run the below commands.
Import-CSV ./groupimport.csv | New-JCUserGroupThis example takes the above file groupimport.csv as input for the command New-JCUserGroup and creates a JumpCloud user group for each entry under the column header 'GroupName'.
Example Output:
Name   id                       Result
----   --                       ------
Group1 5cake00e232e110d42375e93 Created
Group2 5cake00e1f24757f6e06fa6f Created
Group3 5cake00e1f24757f6e06fa70 Created
Group4 5cake00e232e110d42375e94 Created
Group5 5cake00e1f24757f6e06fa71 Created
Example using the above file groupimport.csv to create JumpCloud system groups:
Be sure you provide the full file path to the CSV file or are within the directory of the file in your terminal when you attempt to run the below commands.
Import-CSV ./groupimport.csv | New-JCSystemGroupThis example takes the above file groupimport.csv as input for the command New-JCSystemGroup and creates a JumpCloud system group for each entry under the column header 'GroupName'.
Example Output:
Name   id                       Result
----   --                       ------
Group1 5suhh00e232e110d42375e93 Created
Group2 5suhh00e1f24757f6e06fa6f Created
Group3 5suhh00e1f24757f6e06fa70 Created
Group4 5suhh00e232e110d42375e94 Created
Group5 5suhh00e1f24757f6e06fa71 Created
Step 1: Create the CSV
The commands Set-JCSystem has one mandatory parameter 'SystemID' and five optional parameters. Locate the name of the parameter you wish to modify in the Set-JCSystem parameter documentation.
Create a CSV file that has a column named SystemID and columns for the parameters you wish to modify in bulk.
For this example we will update the displayName parameter.
Then fill out the columns with an entry for each JumpCloud system you wish to modify and input a value for the parameter being modified.
Example contents for a CSV file named systemupdate.csv:
SystemID, displayName
69dbdbe7f940954c24cea846, bobs.system
5a4969e671ce91367a22c4c4, bruce.system
5b194a5c86d0293dbee0ee07, mary.system
Step 2: Import the CSV
In PowerShell navigate to the location of the CSV file (using cd "path to csv") and pipe "Import-CSV -path "csvname" into the Set-JCSystem command.
Following the pipe is a for-each command where the values of the parameters are being pulled from the current object being passed into the pipeline using "$_.parameterName'"
Learn more about the PowerShell pipeline here.
Example using above file systemupdate.csv and the command Set-JCUserGroupMember:
Import-Csv -Path ./systemupdate.csv | % {Set-JCSystem -SystemID $_.SystemID -displayName $_.DisplayName}
Get-JCUserGroupMember -GroupName 'Students' | % {Get-JCuser -Username $_.username | select username, enable_user_portal_multifactor, totp_enabled}
This command will query the JumpCloud user group 'Students' and returns the group members and their MFA status. To modify this command for your organization change 'Students' to the name of the JumpCloud group you wish to query.
Get-JCUserGroupMember -GroupName 'Students' | Set-JCUser -enable_user_portal_multifactor $trueThis command will trigger an MFA invite for all members of the JumpCloud user group 'Students' and enforce MFA login for the JumpCloud user portal for their accounts. If MFA is enabled for any existing members of the group they will not receive the invite. To modify this command for your organization change 'Students' to the name of the JumpCloud group you wish to enable MFA for.
Get-JCSystemGroupMember -GroupName "MFA Enabled" | Set-JCSystem -allowMultiFactorAuthentication $trueThis command will set allowMultiFactorAuthentication to $true and enable MFA authentication for all users that have multifactor authentication enabled on the target machines in the JumpCloud system group MFA Enabled. Note that this command enabled this value for existing members of the JumpCloud system group. To enable MFA for future members of the system group this command will need to re-run.
Import-JCCommand imports curated JumpCloud commands crafted by JumpCloud Admins into a JumpCloud tenant.
JumpCloud commands use the JumpCloud agent to run PowerShell, cmd, or bash commands on JumpCloud managed systems.
A current list of available commands with command descriptions can be found within the JumpCloud Commands Gallery:
To import a command from the JumpCloud Commands Gallery locate, copy, and run the import command for the command template.
This can be found under the Import This Command header for each command within the gallery.
Example for command Mac - List All Users
Import This Command
To import this command into your JumpCloud tenant run the below command using the JumpCloud PowerShell Module
Import-JCCommand -URL 'https://git.io/jccg-Mac-ListAllUsers'
JumpCloud commands that are configured run on a 'trigger(webhook)' can be run using the command Invoke-JCCommand.
To set a command to run on 'trigger(webhook)':
-
Navigate to the JumpCloud admin console 'Commands' tab and select the command you wish to modify.
-
Under the Launch Event header change the Event drop down menu to 'Run on trigger(webhook)'
-
Enter a 'Trigger Name' (Trigger names can not contain spaces)
-
Save the command
Get-JCCommand | Select-Object name, launchType, trigger
This command will display all JumpCloud commands, the command name, launchType, and trigger if the launchType is set to 'trigger'.
Get-JCCommand | Where-Object launchType -EQ 'trigger' | Select-Object name, trigger
This command displays all JumpCloud commands that are set to 'Run on trigger(webhook)' and shows the command name and the trigger.
Invoke-JCCommand linuxlistallusers
This command runs the JumpCloud command configured to 'Run on trigger(webhook)' and configured wit the trigger name 'linuxlistallusers' on all online the systems associated with the command.
Get-JCCommand | Where-object trigger -Like *macimage* | Invoke-JCCommand
This command runs all commands configured to 'Run on trigger(webhook)' and configured with trigger names that contain macimage on all online the systems associated with the commands.
Get-JCCommandResult
Returns all JumpCloud command results
Get-JCCommandResult | Select-Object name, requestTime, system, exitCode
Returns all command results in a table format and displays the name, requestTime, system, and exitCode for each result.
Get-JCCommandResult | Where-Object exitCode -NE 0
Returns all command results that did not return an exitCode of '0' (an exitCode of 0 generally represents a successful command result)
Get-JCCommandResult | Where-Object system -EQ 'bruces.mac'
Returns all command results for the system 'bruces.mac'
Get-JCCommandResult | Where-Object system -like "*mac*" | Select-Object name, requestTime, system, exitCode
Returns all command results run on systems that have a name like "mac" and displays the name, requestTime, system, and exitCode for each result.
Get-JCCommandResult | Where-Object requestTime -ge (Get-Date).ToString('yyy-MM-ddTHH:mm:ss')Returns all command results for command that were run on the current day.
Get-JCCommandResult | Where-Object requestTime -ge (Get-Date).AddDays(-7).ToString('yyy-MM-ddTHH:mm:ss') | Select-Object name, requestTime, system, exitCode
Return all command results for commands that were run in the past 7 days and displays the name, requestTime, system, and exitCode for each result.
Within the JumpCloud UI in order to see the 'output' of a command you must click into a specific command result.
This logic also applies the the command Get-JCCommandResult
By using the parameter set -ByID or specifying a commandResultID when using Get-JCCommandResult you can view the output of a command.
Example:
PS > Get-JCCommandResult -CommandResultID 5a98650nnie7for2ev94b1er5

name               : Mac - List All Users | v1.0 JCCG
command            : dscl . list /Users | grep -v '^_' | grep -v 'daemon' | grep -v 'nobody' | grep -v 'root'

system             : admins-Mac.local
organization       : 59sf9co8o00t4ef463187r62
workflowId         : 5d9864o53g20s8268c4at5f6
workflowInstanceId : 5m9864ff9195307a9569lz74
output             : admin
                     scooter
                     buster
exitCode           : 0
user               : root
sudo               : False
requestTime        : 3/1/18 8:39:43 PM
responseTime       : 3/1/18 8:39:43 PM
_id                : 5a98650fde7baa2ad94b1ad5
error              :
Shows the command results including output for a command with the ID '5a98650fde7baa2ad94b1ad5'. This command 'Mac - List All Users | v1.0 JCCG' shows all accounts (JumpCloud / non JumpCloud) on a Mac machine. The output shows three users 'admin, scooter, and buster'
Get-JCCommandResult | Where-Object exitCode -NE 0| Get-JCCommandResult -ByID | Select-Object system, exitCode,requestTime, output | Format-Table -WrapDisplays the command results including output for all commands that do not have exitCode of '0'
Get-JCCommandResult | Where-Object Name -eq "Mac - List All Users | v1.0 JCCG" | Get-JCCommandResult -ByID | Select-Object system, exitCode,requestTime, output | Format-Table -WrapShows the command results including output for all commands with the name "Mac - List All Users | v1.0 JCCG". 'Format-Table -Wrap' is used to show output in the terminal
Get-JCCommandResult | Get-JCCommandResult -byID | Export-Csv CommandResults.csv
Returns all command results and exports them to the CSV 'CommandResults.csv'. Command OUTPUT included.
Get-JCCommandResult | Where-Object requestTime -ge (Get-Date).ToString('yyy-MM-ddTHH:mm:ss') | Get-JCCommandResult -ByID | Export-Csv CommandResultsToday_withOutput.csvReturns all command results for command that were run on the current day and exports them to the CSV 'CommandResultsToday_withOutput.csv'. Command OUTPUT included.
Get-JCCommandResult | Where-Object exitCode -NE 0| Get-JCCommandResult -ByID | Select-Object system, exitCode,requestTime, output | Export-Csv FailedCommand.csvExports the command results including output for all commands that do not have exitCode of '0' to the CSV file 'FailedCommand.csv'
$CommandName="Mac - Verify JumpCloud Service Account | v1.1 JCCG"
Get-JCCommandResult | Where-Object Name -Like "$CommandName"  | Get-JCCommandResult -ByID | Select-Object name, system, systemId, exitCode, output | Export-CSV "JCCommandResults.csv"
This command will search all JumpCloud command results for a specific command name and export the command results to a CSV file.
The variable $CommandName should be populated with the command name you wish to search.
In this example the variable is set to search for commands with a name of "Mac - Verify JumpCloud Service Account | v1.1 JCCG". Modify this variable to the name of the command that you wish to search for.
Remove-JCCommandResult -CommandResultID 5a98650nnie7for2ev94b1er5
Removes the JumpCloud command result with CommandResultID '5aba7c1c13d263515f35f018'. A prompt will display to confirm the delete.
Remove-JCCommandResult -CommandResultID 5a98650nnie7for2ev94b1er5 -force
Removes the JumpCloud command result with CommandResultID '5aba7c1c13d263515f35f018'. Because the '-force' parameter is used a confirm prompt will not display.
Get-JCCommandResult | Where-Object exitCode -eq 0 | Remove-JCCommandResult -force
Removes all JumpCloud command results that have an exitCode of '0'. Because the '-force' parameter is used a confirm prompt will not display.
Get-JCCommandResult | Where-Object requestTime -ge (Get-Date).ToString('yyy-MM-ddTHH:mm:ss') | Remove-JCCommandResult -forceRemoves all JumpCloud command results run on the current day. Because the '-force' parameter is used a confirm prompt will not display.
Get-JCCommand | ? commandType -ne windows | Get-JCCommand -ByID | ? user -ne '000000000000000000000000' | Select-Object name, @{ Name = 'username'; Expression = {Get-JCUser -id $_.user | Select-Object -expandproperty username}}Returns a list of all commands where a JumpCloud user is set as the run-as user.
Get-JCSystemInsights -Table User -SystemId "5a55934c2a9te8635695c817"To search for users on a JumpCloud system use the -id parameter with the systems JumpCloud ID. The command Get-JCSystem -returnProperties hostname can be used to get a list of JumpCloud systems with the system hostname and JumpCloud ID.
Get-JCSystemInsights -Table User -Filter username:eq:clarence.clemonsThis command will search for a user with username clarence.clemons across all systems with systemInsights enabled.
Get-JCSystemInsights -Table User | Select-Object username, SystemId | Where-Object type -ne "special" | Where-Object username -notlike _* | Where-Object username -notin $("daemon","root","nobody")This command will output all users that are not system accounts on all systems with systemInsights enabled and return the username and the system_id.
Get-JCSystemInsights -Table User | Select-Object username, systemId | Where-Object type -ne "special" | Where-Object username -notlike _* | Where-Object username -notin $("daemon","root","nobody") | Export-CSV existing_users_on_systems.csvThis command will output all users that are not system accounts on all systems with systemInsights enabled and export the results to a CSV file.
Get-JCSystemApp -SystemId "5d5592cedab97349236d1d01"Get-JCSystemApp -SystemOS macOS | ConvertTo-CSV | Out-File macOSapps.csvThis command will output all installed applications for all Mac systems with systemInsights enabled and export the results to a CSV file.
Get-JCSystemApp -SystemOS windows | ConvertTo-CSV | Out-File windowsPrograms.csvThis command will output all installed applications for all windows systems with systemInsights enabled and export the results to a CSV file.
Get-JCSystemApp -SystemOS linux | ConvertTo-CSV | Out-File linuxPackages.csvThis command will output all installed applications for all linux systems with systemInsights enabled and export the results to a CSV file.
Get-JCSystemApp -Name "Google Chrome"This command will output all instances of Google Chrome installed on all devices. Note: output from windows, macOS may be returned here. The table property differ slightly between the two OS types.
Get-JCEvent -Service:('all') -StartTime:((Get-date).AddDays(-30))This command will query all event logs between the time the command was run and thirty days prior.
Get-JCEvent -Service:('directory') -StartTime:((Get-date).AddHours(-1)) -Limit:('10')This command will get get directory results from the last hour limited to the last 10 results in the time range
Get-JCEvent -Service:('directory') -StartTime:('2020-04-14T00:00:00Z') -Sort:("DESC") -EndTime:('2020-04-20T23:00:00Z')This command will get the directory results between a time range with the date specified using a RFC3339-formatted date.
Get-JCEvent -Service:('directory') -StartTime:((Get-date).AddDays(-30)) -Sort:("DESC") -EndTime:((Get-date).AddDays(-5))This command will get the directory results between thirty and five days ago.
Get-JCEvent -Service:('all') -StartTime:((Get-date).AddDays(-30)) -SearchTermAnd @{"event_type" = "admin_login_attempt"}This command will query all event logs between the current time and thirty days prior and filter results to display only admin login attempts
Get-JCEvent -Service:('all') -StartTime:((Get-date).AddDays(-30)) -SearchTermAnd @{"event_type" = "admin_login_attempt"; "resource.email" = "[email protected]"}This command will query all event logs between the current time and thirty days prior and filter results to display only admin login attempts by Herbie Hancock's email address.
Get-JCEvent -Service:('all') -StartTime:((Get-date).AddDays(-30)) -SearchTermOr @{"initiated_by.username" = @("herbie.hancock", "jimmy.mcgriff") }This command will search for all events initiated by the two users herbie.hancock and jimmy.mcgriff between between the current time and thirty days prior.
Get-JCEvent -Service:('all') -StartTime:((Get-date).AddDays(-30)) -SearchTermAnd @{"event_type" = "user_delete"}This command will query all event logs between the current time and thirty days prior and filter results to display only user delete events
Get-JCEvent -Service:('all') -StartTime:((Get-date).AddDays(-30)) -SearchTermAnd @{"event_type" = "user_create"}This command will query all event logs between the current time and thirty days prior and filter results to display only user create events
Get-JCEvent -Service:('all') -StartTime:((Get-date).AddDays(-30)) -SearchTermAnd @{"event_type" = "organization_update"}This command will query all event logs between the current time and thirty days prior and filter results to display only JumpCloud organization updates
Get-JCEvent -Service:('all') -StartTime:((Get-date).AddDays(-30)) -SearchTermAnd @{"event_type" = "group_delete"}
This command will query all event logs between the current time and thirty days prior and filter results to display only group delete events
Get-JCEvent -Service:('all') -StartTime:((Get-date).AddDays(-30)) -SearchTermAnd @{"event_type" = "group_create"}This command will query all event logs between the current time and thirty days prior and filter results to display only group create events
Get-JCEvent -Service:('all') -StartTime:((Get-date).AddDays(-30)) -SearchTermAnd @{"event_type" = "sso_auth"}This command will query all event logs between the current time and thirty days prior and filter results to display only SSO authorization events
Get-JCEvent -Service:('sso') -StartTime:((Get-date).AddDays(-30)) -SearchTermAnd @{"initiated_by.username" = "herbie.hancock" }This command will query all event logs between the current time and thirty days prior and filter results to display only SSO authorization events by user Herbie Hancock.
Get-JCEvent -Service:('all') -StartTime:((Get-date).AddDays(-30)) -SearchTermAnd @{"username" = "gw"}This command will query all event logs between the current date and thirty days prior where the "gw" user username appears in the results list.
Get-JCPolicy | Get-JCPolicyResult | Where-Object {$_.systemID -eq "5k193yl02er3oc5951781ks6"
This command will show all the policy results for a system with JumpCloud systemID 5k193yl02er3oc5951781ks6 replace 5k193yl02er3oc5951781ks6 with a system ID for a system in your JumpCloud tenant to use this example.
New-JCRadiusServer -Name "Boulder Office HA 1" -networkSourceIp 70.91.122.111This command creates a new JumpCloud RADIUS server with the name: "Boulder Office HA 1" and the networkSourceIp: 70.91.122.111. If no shared secret is specified when creating a RADIUS server a random 31 character shared secret will be generated.
Set-JCRadiusServer -Name "Boulder Office HA 1" -networkSourceIp 70.91.111.122This command updates the JumpCloud RADIUS server with the name: "Boulder Office HA 1" and updates the networkSourceIp to 70.91.111.122
Add-JCAssociation -Type user_group -Name "Accounting" -TargetType radius_server -TargetName "Boulder Office HA 1"This example will associate the JumpCloud user group named "Accounting" to the JumpCloud RADIUS server named "Boulder Office HA 1". All users in this user group will be able to authenticate against the "Boulder Office HA 1" RADIUS server.
Remove-JCAssociation -Type user_group -Name "Accounting" -TargetType radius_server -TargetName "Boulder Office HA 1"This example will remove the association between the JumpCloud user group named "Accounting" and the JumpCloud RADIUS server named "Boulder Office HA 1". All users in this user group will no longer be able to authenticate against the "Boulder Office HA 1" RADIUS server.
Copying all JumpCloud Associations From One User to Another and Excluding Direct System Associations
Copy-JCAssociation -Type user -username 'gale.boetticher' -TargetName 'jesse.pinkman' -ExcludeType system -ForceThis example will copy all the JumpCloud associations from the user 'gale.boetticher' to the user 'jesse.pinkman' and exclude the direct system associations using the -ExcludeType parameter. Using the -Force parameter will prevent a Y/N prompt from being displayed to confirm each association.
Copying all JumpCloud Associations From One User to Another, Excluding Direct System Associations and Removing Existing Associations
Copy-JCAssociation -Type user -username 'gale.boetticher' -TargetName 'jesse.pinkman' -ExcludeType system -RemoveExisting -ForceThis example will copy all the JumpCloud associations from the user 'gale.boetticher' to the user 'jesse.pinkman' and exclude the direct system associations using the -ExcludeType parameter. Using the -RemoveExisting paramater will remove all existing associations from user jesse.pinkman so the associations excluding 'systems' are identical to user gale.boetticher. Using the -Force paramter will prevent a Y/N prompt from being displayed to confirm each association.
Copy-JCAssociation -Type user -username '-username 'gale.boetticher' -TargetName 'jesse.pinkman' -IncludeType user_groupThis example will only copy the user group associations from the user gale.boetticher to the user jesse.pinkman. The -RemoveExisting parameter can be added to this example to duplicate the user group associations from one user to another. Using -RemoveExisting would remove any existing user group associations from the target user.
Copying Resource Associations from One User Group to Another and Excluding Members of the User Group
Copy-JCAssociation -Type user_group -Name Accounting -TargetName AccountingAdmins -ExcludeType userThis example shows how to copy the associations of a user group from one group to another and exclude copying the members of the group. This can be used to duplicate group associations from one group to another. In this example the associations of user group Accounting are copied to the user group AccountingAdmins. The -force parameter can be used to add all associations without a 'Y/N' prompt.
Copy-JCAssociation -Type system_group -Name 'Denver Dev Systems' -TargetName 'Boulder Dev Systems' -ExcludeType systemThis example shows how to copy the associations of a system group from one group to another and exclude copying the members of the group. This can be used to duplicate group associations from one group to another. In this example the associations of system group Denver Dev Systems are copied to the system group Boulder Dev Systems. The -force parameter can be used to add all associations without a 'Y/N' prompt.
The function Select-Object can be used to create calculated PowerShell properties.
Calculated properties are used with the Select-Object command to add additional fields to PowerShell objects and follow a format of @{Name="Enter Name"; Expression={Enter PowerShell expression}} after the Select-Object command is called.
Example:
Get-ChildItem C:\Test | Select-Object Name, @{Name="upperCaseName"; Expression={$_.Name.ToUpper()}Calculated fields allow you to nest PowerShell commands within one another for custom use cases.
These fields can be used in tandem with the PowerShell pipeline as the input used to link PowerShell commands together or to add additional values to objects exported to a CSV file.
Using calculated fields may increase the time it takes to return the results of a PowerShell commands as additional memory and operations are occurring.
Find some examples for using calculated properties with the JumpCloud module below:
Get-JCUserGroupMember -groupName Sales | Select-Object GroupName, Username, @{ Name = 'UserDetails'; Expression = {Get-JCUser -username $_.Username -returnproperties firstname, lastname, email}}Creates and adds a calculated property to the results of the Get-JCUserGroupMember command named UserDetails which contains the users firstname, lastname, email and _id.
Get-JCGroup -type User | ? name -Like "*Sales*" | Get-JCUserGroupMember | Select-Object GroupName, Username, @{ Name = 'UserDetails'; Expression = {Get-JCUser -username $_.Username -returnproperties firstname, lastname, email}} | Select-Object GroupName, Username, @{Name = "firstname"; Expression = {$_.UserDetails.firstname}}, @{Name = "lastname"; Expression = {$_.UserDetails.lastname}}, @{Name = "email"; Expression = {$_.UserDetails.email}} | Export-Csv GroupAndUserDetails.csv -NoTypeInformationExpands on the previous example above and exports all JumpCloud user groups with names like "Sales" using the wild card character * and their group members to a CSV file where each sub property of the calculated property UserDetails is expanded into an isolated property and creates a csv with the resulting columns:
"GroupName","Username","firstname","lastname","email"With an entry for each user group member. To customize this command modify this section of the example: Get-JCGroup -type User | ? name -Like "*Sales*"