Testing with Physical Devices - TestlumFramework/Testlum GitHub Wiki
Note: enabling the developer options or debug mode on your device may differ depending on the device and OS version. In case our guide does not suit you, please check how it is done on your device’s manufacturer's official website or check the official Android Studio documentation on how it is done.
First, we need to enable developer options if they were hidden from your phone Settings until now.
On your device, find the Build number option.
The location of the Build number settings is usually this way: Settings > About phone > Build number (click several times).
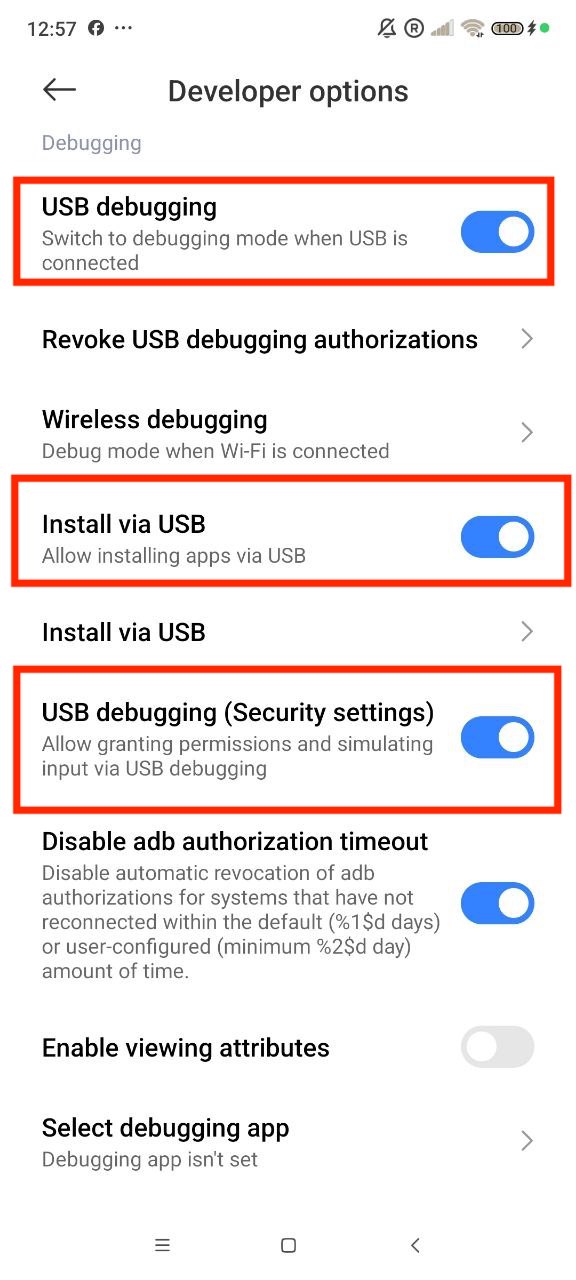
Once developer options are enabled, we must enable the USB debugging mode on your Android device.
For that, go to Settings > Additional settings > Developer Options > USB debugging and turn it on.
Also, you need to enable installation via USB and USB debugging (Security settings) because devices running Android 9 (Pie) or above have restrictions on accessing certain internal settings that have been introduced.
Then, connect your Android device to the computer via a USB cable and allow USB debugging mode.
Usually, all the devices install drivers automatically once they are connected to the computer. But, if you have a problem connecting your device to your computer, try to do this:
If your device manufacturer is Google, you can install your USB drivers from Android Studio.
- Open Android Studio and go to
Settings > Languages&Frameworks > Android SDK.- In the window that opens, select the
SDK Toolstab, check the boxGoogle USB Driver, and clickApply.
For other devices:
- Find in a search engine on your computer the
Device Managersettings.- Find
Portable Devices, right-click onYour Device Name, and chooseUpdate driver.- Choose the
Search automaticallyoption.- Or download and install them manually from your manufacturer's official website.
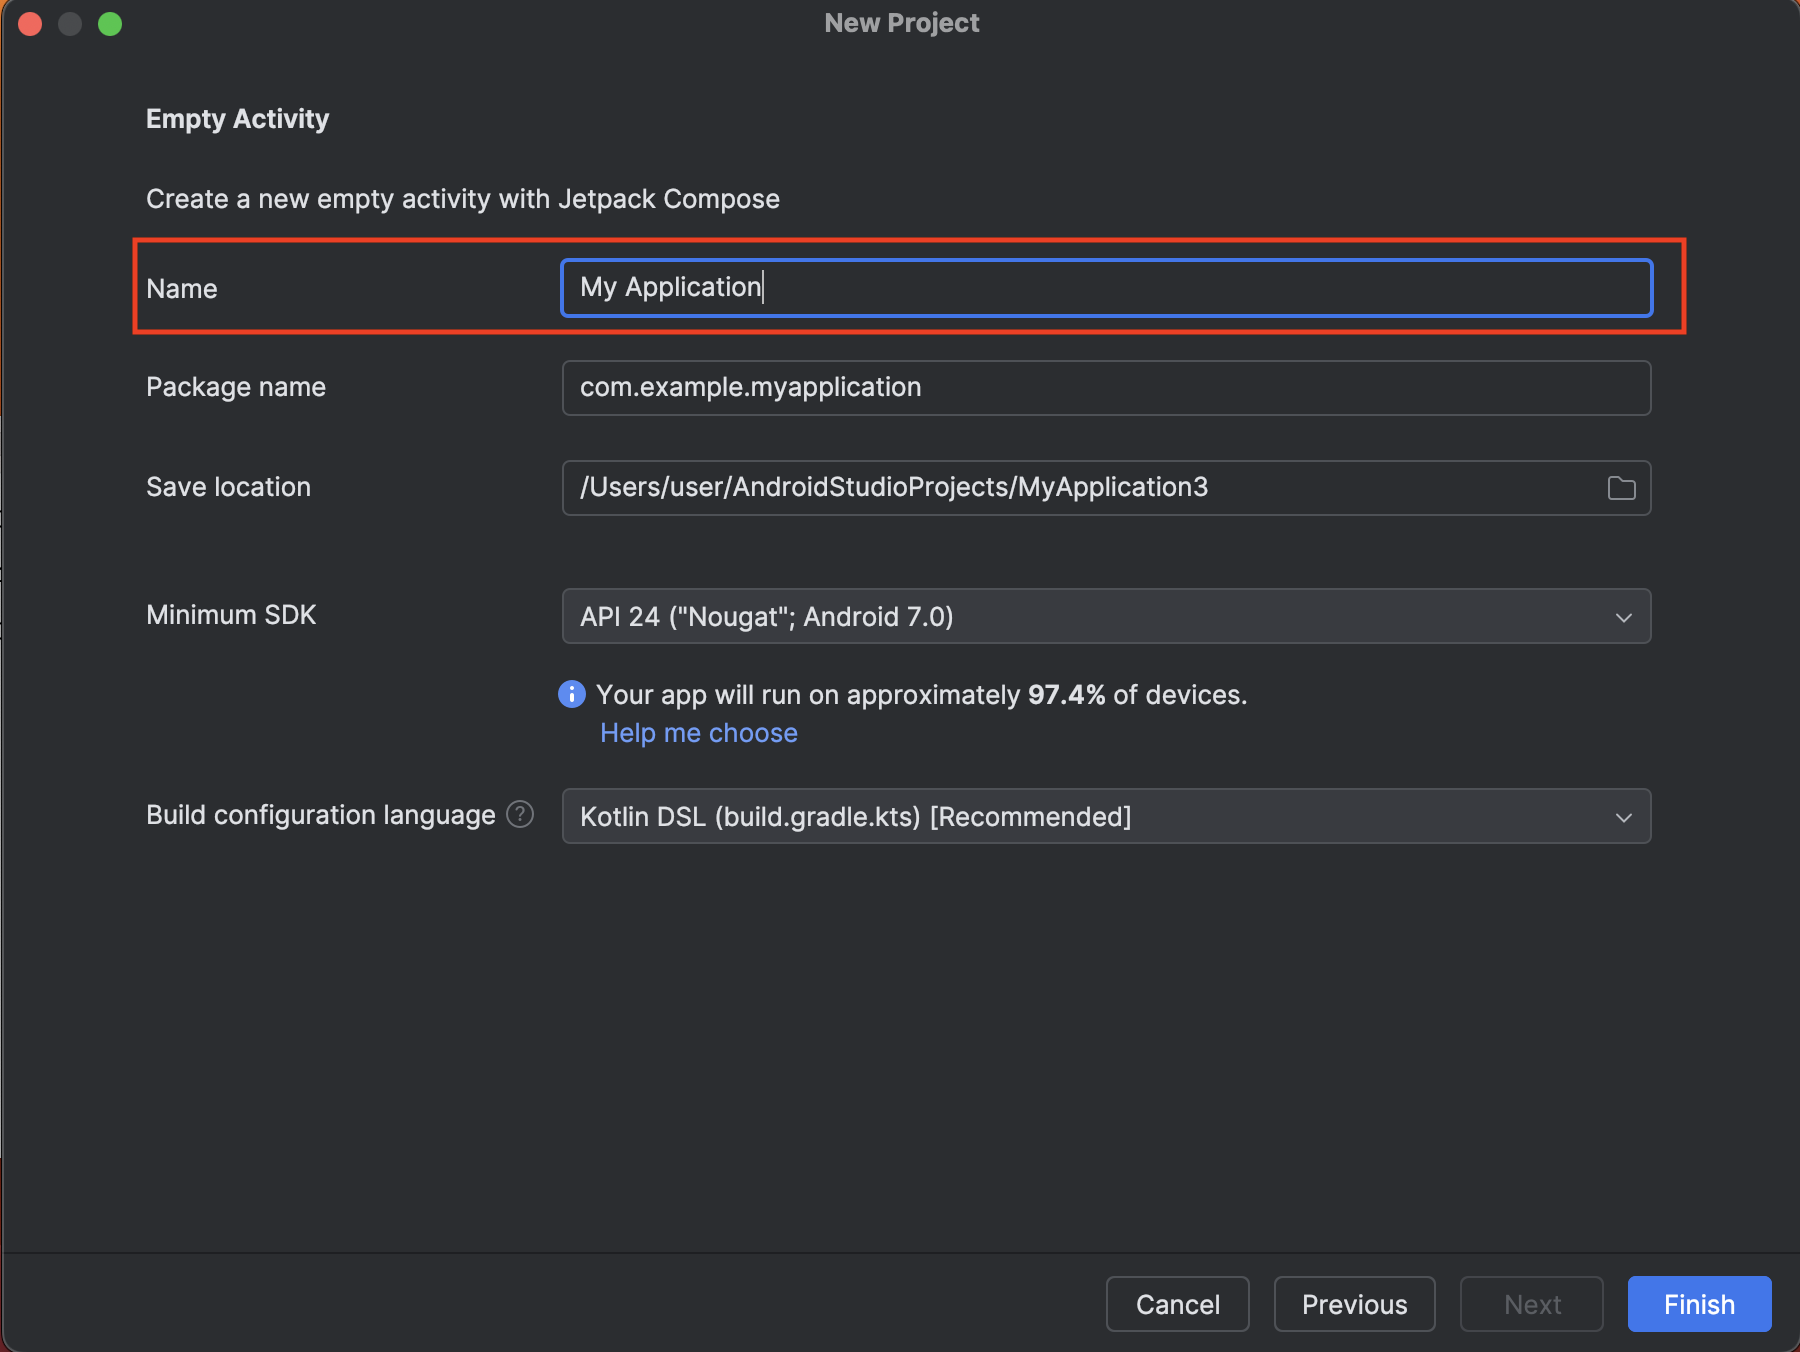
⚠️ Note: If you have not yet installed and configured Android Studio, please do it to continue with real device testing.
Open Android Studio and create a new project, then name it.

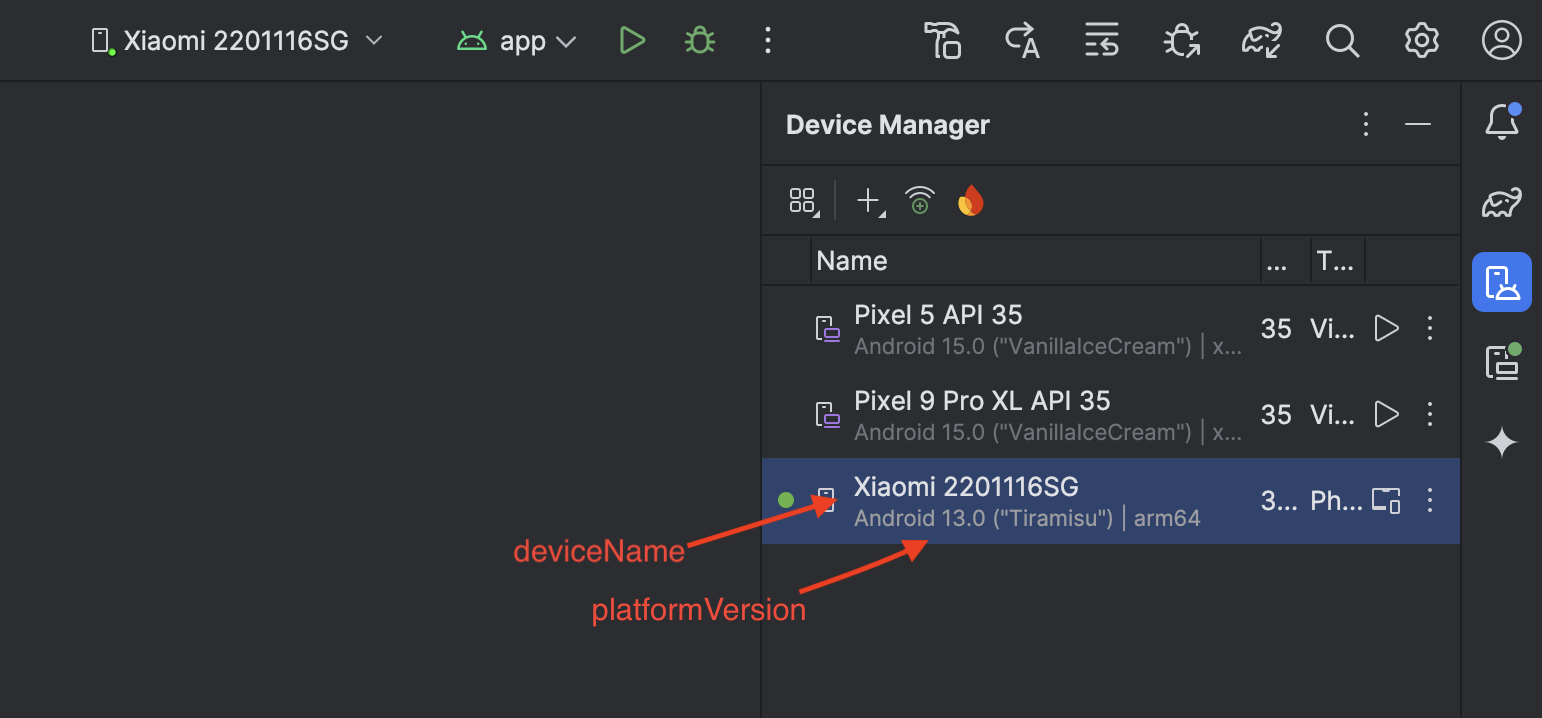
Open tab View > Tool Windows > Device Manager.
🛠️ Configure ui.xml File
Inside your config folder, locate and edit the <native> block in the ui.xml file.
Use <appiumServer> inside <connection> and <appiumCapabilities> inside <device>.
Fill in the following tags:
| Tag | Description |
|---|---|
<deviceName> |
Copy the device name from Android Studio and paste it |
<platformVersion> |
Find it on your device (Settings ➔ About phone) or in Android Studio |
<udid> |
Run adb devices in your CLI and copy the device ID |
⚡ Launch Appium Server
- If you don't have Appium installed, install it first.
- Then launch Appium by running the command:
appium🗂️ Example
ui.xmlConfiguration<native enabled="true"> <takeScreenshots enable="false"/> <elementAutowait seconds="300"/> <connection> <appiumServer> <serverUrl>http://127.0.0.1:4723/</serverUrl> </appiumServer> </connection> <devices> <device alias="NATIVE_0" platformName="android" enabled="true"> <appiumCapabilities> <deviceName>Xiaomi 2201116SG</deviceName> <platformVersion>13.0</platformVersion> <udid>453d10d9af64</udid> <appPackage>com.todoist</appPackage> <appActivity>com.todoist.activity.HomeActivity</appActivity> </appiumCapabilities> </device> </devices> </native>
🛎️ Final Step: Appium Settings Installation
After starting a native test scenario, your device may automatically prompt you to install Appium Settings.
👉 Simply accept the installation to ensure everything works smoothly.
✅ Now you are ready to run native tests on a real device with Testlum!
Enjoy your seamless mobile automation journey! 🚀