Locators Collecting in Native Applications - TestlumFramework/Testlum GitHub Wiki
- Prerequisites:
- Install Node.js: Appium requires Node.js to run. If you haven’t already, download and install Node.js from the official website: https://nodejs.org/
- Install Appium: Install the Appium command-line tool using npm (Node Package Manager) by running the following command in your terminal:
npm install -g appium- Install Appium Server Dependencies: Appium requires additional dependencies for different platforms (Android and/or iOS).
- Launch Appium Server:
- Open a terminal window.
- Start the Appium server by running the command: appium.
- Connect a Mobile Device or Emulator/Simulator:
- Make sure you have a physical mobile device connected to your computer with USB debugging enabled, or you have an emulator/simulator set up and running.
- Open Appium Inspector:
- Install and open Appium Inspector.
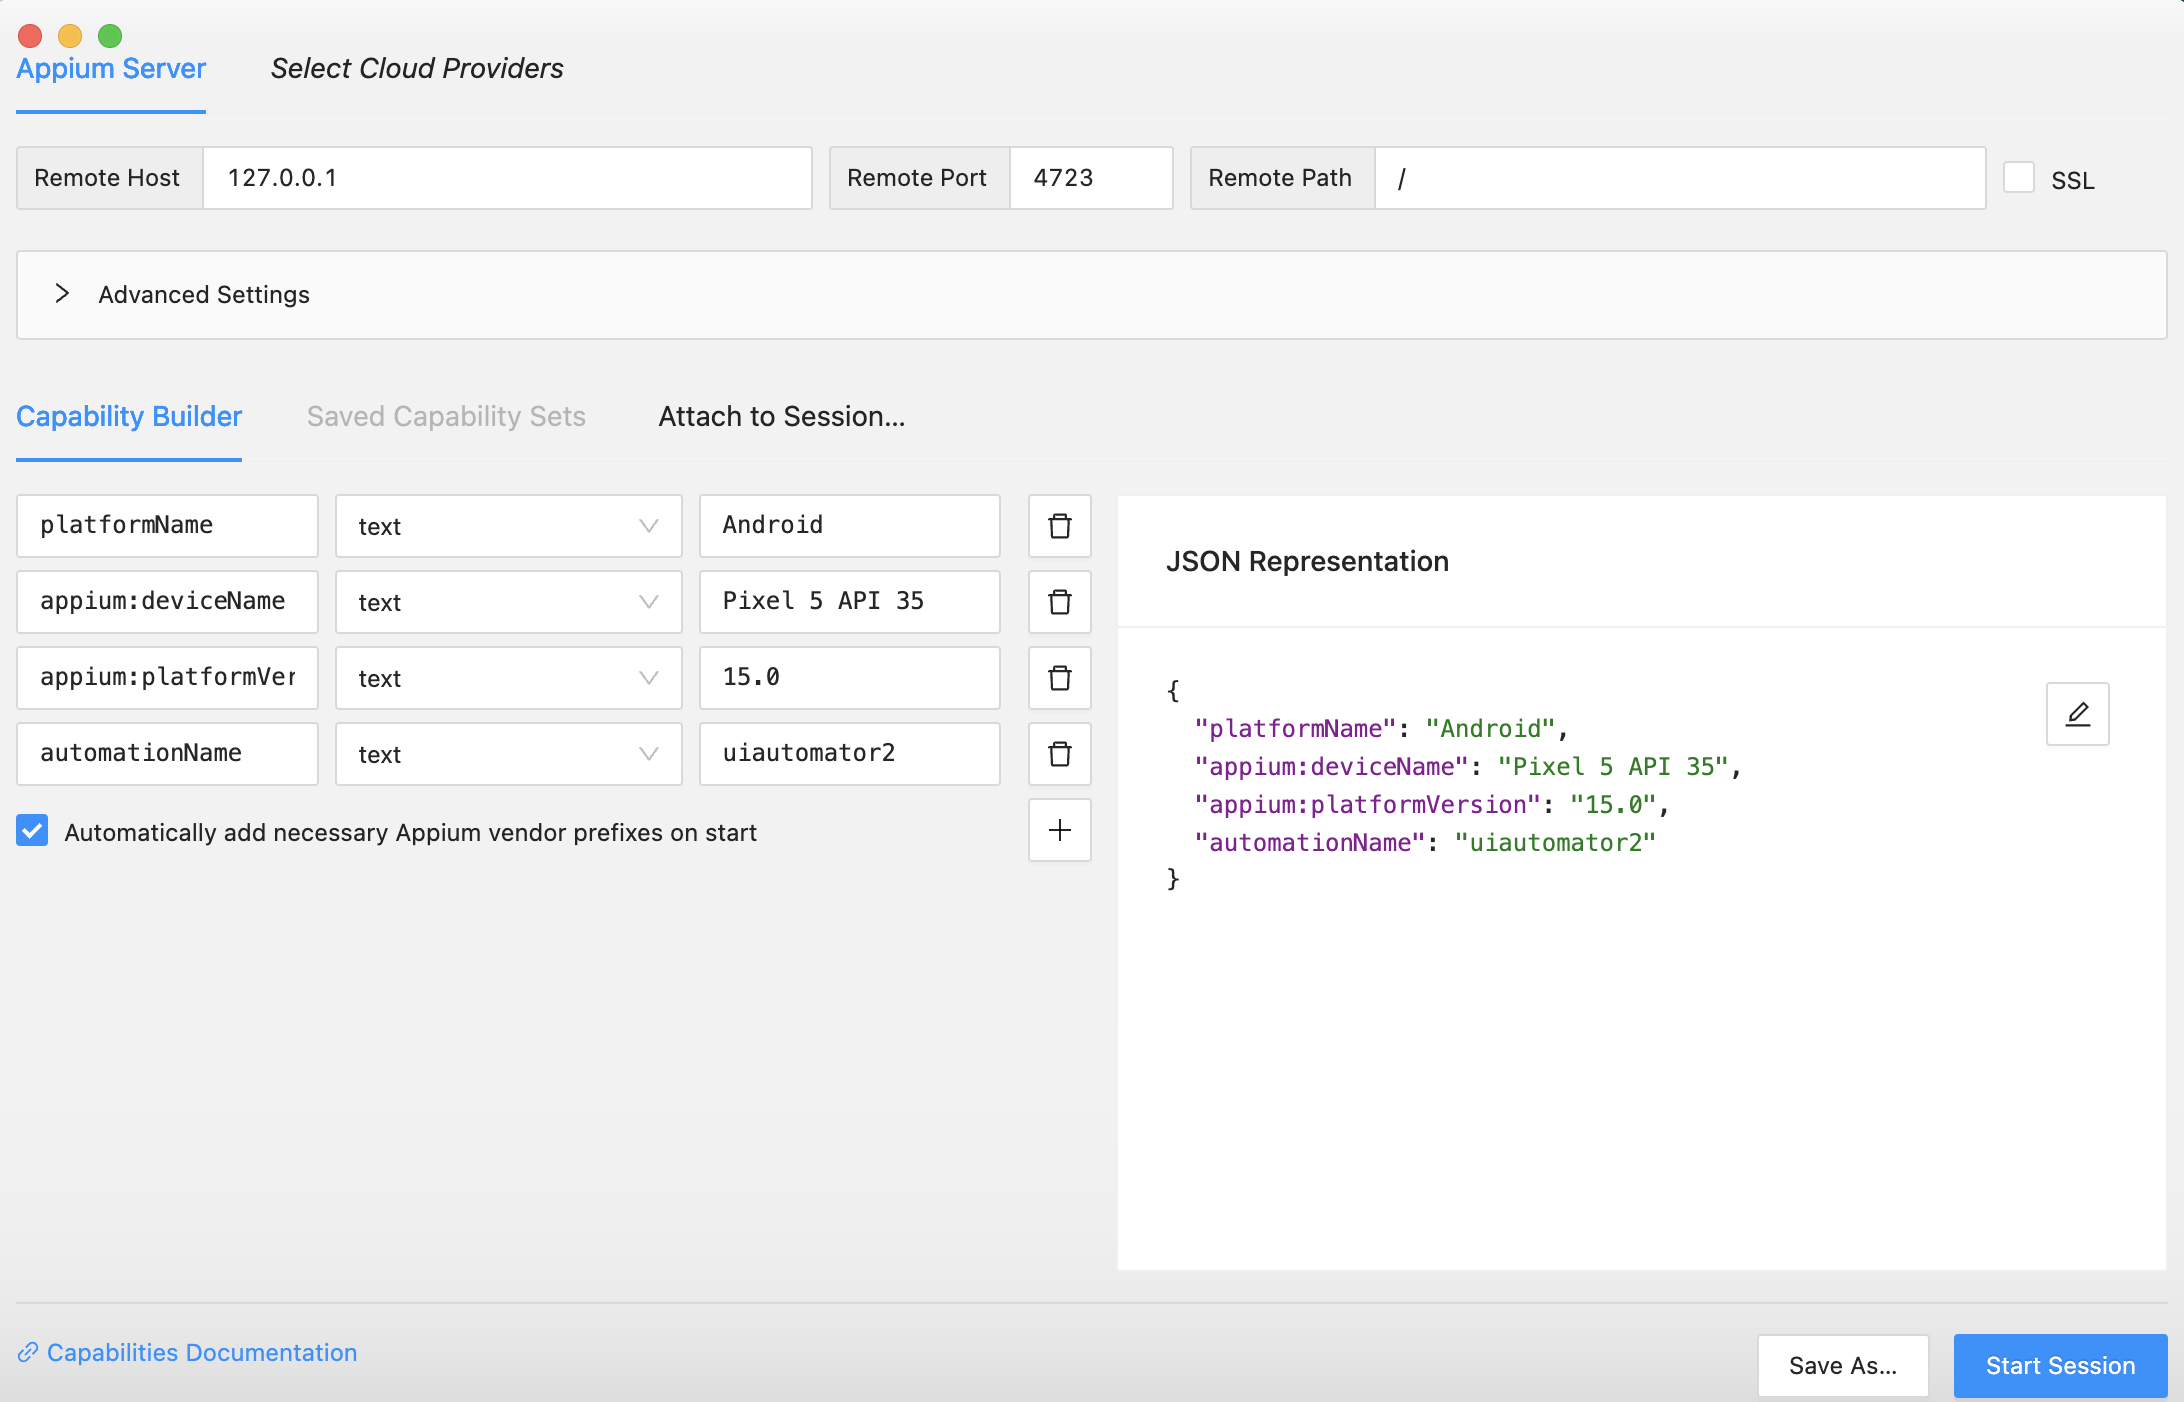
- Configure Appium Inspector
In the Desired Capabilities section, enter the capabilities required for your specific app and device.
Platform: Select the platform of your device (Android or iOS).Device Name: Choose the connected device or emulator/simulator.Platform Version: Specify the platform version of the device.AutomationName.Example for Android
{
    "platformName": "Android",
    "appium:deviceName": "MyDevice",
    "appium:platformVersion": "13.0",
    "appium:automationName": "uiautomator2"
}
For iOS, set platformName to iOS and configure the capabilities accordingly (like deviceName, platformVersion, automationName, etc.).
- Start a Session
- Click the “Start Session” button in Appium Inspector. This will initiate a connection between the Inspector and the mobile device/emulator. If everything is set up correctly, Appium Inspector will connect to your device or emulator and launch your app for inspection.
- Inspect and Interact:
- The Appium Inspector GUI will display a preview of your app’s user interface.
- Interact with the app by clicking, tapping, swiping, or performing other actions on the app’s elements.
- As you interact with elements, Appium Inspector will highlight the selected element and display its properties in the right panel.
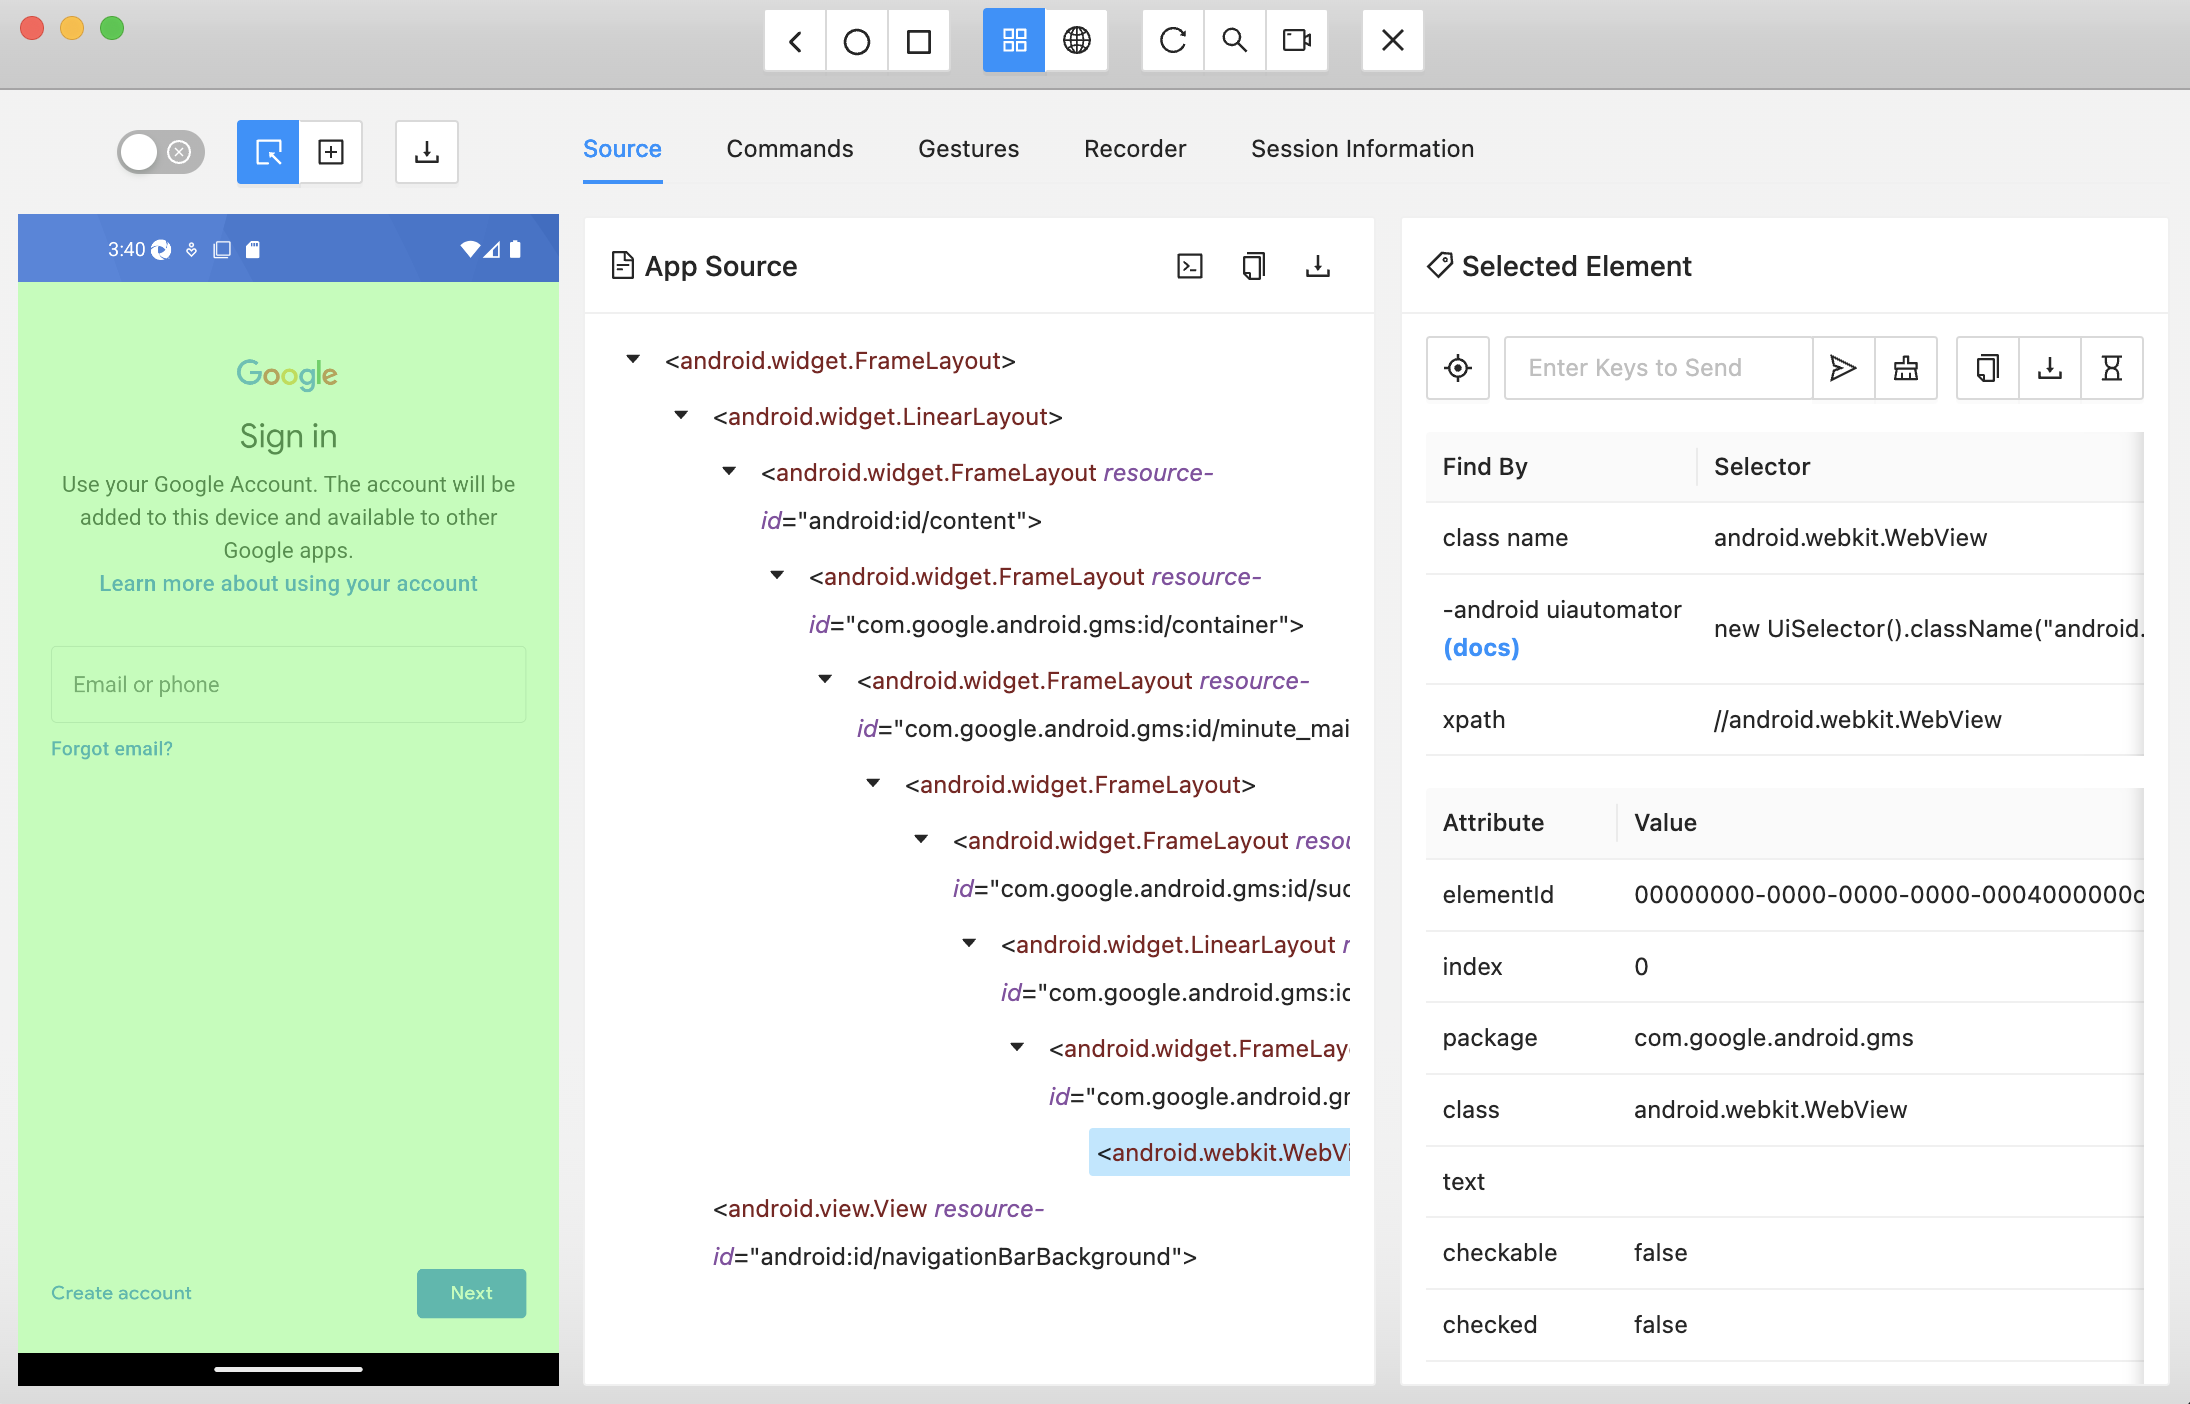
- Identify Elements:
- Use Appium Inspector to identify the elements you want to automate. Take note of the element properties, such as resource IDs, accessibility IDs, class names, etc.
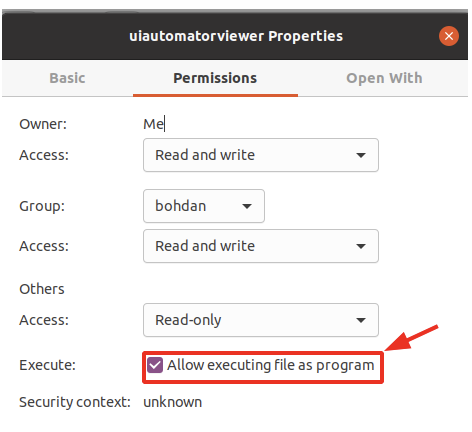
To interact, you will need to run the file
uiautomatorviewer. The file path is in the Android folder/home/admin/Android/Sdk/tools/bin. For Linux users, you need to enable the feature in order for it to run as an application.
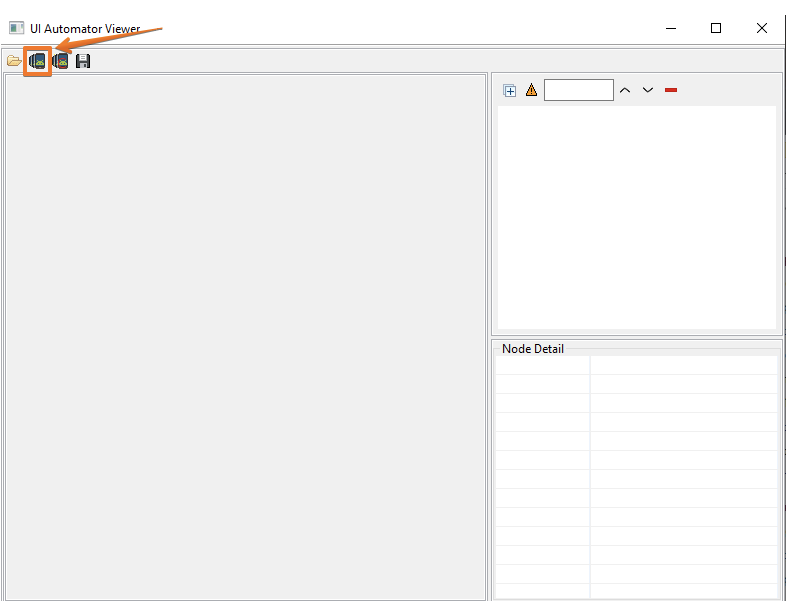
Thanks to
uiautomatorvieweryou can select locators by simply clicking on one of the elements, you can also:
- upload saved screenshots from folder;
- take a screenshot of the screen, provided that Android Studio is running;
- save screenshots in folders.
After launching the emulator and application the Android Studio in uiautomatorviewer needs to take a screenshot of the device.
For
idlocator selectresource-idjust need to copy and paste it into the locator
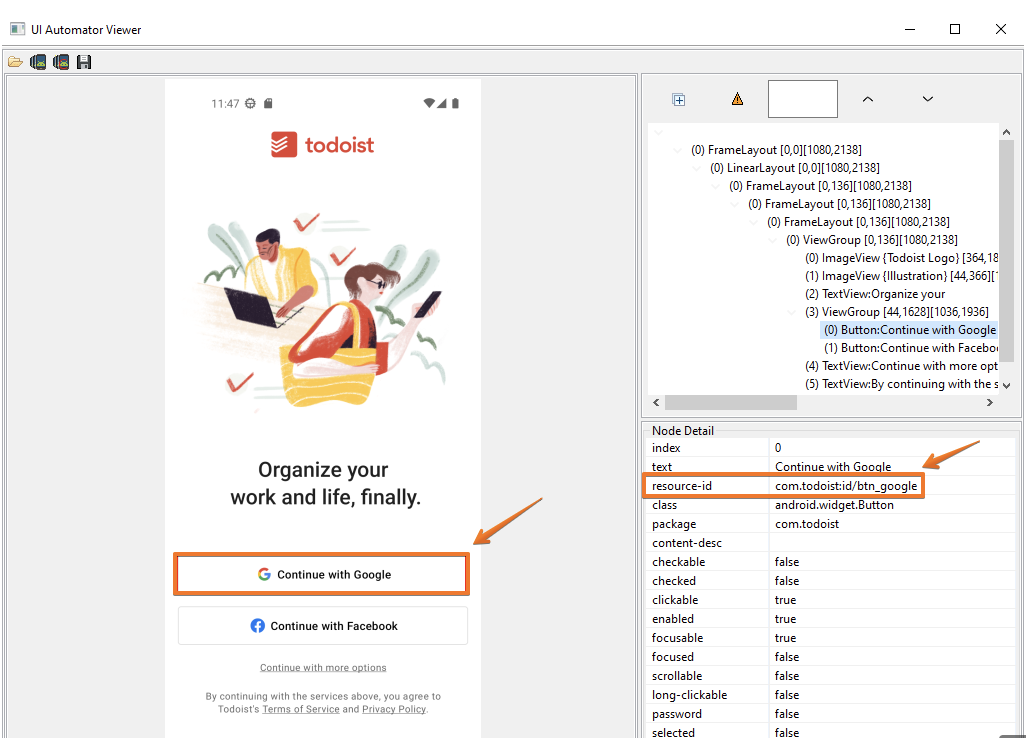
<locator locatorId="name">
         <id>com.todoist:id/fab</id>
</locator>
It is also possible to use
xpathas a locator. This locators is divided into two types:
- Using
//with class with[@content-desc='name'].
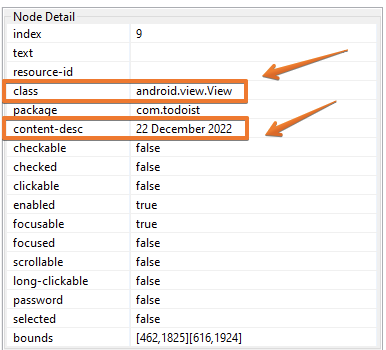
<locator locatorId="name">
       <xpath>//android.widget.nameClass[@content-desc='name']</xpath>
</locator>
- Using
//with class with[@text='name'].
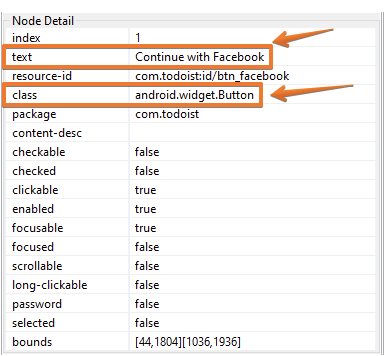
<locator locatorId="name">
       <xpath>//android.widget.nameClass[@text='name']</xpath>
</locator>