How to integrate the OauthExternalAuthentication project with your Sitefinity instance - Sitefinity/Sitefinity-External-STS-Integration GitHub Wiki
Home / How to integrate the OauthExternalAuthentication project with your Sitefinity instance
Note:
Due to a number of known issues, it's recommended to run the OauthExternalAuthentication project with Sitefinity under IIS and not under the integrated development server (Cassini).
Automatic package restoration
This project uses NuGet packages and supports automatic package restoration in order to automatically retrieve and add the required references at build time. To use automatic package restoration:
-
Place the OauthExternalAuthentication folder (containing the OauthExternalAuthentication.csproj project) to the root of your sitefinity website. The folder should be a sibling to the SitefinityWebApp project file.
-
Open your Sitefinity solution in Visual Studio.
Add the OauthExternalAuthentication.csproj project to the solution. -
Make sure your compound solution with both projects is saved.
-
Right-click the solution in Solution Explorer and click Enable NuGet Package Restore.
-
The versions of Sitefinity references in the NuGet packages are listed in the packages.config file (additional version information can be found at the Releases page). If the version of Sitefinity in the restored packages does not match the Sitefinity version of your project, change references to the following assemblies from your website's bin folder:
- Telerik.Sitefinity
- Telerik.Sitefinity.Model
- Telerik.Sitefinity.Utilities
- Telerik.OpenAccess
Resolve packages on the SitefinityWebApp project
Some NuGet packages need to be manually restored and installed on the SitefinityWebApp project.
-
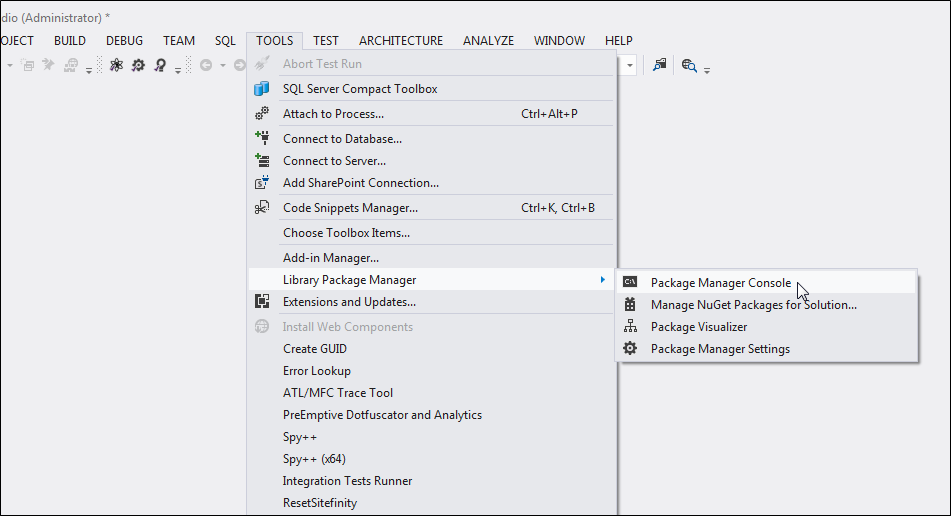
Open the Package Manager Console window in Visual Studio, on the Tools menu, select Library Package Manager » Package Manager Console:
-
On the Package Manager Console, switch to the SitefinityWebApp project on the Default project drop-down.

-
Install the Microsoft.AspNet.Membership.OpenAuth package by typing the following command in the Package Manager Console:
Install-Package Microsoft.AspNet.Membership.OpenAuth -
Install the DotNetOpenAuth.AspNet package by typing the following command in the Package Manager Console:
Install-Package DotNetOpenAuth.AspNet -
Install the DotNetOpenAuth.GoogleOAuth2 package by typing the following command in the Package Manager Console:
Install-Package DotNetOpenAuth.GoogleOAuth2 -
Make sure your SitefinityWebApp project has a reference to Newtonsoft.Json. Particularly if you're running an upgraded project in which the reference has been removed as part of the upgrade procedure.
To add the reference, on the Package Manager Console select the SitefinityWebApp project (similarly to the previous step) and insall the Newtonsoft.Json package by running the command:
Install-Package Newtonsoft.Json -
Add a reference to the OauthExternalAuthentication to your SitefinityWebApp project and build the entire solution.
-
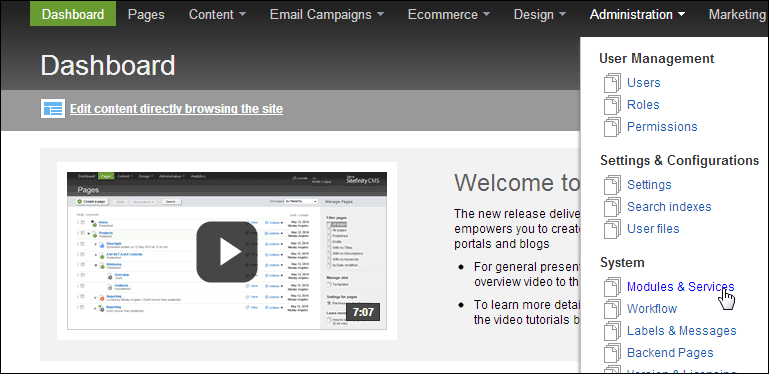
On Sitefinity's backend and navigate to Administration » Modules & Services
-
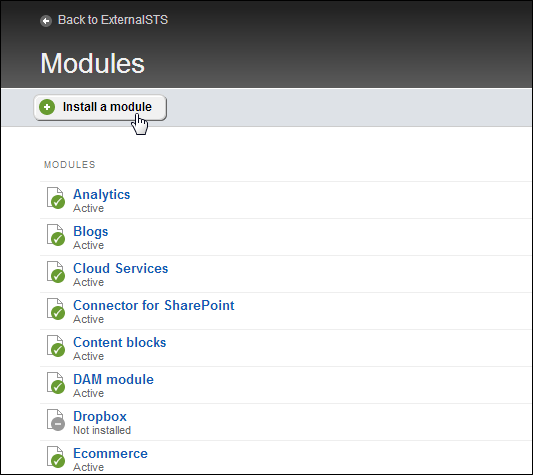
Click Install a module,
-
Fill the form as shown below, and click Save:
Name: OauthExternalAuthentication
Type: OauthExternalAuthentication.OAuthAuthenticationModule, OauthExternalAuthentication
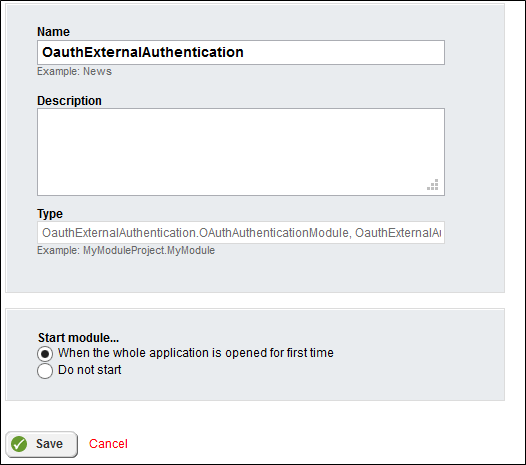
-
The OAuthAuthenticationModule registers now a config section (OAEConfig) in its initialization process. This makes it easy to configure the provider's parameters.
In order to set a Facebook application and obtain a relevant ID and secret key, follow the instructions on the Setting Up The Authentication Integration with Facebook page.
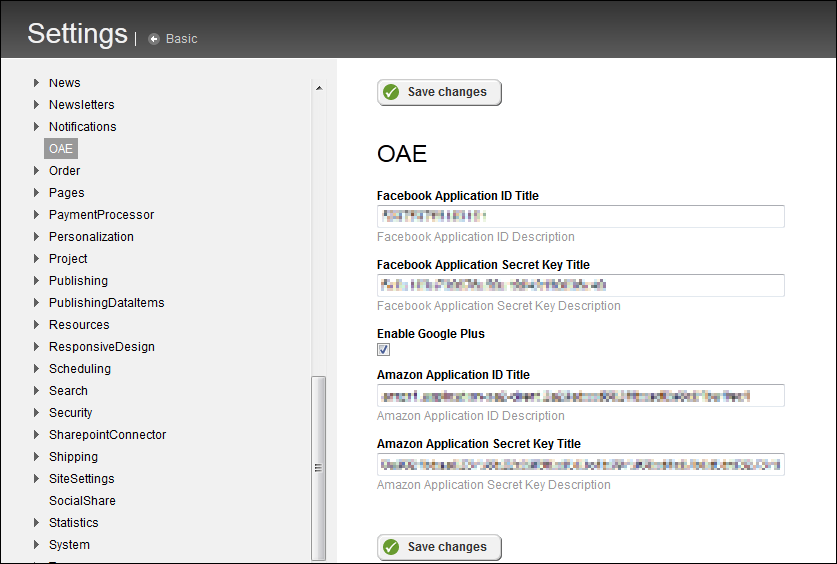
Log into Sitefinity's backend with an administrator's account and navigate to Adminitration » Settings » Advanced. Scroll down the tree to OAE and fill the relevant parameters:
- To enable Facebook's login on the sample's widget, fill in your application ID and secret key in their respective fields (For more information about configuring Facebook's login see Setting up the authentication integration with Facebook).
- To enable Google's login on the sample's widget, check the Enable Google Plus checkbox (For more information about configuring Google's login see Setting up the authentication integration with Google).
- To enable Amazon's login on the sample's widget, fill in your application ID and secret key in their respective fields (For more information about configuring Amazon's login see Setting up the authentication integration with Amazon).
