Create and register your bot in Azure AD portal - SharePoint/Bot-Powered-ACE-Preview GitHub Wiki
To create and register your bot in Microsoft Azure Active Directory (Azure AD), create a tunnel using ngrok, add messaging endpoint, and then perform the following steps:
- Create Azure Bot resource to register bot with Azure Bot Service.
- Create client secret to enable SSO authentication of the bot.
- Add Teams channel to deploy the bot to a Teams channel.
- Use ngrok to create a tunnel to your web server's endpoints.
- Add messaging endpoint to the ngrok tunnel you created.
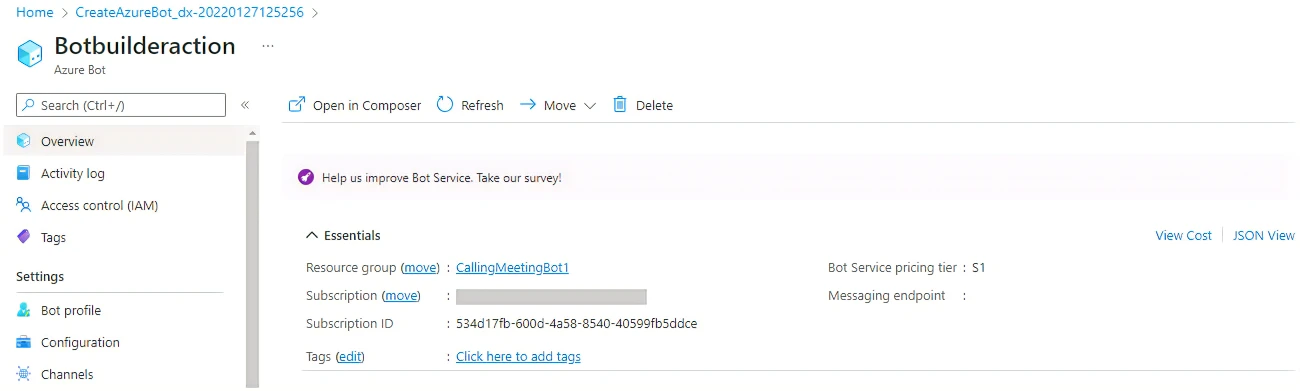
To create Azure Bot resource
- Go to the Microsoft Azure portal.
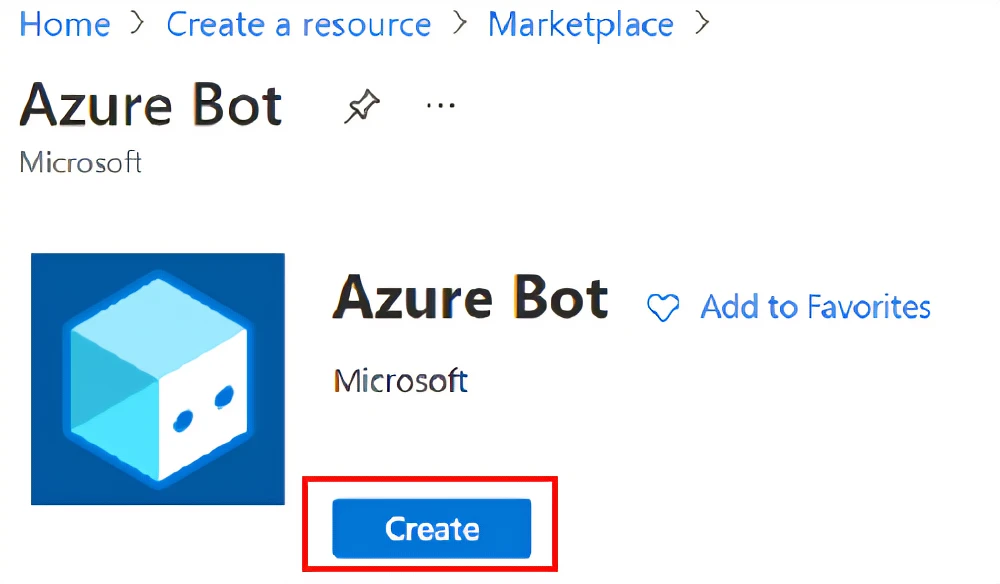
- Select Create a resource.
- In the search box, enter Azure Bot.
- Select Enter.
- Select Azure Bot.
- Select Create.
- Enter required bot handle name in Bot handle.
- Select your Subscription from the dropdown list.
- Select your Resource group from the dropdown list.
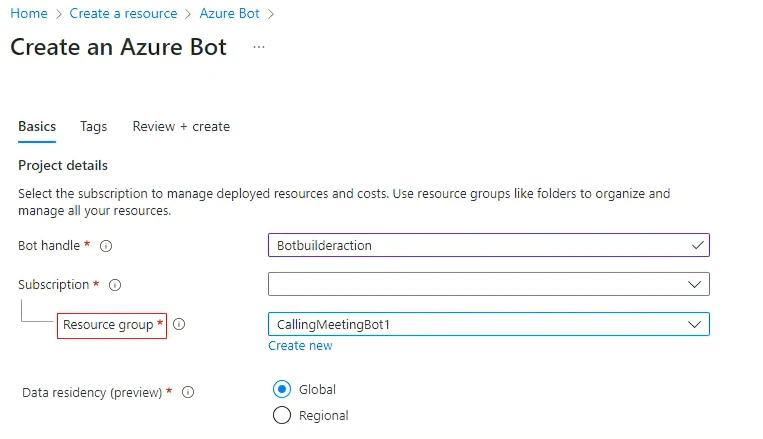
To create a new resource group (select Create new > enter resource name > select OK). Select the required location from New resource group location dropdown list. For more information, see Create resource group.
- In the Microsoft App ID section, by default Create new Microsoft App ID is selected.
You can either select Use existing app registration and enter Existing app ID and Existing app password, or select Create new Microsoft App ID.
NOTE You can't create more than one bot with the same Microsoft App ID.
- Select MultiTenant for Type of App and then select Review + create.
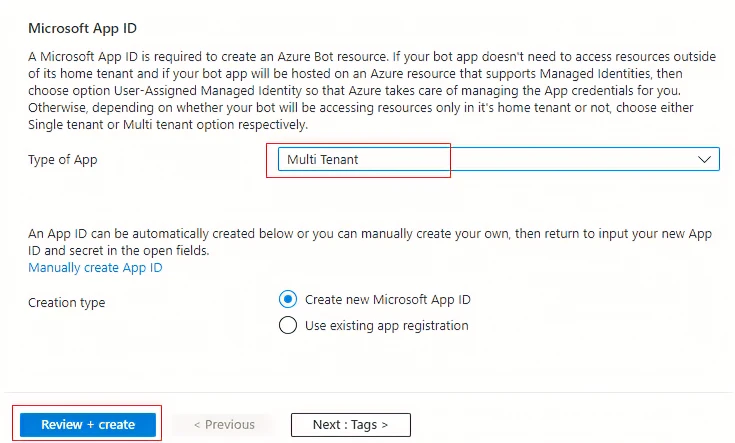
- If the validation is passed, select Create. It takes a few moments for your bot service to be provisioned.
- Select Go to resource.
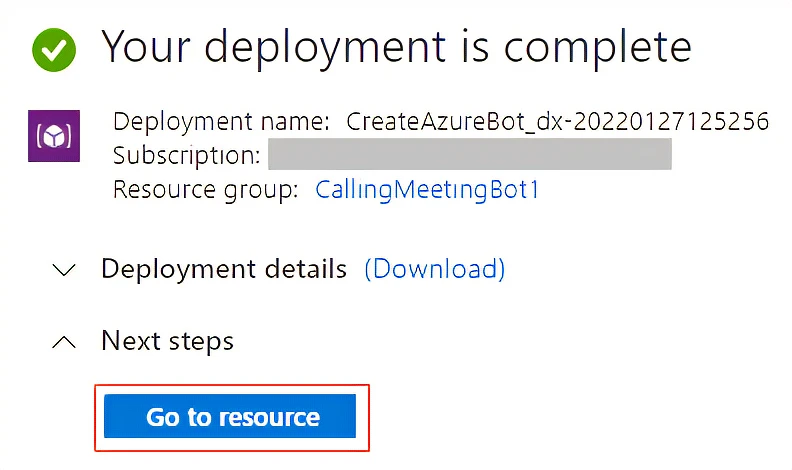
An Azure bot is created.
To create client secret
Perform the following steps if you've created a new Microsoft App ID:
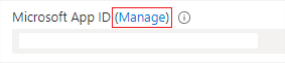
14. In the left pane, select Configuration.
> [!TIP]
> Save the Microsoft App ID or Client ID for future reference.
15. Next to Microsoft App ID, select Manage.
- In the Client secrets section, select New client secret.
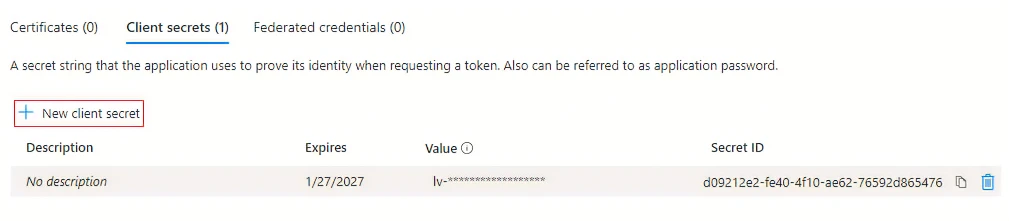
The Add a client secret window appears.
17. Enter Description.
18. Select Add.
19. In the Value column, select the Copy to clipboard icon.

TIP Save the client secret value or app password for future reference.
To add the channel
20. Select Home.

- Select your bot from Recent resources.
- Select Channels in the left pane and select Microsoft 365
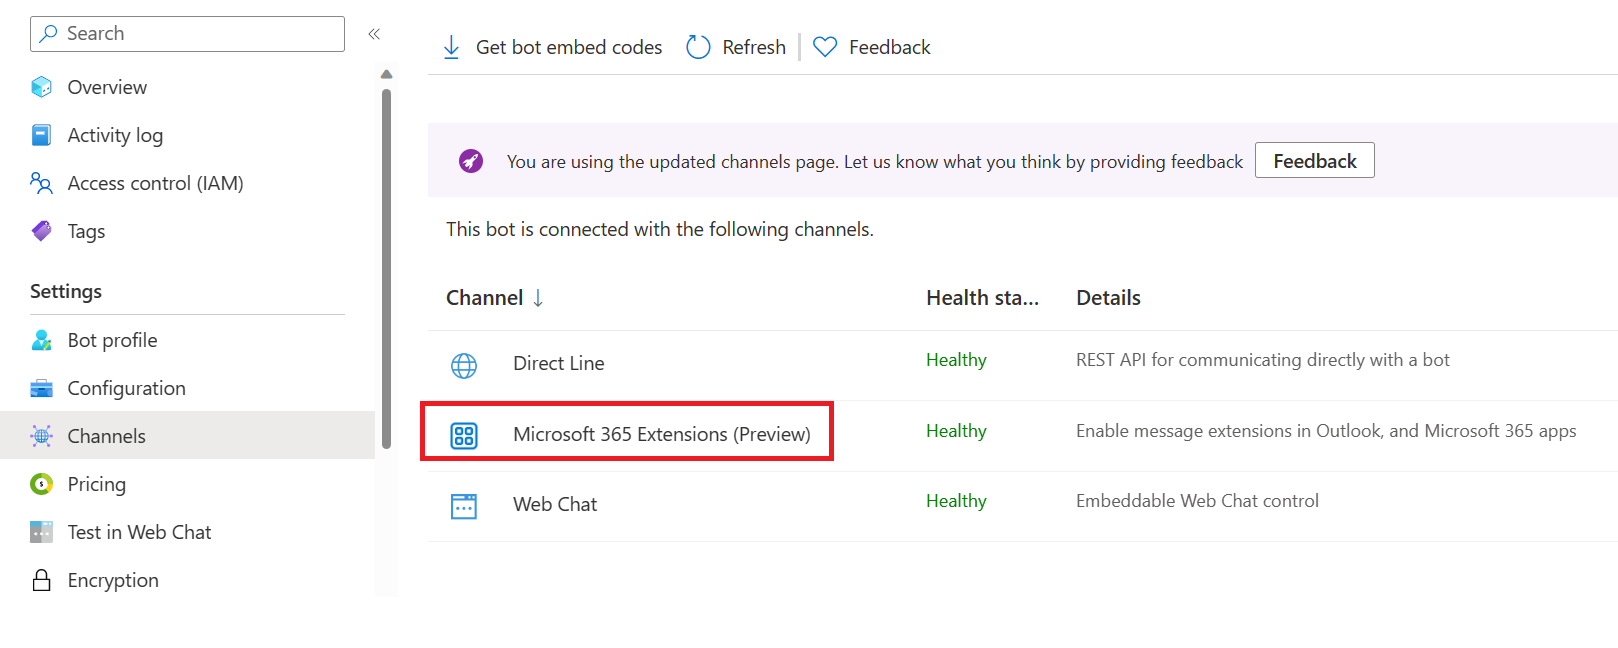
- Select Apply.
To create tunnel for local web server
24. Use ngrok to create a tunnel to your locally running web server's publicly available HTTPS endpoints.
25. Run the following command in ngrok:
ngrok http --host-header=localhost 3978TIP If you encounter ERR_NGROK_4018, follow the steps provided in the command prompt to sign-up and authenticate ngrok. Then run the
ngrok http --host-header=localhost 3978command.
To add messaging endpoint
26. From ngrok, copy the HTTPS URL (https to io).
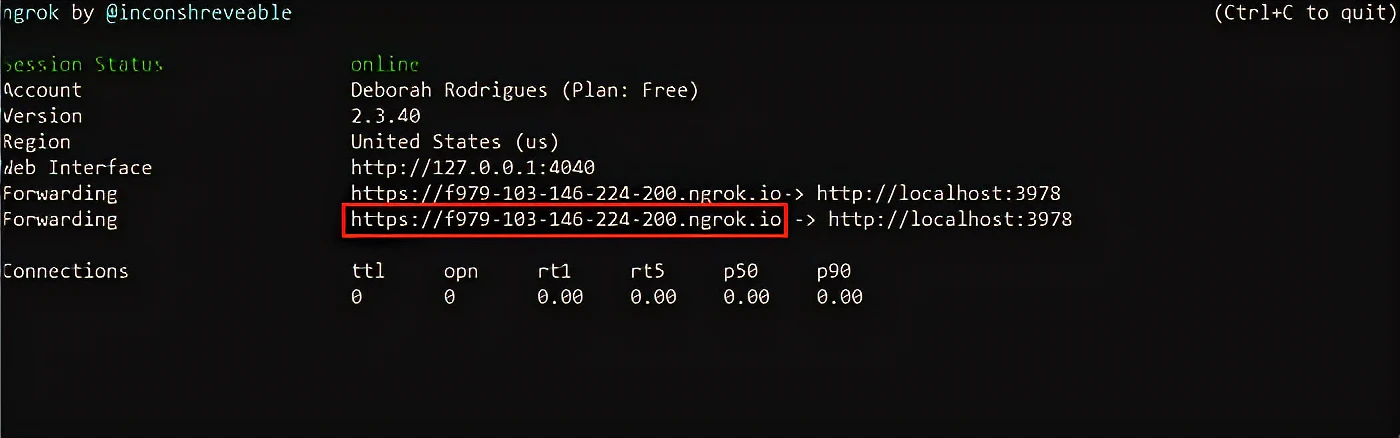
NOTE The HTTPS URL in your ngrok is your fully qualified domain name. The
WebAppDomainis a fully qualified domain name that doesn't includehttps://in it.
- In Settings for the Azure bot that you created, select Configuration.
- In Messaging endpoint, add the HTTPS URL available from ngrok and at the end of the URL add /api/messages.

- Select Apply. You have successfully set up a bot in Azure Bot Service.