Home - SelinaWernike/MMAudioUndVideo GitHub Wiki
Welcome to the MMAudioUndVideo wiki!
This wiki provides information about the semester project of group 2 of the course "Audio-Video-Technik" during winter semester 2020/2021. This page is also available in German.
We wanted to deal more with the "video" part of the audio-video course and thus decided to create a VJ application. Our goal was to develop an application that allows you to combine and cut multiple videos into one end result. In addition, you should be able to underlay them with audio and image filters.
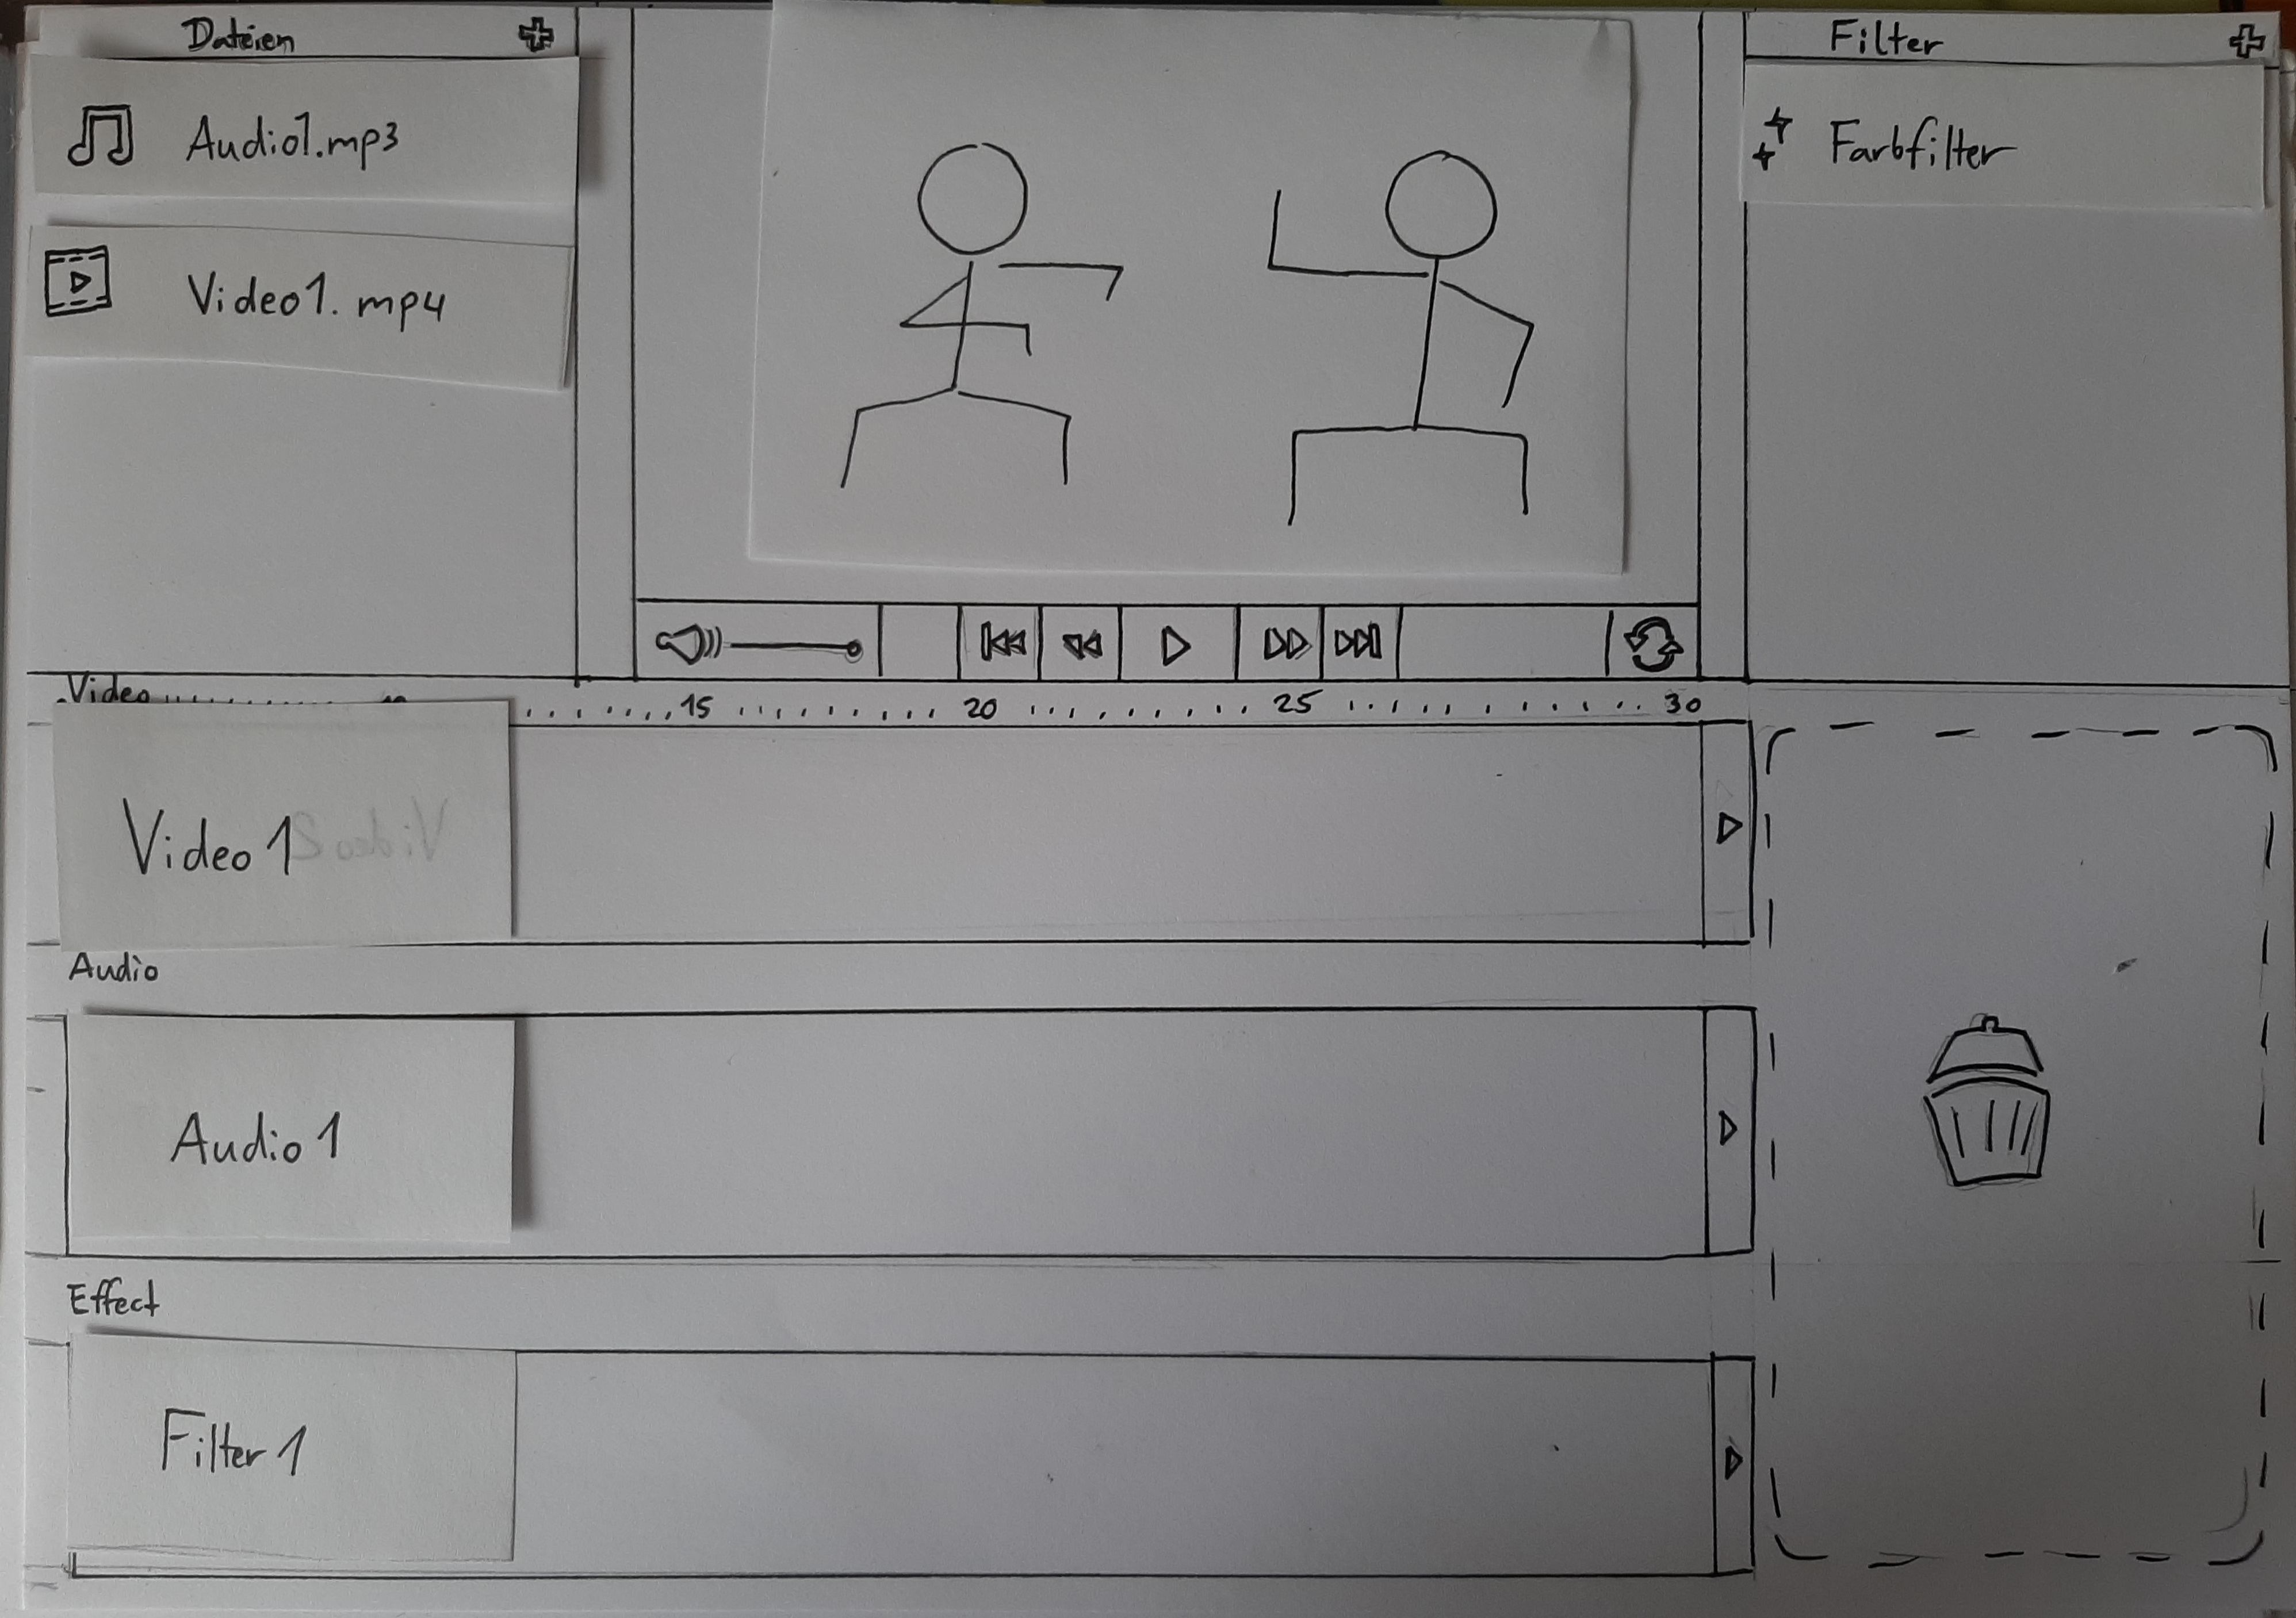
paper prototype

This paper prototype already had many of the ideas that we included in the final UI. We discarded the "+" option for the filters, as this was an unnecessary extra step - now, all selectable filters are directly inside the filter list and drag&drop-able into the effect track. We also discarded the trash can area, as it took up too much space for a function that can be displayed with a simple "X" at the respective element to be deleted.
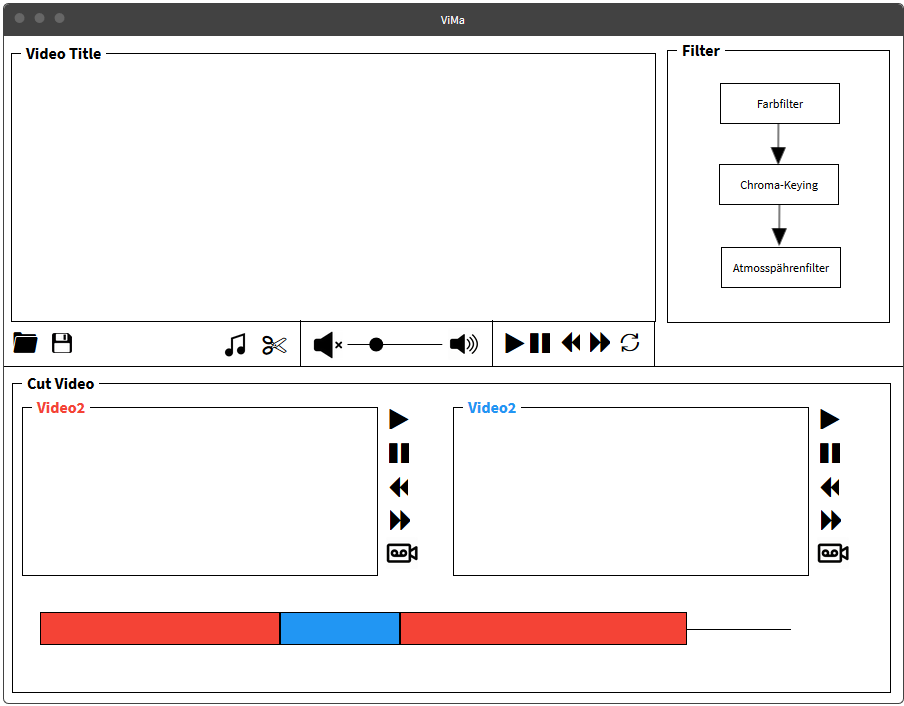
alternate mockup

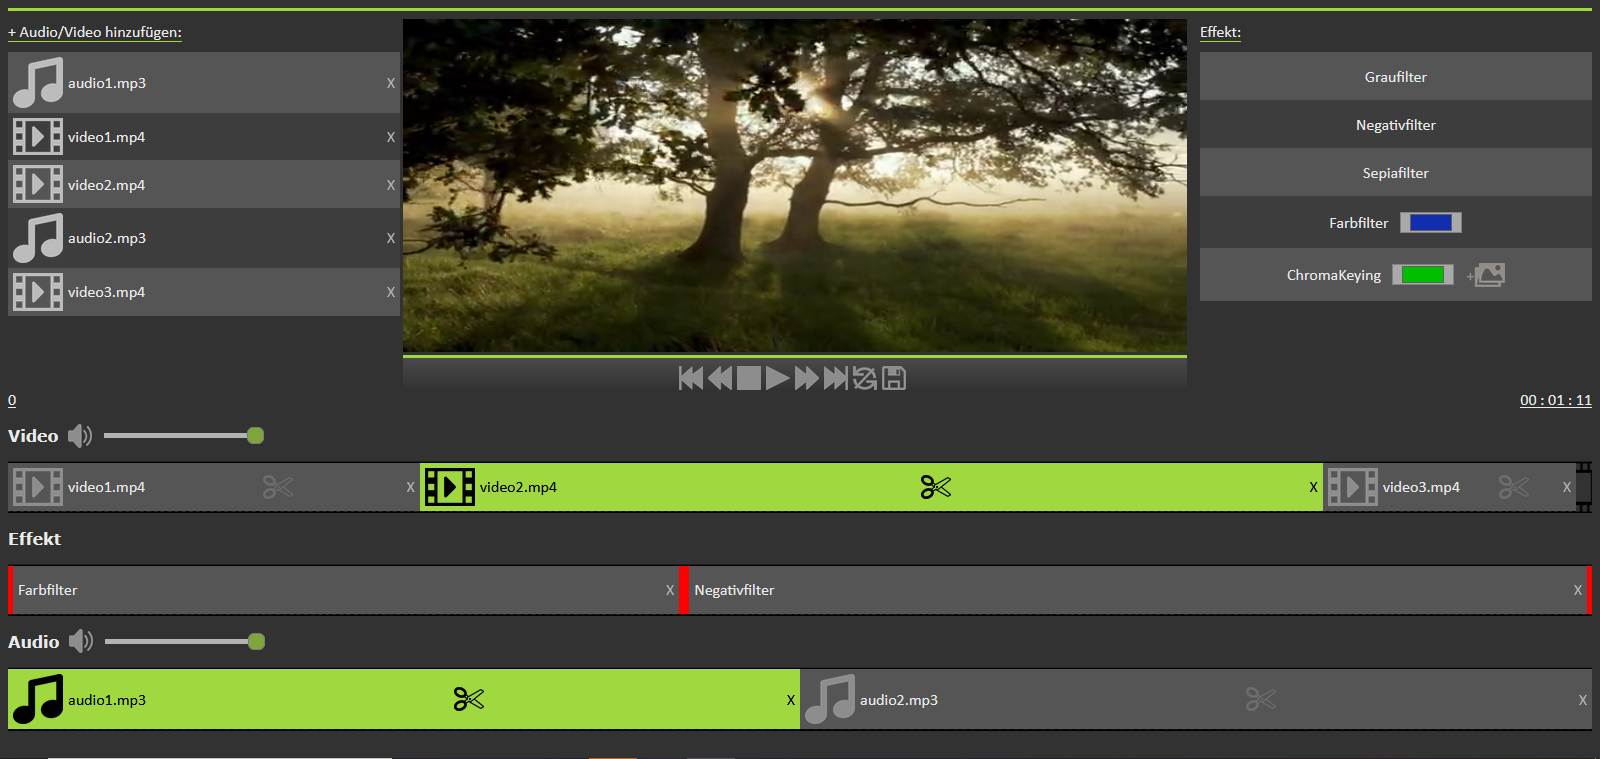
user interface

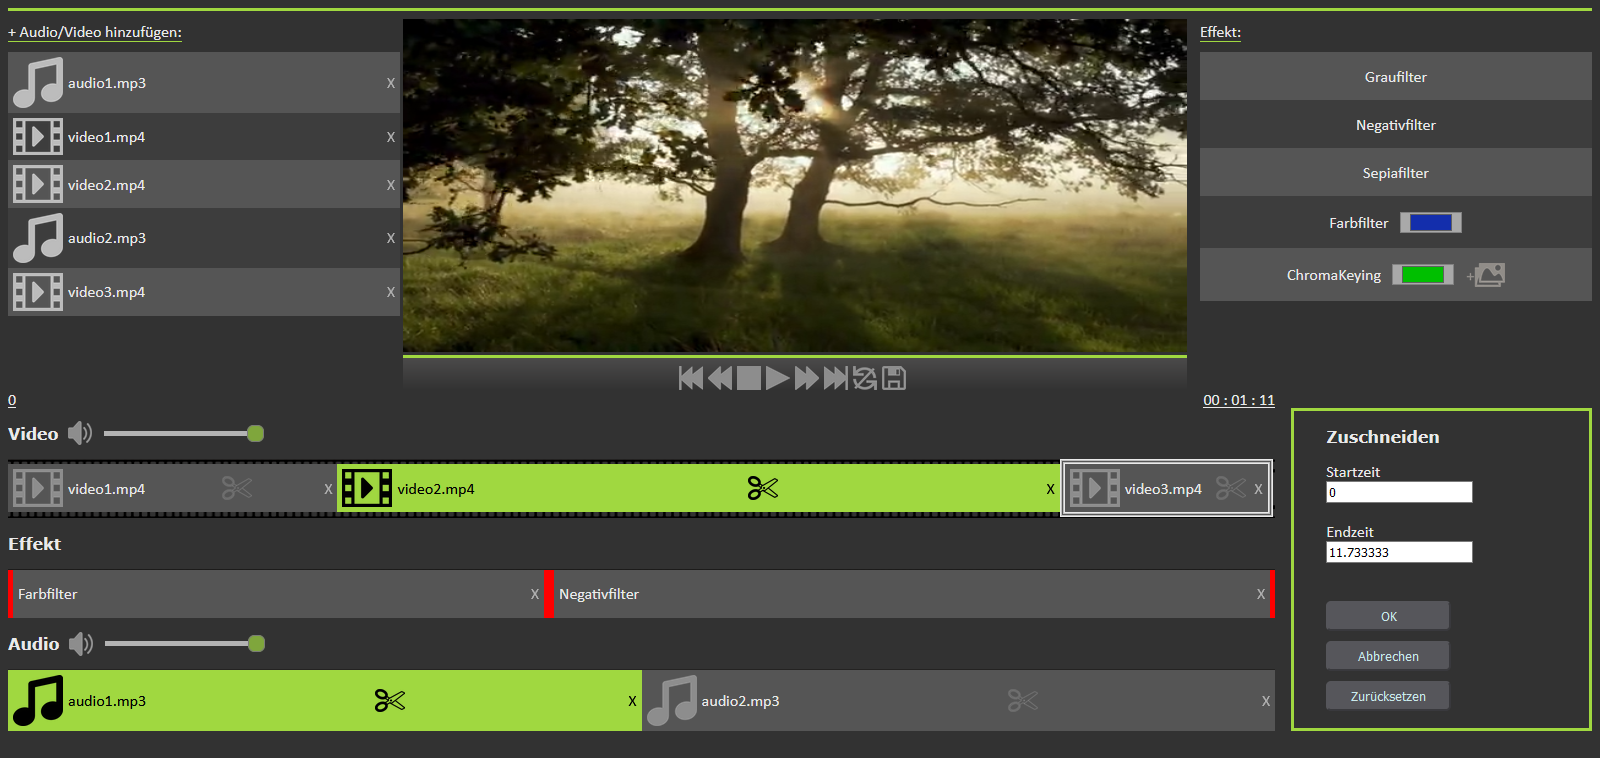
user inferface - cutting menu

The color scheme is primarily dark gray, with light gray for text and saturated green and red for highlights.
Requirement: node.js needs to be installed
- open a command window and navigate to a folder you want to clone the repository to.
git clone https://github.com/SelinaWernike/MMAudioUndVideo.gitnpm installnpm start
Alternatively, just can visit the deployed website at https://vima-mm.herokuapp.com/.
Starting point: you started the application with "npm start".
- uploading videos/audios
Press the text "+ Video/Audio hinzufügen:" (add video/audio) in the upper left corner, and select any number of video and audio files in the selection dialog that opens. These will appear as a list below the text field after confirming the selection. - dragging videos/audios onto track
To place a video or audio element on a track, drag&drop it from the list to the correspondingly labeled track (navigate the mouse over a video or audio element and press the left mouse button. Hold down the mouse button and drag the element to the track in the lower half of the screen. Then release the mouse button). The insert position is determined by the drop position on the track. - dragging effect onto track
To drag an effect onto a track, drag&drop it from the effect list onto the effect track. If you want to apply a color filter, you can set the color beforehand by clicking on the button to the right of the filter in the list. In case of a ChromaKeying filter you can set the color to be made transparent and select an image to be displayed as a background in the transparent area by clicking the icon to the right of the color button. - adjusting length of video and/or audio
You can adjust the length of a video or audio element by clicking on the scissors icon of the element. This opens the cutting menu where you can enter the new start and/or end time. Click "Ok" to confirm the change, "Abbrechen" (cancel) to close the application without changing the times and "Zurücksetzen" (reset) to restore the original length of the video without closing the cutting menu. - adjusting the effect length
You can adjust the length of an effect element by moving the red highlighted borders to the left or right while holding down the left mouse button. - Change position
Dragging a trackelement over another trackelement (thex have to be on the same track) will swap there position. - watching the compiled video
You can play the video by pressing the triangular Play button below the video field. If you click the button again, the video will pause. The square button to the left of the play button stops the video and resets it to the beginning. The double triangles to the left and right respectively are used to jump back and forward a few seconds. The double triangles with a line are used to jump forward or back by a whole video element. You can also jump to specific videos by clicking on the videos on the track. The icon with the two arrows forming a circle turns on or off the looping of the video. - saving!
If you are satisfied with your video creation, you can save it with the floppy disk icon on the far left in the icon row below the video field. This will take a while (same time as watching it normally)!
technologies used: The technologies used for this project are JavaScript, HTML5 and CSS3.
The central object of the architecture is the trackController. All requests to the individual tracks run through it, it can deliver the desired videos, audios and filters (current, previous, next, first) and let the playback jump to a specific point in time.
For video and audio playback, there are the video and audio controllers, which respond to the events associated with media playback - that is, to the events fired by the buttons under the video field (play, pause, stop, fast-forward, rewind, skip forward or backward a video element, loop - but NOT save!). In addition, they also change the video and audio sources and control the volume. The trackController knows the other Controllers, while they only know the TrackController.
Each track (video, audio, effect) has its own editManager object. This manages the information of the elements located on the tracks, deals with adding and removing objects to/from the track and changing the order. It also highlights the currently played items and can return the correct item for certain criteria (time, index). Other Controller acces the editManager over the trackController.
The fileManager represents the file list and has access to the FileMap where all selected video and audio files are stored.
The filterManager has access to the available filter types (know as "effects" on the user interface) and applies the current filter to the current video.
The settingsManager processes and validates the entries in the crop menu and passes on the changed values for the currently edited element when "OK" or "Zurücksetzen" (reset) is pressed.
The downloadManager triggers the download of the filtered video after clicking the save button. To do this, it makes a copy of the existing objects and the video is played back in the background on an invisible canvas and recorded in the process. After this process has been completed, a downloadable file is obtained.