Cloning instructions - Self-Fulfilling-Idiocy-The-Game/SelfFulfillingIdiocy GitHub Wiki
How to clone the repository
Introduction
This guide will explain the process of cloning the repository to your machine to use in Unreal Engine.
It's made for both veterans and beginners. If you know how to clone in general, skip to the Unreal Specific section. If not, read the whole thing If you're an expert in Github and Unreal, I'll go through at lightning speed in Quick Checklist.
I suggest getting a good understanding of Github when you have the time. One of us can explain it to you if you like, or we can put it in a new wiki page.
Cloning the repository
To begin you need to create a clone. Start by downloading Github for desktop from here.
This is the application you will use to manage the Github project.
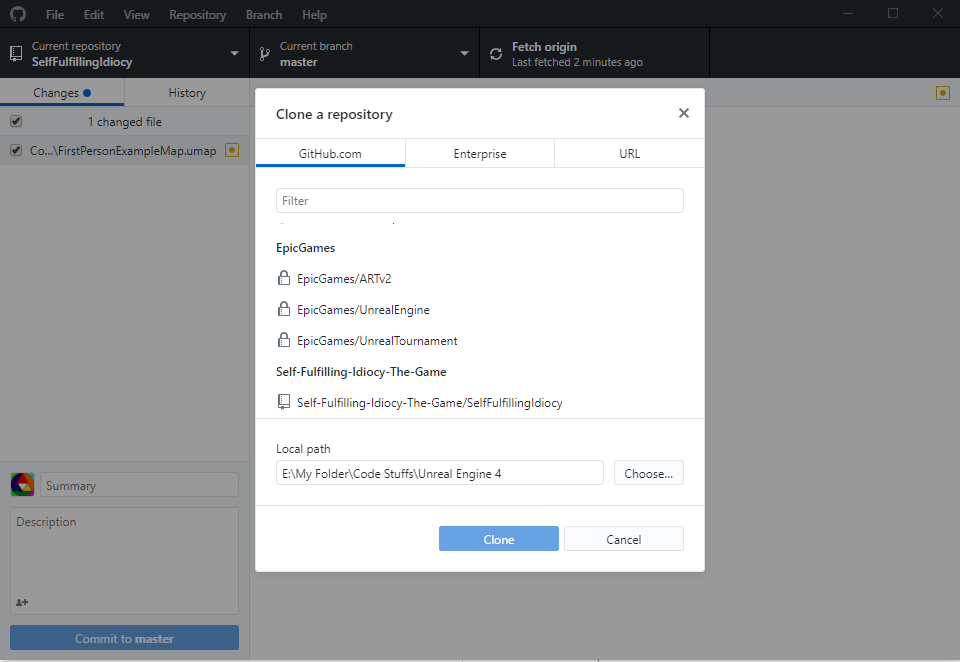
Open it and sign into your Github account. Click File/Clone Repository. You should be presented with this:
 Click the bottom one, labelled SelfFulfillingIdiocy. Choose a file location to clone to and remember it, or write it down.
When you click clone, it will download the project onto your computer. Whenever you edit the project, it will automatically change on Github desktop. To send those changes to other people, choose a branch and push.
Now you have the project, it's time to open it in Unreal.
Unreal Specific
By this point, I'll assume you've cloned the project to a known folder.
Open up Unreal and choose SelfFulfillingIdiocy.
If that isn't an option, click browse and find the location you cloned the repository to. When you choose it there will be a lot of loading.
When it's done, you will get an error. Dismiss and ignore it. Click the big bold button at the top that says Build.
It'll take a long time, and bring up a second error message. Dismiss and ignore that one too. Once it's done, it should be ready to use.
Quick Checklist
- Clone to known folder.
- Load project
- Ignore any and all errors
- Build project
- Presto