Setup OSGeoLive 13.0 - Sandeep10021/mapmint GitHub Wiki
Install OSGeoLive 13.0 on your virtual machine
Downloads
- Download Virtual Box(https://www.virtualbox.org/wiki/Downloads) for Windows and run the installer
- Download the OSGeoLive 13.0 Virtual disk file (vmdk) from live.osgeo.org
Note:
- In the entire demo you have to follow OSGeoLive 13.0 instead of OSGeoLive 10.5
Create a Virtual Machine
-
Start the VirtualBox application and click on the New button to create a new VM, and then Next

-
Enter a name such as OSGeoLive, and choose Linux as the “Operating system”, and Ubuntu as the “Version”
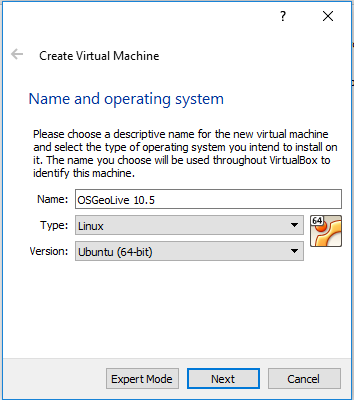
-
Set the memory
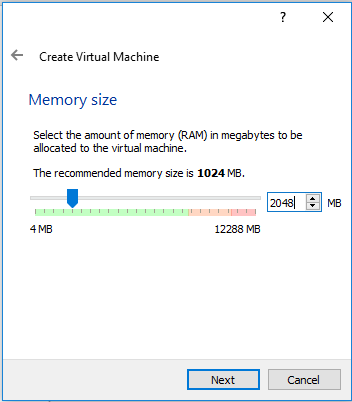
-
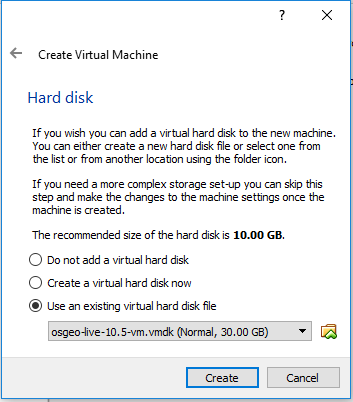
Continue to the next screen and choose “Use an existing virtual hard disk file”. Now click on the button (a folder icon) to browse to where you saved the OSGeoLive vmdk-file. Select this file, press Next and Create
Config tips and tweaks (OPTIONAL!)
-
Once the VM is created, click on the Settings button. In the “General” section, go to the Advanced tab, and click to select “Show at top of screen” for the Mini toolbar

-
Go to the “Display” section and increase video memory to 32 or 64 MB. In some host operating systems, it may be required to “Enable 3D Acceleration” for display to work properly
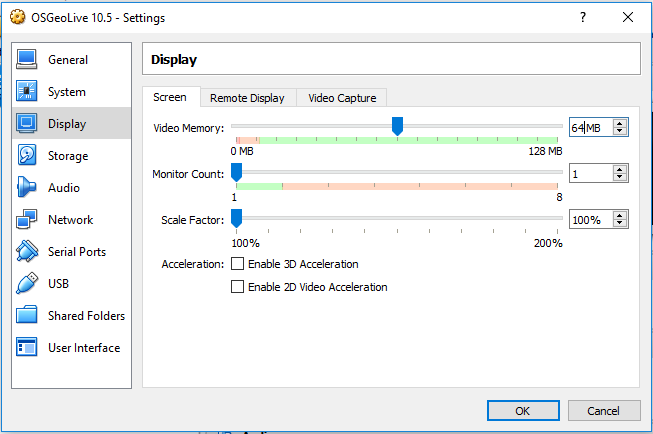
-
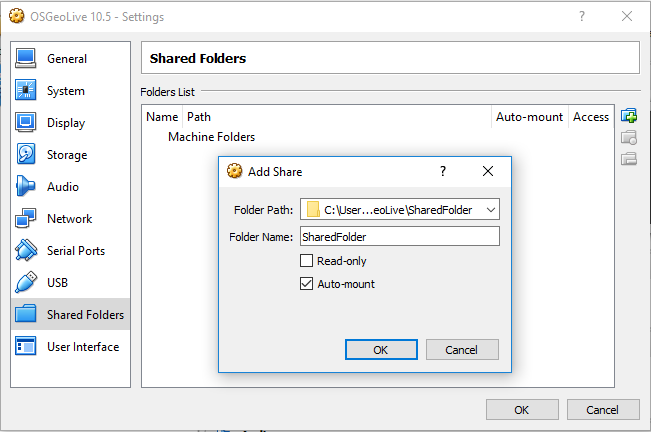
In addition, move to the “Shared Folders” section, and click the “Add folder” (green + icon on the right) to find a directory on your host computer that you wish to share inside the VM
-
You can choose to make the shared folder read-only, and auto-mounted. Once the “Folder path” and “Folder name” are defined, click OK, and again OK to finish and close the settings window
Running the Virtual Machine
- Now bootup the VM by clicking the Start (green arrow) button
- Set username and password to 'user' for convenience and proper operation of all the applications
Welcome to OSGeoLive 13.0 !
