Design - SCCapstone/WorkAnyPlace GitHub Wiki
Design of WorkAnyPlace
Sign Up

This page simply allows the user to create an account on WorkAnyPlace using their email, phone number, and creating a password. On the bottom there is a 3-step icon because there are email verification and confirmation steps following the first page. After this account is created, the user will be able to create job posts or take preexisting jobs. If the user has already created an account, the link at the bottom redirects to the login page.
Login

This page is used to sign in to an existing WorkAnyPlace account using an email and password. If a password is forgotten, the user can click on the forgot password link and a password reset email will be generated. There is also a link to the sign up page to be used if the user has not created an account before.
*The two unique design perspectives for login and sign up were used to demonstrate what WorkAnyPlace will look like across multiple platforms.
Messages

The Messages page is one of the main tabs within the app. On it, the user can see all of the different conversations they have with different users listed out. Users also have the ability to start a new conversation from the messages page.
Conversation

The Conversation page is what the user would see after clicking on of the the conversations from the messages page. This page shows the full conversation between the two users along with the ability to type more in the conversation.
Stat

The stats page is the 4th tab connected to the main tabs. This page was originally the wallet page but has been changed to the stats page which will display stats of the user. There will be stats such as how many jobs and hours worked and how much money has been made. This will give the user a good understanding of how much work they have completed and how much they got paid for that work. It will also display the created jobs which refers to the jobs created by the user that someone else has completed. The group stat will be selected by the user from a select list of groups. This will be used as a notification system for when a job with that group has been posted in the users area. This will not hide any other jobs that have a different group from the jobs page. This can also be used to give job posters an idea of what their employee is skilled at. The star rating is used to give other job posters a reference of how the user did on past jobs.
Account Settings

This is the Account settings page. Here the user can change edit their profile picture, name, username, email and group. It can be reached from the settings icon on the stats page.
Rate User

On this page a user can rate someone who has completed a job for them. This will be used to determine their average start rating. The rating will work by giving the worker a rating out of 5 stars and they can also leave comments. This page will be available to the user after the worker has completed the job.
View Profile

This is the View Profile page. To get to this page the user has to click on the profile picture icon of another user. On this page it displays the username, star rating, reviews left from the comment section of the rate page from other users, and the user's group. This will allow users to know some information about other users.
Create Jobs

This is the create jobs page. To get to this page the user has to click on the plus sign on the jobs page. On this page, the user can type in the title, description, job type, start date, pay rate and location. The publish post button let the user post the job created. The back button on the top left of the screen lets the user go back to jobs page.
Jobs and MyJobs
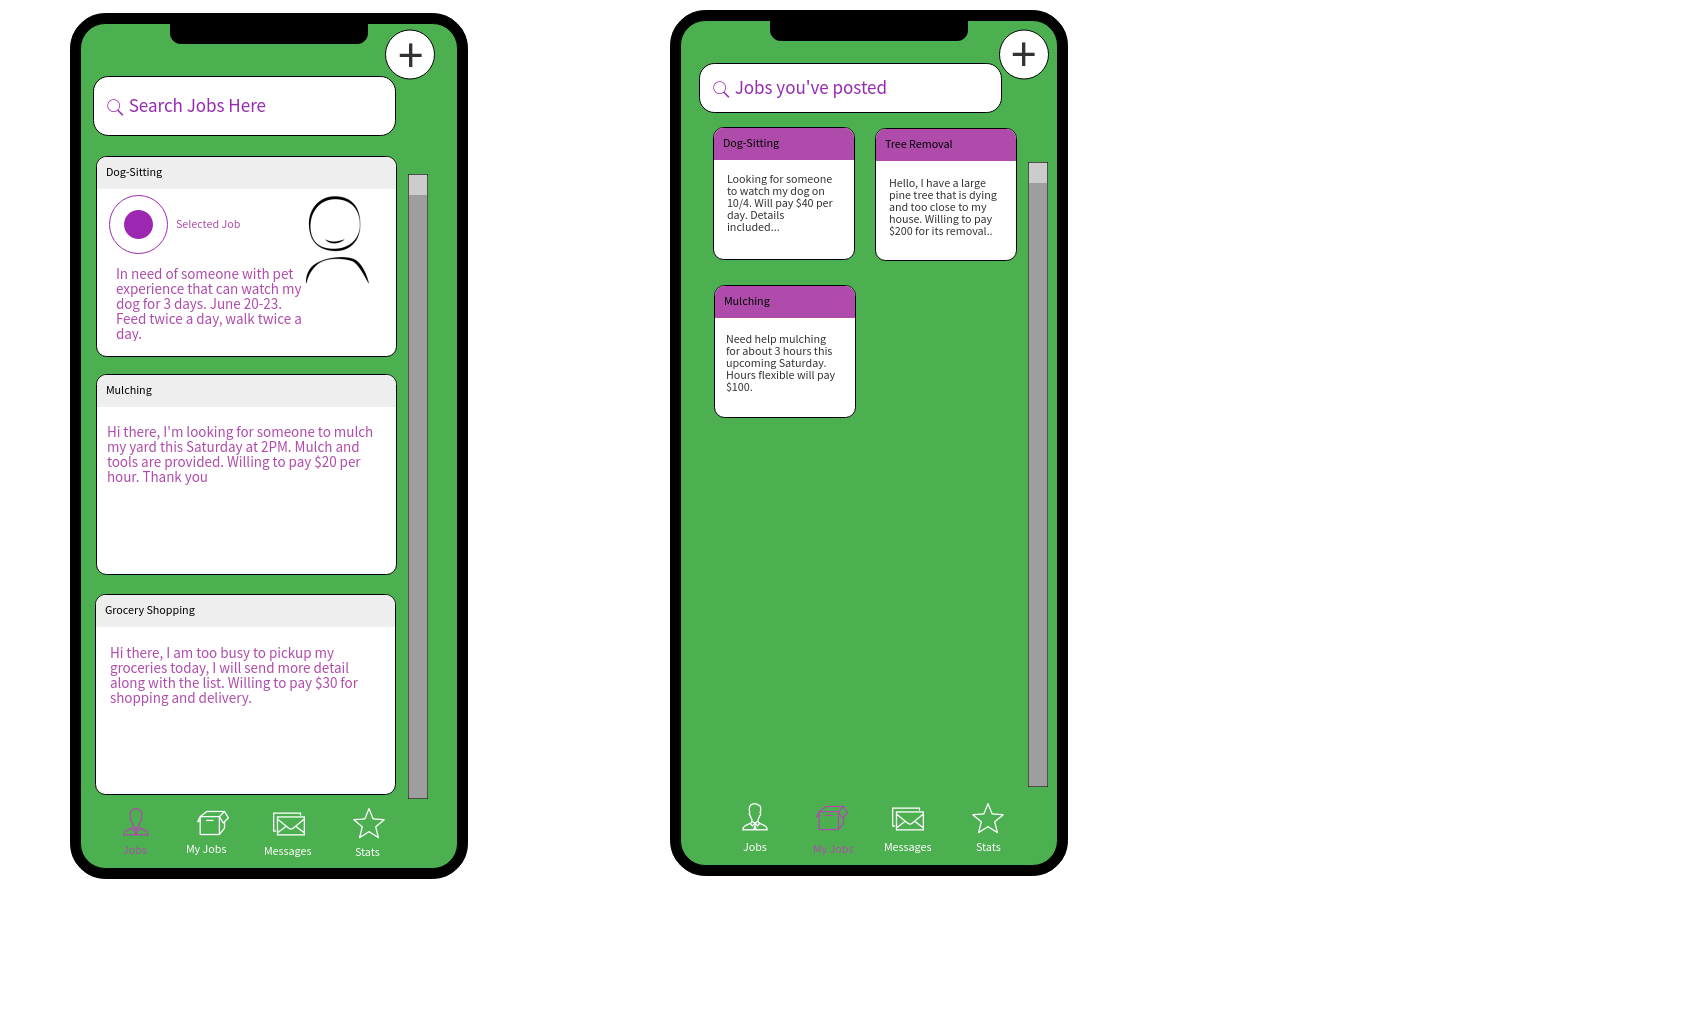
 These are the Jobs and MyJobs page. The first, allows workers to search for jobs to work. Based off price, job type, and date, the search bar allows the workers to search for jobs to work here. The scroll bar and navigation panel allow you to click through different pages.
The MyJobs Page allows you to post and manage the jobs that you posted. Here you can view and edit how many workers have viewed or accepted your jobs. Once the jobs have been accepted they turn purple so that you know that your job will be completed. Once accepted you will then have the ability to communicate with the user and exchange contact information and other details.