3.March progress - RoboticsURJC/tfg-icebollada GitHub Wiki
First week
After a talk with the people that is working with the mice about the project, development of some concrete topics.
-
PiCamera: There are some problems with the videos that are recording in the laboratory.
- Not visible timelines in VLC: Obtain the video in .avi format instead of .h264 with the piCamera using OpenCV, and observe that in this format the time is visible in VLC. In any case, to be sure that this problem is solved, write in the video the time that the video is running.
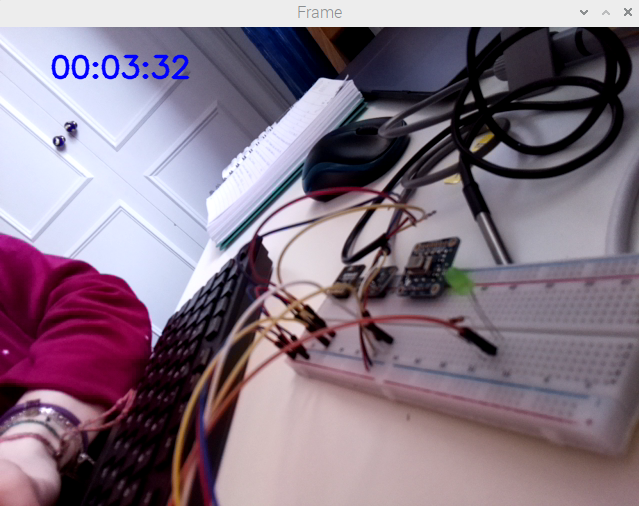
- Problem: The times in VLC and in the video wrote in blue doesn't match after some time.
- There was a problem with some jumps and streaks in the videos, but apparently this problem doesn't appear with the execution from the piCamera.
- Weight of the video: The weight obtained for a 1 hour video is 430MB
- Video compression: The compression requires around 10 seconds for a 1 hour video.
- Tried the mice detector done in February with the video the laboratory provided me. The dataset is too little to detect the different mice in these conditions.

- Not visible timelines in VLC: Obtain the video in .avi format instead of .h264 with the piCamera using OpenCV, and observe that in this format the time is visible in VLC. In any case, to be sure that this problem is solved, write in the video the time that the video is running.
-
Look for a sensor to measure the ammonia: MQ-135. This value is very important to be taken int account in the laboratory, so will be implemented in the project.
-
Find a tool for the user interface: Node-Red.
-
Installation on the raspberry pi.
-
Learn how it works. This video has been very useful.
-
Try it with AM2315 sensor.
-
As you can see in the next video, is working in a room with high humidity, that is reduced when the sensor is moved to the window.

-
Also thanks to Node-Red, we can see the results in the phone:
-
Second week
-
Water level sensor: Try with a pause of 1 seconds at the beginning of the code to see if works having a bit of time before starts to measure, but still not working.
-
Added in Node-Red a switch to enable the flow or to stop it. Also added nodes to let save the values measured by the sensor in a CSV in the Desktop. Found helpful documentation here. Here is how the final scheme looks like.
-
PiCamera: Try to solve the problem with the timelines in the video, by changing the time writing in the screen to the global time, but the error still persists.
-
AMG8833 on Node-Red: Try to show the image on node-red. Based on this video, and using also the code downloaded when we first tried the sensor, convert the 8x8 lectures of the sensor to a 32x32 map:
- Exec node:
- Create a list with the 64 values read by the camera, and map them using map_value function.
- Use griddata function to perform the interpolation with the cubic method to obtain a double list of 32x32 values.
- Render image:
- Node red works with JavaScript. In this function, we define the minimum and maximum temperatures among the values of the current read of sensor.
- Calculate the color of the box depending of the temperature in a range between indigo and red.
- In HTML, write the disposition of the boxes to make a map of 32x32.
- Template: To be able to be seen in the user interface (dashboard).
- Exec node:

- AMG8833 on Node-Red - New version: After try to join all the cells in the previous one to look more realistic but without success, try to capture the images of the sensor and show them in the user interface.
- Exec node: Print the list of measures read by the camera, 8x8.
- Normalise data: Parse the values in JSON and obtain the maximum and minimum values of the current measure.
- Colorise: Assign a color depending of the temperature of the pixel.
- To be able to show it in the user interface, the image has to be converted to base64.
- Image: Define the dimensions the image will have on the UI.
- Template: To be able to be seen in the user interface (dashboard).
You can see here a video of how it works, where a hand with 1, 2 and 3 fingers can be recognized way better than in the first version:

The changes are based on these references: Reference 1, reference 2 and reference 3.
Third week
-
Keep trying to solve the problem of the speed in the videos. Found this information and change the code according to it, but no improvements obtained. Also tried with different configurations:
- Video formats: .avi, .mp4, .h264...
- With and without OpenCV
- Changing the framerate (found here)
-
Added security to Node-Red platform: Added a username and a password that will be useful and necessary for the privacy. Useful video and documentation

It also ask for the login in other devices:
-
Water level sensor: After try all possible options to make it work with digital reads, bought a MCP3008 Analog to Digital converter to make it work as it should.
- Try the code. The result is that finally the sensor is given different values depending on the level of the water.
-
MCP3008: The analog to digital converter requires some changes to work properly. The code found in that link will be useful for the development of the water sensor level code.
- Connect the ADC to the raspberry following this steps. Connect also the water level sensor to pin 0.
- Implementation on Node-Red: After many attempts to try to get the percentage of the level of water I have realized (said by other users as well) that this sensor is not precise enough.
What I have decided to do is set up some ranges of low, low-medium, low-high and high water by testing many times to get the appropriate ranges with the values provided by the ADC.
I have got a more appropriate widget on node-red.
Here is a video of how the sensor is working:

-
MQ-135: Sensor to measure the ammonia among other different gases.
- Connection of the sensor with the ADC and read the documentation
- Preheat the sensor: The sensor has been measuring normal conditions during 26 hours.
Fourth week
-
Keep trying to find a solution for the duration of the videos. After some tries, I have found that, for example, the duration of a record of 60 seconds turns into a video of 68.8, with a framerate of 25. The total number of frames should be (60 * 25 = 1500) 1500 frames but after count them are 1721 (68.8 * 25). So the problem is that the camera is creating more frames that it should, but not found a solution to this problem yet. I have also tried the same code in a computer but the problem is there as well.
-
Water level sensor: Try to turn the sensor measure from ranges into a percentage, but the measure is not precise and the maximum value variates depending on the moment of measure.
-
Seek camera in node-red: Integration of the thermal seek camera in the user interface of node-red, with a web server using flask.
- Flask installation
- To show the image on the server: This video has been useful to understand how flask works and to have a first contact to it. To be able to show the image, I have mix the code that made it work in local and the simple base code of flask.
- To add buttons to activate and deactivate the camera: This video has been useful to develop this feature.
- Show it in the user interface with the template node.

-
Pi cam in node-red: Integration of the pi camera in node-red with a web server using flask.
- First contact with multiple buttons.
- Create a server to reproduce the image recorded by the piCam and added a button to start/stop the recording of video.This example has been used and modified to obtain the server as we wanted.
- Show it in the user interface with the template node.
