Intro to Modding - RighteousRyan1/TanksRebirth GitHub Wiki
A Quick Note
Modding is no easy task- it may take a little bit to adjust to a codebase.
I say this because my codebase definitely isn't the best, as it heavily improved over the time since I started this passion project. You may see some things that are written terribly, and then you may see some things that are written with sanity in mind.
What You Will Need
Tanks Rebirth automatically compiles mods for you, given that you have the .NET 8 SDK (1.7 or higher) or the .NET 6 SDK (1.6.2 or lower), so you don't need an IDE per-se, but I highly recommend one as it has autocomplete and autofill. If you are looking for something in the codebase, you can just scan through an IDE as opposed to scanning through source files yourself.
Recommended IDEs:
- Visual Studio Community 2022 (2019 and older will not work with
.NET 6.0or8.0) - JetBrains Rider
If you don't want to use disk space on an IDE, here are some options:
- Visual Studio Code (better than something like Notepad)
- Sublime Text
- Notepad++
I personally advocate for Visual Studio Community since that's what I use every day. For that reason, I will be showing image examples through VS2022.
Before You Start
Keep in mind that the built-in mod loader is not fully functional yet, and is subject to inadequacies.
If there is anything that you think needs adding, check the #suggestions channel of my discord server.
And most importantly, mods will always be stored at:
* = if you compile for yourself on Linux, for now
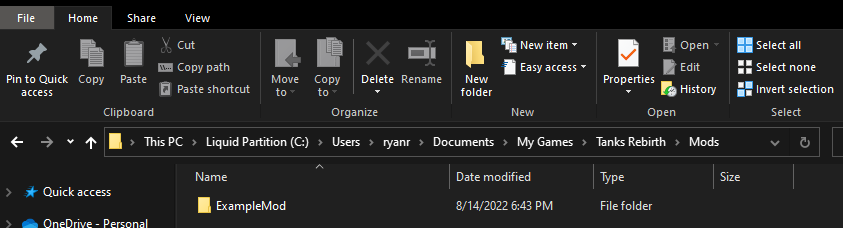
Windows: ...\Documents\My Games\Tanks Rebirth\Mods\
MacOS*:
Linux*: ~\Documents\My Games\Tanks Rebirth\Mods\
A mod would be in a folder like shown.
Starting Out
Among the very first things you need to know is how the game loads mods.
As of v1.1 of this mod loader, the entry point from a mod to Tanks Rebirth my by making a class that inherits from TanksMod, which is located in TanksRebirth.GameContent.ModSupport. It provides a few properties and methods to get yourself into the game's code.
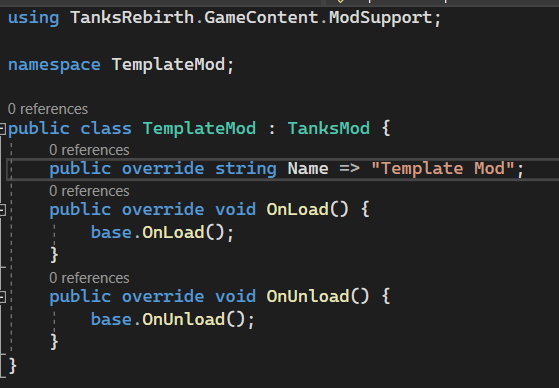
After installing the template mod, this is what should be inside of it. I included a lot of the namespaces that could be useful.
Until the in-game mod skeleton maker is available, you will need to change the name of your .csproj file to what you want the name of the mod to be. Be sure that the folder name is the same as the name of your mod's project.
If you are working with a stable (?), openly released version of the game (one of the tags), or self-build and choose to not change source, you can just leave the current version of the game's DLL, as the template will always be updated with the most recent release of the game on this GitHub page.
But, if you are working with an in-development version of the game, I suggest changing this path to the current directory of your game until you decide to share it with someone. Eventually this game will require you to install it through an installer so it always goes to the same directory.

When all of that is set up, all you have left to do is to open the .csproj with the IDE of your choice!
Be sure consult the documentation if you need any pointers.
Beginning Modding
This modding API is quite trivial at its core- all it requires is you downloading the template. This template contains the binaries for the most recent version of the game, version 1.7.1.
Interacting with this game involves the modder taking advantage of events. The template comes with a brief description commented in the method bodies of what you can do.
To start off, we can modify events that happen into the game by subscribing our own methods to them. For example, we can hook into Tank.OnDamage, as said in the comments of the OnLoad method.
Assuming you are using an IDE, pressing tab after entering += will automatically declare a new method under the current one.
Delete the statement that throws a new exception. We don't want our mod to crash the game!
We can see there are 3 parameters here, victim, destroy, and context. In any of the game's events, the by-value parameters, such as integer types, floating point types, and booleans (which, under the hood, are also integer types to an extent) are read-only. Trying to change them will result in no difference to the code the game itself runs.
So, with our method here, victim is the tank that was hit by a flying bullet/shell. We can modify the parameters of this tank by typing victim. and seeing what intellisense tells us.
Here is the beginning of our list of members, properties, and methods included within the Tank class.
Since generally, a tank is destroyed when it's damaged, changing a property will essentially be useless. So, we can call a method that exists within the Tank class, LayMine().
Do note that this method will only place a mine if the tank itself is allowed to place mines and has more mines to spare.
When the mod unloads via your mod's OnUnload method, you will have to un-subsubscribe your events via the following syntax:
The game does not automatically un-hook events, so the modder must do it themselves.
Cool Shortcuts
If you put your game in Debug View (using Insert), you can use the keybinds U + I to unload every mod. You can also use O + P to re-load every mod. If your mod un-subscribes events properly (using Event -= MethodName), you can see your behaviors change in real-time just with the press of two keys.
Changing Vanilla Behavior
// TODO