The Legend of Zelda: A Link to the Past & Four Swords Subset - RetroAchievements/guides GitHub Wiki

The Legend of Zelda: A Link to the Past & Four Swords was released on the GBA on December 2, 2003, and was a port to the wildly popular SNES game. It came with an extra game mode in four swords and a dungeon tied to the progress of that mode. You've probably completed the main set and are ready to tackle some harder challenges. Good luck! This set was created by Mutawarrior and FBernkastelKues, and was almost completely uncompleted for 7 years until MitSuS shared a lot of information about the low% path. Kaaz also did a lot of work in finding and sharing information on the glitch achievements. Thanks to these two, this guide is possible.
- 💎 Achievement Guide
- 📜 Introduction
- 🏆 Any % (ft. Zelda)
- 🏆 Low %
- 🏆 Post Game
- 📜 Credits

Set consists of 30 achievements worth 406 points

Set released on 22 Aug, 2018
This set can be completed in 1 playthrough, as you can continue on your low% file to collect most achievements after the fact. There will be a handful of achievements that you will need to do in a separate save file or during your playthrough that you will need to reset without saving after. Luckily Mutawarrior allowed saving in Legendary Hero, otherwise a second playthrough would be necessary.
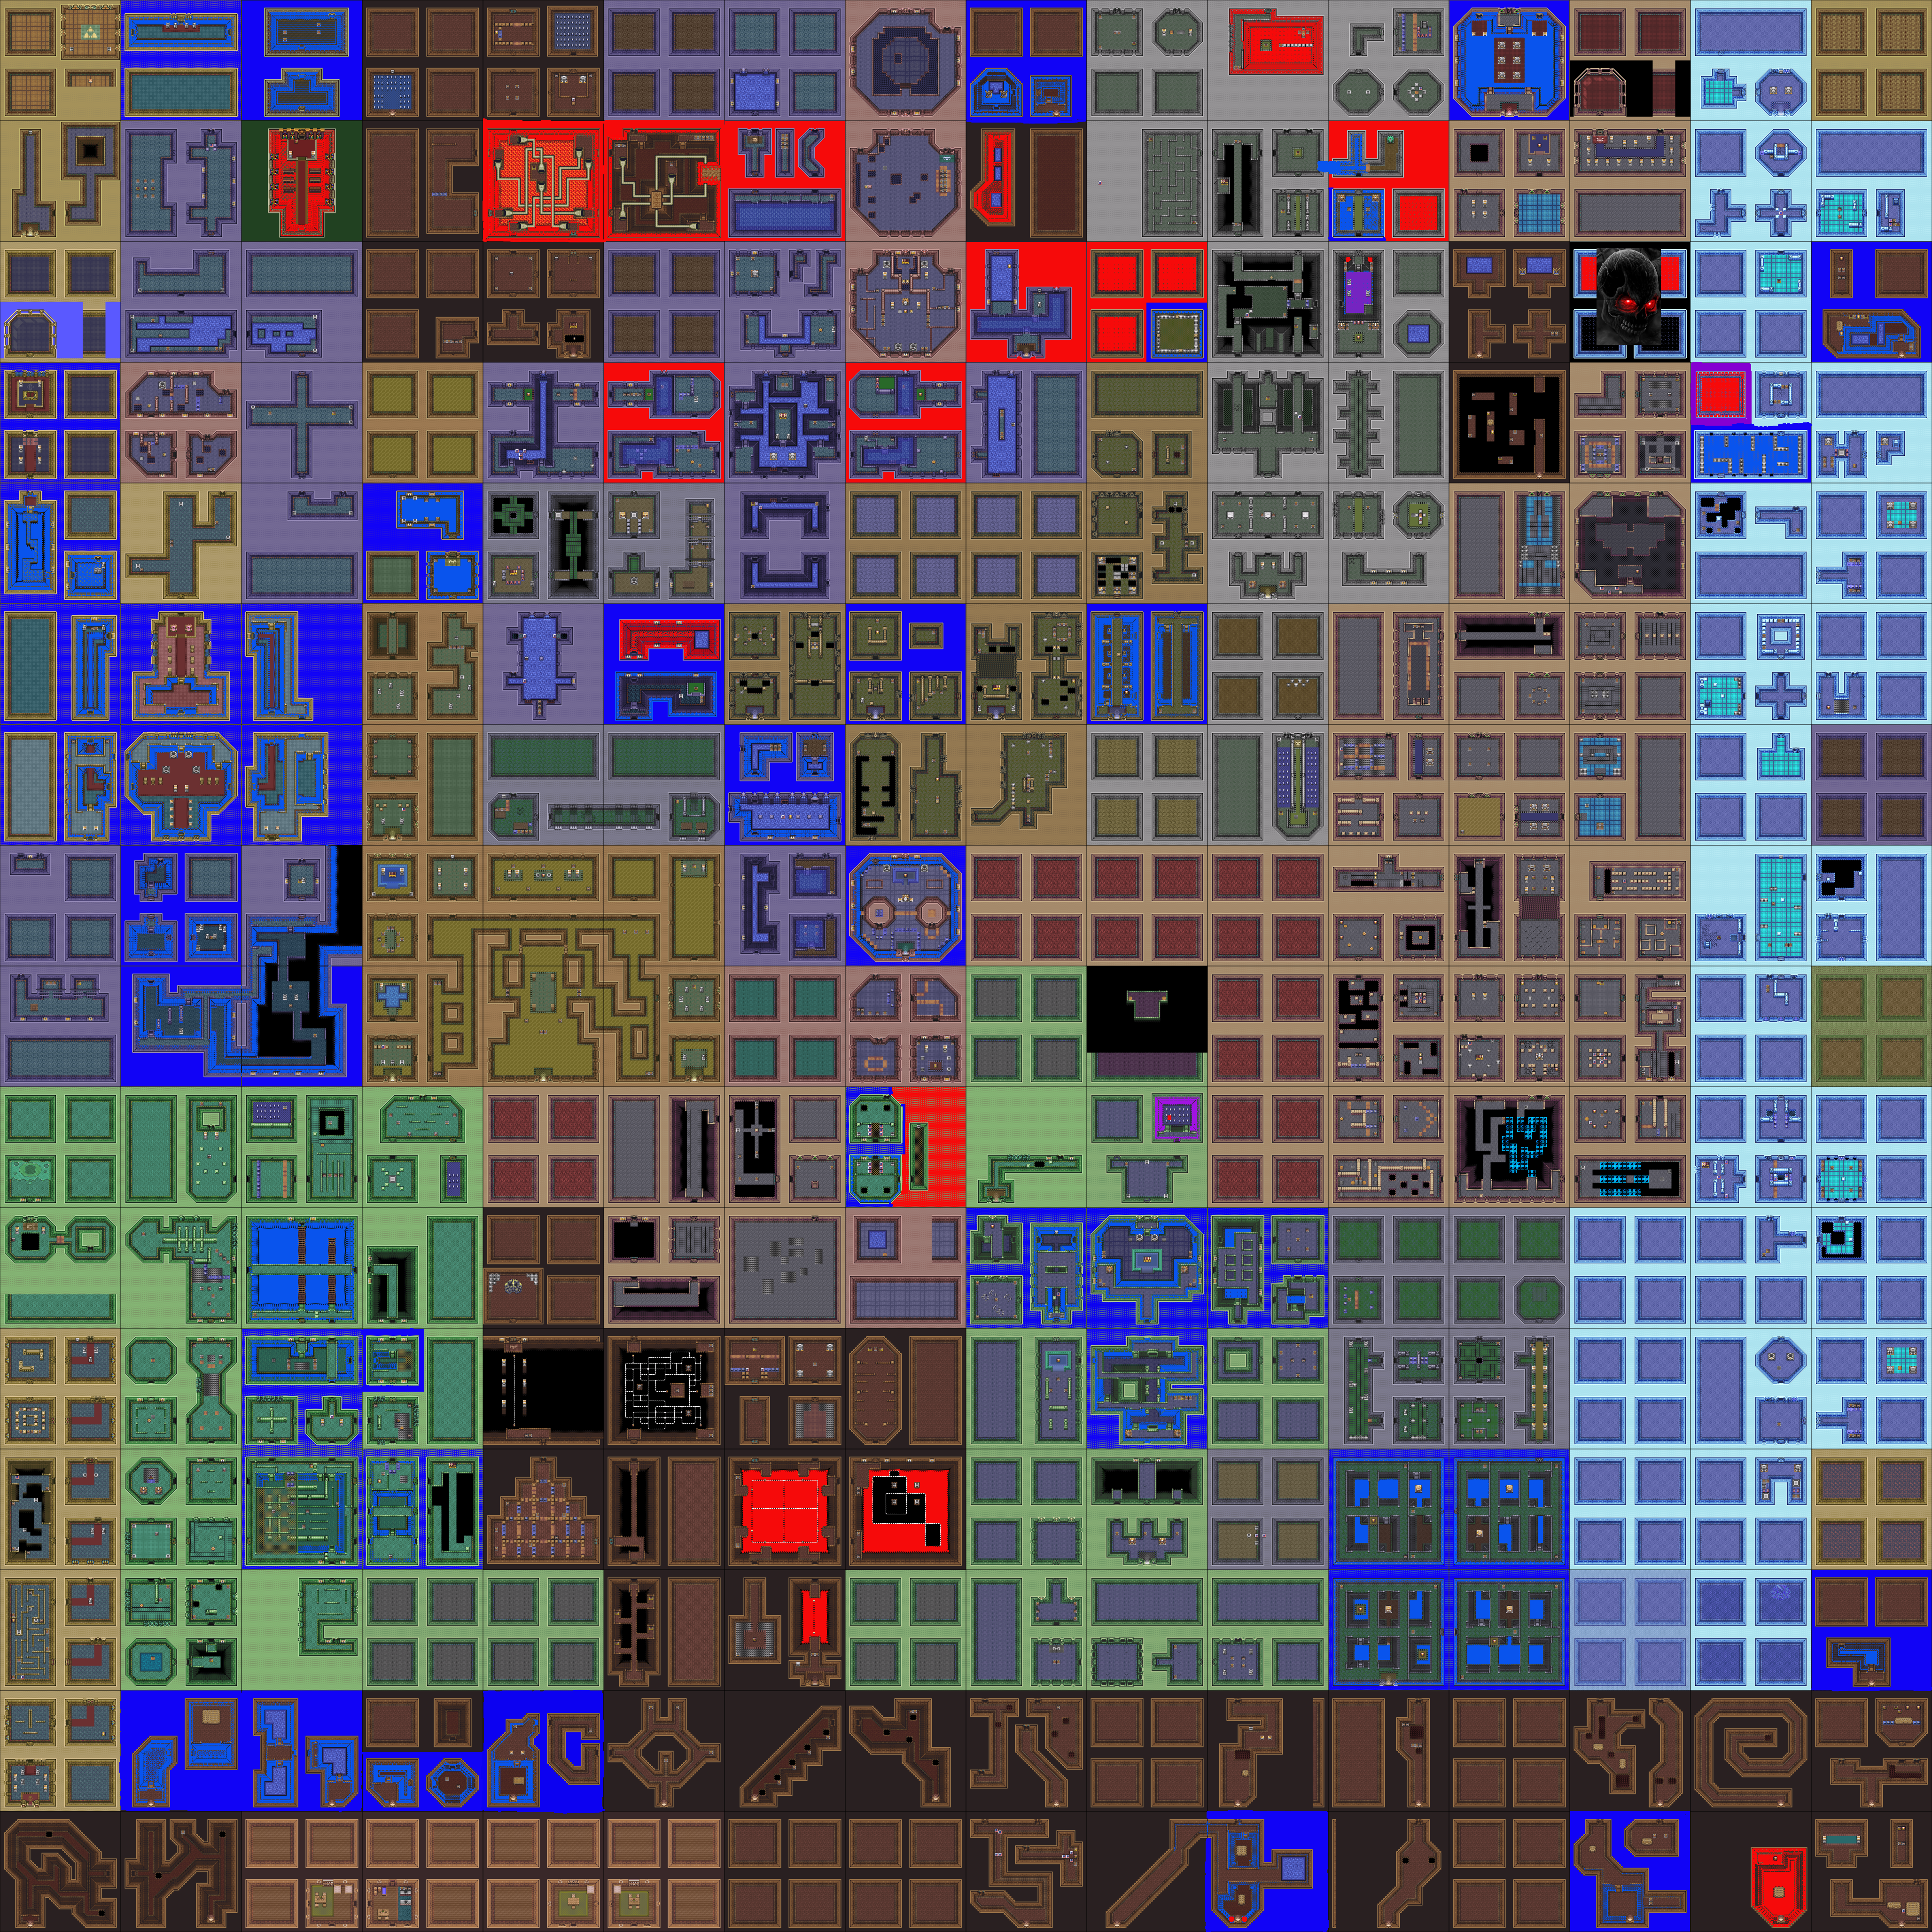
You will be making extensive use of Exploration Glitch (EG) in this playthrough, I'll do my best to provide maps and directions so that you make it through safely, as it can be tough to find your way through the maze of rooms. I will be using this map as a base from alttp-wiki. Let's jump right into the any% guide.
This section will cover the following achievements:
Click here ◂ to toggle open the table of contents
For this section, you will be completing an Any% run + saving Zelda--there will be 2 methods of accomplishing this. This will get you 3 achievements at once!
Triforce Majeure (5)
Obtain the Triforce without fighting Ganon.
A Whole New World (5)
Take Princess Zelda to see the Triforce.
Break on Through (To the Other Side) (5)
Enter the Dark World as Link without the Moon Pearl.
Start the game as normal, and progress until you save Zelda. Now, you need to make your way to the room directly left of the main entrance to Hyrule Castle.
Go into your core settings and make sure core options > Input and Auxiliary Devices > Allow Opposing Directional Input is set to "On". You can check that it is working by pressing up and down on your d-pad at the same time to see Link moonwalk up. (As far as I know only the mGBA core allows this, but others may as well).
Setting options


Go to the upper doorway and press up and down on your d-pad at the same time. Link will walk through the door backwards and the screen will loop and you will appear to be in the center of the room you were just in. Now press up and down on the d-pad again and the screen will loop once more. You will appear to be in a wall. (Continued below the stair clip method).
If you cannot do the up-down method for some reason, this is your best bet. Go up to the second floor of the same room as the previous method, walk up to just left of the stairs, and pull out your sword. Get as close to the rail as you can and align the right side of the tip of your sword with the darker brown pixels next to the black pixels on the right side of the railing as pictured below.

Release B, and press up and right at the same time for 1 frame. You can pause buffer this movement, B-buffer by swinging your sword to halt your momentum, or using turbo-A on your lantern with empty magic and your turbo set to 2 frame intervals. Pull out your sword again and realign to the same pixels as before without moving vertically at all. Repeat the process a total of 7 times--you should be at the same spot as the picture below.

Walk to the left where the next picture is and up into the wall. Now it should appear that you're walking on the wall!


You're still on the same layer that you started on, but you've clipped out of bounds, now walk over to the vertical wall to your left, and push into it to jump completely out of bounds.
Whichever method you used, this is your first encounter with EG in the GBA port!
Warning
EG is a dangerous glitch and can softlock you easily forcing you to save and quit (S&Q), mirror back to the entrance, or in extreme cases--soft reset the game if it freezes. Be sure to follow the paths I provide.
long map of your route

- If you used the up-down method, walk up 1 screen transition to be in the room you were just in and walk to the left side of the screen to get to the same spot as the stair clip method.
- Go up for 2 screen transitions, you should now be in the upper portion of Hyrule Castle and see enemies in the room below.
Caution
You can accidentally jump into the room here.
- Walk to the right side of the screen and stop before the screen transition. On your way over, you should see Link's hat bobbing in the wall, stop just after it disappears.
- Now continue going straight up until you get to the Triforce!
Watch the credits play out and you should get 3 achievements. Since the game assumes you were in the dark world when you get the Triforce, you will get Break on Through (To the Other Side) (5) as well.
Now onto low %!
This section will cover the following achievements:
Click here ◂ to toggle open the table of contents
I Fought the Law
Eastern Hymn
Desert Raven
Rocky Mountain Way
A Shout in the Dark
Fireworks
Eiffel Tower High
Hyrule's Angel
In the Green Swamp
Rusty Cage
Dragon's Skull
Fire and Ice
Back in the Swamp
Bereden vag for Herran
Khnoro Aamar Fossil
Blood of Ganon
Four Sword Sanctuary
Hidden Dungeon
Slash-Free Hero
Legendary Hero
Important
Un-map your B and turbo B buttons before starting this run. You never need to use B since you will not collect a sword, and this is a great time to get the 2 B-less achievements. Save your remap file to the game, and check to make sure they are unmapped if you ever close and reopen the emulator or game.
Important
Save constantly so that you can reload if you ever die so that you will not need to redo Legendary Hero!
Note
There is a developer provided save file in the subset forum page found here. If you don't want to EG into the Palace of the Four Sword every single time while doing the bosses later on, it is reccomended to use this save file. Also note that the file you're using is required to at least have seen the credits before the guy in the palace allows you in, so at somepoint you will have to EG to credits if you use this file. Refer to the eg map and look for opportunites to do this whenever you want. You will know the file is ready when there's a Triforce symbol (looks more like a hut) on the alttp file on the file select.
This is the main portion of this set, the low% run makes use of EG and other glitches to avoid the following items:
1. Mushroom/Magic Powder
2. Bottles with anything other than 1 Magic Potion
3. Silver Arrows
4. Boomerang
5. Bombos Medallion
6. Ether Medallion
7. Quake Medallion
8. Book of Mudora
9. Cane of Byrna
10. Magic Cape
11. Titan's Mitt
12. Swords
13. Shields
14. Tunic Upgrades
15. Magic Upgrades
16. Bomb & Arrow Upgrades
17. Unnecessary Heart Containers
In order to use any item collected during the run, you will need to complete their respective dungeon before you earn the right to use them in other dungeons. This means there isn't a set dungeon order--for example you do not need to wait until the last minute to complete Skull Woods just because you do not need the fire rod in Thieves' Hideout. With that in mind, ice rod is considered the item from Turtle Rock, so do not pick it up early.
I Fought the Law (5)
Get past the guards at the beginning of the game before getting your sword.
MitSuS posted a video of this whole sequence up to saving Zelda. I will give a few alternate strats and explain what is going on through that video in this guide.
Our journey begins with getting past the guards just south of Link's house with nothing but our lantern. There are 2 ways to do this:
- Tape down/toggle your turbo A and d-pad down, turn on fast forward and wait several hours until enough of Zelda's telepathy messages have come through for Link to make it all the way past the guards.
- Use your lantern the frame after the guard's message ends several times to make it through quickly.
- Use a wall clip to get onto the cliff next to the guards.
If your are going for option 2 (recommended), discovered by MitSuS, you can easily do it with turbo by using the VBA-M core and setting your turbo to once per frame, or you can attempt to do it by hand.
Start by lining up on this y-axis pixel where you see 2 of the upper left dark grass pixels next to Link's arm while he is idle:

To do it by hand, use your d-pad down to progress the text and try to press A 2 frames after pressing down to close the text box--the frame the text box actually closes. This make you use your lantern and move a few pixels down. Now just do this 23 times :) I got this to work a couple times real time just to verify that it does actually work, then I tried with frame advance and confirmed it is frame perfect.
Otherwise, set your emulator's turbo speed to 1 frame like this (as far as I can tell this is only possible on VBA-M core):
Setting options


Then turn on fast forward, hold d-pad down and your turbo a button to blast through in seconds. You can nudge Link left or right if you are not moving.
Finally, for option 3, go to this corner:

Now press up and left on your d-pad for 1 frame, then press down (for however many frames). You can pause buffer to make sure you are only pressing for 1 frame. You will need to do this 6 times to get here:

Hold down and left for 5 frames to get here, as long as you press down and left together Link will keep popping back to the spot he was above, so pause, press down and left, then keep pausing until you get the frame:

Press up and left one more frame, then down and left just until you are pushed over here (don't hold too long or Link will jump back down).

Now just press up and left for up to 2 more frames to get Link here:

Finally press down to jump onto the cliff.
If you are set on doing this by hand, I suggest option 3, it should take less than a minute with good pause buffering, and is only 8 frame perfect inputs as opposed to 23. It also keeps all your magic, and you get to use the much more stable mGBA core. However, if you mess up anywhere you need to redo it again from the beginning. Really I suggest just using the lantern method with turbo.
After you go down a screen from the guards, go back up a screen where you came from (jump off the cliff first if you got down with option 3). The guards will talk to you, once they finish press up again, and the screen will scroll up. Come back down a screen once more and the screen will scroll twice. Now go to the right a screen and jump off the ledge. Your world coordinates are not lining up with what is being shown on screen, to fix this, simply enter the fortune teller's house immediately to the north of you and exit.
Now, make your way to the Eastern Palace. You'll notice that there are no enemies, the overworld is still raining, and Zelda occasionally calls to you asking to save her.
Caution
S&Q will send you back to Link's house at this point in the game, if you want Legendary Hero, make sure not to die yet or you will need to repass the guards!
Eastern Hymn (10)
Beat the Eastern Palace with the bare minimum of equipment.
Note
Maps and compasses are fine to collect, they will not nullify the low% achievements.
Your lantern will be your weapon until you get bow, it can kill skeletons in 2 hits and the squiggly dudes in 1 hit. With good positioning you can hit multiple enemies at once, and the hitbox lasts just barely longer than it feels like it should, so some enemies may walk into the fire and take damage! Luckily there are not many forced combat encounters before bow.
Make your way to the cannon room and collect your 112 rupees. Then up and left to the skeleton room. If you did the snes subset you'll remember that if you walk around the edge of the room, then slightly down from the north door, only 2 skeletons will spawn. This makes the fight easier with pots.
Head through the dungeon as normal until the boss key room, using lantern to defend yourself as needed. You can use pots to kill the Eyegore and skeletons, or just damage boost to pick up the pot and press the button. If you damage boost, collect the two hearts from the pots below the button.
Caution
Damage boosting is dangerous, if you die you will need to reset back to Link's house to still be eligible for Legendary Hero!
Collect your bow and the 10 arrows from the pots on the left side of the room, and continue as normal until the boss.
This one is a pretty easy fight. You will need a minimum of 18 arrows to complete the fight. Realistically 20-25 to give yourself room for error. Luckily, you can fill up to 30 in the room before.
Simply shoot each knight 3 times to kill it. The final knight regenerates its hp when it turns red, so any shots on it are lost at this phase. Try to get on the same vertical axis as it and shoot 3 times to kill it.
Go ahead an collect pegasus boots, then use them to break the wall in the back of the room to collect bombs and more rupees. Now S&Q back to Link's house.
Desert Raven (10)
Beat the Desert Palace with the bare minimum of equipment.
Pass the guards to the south of Link's house again. Unfortunately, our new arsenal does not make this any easier.
Head to the desert and into the Desert Palace. You'll notice that in the stormy world, the things normally blocking the way are absent and you will be able to walk right in without book of mudora.
Grab power glove and fill up your arrows with the 2 guaranteed arrow spawns in pots at the top and bottom of the far left hallway (the one you go through just before leaving for the second half of the dungeon).
Try to stick to your lantern for defense in the second half since you need a lot of arrows for the boss. Although there is a single 5 arrow spawn right before the boss door.
Make your way to the boss room with your new power glove.
This is basically Worm Kebabs from the base snes set.
Each worm takes 4 hits to kill, so you need a minimum of 12 arrows. However, you're going to want to enter with all 30 arrows, because it's easy to miss. Stand at the bottom of the arena and try to time your arrows to hit the worms just as they leave the sand.
Otherwise hitting them as they are moving straight vertically is your best bet to get a hit in.
After collecting your pendant head up to Kakariko Village to pick up the bottle from the back of the bar, which you will use for glitches going forward. You also have the opportunity to pick up bug catching net although it is not strictly required.
Now you have a choice to make:
- (Recommended) If you are using mGBA, set core options > Input and Auxiliary Devices > Allow Opposing Directional Input to "On", just like you may have done with Any%. Now if you press up and down together, Link should moonwalk up.
- Otherwise, buy a blue potion from the witch's hut.
Either way, I recommend switching off of the VBA-M core (I personally found that the be very unstable). You may S&Q at any point now, since you can pass the guards by going up a screen and picking up the rock on the right exit.
Head over to Eastern Palace and make your way to the northern exit in the cannon room. If you are doing the Up-Down method, simply press up and down on your d-pad at the same time and Link will walk through the door backwards. Your screen will scroll down and Link will appear in the middle of the wall. Now walk up and the screen will scroll a bit more and Link will be on the bottom of the screen. Now walk down just a little and walk into this wall to jump out of bounds:

If you are doing the bottle adventure method like MitSuS's video, walk into the exit just until Link is not visible. Make sure you are missing some health or some magic and equip your blue potion. Press up and A at the same time. Link should drink the potion, but your health and magic should remain the same. Now press up to go through the door and the screen will scroll. Link will appear to be standing on the rail of the bridge in the cannon room. Walk down and into the same wall as above to jump out of bounds.
- Now walk down a bit until you are under the path that lead to the rupees you collected earlier and go 1 screen transition left.
- If you did the bottle method, walk down 1 screen transition to go to the boss key room.
- If you did the up-down method you are already in the boss key room.
- In both cases, now go back up 1 screen transition to ensure you are on the bottom of the screen with 2 statues, stairs, and offset blocks.
- Go left until you see the offset skulls from Misery Mire (10 screen transitions).
- Go up 2 screen transitions until you are in the dungeons of Hyrule Castle (make sure not to accidentally jump into bounds)!
- Walk 1 screen transition to the left then back 1 right to make sure you are on the left edge of the screen.
- Walk 2 screen transitions up to get the main room of the castle.
- Walk left 1 screen and jump into bounds.
- Leave the castle and re-enter to load it properly.
large map of this section

Now use your bow and lantern as a weapon to save Zelda as normal. While going through the sewers make sure to use bomb/pegasus boots to break the breakable wall for 300 rupees. Now Zelda will finally stop asking you to save her--great!
Caution
Do not collect the boomerang or sanctuary heart container in this section!
Go and pick up Zora Flippers, then go continue to Death Mountain.
Earn your magic mirror, and progress enough in Tower of Hera to collect Moon Pearl. Note that bumper beetles can be harmed with your lantern. You will be unable to kill Moldorm yet without hammer, so leave and decide if you want to fight Agahnim next using bug catching net, or do Dark Palace for hammer. Since we want to skip as many items as possible, let's go to Dark Palace first. But you will get Hyrule's Angel if you go do Agahnim now with bug catching net. Be warned though, this locks Hyrule Castle, making getting back to Tower of Hera a pain, and locks you out of the only way I know how to get Fireworks.
Rocky Mountain Way (5)
Perform the Death Mountain Descent glitch.
In order to complete Dark Palace, we need to enter the dark world legitimately and open the palace with KiKi. So start by exiting Tower of Hera and entering the dark world portal just below you.
Drop down the mountain and go right once, then use your mirror between these two statues all the way against the wall.

Now walk 1 pixel to the right and wait until Link goes back to the dark world. If done correctly, Link should stand in place without being sent back to the light world. Use the mirror again and walk right onto the bridge, then after the blinking stops walk slowly back into your mirror portal. If done correctly, Link will be standing in the wall, and you can jump off the edge into the black area below.
Now make your way down and exit here on the screen:

Hop down and you'll be in the dark world!
Swim across the river and make your way to the Dark Palace.
Tip
If you forgot to buy Zora Flipper previously, just use your magic mirror to cross the bridge as normal, collect the flippers, then return to your portal.
A Shout in the Dark (10)
Beat the Dark Palace with the bare minimum of equipment.
Complete Dark Palace as normal, defending yourself with arrows and lamp fire until you get Magic Hammer. You'll notice this weird graphical glitch when you swing the hammer to the left, right, or down.

This is the hammer's damage hitbox, it's utterly broken. It's massive, has a huge range away from Link, and lingers as long as it's on screen. Even if the graphical glitch does not occur, this is still the hitbox. Its only downside is that you cannot hit to the right side of Link. Swinging your hammer up gives the normal tiny hitbox. Luckily in terms of breaking overworld obstacles, the hammer works normally.
Due to this hitbox, you will need to fight turtles on the way to the boss from the bottom right. It takes some getting used to, but once you're used to it this is a massive boon.
Continue to the boss room as normal.
You can now see the true power of the hammer. Get close enough to the mask, then turn right or left and pound. The mask will be obliterated in 3-4 hits, now do the same thing to the head to finish the boss of in 4 more hits. Otherwise it takes 6 arrows to kill.
Fireworks (5)
Obtain the Ether Medallion without using the Book of Mudora.
S&Q in the light world and head back to Hyrule Castle in the same room we keep jumping out of bounds from. Leave the castle from the same room and re-enter, now save.
Now we will get out of bounds, you can use the stair clip method from Any%, but not the up-down method since that one does not allow you to attack anything.
Or, now that you have mirror, you can learn the final method of getting out of bounds, by using your mirror.
Go to the ledge to the left of the stairs and start walking into them, just as Link jumps use your mirror. You will know you were successful if you see Link start to jump as the mirror sends you back to the door, or if you hear Link say "HUP" as the mirror is used. Now use pegasus boots to ram into the wall and you'll be out of bounds!
The timing on the mirror usage can take some getting used to, but once you got it, this is the easiest way to get into EG without getting a screen offset.
Now we need to walk to the Tower of Hera.
- Go 2 screens down
- Go 1 screen to the right
- Go 1 screen down then back up to get onto the bottom of the screen
- Go 6 screen to the right and get to around the middle of that room.
- Go 1 screen up and jump into bounds
Large map of the path

If the camera is not centered on Link, walk back and forth until it is and attack an enemy to make sure you are not offset.
Without leaving the tower, go up and kill Moldorm.
Very easy, 3 hits with your busted hammer and it's dead.
You will get the Ether Medallion instead of a heart container, as well as the Fireworks achievement! Nice! Now reset your game without saving.
Warning
Reset your game without saving, the Ether Medallion is a restricted item
Eiffel Tower High (10)
Beat the Tower of Hera with the bare minimum of equipment.
Reload your save and do the same thing as above, except this time leave the tower once first before ascending.
After collecting your pendant, S&Q and return to the same room in Hyrule Tower.
Hyrule's Angel (10)
Beat Agahnim in Hyrule Castle with the bare minimum of equipment.
Use the mirror method or ladder clip to get out of bounds again, and walk 2 screens up, then jump in bounds. Enter Agahnim's room, open the curtain with the lantern and begin the fight.
Whether you are using hammer or bug catching net, the skewed hitbox is the same. Stand slightly to the bottom right of him so the hitbox is right next to him and continue mashing A to keep the hitbox up so that his magic is immediately returned to him. If you are positioned properly, the blue attack will miss you as well.
The only time you cannot counter attack is if he is in the bottom right corner. Good luck!
In the Green Swamp (10)
Beat the Swamp Palace with the bare minimum of equipment.
Make your way down to the Swamp Palace and complete it as normal. Save often, leave and replenish your health at the fairy to the north in the light world if you need to, we still do not want to die and I find this palace to be the easiest to die in due to all the moving things in the water.
Since your hammer cannot defend you from below, be ready to pull out your lantern if anything is going to hit you.
You're going to feel the weakness of the hammer hitbox here, phase 1 can be rough. The best thing to do is to be to the right or below the boss when you hookshot the Arrgi to you. Then turn left or right and smack them with a hammer to kill them. If you need to hookshot them above or to the left, you will need to run to the other side of them as they return to Arrghus to hit them. Nothing else will affect them.
In phase 2 Arrghus will fall onto the last spot the player was standing when he jumps. Attack from the lower right side to hit it with your hammer as soon as it falls. Once you hit it, run up left to try and get it back towards the center, then run back down right to get your placement correct once you see the shadow. It will take 4 hits to kill.
Rusty Cage (10)
Beat the Thieve's Hideout with the bare minimum of equipment.
Caution
Do not pick up the Titan's Mitt in this dungeon, it is a restricted item!
Get big key, bomb the floor, and take Blind to the boss room as normal. Be sure to NOT pick up Titan's Mitt on the way. Save every time you make progress in this dungeon, it can be treacherous! The most difficult room in my opinion is the belt room on the way to upstairs, just do your best to kill the blobs as they separate and go slowly. Be sure to use mirror after grabbing big key and disguised Blind to make your journey safer.
Definitely come into this boss with full health for the best chance. Blind takes 3 hammer hits on the first two heads and 2 hammer hits on the last one in order to kill. It takes some getting used to with this hitbox to get him. Stand to the right of the boss, and swing your hammer as he is coming down in his wave cycle. The range of the hitbox and recoil should push you out of the way so that you will not take contact damage.
The extra health earned from this fight is more useful for Mothula than the extra health from Mothula is here.
Dragon's Skull (10)
Beat the Skull Woods with the bare minimum of equipment.
Complete the dungeon as normal. Note that when you drop down to collect the fire rod, the pot to direct left of you has a heart, you can continuously use mirror and recollect the heart until you are at full health!
In the second half of the dungeon, use your lantern to open the vines. It's difficult to get the Mothula without getting hit, but do your best, you do not have a lot of health for the fight. Absolutely be sure to save before jumping into the pit with the boss so you can reload if you die.
Mothula is always difficult because of the moving floor and spike traps. Luckily it's insanely easy to hit Mothula with your hammer's hitbox. It will take 4 hammer hits to kill, just do your best to get the hits in before you take too much damage. If Mothula stops to attack, try to make your way to the right to avoid it. Good luck!
Fire and Ice (10)
Beat the Ice Palace with the bare minimum of equipment.
Caution
Do not collect Blue Tunic, it is a restricted item!
Since we skipped Titan's Mitts we need to use EG to get to Ice Palace. Head over to Thieves' Town, be sure you start at full health, this is a tough trek. You should have 1 key left over in this dungeon, this would not be a bad time to grab it. At the entrance use the mirror method to get out of bounds.
- Go right 1 screen
- Go to the edge of the screen without going one more screen over (or you will need to mirror back to the beginning)
- Go up 15 screen
- Go right 2 screens
Large map of the path

You will now be in bounds in the scrolling room.
Warning
Do not collect the big key until you've exited and re-entered the dungeon!
Whether you elected to grab the key earlier or not, walk over to the right side of the room to grab the key from the biri. Use the spare key to open the right side door in the plus shaped room with the giant floor trap and 4 doors.
You are still technically within Thieves' Town, meaning a few things:
- You have the big key unlocked,
- Any key you get here will persist within Thieves' Hideout and not Ice Palace
- You can still open locked doors, including the boss door.
- Magic mirror and S&Q will bring you back to Thieves' Hideout.
- The boss will not spawn the crystal, meaning you cannot complete the dungeon.
In order to make the game consider you within Ice Palace, you will need to make your way back to the entrance, leave and reenter. (Just like we did with Tower of Hera earlier). Also, due to point 2 above, any key you collect on your way up should be used. Once it is collected, it's gone and cannot be collected again. Do not pick up the boss key before you exit and re-enter!
Warning
If you use the spare key from Thieves' Town in Ice Palace, you will need to exit Ice Palace after EG with 1 key leftover to make up for it. We will eventually need the Titan's Mit after low%, which is behind a locked door. Using the key from Thieves' Town in Ice Palace helps us take a useful shortcut and is recommended, but not required. If you use the extra key, be sure to follow this route:
- conveyor room (2 keys) - 1 extra from Thieves' Town, 1 from biri
- unlock door in same room (1 key)
- progress and unlock shortcut door in big spike trap plus shaped room (0 keys)
- skip key in next room and grab key upstairs in next room (in your path to the tongue switch) (1 key)
- progress to big key chest room, do not open chest until after leaving dungeon!!!
- go to entrance, unlock door in second room, grab key from biri, leave (1 key for Thieves' Town).
The rest of the keys should be able to be collected normally and you shouldn't be locked out of any doors if you did this properly. If you accidentally don't do this, you're not out of luck and can still get another spare key from Thieves' Town EG. Good candidates for spare keys are Misery Mire, and Skull Woods.
This is another tough dungeon, the penguins do a lot of damage as the game expects you to be picking up a defense upgrade here. Save often, even on the way up. Permanent progress is permanent and will make the journey easier on subsequent attempts.
The hardest room on the way up in my opinion is the penguin room right after the big key room. I found it helpful to move up and over the wall rather than straight through the room. Obliterate the penguins with your hookshot that for some reason kills them in 1 hit.
Once you escape the dungeon consider restoring your health at the Fountain of Happiness in the Light World. Don't get any upgrades though!
Once you leave and re-enter, complete the rest of the dungeon as normal.
Be sure to enter the room with full magic and full health if you can help it! In the gba version the falling ice gives magic if you are all out, so use your fire rod to completion every time.
As far as I can tell Fire Rod Double that was showcased in the snes subset for Break the Ice still works in the gba version. Saving some magic for p2 is nice.
The range of the hammer hitbox of P2 is extremely helpful as long as you can stay to the bottom right of the eyes. It can get pretty hectic though and most of the time you will be on the defensive looking for openings. Attack wherever you can, it takes 8 hammer hits, or 4 fire rod hits to kill each eye. Consider pause buffering to know how to dodge the falling ice and assess your next move.
Back in the Swamp (25)
Beat the Misery Mire with the bare minimum of equipment.
Here's the big one. Get to full health and go back to Thieves' Hideout. This one is nuts. MitSuS has uploaded a video of this section of the game here. Be sure to watch it and follow along because this one is easy mess up.
Since we do not get Ether, we need to enter the Misery Mire with EG, but since the entrance is not open, we need another way to make the game think we are properly in Misery Mire. This is where this wacky route comes in.
Caution
Be sure not to bonk or jump out of rooms, and to follow the route exactly or else you will probably need to restart!
- Start by arming EG with the mirror in Thieves' Hideout, but do not bonk into any walls.
- Walk all the way to Dark Palace without getting hit and without bonking. (Make full use of the hookshot stun; jumping off ledges is fine).
- At the entrance room of Dark Palace, bonk to get out of bounds.
- Go 6 screens to the right.
- Go 1 screen up.
- Slowly move up and to the right until you see Link's head right about here:
 - Press up to jump off the edge into the pit.
- Go down 1 screen
- Go right 1 screen
- Get to about the center of the room and slowly move down and around until you walk down the stairs/ladder connecting the lower and upper portions of the room.
- Press up to jump off the edge into the pit.
- Go down 1 screen
- Go right 1 screen
- Get to about the center of the room and slowly move down and around until you walk down the stairs/ladder connecting the lower and upper portions of the room.
map of part 1

- Go back up and towards the stage and into the sewers.
- There are no enemies, so make your way to the room where there are bombable walls without bonking.
- Bonk again around here to get out of bounds again
 - Go left 4 screens until you can see Link under a weird semi-translucent layer.
- Go right one screen and go slightly left to get to the very edge of the screen (this is important!).
- Go down 3 screens until you are in the same screen you were in when you jumped into the hole.
- Go down one screen then back up and jump into the hole just like you did before.
- Go down one screen
- Go right 2 screens until you see a stair/ladder right at the top of the room.
- Make your way over to it, then climb down. Use the hookshot to see where you are so you don't accidentally jump down instead.
- Go left 4 screens until you can see Link under a weird semi-translucent layer.
- Go right one screen and go slightly left to get to the very edge of the screen (this is important!).
- Go down 3 screens until you are in the same screen you were in when you jumped into the hole.
- Go down one screen then back up and jump into the hole just like you did before.
- Go down one screen
- Go right 2 screens until you see a stair/ladder right at the top of the room.
- Make your way over to it, then climb down. Use the hookshot to see where you are so you don't accidentally jump down instead.
map of part 2

- Go into the room to the left, then return and go up the ladder and bonk to go out of bounds for the final time.
- Go left 2 screens
- Pass the hallway but do not go to a screen transition and go down 5 screens until you pass the Misery Mire boss/are in Misery Mire. (you may need to nudge Link left or right in the boss room)
- Go to the right side of the screen
- Go down until the screen stops scrolling (not to the transition)
- Go right 1 screen
- Go down 2 screens
- Go right 1 screen and you should be in the main room.
- Make your way over to the main entrance and jump into the lower portion or climb the ladder down.
map of part 3

- Go through the south entrance, then back up the stairs to the main entrance.
Warning
Do not leave the dungeon, just get to the entrance room then go back down!!!
Now complete the dungeon as normal. Keep in mind that if you S&Q or die you will go back to the Dark Palace and need to do this again. So be careful!
Throughout the dungeon it's really easy to take damage, and not that easy to get health back. You only need a couple of small keys to finish, so skip the key in the spikes, and make sure you know the most efficient path to completion to minimize your danger.
In the torch room to unlock the hole to the big key you can use fire rod while the block is moving to shoot through the blocks to light the torches. This will help you finish before any Wizzrobes spawn.
Thanks to your hammer's hitbox this is probably the easiest boss in the game (thank goodness). Just hug the right wall a bit under the slime and mash A. All the small eyes will float into the hitbox and die without ever getting close to you, and the lightning should never hit you.
Once the 9 attacking eyes are dead, the big eye will attack. Do not use your hammer, just get under it vertically and shoot it 8 times with your bow. It will be stuck to the back of the wall unable to approach, making this fight a breeze.
Bereden vag for Herran (5)
Perform the Walk on water glitch.
We need Ice Rod for Turtle Rock, so go ahead and grab it now.
The Ice Rod cave is actually the easiest place to do the walk on water glitch, so let's knock that one out here!
As you're leaving the cave, stand about right here and use pegasus boots to leave. You should slide on the wall out the door. The sliding on the wall is the important part.

Now just use pegasus boots to jump off any straight horizontal cliff into the water and you'll be walking on water!
Khnoro Aamar Fossil (10)
Beat Turtle Rock with the bare minimum of equipment.
MitSuS posted a video of how to get here on this link
Since we do not get quake, we need to go in a roundabout way to get to one of the lower entrances to Turtle Rock, normally only accessible by leaving and re-entering the dungeon itself.
With Ice Rod in hand, go and acquire a green or blue potion however you want and make your way up to Death Mountain. Go to the Dark World with the portal just below Tower of Hera and descend. Use a bit of magic so that you can drink you potion, heal at the fairy on the far west side of the mountain if you need to, equip your potion and save so that you can retry if you mess up.
Now make your way to the right side of the screen. Your vertical alignment is not important, but you need to be on the last pixel before the screen transition.

Now press right on your d-pad and A at the same time, just like you may have way back when you went to save Zelda. If done correctly, the item pause screen will come up, the potion will be consumed, you will still be missing magic, and the screen will not have transitioned.
Now follow the path left, hugging the upper wall, past the glitched screen until you see the bottom of a ladder, go up below it and you will ascend.

Go right this time, until you pass the glitched screen again and use your magic mirror at around this spot (not precise).
Important
This is the second time you will see this pattern, do not use your magic mirror on the first time you see the pattern (before the glitched screen).
Caution
Wait until the portal activates again, if you enter now the portal back to the Dark World will be gone when you re-emerge from the cave!

You will now be at one of the lower entrances to Turtle Rock leading to the Mirror Shield!
Caution
Do not collect the Mirror Shield, it is a restricted item!
Enter, and collect the Big Key, and return to the first floor to just grab the key in the Chain Chomp room, then mirror back to the entrance.
Go through the rest of the dungeon as normal. Since we got the key in the Chain Chomp room, you do not need to collect the key in the long eye-laser room that leads to outside. If you skipped the Chain Chomp key, or accidentally used it somewhere else, use the bumper beetle to damage boost and use i-frames to get the the chest.
Leave the dungeon and heal with fairies in the light world, the return into the dungeon and save. Head on down to the boss, use your cane to make the platform before collecting the magic pot, full magic is important here--hitting the ice rod is the hardest part of the fight.
This one can be rough, especially if you miss too many of your magic shots you'll need to restart.
Start with the ice head, it's easier to hit and affects the battle more if you let it attack you. Hit the head with a blast from your fire rod while you are in range to hammer it so that you can immediately attack. It will take 2 fire rods and 4 hammer hits to kill.
The fire head is significantly harder to hit, the ice rod attack moves slower, and the fire head is not in a great spot to hit with the skewed hammer hitbox. I recommend pause buffering to find a good position to hit it with your ice rod, then wailing with the hammer while you have the chance. It will take 2 ice rods and 5 hammer hits to kill. Realistically, between it being poorly placed and the main head being a threat, you will need to hit it with 3-4 ice rods to leave it vulnerable long enough to get all the hammer shots in.
The last phase is luckily extremely easy so long as the floor is not icy. Just run in circles and hit it with you hammer while it is above you to the left. It takes 5 hits to kill.
Blood of Ganon (25)
Beat Ganon's Tower with the bare minimum of equipment.
You can get to Ganon's Tower however you would like. If you are continuing just after Turtle Rock, the easiest method is to use the mirror outside the dungeon (while you're stuck in the Turtles head). You will then be on the ladder beyond the Titans Mit block. Now you can hammer the stumps (right, top, left) to create the portal. Then enter the portal and head left 2 screens. Be wary of the Lynels. You can mirror hop between light and dark world if you think you're going to get hit.
Another option to get there is doing the same thing as the Turtle Rock path, set up the same way, then use Magic Mirror here instead--just north of where you did last time.

This will put you on the upper cliff. Wait until you get sent back to the Dark World, then enter the cave to your right and re-emerge to fix your map. Now go left to get to the tower. Take your time dodging the Lynel's attacks, they can do a lot of damage if you are not careful.
Once you enter the tower, save.
Warning
Do not collect the Red Mail, it is a restricted item!
Complete the tower as normal, at this point you should be well enough versed in swordsless hammer combat that the tower should not be too difficult. Here are a few tips:
- Collect 2 extra keys in the basement so that you can skip the keys in the upper tower.
- Heal before going to the upper area with the fairies in the bomb-able room after the Big Key.
- Collect the 10 arrow chest in the room down the right stairs from the main room.
- Off-screen beamos cannot shoot you.
- Be sure to make use of your hookshot to stun enemies that are hard to hit or that you do not need to fight.
- Collect as much health as you can on the way up to ensure you do not die.
Tip
If you are low on health when you get to the Moldorm room, you can hop down to the floor below (be sure to look at a map to not land on any spikes) and you can grind hearts for as long as you want from the infinite respawning wizzrobes. Just make sure the anti-fairy is off screen while you do this and you can stay close to the walls to prevent some of the wizzrobes from spawning if you would like. The easiest to hit is the left wizzrobe because our hammer is broken.
This is a bit more challenging than before since there are 2 other copies you need to consider. However, the premise remains the same. I recommend making use of pause to see where the clones will all be, and decide how you want to take your shot. It's pretty hard to aim with the hammer, so I still think it is best to attack right next to the real one whenever you can. He takes 6 hits to kill.
Congratulations! If this was the snes version, you would be done! But luckily for us, the fun does not stop yet. We have one more dungeon to tackle :)
Four Sword Sanctuary (5)
Glitch into the Palace of the Four Swords.
If you were smart and used the provided save at the beginning you will only need to do this once for the achievement. Although you will need to EG to the Triforce once to be let into the palace. Otherwise, I recommend going up until you get the Mothula 2 room since it skips the path beforehand, making it easy to retry. This might even be worth it if you used the same at least for Mothula alone.
After killing Mothula, you can try to get in through the Arrghus 2 path seen in the map below, but it's a lot more precise, I suggest just going through the portal after Mothula 2 to get to the main room in the dungeon.
Get full health and magic, and start at Thieves' Hideout and get EG using the mirror.
- Go right 1 screen
- Go to the bottom right corner without making the screen transition
- Go up 3 screens to the Blind boss room
- Go right 2 screens, then left 2 to get all the way to the right side of the screen, you should see Mothula 2
- Go down 2 screen and try to take the left stairs to get back into bounds.
map of the path

Hidden Dungeon (25)
Beat the Palace of the Four Swords with the bare minimum of equipment.
Note that using EG to get into this dungeon does not nullify the achievement in case you did not download the save linked in the forum topic. You are allowed to do this on a fresh save with no progress in Four Swords.
I consider this one to be the hardest fight in the palace. It takes 16 hits to kill with hammer or 32 with fire rod, and contact damage does 4 hearts to you. This includes walking into a Mothula while maneuvering about the arena.
Start by killing a clone immediately, it's easier to dodge 2 than 3. Watch where the bees go and continue attacking that one. Try to stay at the bottom of the arena, and look for openings to run in and attack. If it swoops at you and you do not feel like you can dodge, attack with your hammer to attempt to hit it away. Pause buffering is your friend here, use it to stay alive and get hits where you can.
Tip
Mothula's body and its clones cannot hit you at the bottom of the screen. The hitbox for Mothula's body is not tied to the shadow, and the shadow cannot go below the screen. This makes the fight rather trivial as long as you have patience and can manipulate the projectiles to not be an issue. Only go for hits when it's 100% safe. I guess there's a reason the original Mothula fight had spike traps lined around the screen - including the bottom :)
Note
If you're doing low% alongside the B-less challenge, you will find getting into Arrghus's room complete RNG heck as you will not have the ability to dive without the B button. You can choose to swim through the obstacles and pray that you don't take too much damage, or you can optionally copy your save file into another slot, and resume from that slot. Be sure to remap the B button so you can dodge the obstacles by diving, and don't forget to unmap it once you finish with the palace and go back to your original save file!
Arrghus will move 3 times before it starts spinning the biris around it. As long as you do not try to grab a biri while it is moving it is pretty easy to keep it on the top or left side of the screen. When it starts spinning hookshot a biri and get into position with your hammer to hit it.
Each biri takes 4 hits to kill with the hammer, and luckily the damage they take is saved if they make it back to the boss in case you do not kill it in time. If you hookshot them from below, be sure to move out of the way, down or to the right, as it seems that Link lingers in their hitbox at only that angle. I find that if they are going to zap you, they will do so immediately after the hookshot is finished. So either pause to see if they are zapping or not, or just wait half a second to react. You do not want to get hit by the zap.
Phase 2 is identical to Swamp Palace. Arrghus will fall onto the last place you were when he jumped. Just get into position to the bottom right of the boss as it is falling and swing the hammer after the sound is played when he lands (in the glitchy hitbox). Keep moving up left to keep it in the center. It takes 16 hammer hits to kill.
I find this fight to be the easiest in this palace. It takes 3 hammer hits to knock off the first head, 2 for the second, and 1 for the third. Hitting the boss itself is the exact same as in Thieves' Hideout, and once the heads are off, simply wait until you have an opening to knock them back on to kill it. It can be a bit more difficult when Blind is on the bottom of the screen since you cannot hit the heads back when they are beneath you, so you can either wait until the boss goes back up to the top of the screen or try to maneuver yourself to hit the heads when they are on the top half of the screen.
This fight can be tough, but the hammer helps a lot. It will take 1-4 hits it obliterate the mask, 18 hits to get to part 2, another handful of hits to break the next mask, and 1 arrow to kill.
Compared to the Dark Palace version, this one is a lot faster, especially when it moves down. If it is in the center of the screen, you should be wary of it moving down if you are approaching to attack. While you can attack it and be pushed to safety, this is a risky thing to rely on. It can also move while whipping with its tail. Just like the other bosses, look for openings and attack when you can.
When the small helmasaurs spawn, your hammer will kill them in 1 hit as long as the hitbox is deep enough within their sprites to hit behind their masks.
The hammer destroys the zap on the way to the Dark Links.
For all Links you are going to want to move them with damage boosts to the upper left corner of the arena and attack from here:

This stun locks Green and Red Link, and makes it so that the only retaliation Blue and Purple Link have is their jump attack.
While moving them up here, as long as you are being aggressive and slightly accurate with your hammer they will not be able to attack you with anything except jumps. Keep in mind that the hammer hitbox lingers, and they will walk into if you do not get a direct hit.
For Blue and Purple Link, they may jump at you some times, so watch closely. If they do not take damage, immediately move down right to dodge--there is just enough time to get out of the way and continue your barrage. For this reason, I do not recommend using turbo for these two Links, it helps to be deliberate with each hammer hit, and if it difficult to react, pause after each hit to see if the Link's have turned white with the damage taken. You can also stand at about the middle of the square in the screenshot above as opposed to the top of it. I find that doing so helps me react a bit quicker.
Learning the timing and gaining the muscle memory for dodging the jump attacks is the hardest part of this fight.
Green, Red, and Blue Link all take 16 hits to kill. Purple Link takes 32 hits.
Congratulations! This concludes the low% portion of this set. While the credits have rolled, there is still a loose end--Ganon. Hopefully your B button is still unmapped, because we're going to head out and kill Ganon now to get the 2 b-less achievements.
Warning
If you copied your save file to make getting to Arrghus 2 more manageable, do not forget to unmap the B button again and go back to your original file! You do not want to mess up the B challenge so close to the end!
Slash-Free Hero (50)
Beat the game without using the B button (no sword slashes but dash attacks allowed)
Legendary Hero (100)
Beat the game without dying or using the B button (no sword slashes but dash attacks allowed)
Since we are going to still use this save for the remainder of the achievements, we'll take some time to set up here. Collect the following items
Caution
No silver arrows yet!
- Master Sword > Tempered Sword > Golden Sword
- Fire Shield
- 2 more bottles > fill each with blue potions
- Flute
- Ether
- Titan's Mitts
- Magic Powder
- Magic Meter Upgrade
- Any more hearts if you want them
- Any tunic defense upgrades if you want
Now save and make a copy of this save file in slot 2.
Load either save file and collect the silver arrows, then go into Ganon and kill him with dashes. This is not that difficult, and after all you've gone through with hammer, it should be a piece of cake. Congratulations on finishing the B-less runs!
If you forgot to un-map B or died somewhere, you will need to do the game again. I recommend doing swordsless again for the hammer's hitbox. But now that you do not need to worry about item restrictions it is a lot easier. This playlist has a lot of early item routing. Take advantage of this to have more fun in this playthrough :)
This section will cover the following achievements:
Click here ◂ to toggle open the table of contents
Broken Arrows (10)
Beat Ganon without using the Silver Arrows.
Load up your save that still has normal arrows and hop into the ganon fight. This works the same as the snes version, but as far as I can tell, the torch glitch was patched. So in the final phase of the fight, use fire rod to light both torches, charge up a spin attack, and release it just as Ganon turns translucent to teleport and he will take damage.
Dirty Little Secret (10)
Find the legendary Chris Houlihan room that's inaccessible to most.
Get EG in Thieves' Hideout.
- Go 8 screens to the left and then 1 to the right to get on the left side of the screen. You will be in a translucent room
- Go 15 screens up, you will be in a small room that looks like an upside down T.
- Go 1 screen left.
- Go up 2 screens.
- Go 1 screen to the left.
There's probably a faster way like using the up-down method in desert palace, but I did not play around with that.
map of the path

Night in the Dark Dream (5)
Enter the Negative World.
Warning
This ruins your save, so reset without saving after you finish it!
Get EG in Thieves' Hideout.
- Go right 1 screen
- Get to the right edge of this screen without transitioning
- Go up 15 screens until you are in a plus shaped room
- Go right 1 screen and walk up-right until your game freezes
Eventually it will unfreeze and everything will go bonkers. Use your magic mirror and you'll get the achievement. The weirdness persists if you save, so reset without saving.
Dirty Water (5)
Have Link swim on land.
Go to the Swamp Palace with your flute in the Light World. On the right side of the building, facing left use pegasus boots to get as close to the deep water as possible before you start swimming. Around right here:

Use flute and press left to get into the water just as the duck is picking you up. Press B and you will be swimming on land!
No Muerdas La Mano (5)
Obtain a Fire Shield imbued with the power of magic.
Go to the Dark World and get to the Swamp Palace again (just using the portal north of where you were for the previous achievement).
Use all of your bombs and arrows, and let the tongue thing steal your shield. Now use ether, then kill it while it is frozen. Once you collect your shield again, it will be blue!
Uranium Rock (1)
Get rid of a rock without throwing it.
Let's be honest, you probably got this on accident just picking up a rock. This achievement is broken.
Here is the intended method though curtesy of Kaaz.
Grab the stone on Death Mountain (near the portal where you transform Link into a rabbit) and just below, jump off the cliff.
Boomerang Love (5)
Have the boomerange come back to you again, and again, and again.
This trick does not work with magic boomerang. You will either need to restart and play until you get pegasus boots or use EG to get to Hyrule Castle and collect the normal boomerang.
Once you have both boomerang and pegasus boots, go to Kakariko Village and use the boomerang in the upper right corner, then turn around and run to the other side of the screen. The boomerang will fly across the screen several times and you will get your achievement.
Congratulations on completing this set! I hope you had as much fun as I did going through it :)
| RA-User | Role |
|---|---|

|
🟉 Achievement Set Developer Developer of 28 of the 30 achievements. |

|
🟉 Achievement Set Developer Developer of the 2 B-less achievements. |

|
🟉 RA-Guide Author Author of the above RA Guide. |

|
🟉 Guide contributor Trailblazed the routing for low%, this would not have been possible without MitSuS. |

|
🟉 Guide contributor Found videos for many obscure glitches and answered questions I had. |

|
🟉 Guide contributor Guide proofreading, as well as several new discoveries and tips added to the guide itself. |
| Viewers like you | Thank you! |